Welcome, Guest
Username: Password: Remember me

TOPIC: restoration project make/mode/year unknown

restoration project make/mode/year unknown 2 years 10 months ago #146267

  • Dr.Go!
  • Dr.Go!'s Avatar
  • Offline
  • Contributing Member
  • Contributing Member
  • Posts: 1719
  • Karma: 19
  • Thank you received: 125
I was in the full learning process and I no longer had that motor hoist and don’t have a chain fall or come along. I also figured I would screw up the power head since I don’t yet have those engine skills and didn’t want to mess with gaskets… kind of found myself halfway there before I knew it. I am sure if I had the hoist and skills of most other gear heads on here, I could have done that first. I only have a 15” transom, so I bought this motor knowing I could shorten it. I still have a lot of learning to do, so the people on this site are priceless help to me. That 80 you have sounds like a nice motor, so good luck getting that motor restored.
The following user(s) said Thank You: Fatlenny

Please Log in or Create an account to join the conversation.

Dr.Go!

restoration project make/mode/year unknown 2 years 10 months ago #146284

  • Fatlenny
  • Fatlenny's Avatar Topic Author
  • Offline
  • Senior Boarder
  • Senior Boarder
  • Posts: 241
  • Karma: 3
  • Thank you received: 17
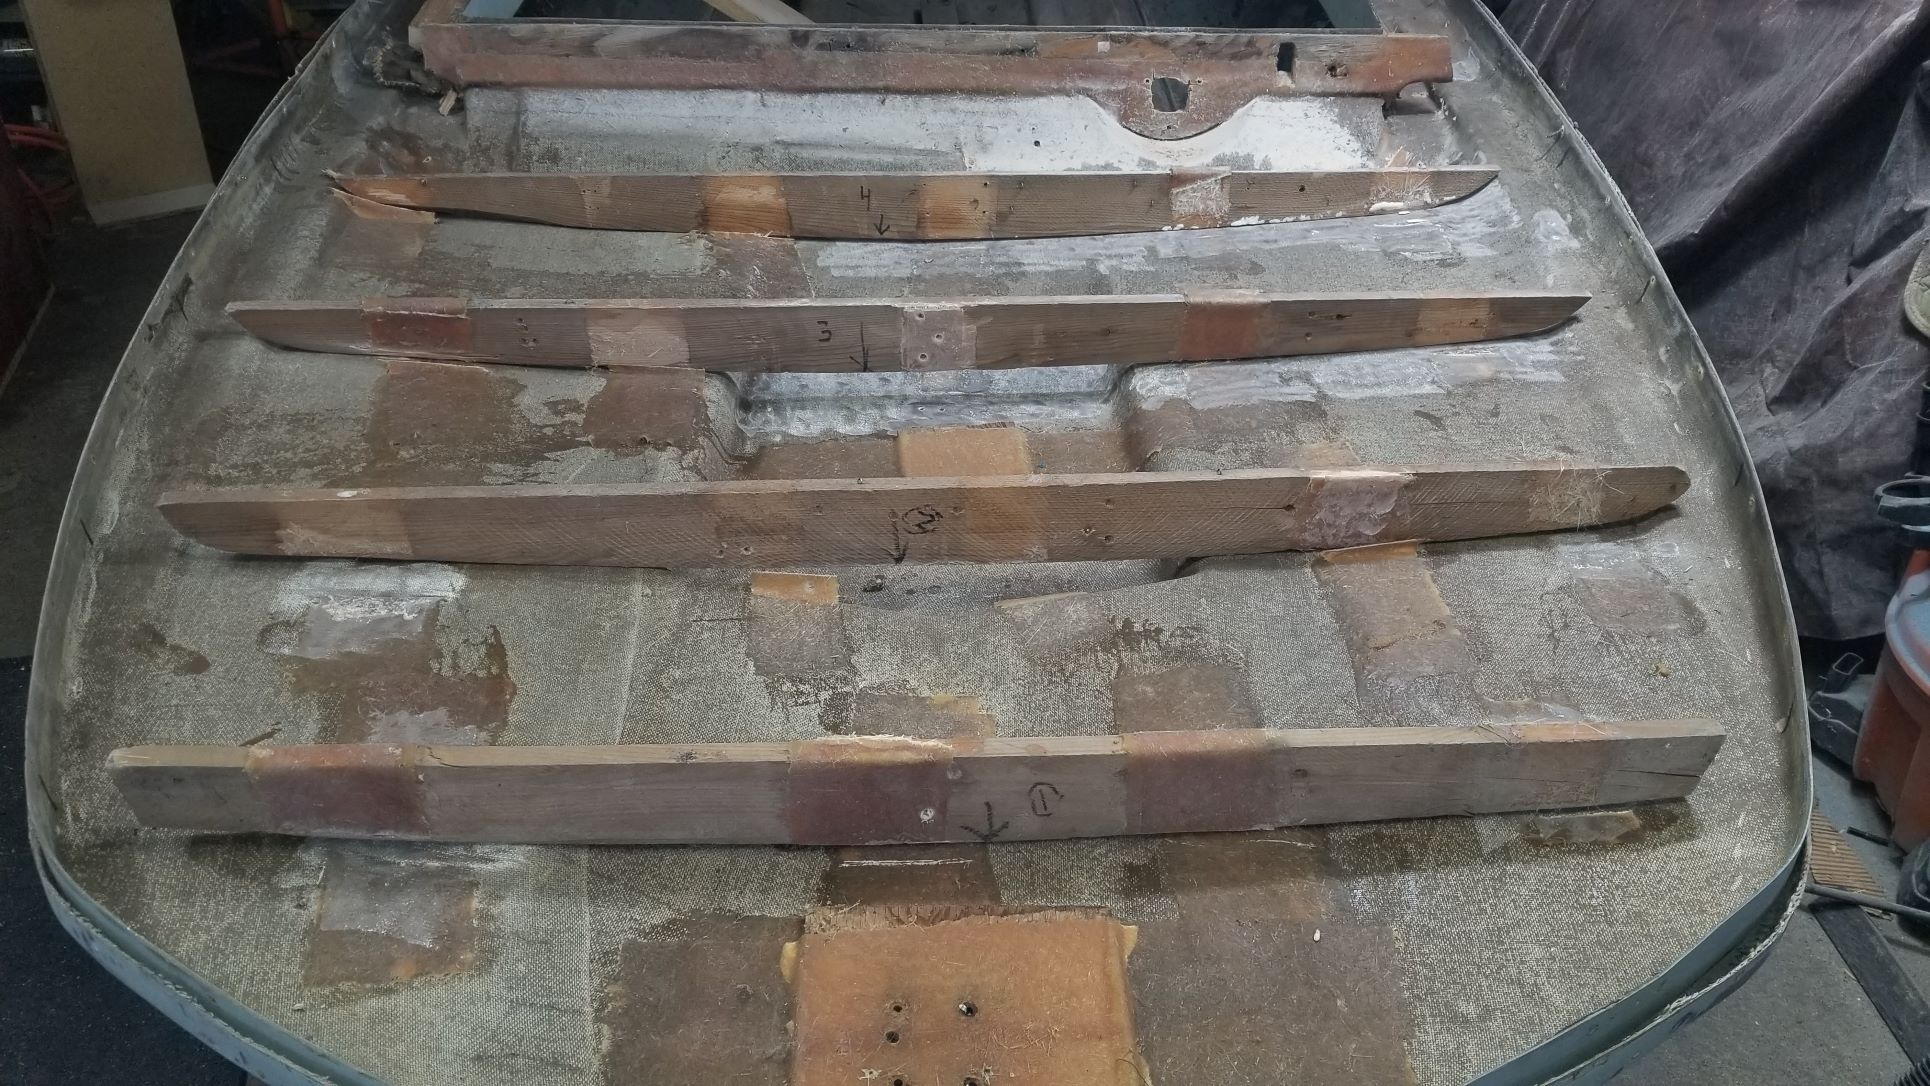
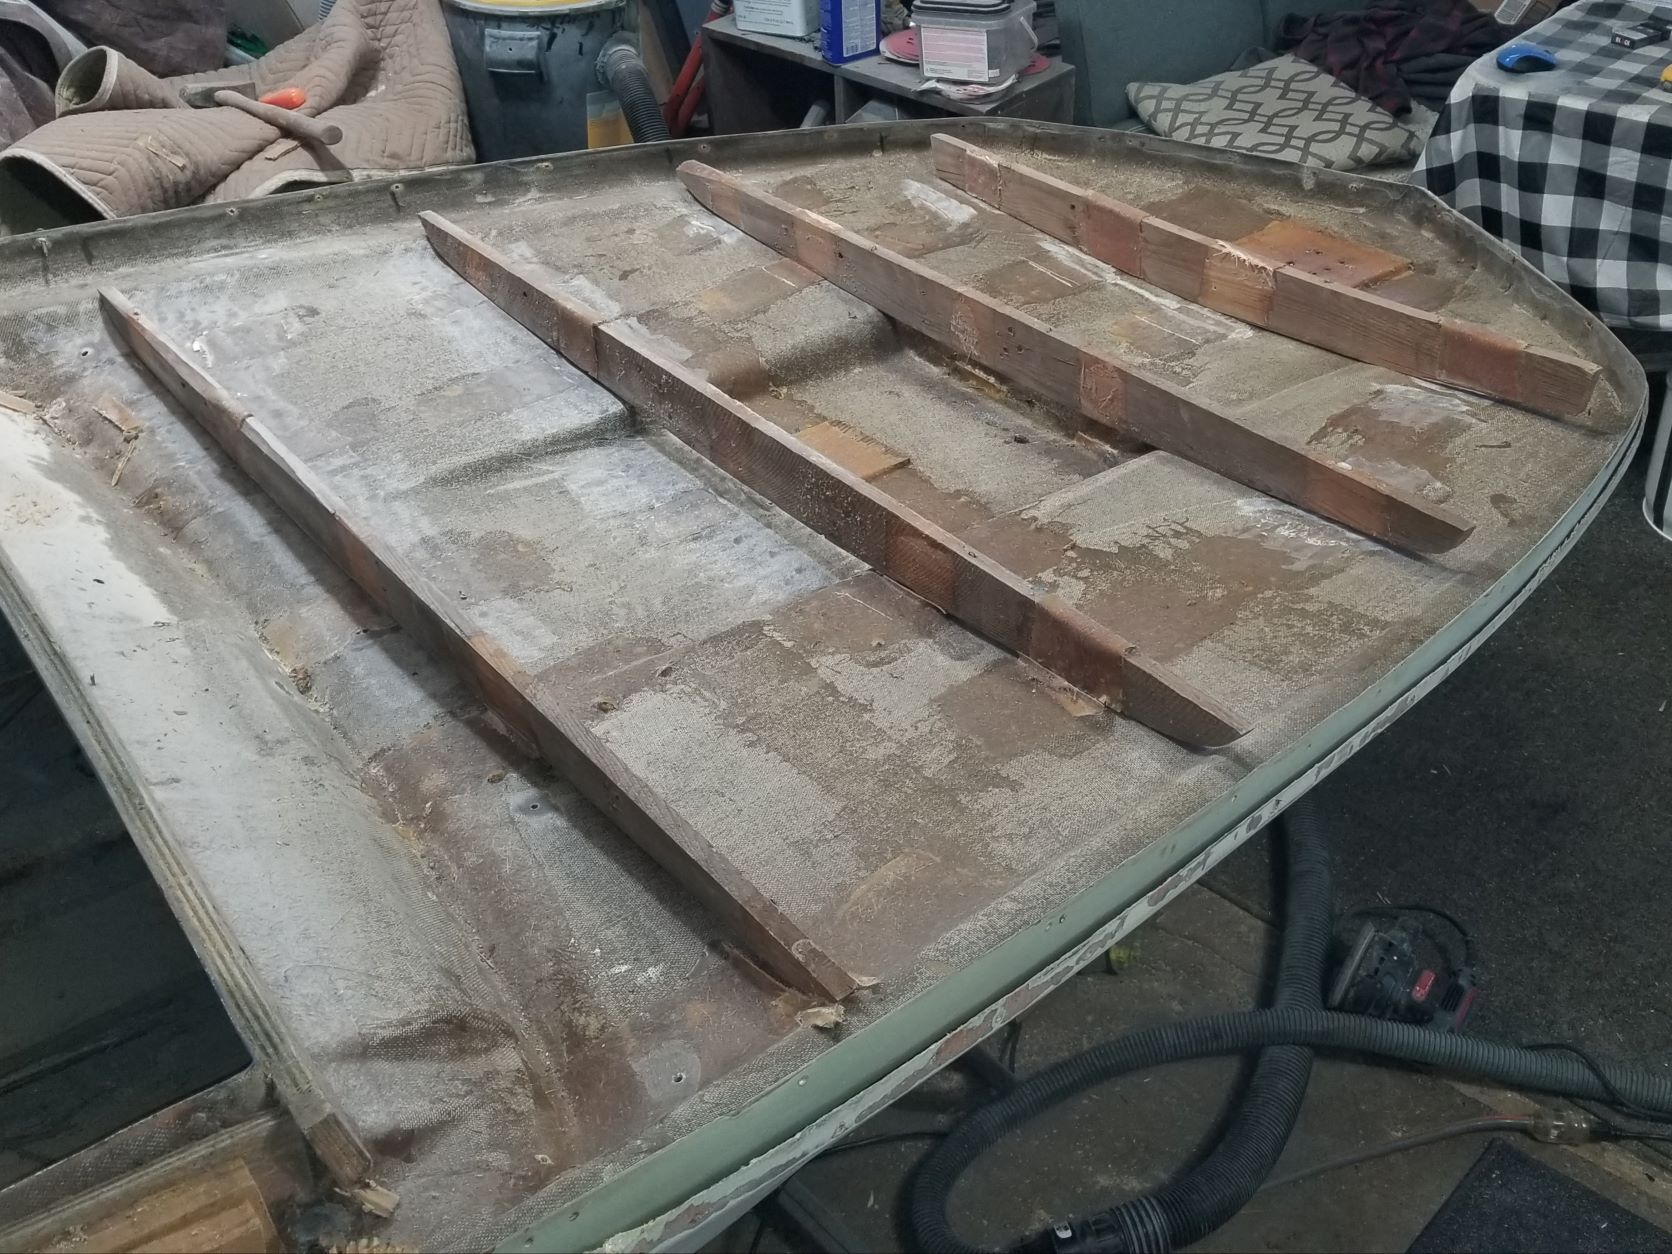
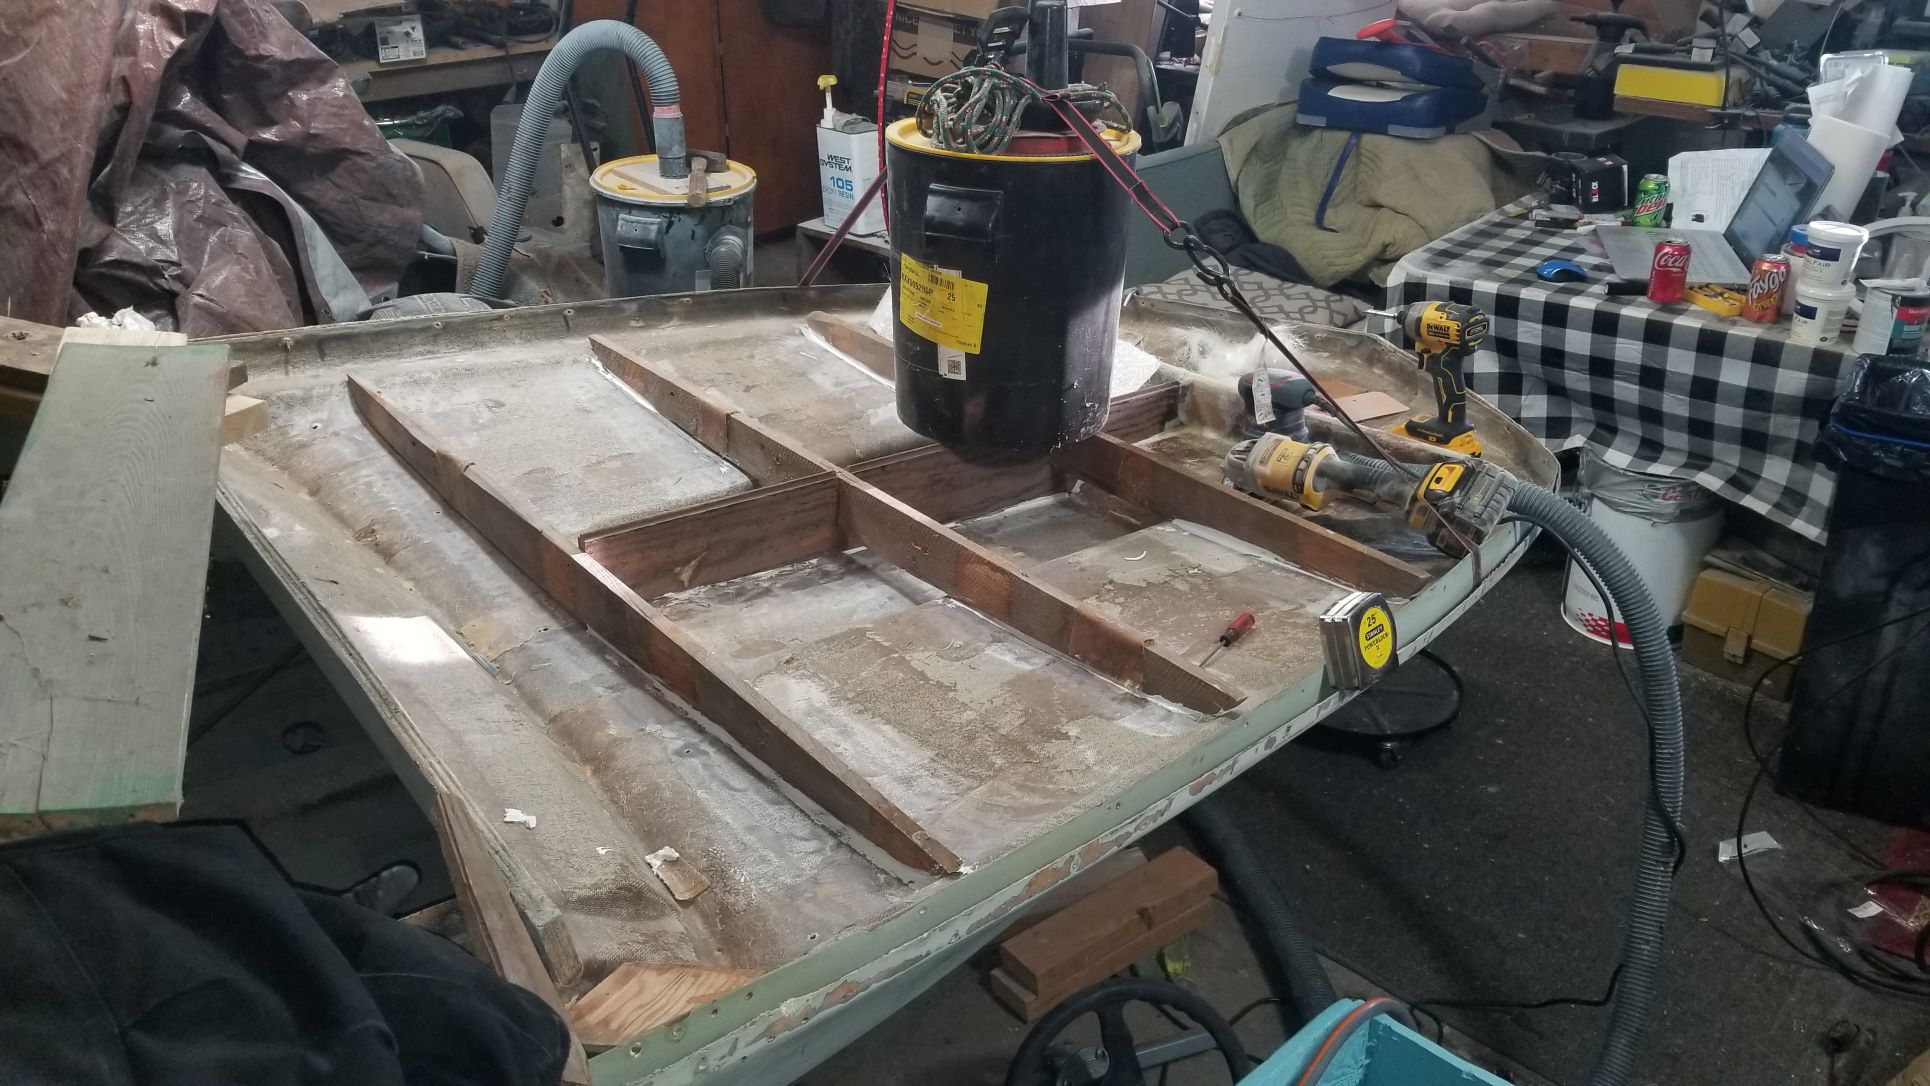
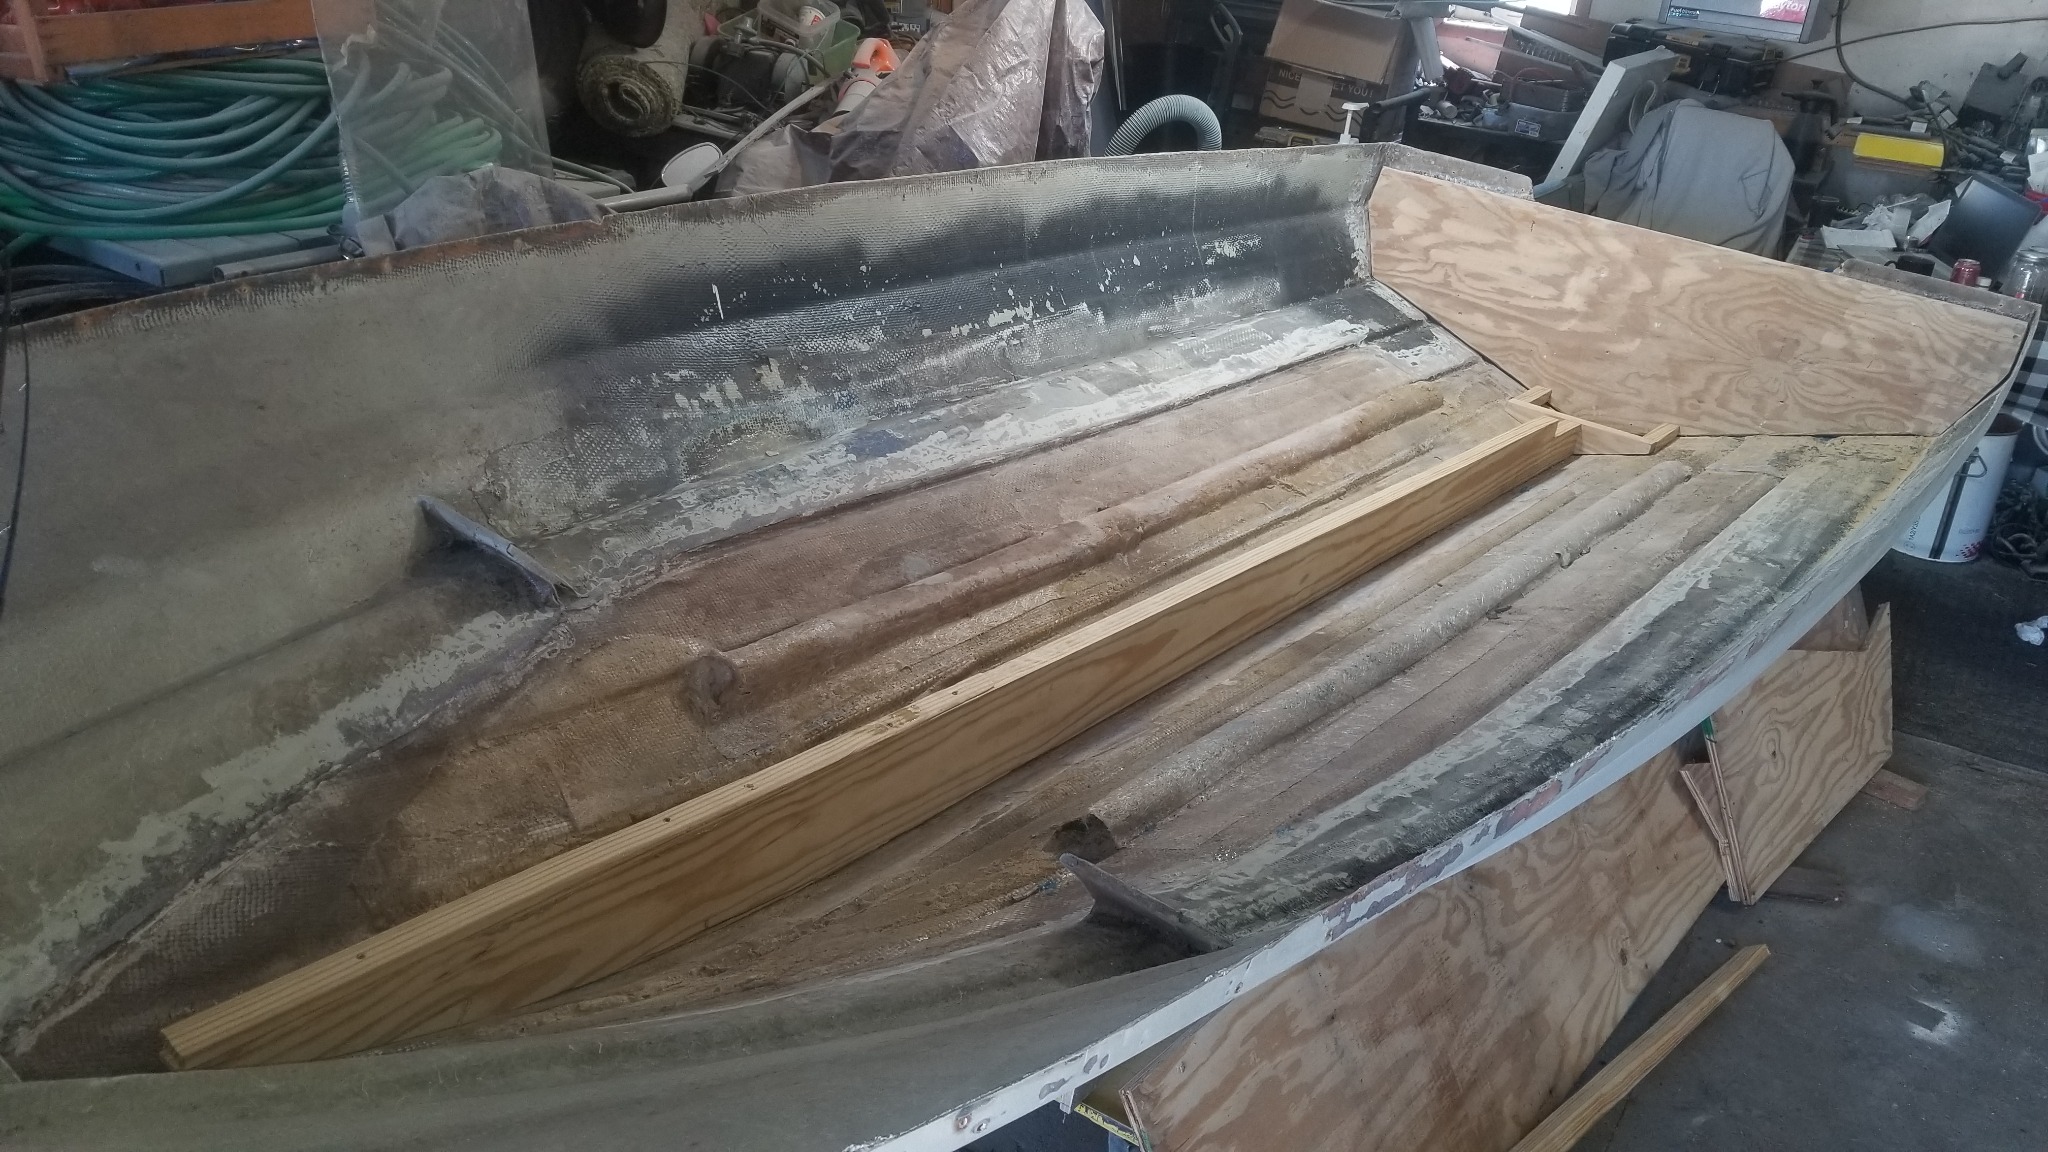
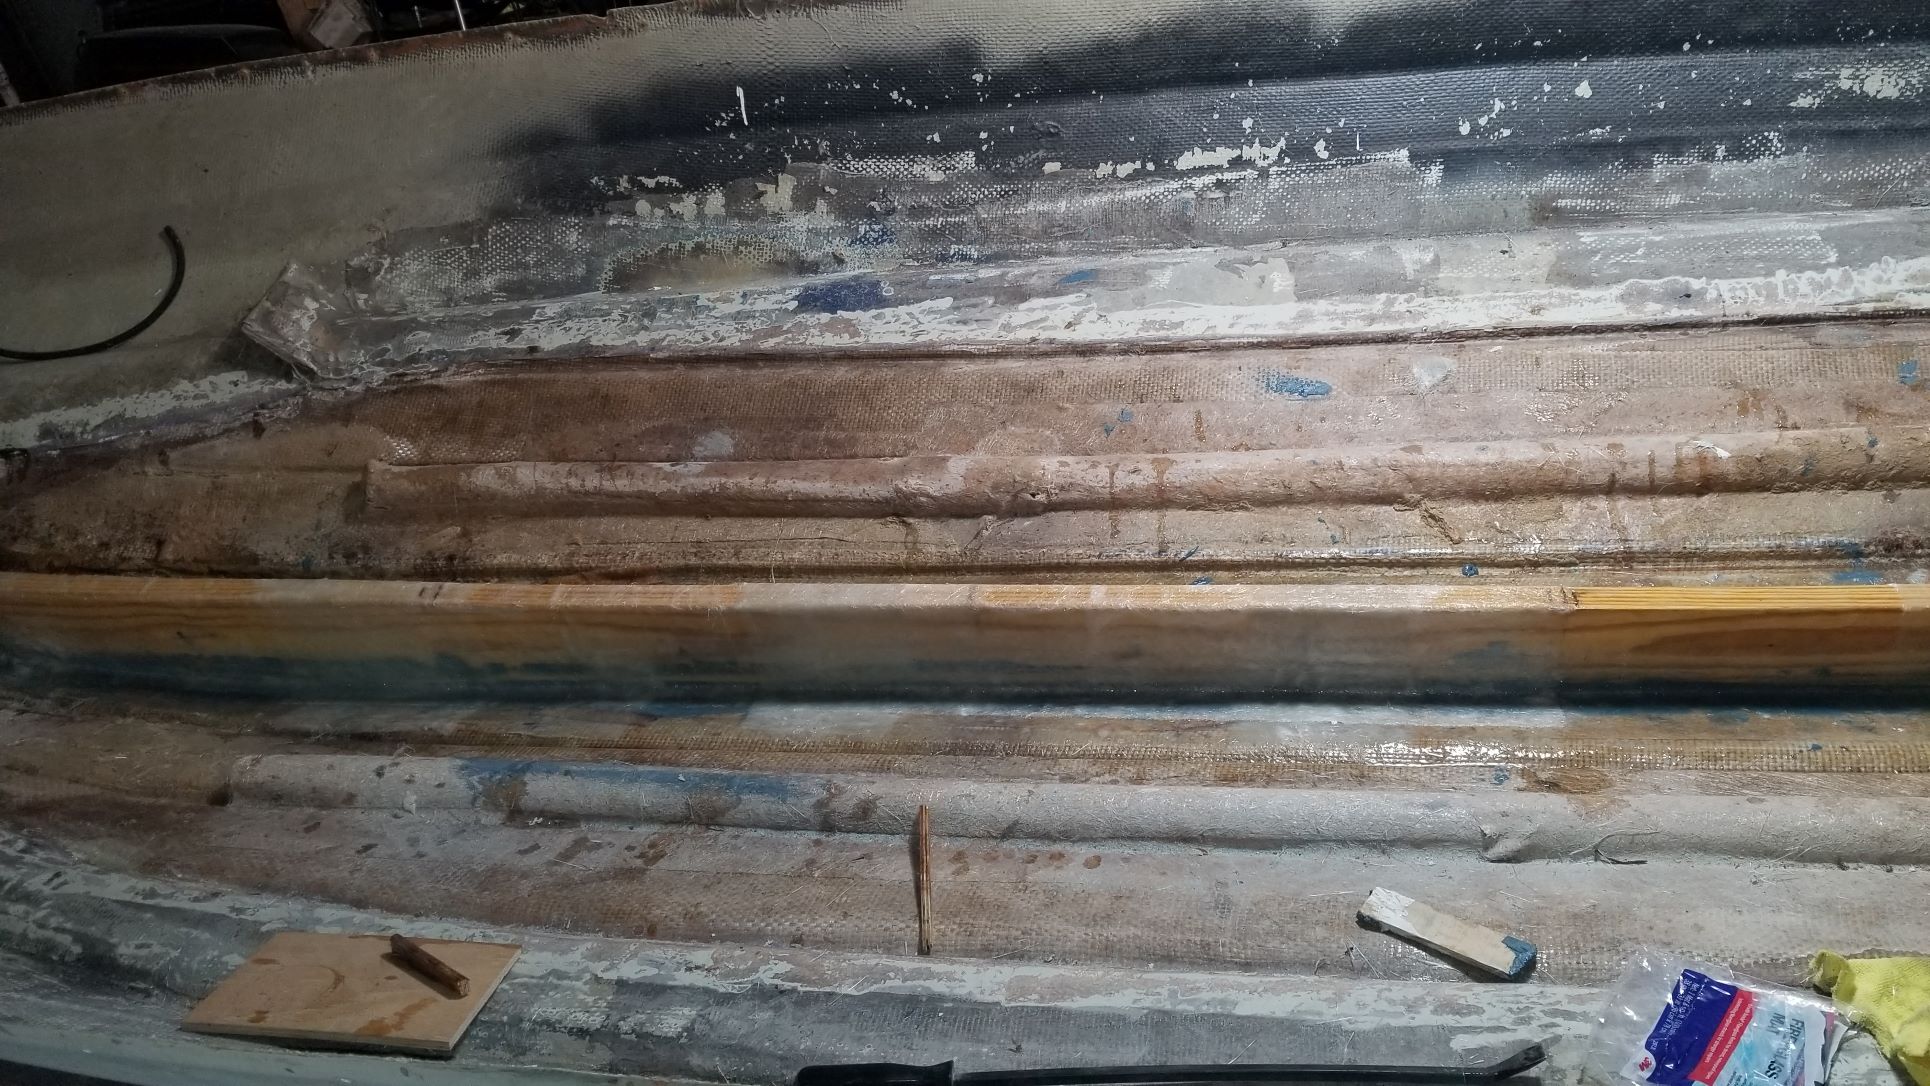
Little at a time getting some more done. We got the cap flipped over and cut away the old fiberglass that was holding the wooden supports for the bow deck. A few of them had broken or detached from the fiberglass on the underside of the deck. It looked like these supports was placed and the cap was flipped over onto the hull before it was dry and the wooden supports sagged away from the bottom of the deck. (sorry didn't get photos) Started to grind on the old fiberglass in preparation to reattach these supports but my battery died on my grinder with the sanding disk on it and went to change it out and realized that someone drained the other 2 and didn't put them on the charger. (could have been me but easier to blame some one else) so I placed these boards back into position to see how they fit against the hull and look to be a really good fit that will take little pressure to get the fiberglass back into the shape it suppose to be at with these supports doing their job. I will add a couple pieces of wood where the faux hood scoop is to give some additional support in that area as there was not really any thing there.


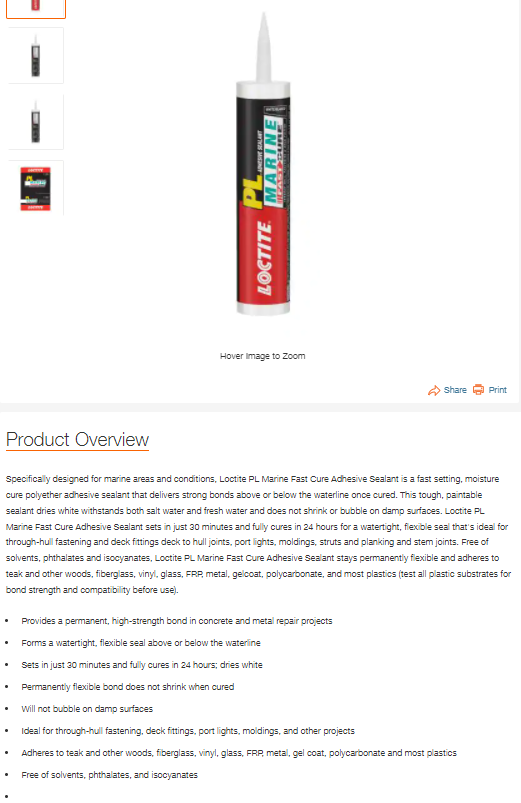
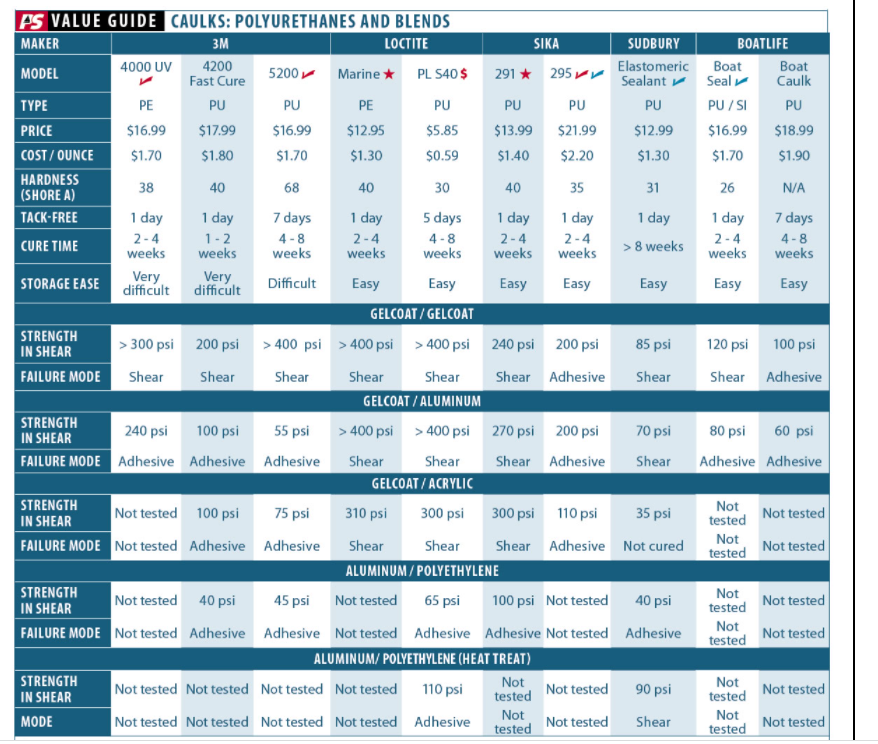
I was shopping for some 5200 adhesive and my home store by me does not carry it, there is one that has 7 in stock 40 miles away but I wondered if there was an alternative product out there that is equivalent. Googling it, I found Loctite makes a product and my local store has it in stock. It is also about $16 instead of the 3M 5200 price of $25. Has any body used this product and had any issues with it? I have only read about people on the boating forums using the 5200. Reading about the product online, it sounds like it is a similar product. I did find where someone did some comparison tests at the address below but wanted to hear from someone here and there opinion to using something that does not take a month or 2 to set up.
www.practical-sailor.com/boat-maintenance/marine-sealant-adhesion-tests


Attachments:

Please Log in or Create an account to join the conversation.

restoration project make/mode/year unknown 2 years 10 months ago #146286

  • 63 Sabre
  • 63 Sabre's Avatar
  • Offline
  • Contributing Member
  • Contributing Member
  • Posts: 4676
  • Karma: 147
  • Thank you received: 167
industry.sika.com/en/home/marine/leisure-boats-andyachts.html

I always used 5200 but a drawback is the 7 day cure time. Once it's there nothing will remove it. wear old clothers!
The Century in my avitar had the bottom planks laid with 5200. An issue was that it was so good that during the dry winter off season the planks would shrink like normal but the 5200 would not move and the planks would develop small splits in the grain.
I've seen sikaflex used also but never tried it.

Please Log in or Create an account to join the conversation.

restoration project make/mode/year unknown 2 years 9 months ago #146295

  • Fatlenny
  • Fatlenny's Avatar Topic Author
  • Offline
  • Senior Boarder
  • Senior Boarder
  • Posts: 241
  • Karma: 3
  • Thank you received: 17
The forums here seems to have gotten very quiet. must have many members who are just having the winter blues. I know I am. It is hard to get motivated even though I know now is the time I need to get kicking on this project and have it ready for the water this summer.

Please Log in or Create an account to join the conversation.

restoration project make/mode/year unknown 2 years 9 months ago #146296

  • Dr.Go!
  • Dr.Go!'s Avatar
  • Offline
  • Contributing Member
  • Contributing Member
  • Posts: 1719
  • Karma: 19
  • Thank you received: 125
For me anyway, the things to do list usually has my hobby near the bottom and family, work, and home and auto maintenance at the top. I seem to go in spurts… I trying to gather parts, materials, etc here and there so I can stage a portion of a project… then if I ever break fee with a tiny window of time, I tend to work on it many hours straight because I never know when I get the next window of time. I think that is why when I finish a part of a project, it is very satisfying because finished project don’t come east. Taken me over a year for a trailer restoration.., got 95 percent done in 6 months in short bursts… then crazy life has stalled that last 5 percent over 6 months… I must finish by spring if I want to use that boat, so we shall see. Best of luck staying motivated … for me it is more time and money that bog things down… just smelling gasoline, epoxy, or wood gets me plenty motivated.

Please Log in or Create an account to join the conversation.

Dr.Go!

restoration project make/mode/year unknown 2 years 9 months ago #146298

Yep hence year 7 and counting on the woody Resorter. Very hard to get it done with only weekends and all those other events you mentioned on top of it!

Bob

Please Log in or Create an account to join the conversation.

restoration project make/mode/year unknown 2 years 9 months ago #146299

  • Fatlenny
  • Fatlenny's Avatar Topic Author
  • Offline
  • Senior Boarder
  • Senior Boarder
  • Posts: 241
  • Karma: 3
  • Thank you received: 17
what is this weekend thing you talk about? it sounds nice, how do i get one of these?

Please Log in or Create an account to join the conversation.

restoration project make/mode/year unknown 2 years 9 months ago #146303

  • 63 Sabre
  • 63 Sabre's Avatar
  • Offline
  • Contributing Member
  • Contributing Member
  • Posts: 4676
  • Karma: 147
  • Thank you received: 167
zzzzzzzzzzzzzzzz.........huh?
It's winter. You'll see a spike when weather warms up in the north. Eh? N,so?
Sit back and have a pastie.
The following user(s) said Thank You: marko

Please Log in or Create an account to join the conversation.

restoration project make/mode/year unknown 2 years 9 months ago #146304

  • Fatlenny
  • Fatlenny's Avatar Topic Author
  • Offline
  • Senior Boarder
  • Senior Boarder
  • Posts: 241
  • Karma: 3
  • Thank you received: 17
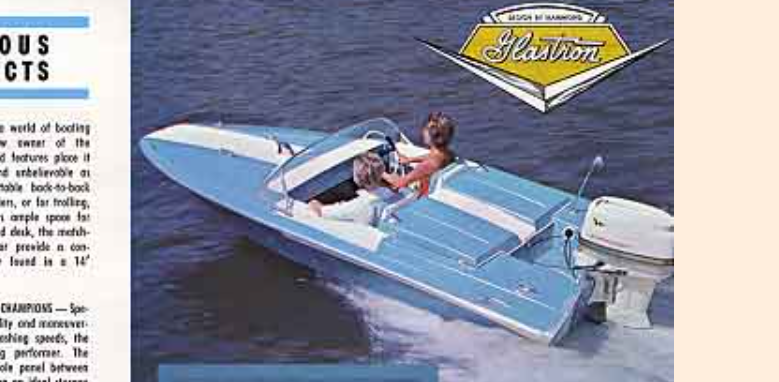
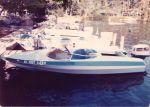
has anyone seen someone make their own tonneau covers to mimic the,,, I think it was a 63 glastron jetflite 143? adding pic. I love the idea of making it look like a 2 seater with the use of a removable cover that reveals a bench seat to seat a couple more. I wonder if anyone has done this or seen it done. I would like some ideas or direction for ideas to do something custom.


.
Attachments:

Please Log in or Create an account to join the conversation.

restoration project make/mode/year unknown 2 years 9 months ago #146356

  • Fatlenny
  • Fatlenny's Avatar Topic Author
  • Offline
  • Senior Boarder
  • Senior Boarder
  • Posts: 241
  • Karma: 3
  • Thank you received: 17
I added an extra support to the existing using a piece of old cedar I had laying around and started to fiberglass it all in. I ran out of the west system epoxy resin I was given by my parents left over from their aviation projects, ordered another gal. kit of TotalBoat epoxy to be able to continue. Should arrive today with any luck. I have noticed that the deck has sagged quite a bit over the years so i have added some weight (bucket of bird seed and a ratchet strap to pull it back into more of a shape it should be) When I get to work on the stringers and flooring I will add some vertical support from the stringers up to the bottom of the deck to keep this from happening again. I have been looking at the some other Glastron builds for ideas on how to make this bow deck much stronger. I cant find any pics now that I am looking for it, but have it in my head how to do it. I have seen where there is 2 vertical supports that make a cubby for skies. Im thinking something like this would make the deck rock solid.

Attachments:

Please Log in or Create an account to join the conversation.

restoration project make/mode/year unknown 2 years 8 months ago #146438

  • Fatlenny
  • Fatlenny's Avatar Topic Author
  • Offline
  • Senior Boarder
  • Senior Boarder
  • Posts: 241
  • Karma: 3
  • Thank you received: 17

Nautilus wrote: WOW! Lots of questions...


I buy my marine plywood here: www.worldpanel.com/
Foam, fiberglass cloth and resin from here: www.uscomposites.com/
3M 5200 (buy at least 4 10 oz. tubes) from here: shop.hamiltonmarine.com/
CPES: www.shiptoshoremarine.com/products/smiths-clear-penetrating-epoxy


Question Nautilus, If you don't mind sharing your expertise some more. As the order of tasks have changed many times in this project, I am finally getting close to setting the stringers and pouring foam. What density foam do you recommend? Thanks in advance and hope all is well.

Please Log in or Create an account to join the conversation.

restoration project make/mode/year unknown 2 years 8 months ago #146439

  • Nautilus
  • Nautilus's Avatar
  • Offline
  • Contributing Member
  • Contributing Member
  • Posts: 1579
  • Karma: 87
  • Thank you received: 58
The stringers need to be totally bedded in 3M 5200 and allowed 4 to 5 days to cure before you pour foam. I use the 2lb foam. The 4lb is too dense and you only get half as much coverage. Buy plenty of graduated plastic buckets...same place you buy the foam. I use the 3 qt ones. You need about 10-12, maybe more.

Attachments:
The following user(s) said Thank You: Fatlenny

Please Log in or Create an account to join the conversation.

Website: NautilusRestorations.com

Mentor to the unenlightened!

"Never allow logic to interfere with a boat purchase." - J. S. Hadley
"Vintage quality beats new junk every time." - J. S. Hadley
"Anything supposed to do two things does both of them half-assed." - J. S. Hadley
"Success makes...

restoration project make/mode/year unknown 2 years 7 months ago #146583

  • Fatlenny
  • Fatlenny's Avatar Topic Author
  • Offline
  • Senior Boarder
  • Senior Boarder
  • Posts: 241
  • Karma: 3
  • Thank you received: 17
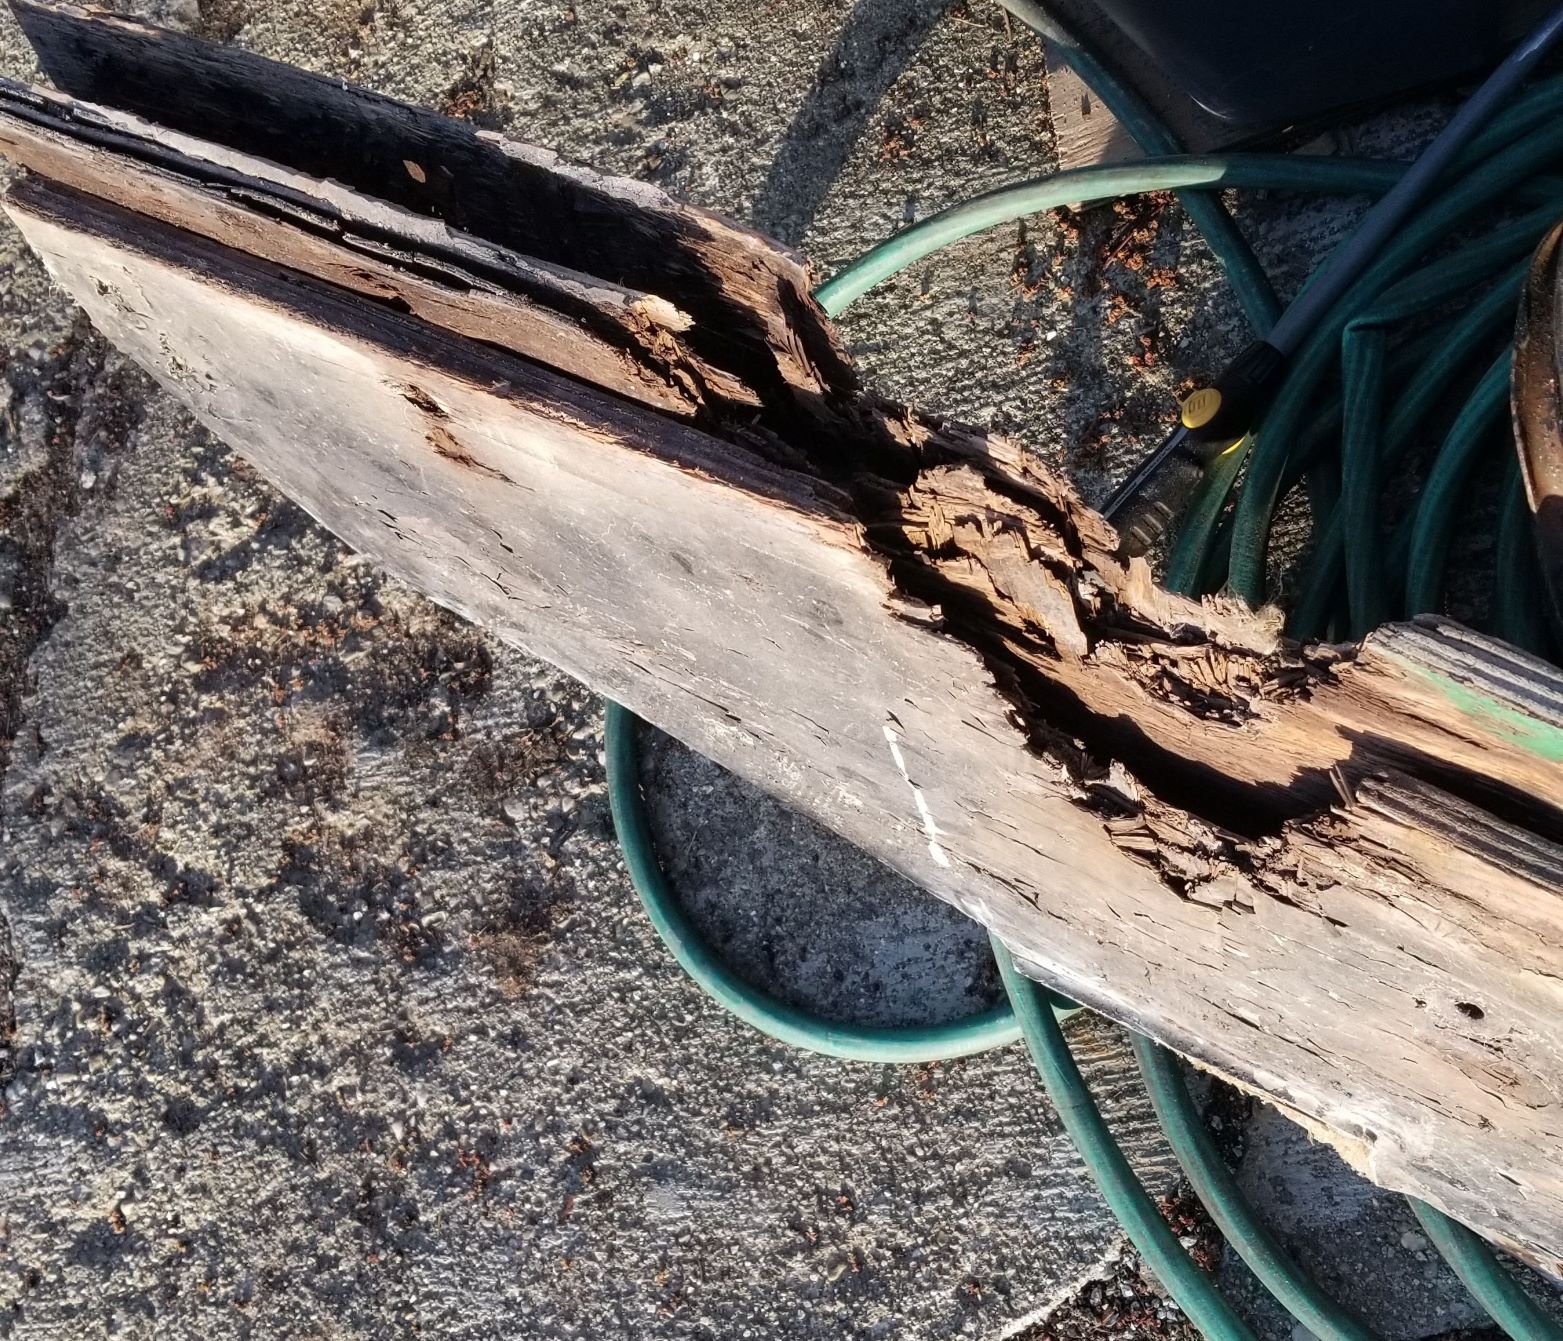
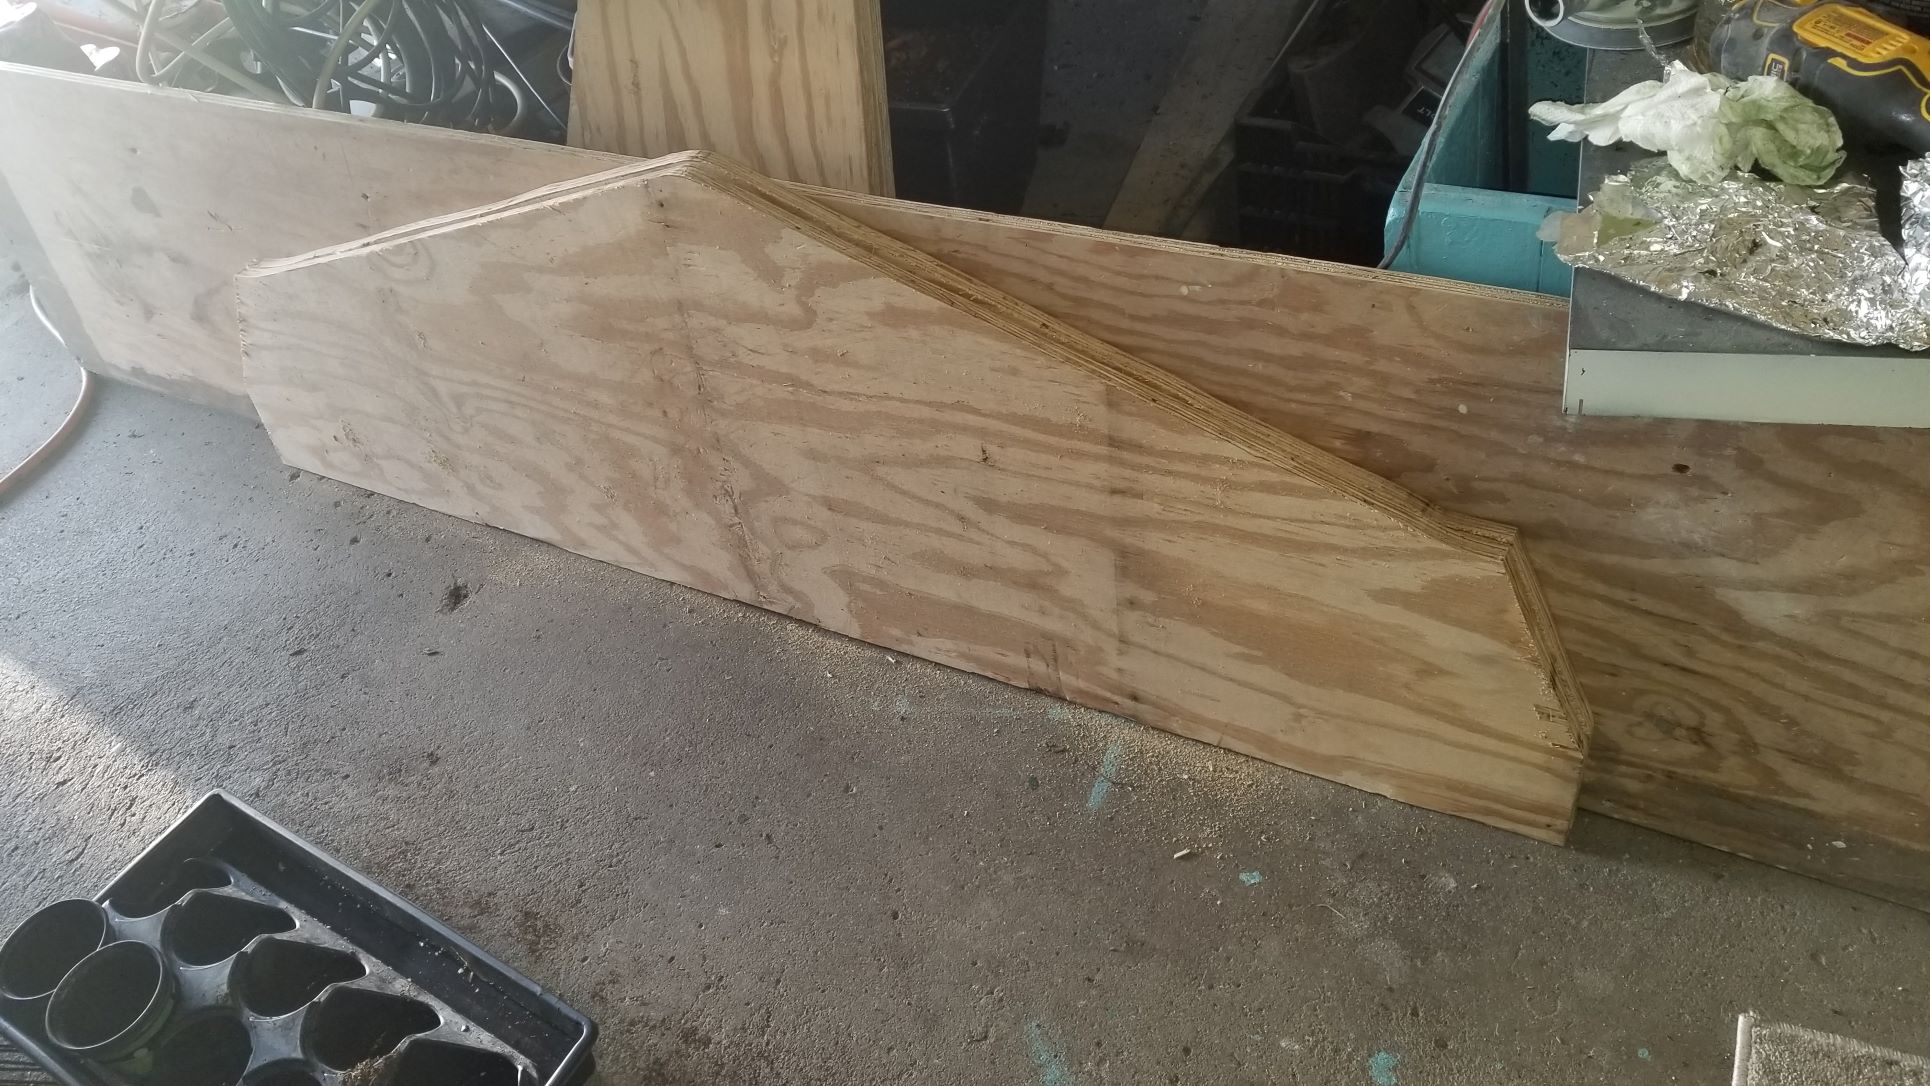
Well, on to the transom. Tonight I cut out 2 pieces to glue together. I cant believe I put her in the water and was going WOT for a good 45 minutes trying to see what this little boat might be capable of with this holding the motor on. It has been 5 months now since the rotted transom was removed. This is takin a bit longer than expected but hoping to have her water ready before summer. That is less than 2 months away. I best get busy!


Attachments:

Please Log in or Create an account to join the conversation.

restoration project make/mode/year unknown 2 years 7 months ago #146637

  • Fatlenny
  • Fatlenny's Avatar Topic Author
  • Offline
  • Senior Boarder
  • Senior Boarder
  • Posts: 241
  • Karma: 3
  • Thank you received: 17
After getting the tape measure out, I discovered the original stringer was 1" thick. As I really didn't want to go smaller than original, I figured it wouldn't hurt to just get a 12' piece of 2"x8" instead of 3/4" I am willing to bet that it would have worked but a little overkill wont hurt, I hope. It was "only" $16 at the local Home Depot. Got everything dry fitted in. It only took me 6 times to get the shape to conform to the hull. (really helped to have the old piece intact to use as a template.) Next will be to seal the transom and stringer pieces in resin. Then off to find some 5200. No stores real local to me carry it. I think a few south of me do, I will have to check them out on my way home from work one day next week.

Jan, as your knowledge seems to have no end, how would you attach the new transom wood to the fiberglass before tabbing in with fiberglass? 5200 or make a thickened resin to attach it to the fiberglass? Do you have a preference in 5200 fast set or just regular for setting the stringer prior to tabbing in?

Attachments:

Please Log in or Create an account to join the conversation.

restoration project make/mode/year unknown 2 years 7 months ago #146638

  • Nautilus
  • Nautilus's Avatar
  • Offline
  • Contributing Member
  • Contributing Member
  • Posts: 1579
  • Karma: 87
  • Thank you received: 58
I'd coat the entire transom with 5200 using a trough with 1/8" divisions. The trick is to "prop" the new wood in place with some kind of arrangement that allows pressure against the wood. The first thing that comes to mind would be 2x4s (or 1xs...whatever you have sitting around) screwed to the stringer in such a way that you force them against the new wood to hold the bottom in place...2 for the middle about 18" apart and two for each end. Clamp the top of the wood everywhere you can. The fast set would do but it's really fast. You need to have everything ready so you can have the whole job done in 15 minutes or less. I'd also seal all the edges with 5200.
The following user(s) said Thank You: Fatlenny

Please Log in or Create an account to join the conversation.

Website: NautilusRestorations.com

Mentor to the unenlightened!

"Never allow logic to interfere with a boat purchase." - J. S. Hadley
"Vintage quality beats new junk every time." - J. S. Hadley
"Anything supposed to do two things does both of them half-assed." - J. S. Hadley
"Success makes...

restoration project make/mode/year unknown 2 years 7 months ago #146640

  • Fatlenny
  • Fatlenny's Avatar Topic Author
  • Offline
  • Senior Boarder
  • Senior Boarder
  • Posts: 241
  • Karma: 3
  • Thank you received: 17
Thanks for the info, I was hoping the fast set was ok. I am not a very patient person and the regular 5200 states it sets up in 7 days. If I can get to tabbing in everything, pouring the foam so I can set the floor,,, well, the sooner the better. Then paint and get it wet! Carpet, windshield buff/install and other interior stuff can wait! LOL. Weather is getting very nice around here and itching to get it on the water. If it was ready, It would have been on the water today.

Please Log in or Create an account to join the conversation.

restoration project make/mode/year unknown 2 years 7 months ago #146662

  • Fatlenny
  • Fatlenny's Avatar Topic Author
  • Offline
  • Senior Boarder
  • Senior Boarder
  • Posts: 241
  • Karma: 3
  • Thank you received: 17
Jan, one thing I was wondering about, you suggested to set the stringers in the 5200 and let set up a few days before pouring the foam, dont you tab your stringers in with fiberglass before pouring foam?

Please Log in or Create an account to join the conversation.

restoration project make/mode/year unknown 2 years 7 months ago #146663

Sorry late to this again. So not to counter Jan's suggestion but give you another one,, I would mix up resin with a little filler to a peanut butter consistency and bed it to the existing fiberglass that way. I can't find the old post with my tablet but someone here had made long jaw transom clamps using 2x4's. For your setup though you could probably use some Harbor Freight 12" deep jaw C clamps and use a board across it to spread the clamping pressure. They're around $10 a piece but go on sale for $7.99 I think. Use a slower setting resin so you have time to spread and clamp. It should be ready overnight. There should be quite a few posts regarding using resin. The biggest thing when using 5200 is to make sure there aren't any gaps in it. 5200 does not dry hard, it stays pliable once fully cured. That's why a lot of folks use it in wood boat planking for "dry bottoms" because it will give a little when the wood expansion and contracts from moisture content.
Just my 2 cents.

Bob
The following user(s) said Thank You: Fatlenny

Please Log in or Create an account to join the conversation.

restoration project make/mode/year unknown 2 years 7 months ago #146671

  • Fatlenny
  • Fatlenny's Avatar Topic Author
  • Offline
  • Senior Boarder
  • Senior Boarder
  • Posts: 241
  • Karma: 3
  • Thank you received: 17
I set the transom with the 5200 and I mixed a bunch of thickened resin today and set the stringer. next few days I will be tabbing everything in with a couple layers of fiberglass. Have to check the finances and see if I can get the floatation foam ordered and maybe have it poured this weekend or next week sometime. If bills insist on coming first, well then I guess its another 2 weeks.

Please Log in or Create an account to join the conversation.

restoration project make/mode/year unknown 2 years 7 months ago #146678

  • Fatlenny
  • Fatlenny's Avatar Topic Author
  • Offline
  • Senior Boarder
  • Senior Boarder
  • Posts: 241
  • Karma: 3
  • Thank you received: 17
I have an opportunity to purchase just the boat at a lower price. this was someone's project that was abandoned shortly after the start. My dilemma is that for a little extra money and a bit more work, according to measurements that I have taken, that I could pull the cap off this glastron v143 jetflite and have cooler boat when finished. I really like the center console and molded in seats. Im just not sure if I want to take on this challenge so close to having this project getting in the water.

https://www.facebook.com/marketplace/item/1809666335896927/?referralSurface=messenger_lightspeed_banner&referralCode=messenger_banner

Please Log in or Create an account to join the conversation.

restoration project make/mode/year unknown 2 years 7 months ago #146679

  • 63 Sabre
  • 63 Sabre's Avatar
  • Offline
  • Contributing Member
  • Contributing Member
  • Posts: 4676
  • Karma: 147
  • Thank you received: 167
Was that a squirt boat? Cool project. you could have a 1 off with a project like that.

Please Log in or Create an account to join the conversation.

restoration project make/mode/year unknown 2 years 7 months ago #146680

  • Fatlenny
  • Fatlenny's Avatar Topic Author
  • Offline
  • Senior Boarder
  • Senior Boarder
  • Posts: 241
  • Karma: 3
  • Thank you received: 17
it looks like it was a late 60s to 1970 Glastron Jetflite V143 outboard. they cut the hull and transom out and started to set in the hull of some newer jet boat or personal watercraft to make it a jet boat. I really like the idea of cutting out the interior section and retrofitting the molded seats and center console, maybe even the dash leaving my odd shaped bow with the faux hood scoop. I believe my project boat is a splash of a Glastron, why not "FrankenTron" the hell out of it? LOL

Please Log in or Create an account to join the conversation.

restoration project make/mode/year unknown 2 years 6 months ago #146687

  • Dr.Go!
  • Dr.Go!'s Avatar
  • Offline
  • Contributing Member
  • Contributing Member
  • Posts: 1719
  • Karma: 19
  • Thank you received: 125
Go for it. I had seen the slightly older jetflite v143 with the motor well cut out, additional stringers put in with motor mounts and a Chevy small block 350 with a v-drive. He did it when it was almost new. If you smack the throttle from an idle. It would jump r clean out of the water by a couple feet at transom and clear the prop! Extremely quick to 80 mph. I used to see it back in the 70s and 80s and believe it still exists somewhere today. He used a clear arching half bubble to keep water from splashing over the transom into the motor, so you could see the motor exposed… one of the baddest home projects I ever saw. I like props for lakes and jets for rivers but that’s just me. Do as you wish… how can you go wrong with a boat that already sinks until you work your magic. I always liked these 143’s. Keep us posted.

Please Log in or Create an account to join the conversation.

Dr.Go!

restoration project make/mode/year unknown 2 years 2 months ago #147278

  • Fatlenny
  • Fatlenny's Avatar Topic Author
  • Offline
  • Senior Boarder
  • Senior Boarder
  • Posts: 241
  • Karma: 3
  • Thank you received: 17
Well summer is officially over. (It has snowed 2 times here already) Got the bass boat winterized and was able to store it over in my parents pole barn. Thanks guys! Now its time to revive this ol thread and get back to work on the old project boat. I didn't get the Jetflite V143 that I was looking at earlier. I had to pass and just let it go. We ordered another gal of resin to get working on finishing tabbing in the stringer. I just need to get some yard work done this weekend, Damn leaves, and move some things around in the garage to be able to get back to work on the hull. I don't remember where I really left off here but the Transom is all set in place along with the stringers, all is coated in resin and most is tabbed in at the rear. The stringer was cut to fit and a few coats of epoxy resin was applied over everything prior to being set in some thickened epoxy down into the hull. I have the floors cut out ready to go in once all is set including adding flotation foam prior to the floors install. I do plan on coating the floor bottom prior to installing just as added protection against any moisture being able to saturate the wood. I still fear the foam process. this could get messy fast and I don't look forward to trimming it. I was hoping to set the floor in and drill holds and pour the foam but I think I was talked out of this method by a wise man here. Thanks for the advice Jan AKA Nautilus. Pictures to follow soon.

Please Log in or Create an account to join the conversation.

restoration project make/mode/year unknown 2 years 1 month ago #147288

  • Fatlenny
  • Fatlenny's Avatar Topic Author
  • Offline
  • Senior Boarder
  • Senior Boarder
  • Posts: 241
  • Karma: 3
  • Thank you received: 17
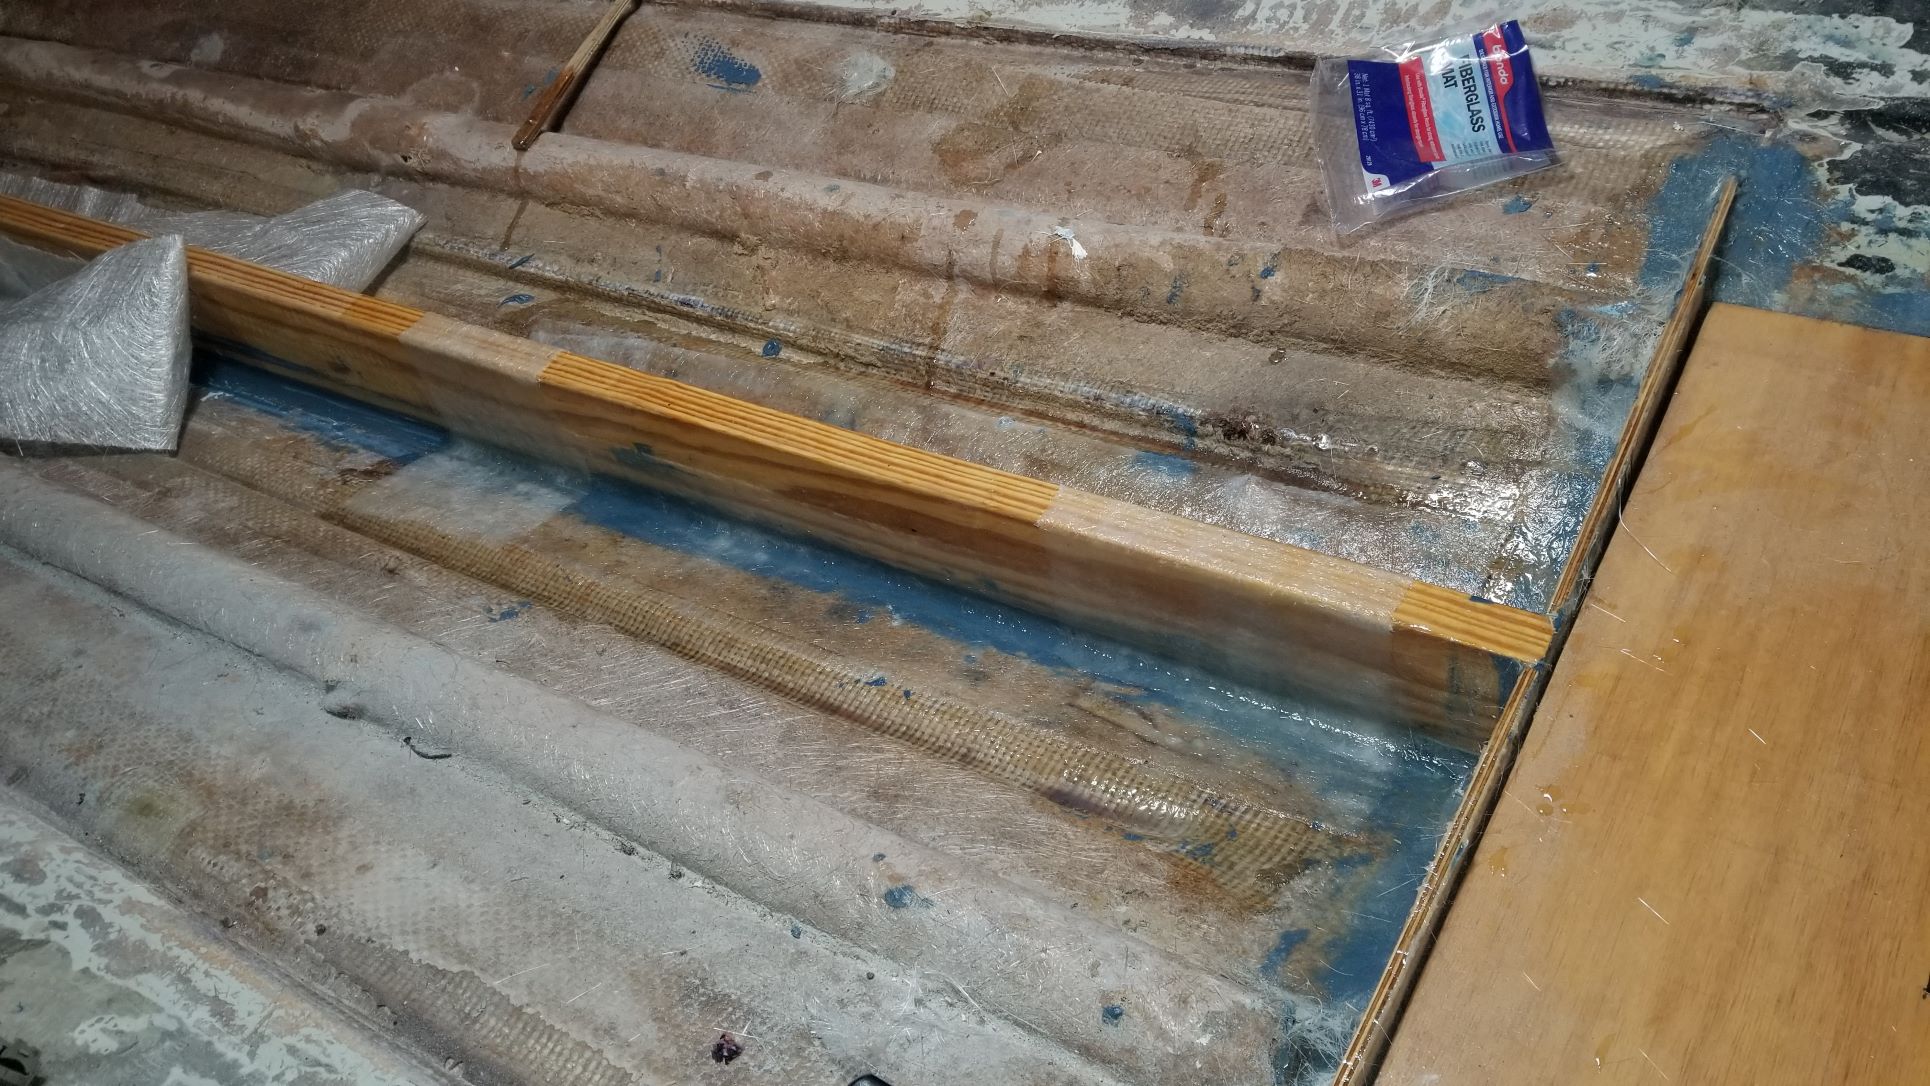
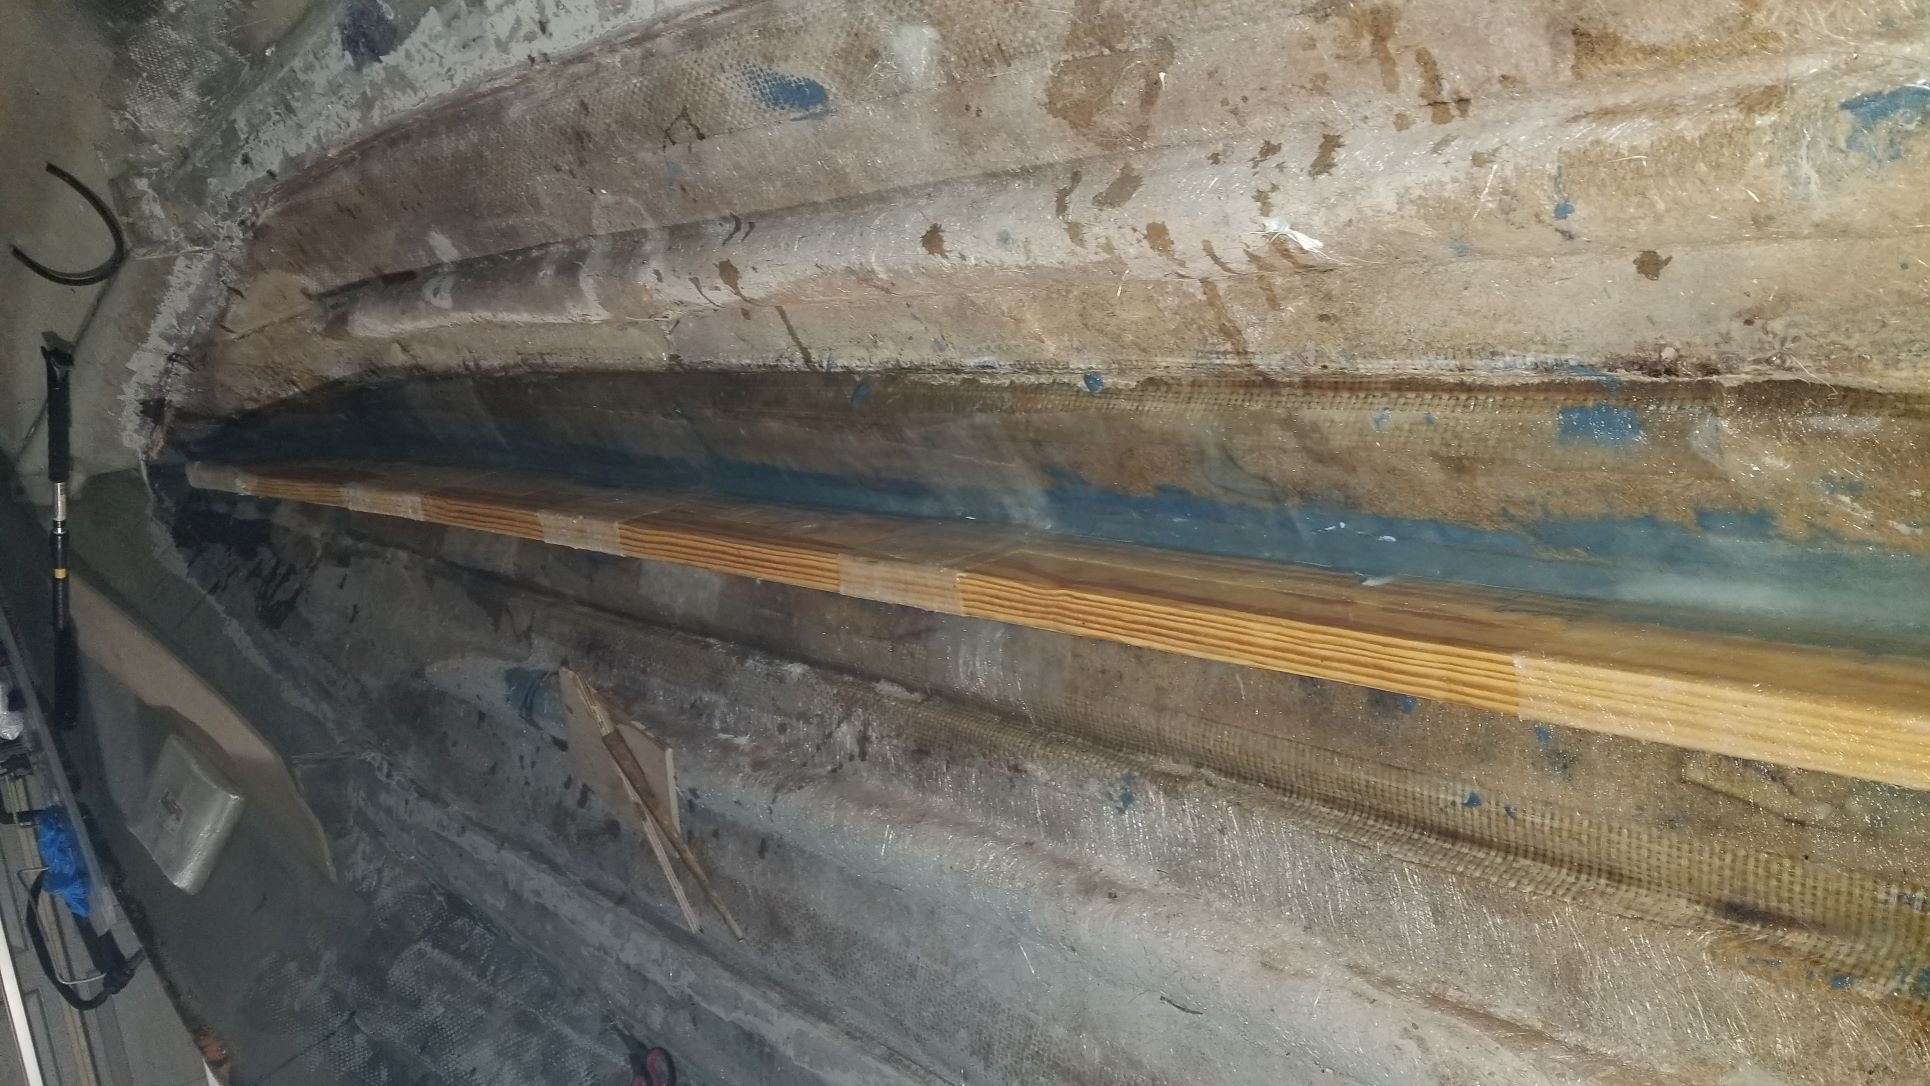
Had some time after work and some on the weekends to finish up tabbing in the stringer. Weather has cooled down quite a bit but still getting out to do some more fishing here and there. Still trying to catch the monster that claims a small fishing hole as her home close by. I have landed a couple of her babies.

Finishing up the last layer of fiberglass today and working out the bubbles. Next is to get the foam poured in.
Attachments:

Please Log in or Create an account to join the conversation.

restoration project make/mode/year unknown 2 years 1 month ago #147289

  • 63 Sabre
  • 63 Sabre's Avatar
  • Offline
  • Contributing Member
  • Contributing Member
  • Posts: 4676
  • Karma: 147
  • Thank you received: 167
The fish in my area would have that for a midnight snack. :P


This musk was hammered on the fox river, lower Green Bay in 2017. Imagine what's here now.
Anywho.. nice progress on the glass.
Attachments:

Please Log in or Create an account to join the conversation.

restoration project make/mode/year unknown 2 years 1 month ago #147290

Great progress!

Bob

Please Log in or Create an account to join the conversation.

restoration project make/mode/year unknown 2 years 1 month ago #147360

  • Fatlenny
  • Fatlenny's Avatar Topic Author
  • Offline
  • Senior Boarder
  • Senior Boarder
  • Posts: 241
  • Karma: 3
  • Thank you received: 17
Well, I either somehow miscalculated on the cubic foot I needed to fill with foam or the product I bought did not preform as expected. We ordered a one gal kit of Lifeboat Foam and I figured somehow that I would have a little bit more than I needed but ended up short only getting about 2/3 of what needs to be done. I wont tell the wife she was right when she said just get the 2 gal kit. Damn me trying to save a buck.

Please Log in or Create an account to join the conversation.

restoration project make/mode/year unknown 2 years 2 weeks ago #147423

  • Fatlenny
  • Fatlenny's Avatar Topic Author
  • Offline
  • Senior Boarder
  • Senior Boarder
  • Posts: 241
  • Karma: 3
  • Thank you received: 17
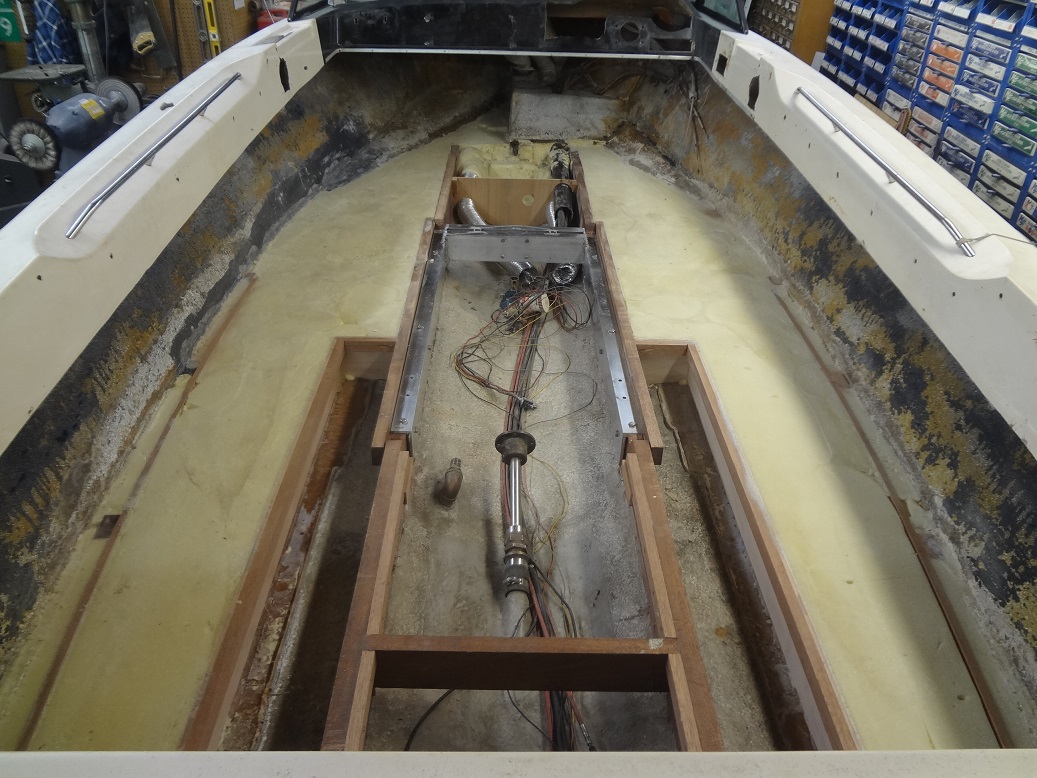
Filling in the rest of the hull under the floor with the foam today. Now to plan on setting the floor in. Question, should I just use 5200 and a bunch of weight to glue this floor down or mix up a peanut butter mix of resin to glue the floor in? I do already plan on glassing the floor in with at least 2 layers of cloth after the floor is glued in place. Any advise on this would be greatly appreciated.

Please Log in or Create an account to join the conversation.

restoration project make/mode/year unknown 1 year 11 months ago #147513

  • Fatlenny
  • Fatlenny's Avatar Topic Author
  • Offline
  • Senior Boarder
  • Senior Boarder
  • Posts: 241
  • Karma: 3
  • Thank you received: 17
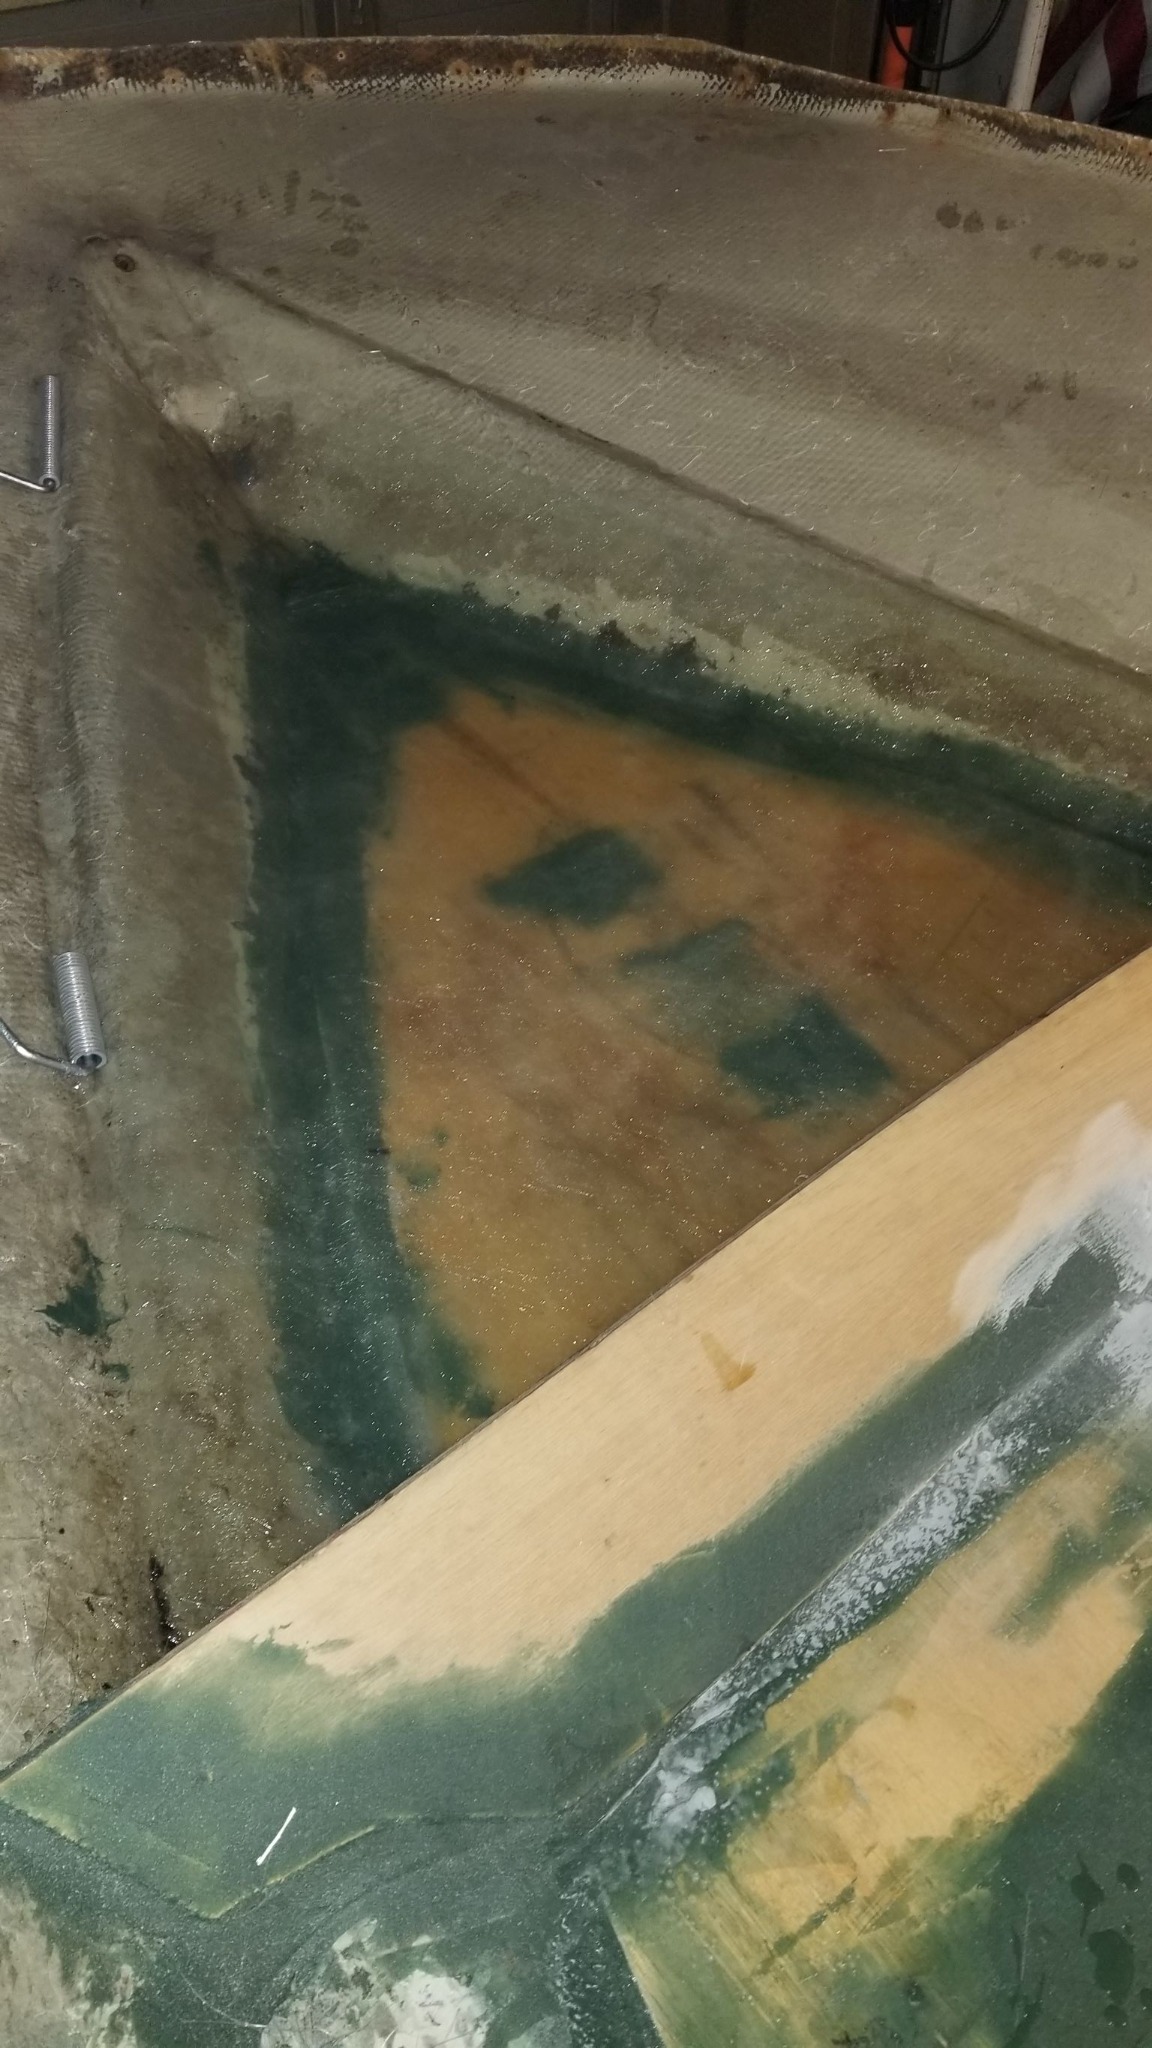
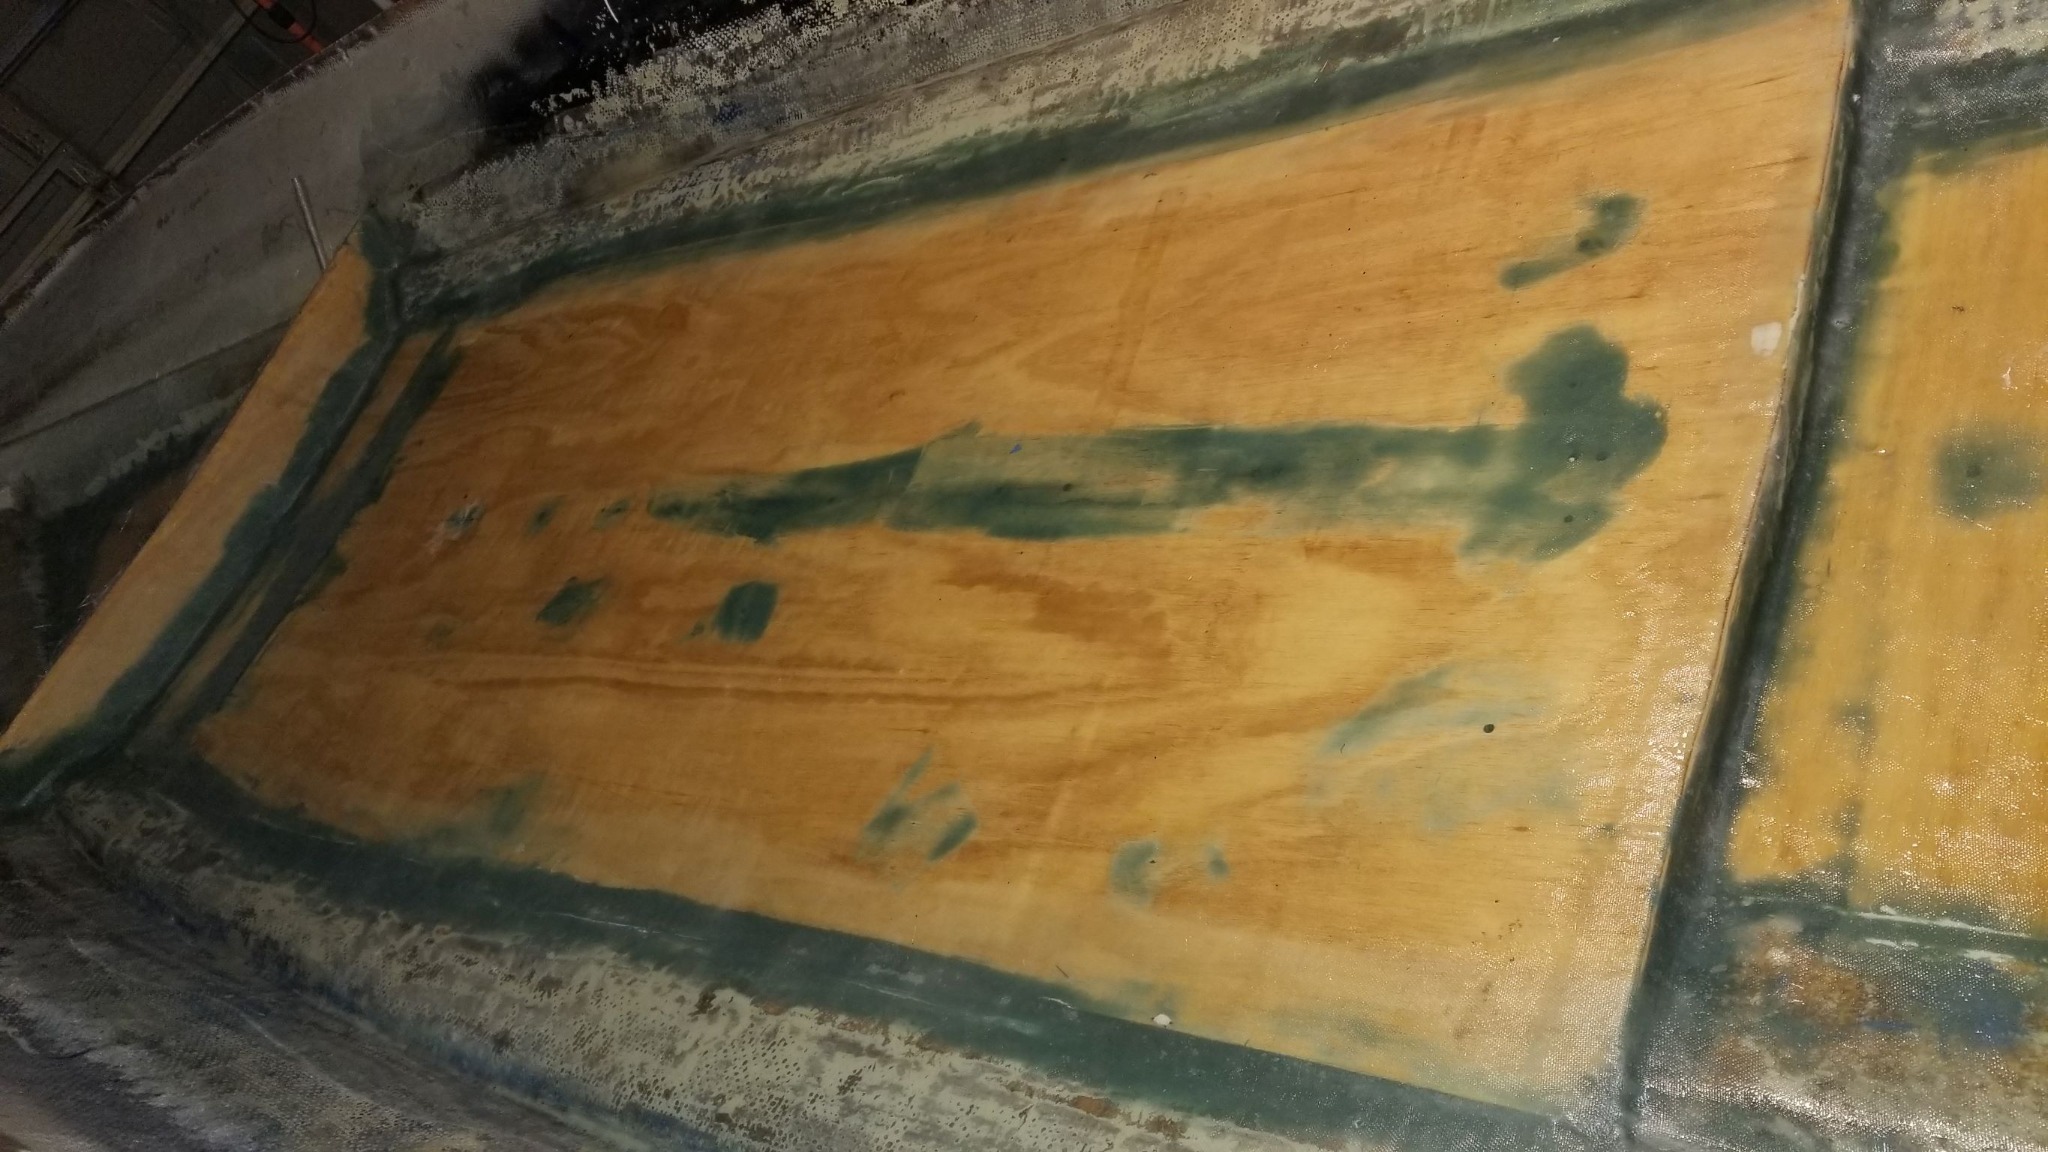
The wood is installed for the floor. We glued it in place with 5200 then mixed up some thickened resin and filled in and leveled any gaps around the edges of the floor. We ordered and received some more resin and fiberglass to glass in the floor. If all goes as planned we will glass the floor in tomorrow. Pictures to follow on this progress.

We plan on priming and painting the interior of the hull then call one of the kids to come help flip the hull over to work on any fairing needed on the bottom side of the hull then we can prime and paint the hull. Guess we need to get the paint ordered soon for the hull and the cap. Getting close, cant wait till spring!

Please Log in or Create an account to join the conversation.

restoration project make/mode/year unknown 1 year 11 months ago #147515

Good to hear! Keep it up! Spring will be here before you know it.

Please Log in or Create an account to join the conversation.

restoration project make/mode/year unknown 1 year 11 months ago #147518

Excellent, keep up the good work!

Bob

Please Log in or Create an account to join the conversation.

restoration project make/mode/year unknown 1 year 11 months ago #147522

  • Fatlenny
  • Fatlenny's Avatar Topic Author
  • Offline
  • Senior Boarder
  • Senior Boarder
  • Posts: 241
  • Karma: 3
  • Thank you received: 17
The fun has begun. Working out the bubbles is quite the job. I hope I have enough resin though. I may not do as many layers on the main part floor as I had planned. It may be overkill to go 2 layers of chop mat and 2 layers of cloth. I think I will try to do a layer of chop on the edges then cloth over the whole main part of the floor, then a full layer of chop and finally a full layer of cloth to finish it up. Will have to see how far the 1.25 Gal. of resin I have left will get me.

Attachments:

Please Log in or Create an account to join the conversation.

restoration project make/mode/year unknown 1 year 11 months ago #147524

  • Fatlenny
  • Fatlenny's Avatar Topic Author
  • Offline
  • Senior Boarder
  • Senior Boarder
  • Posts: 241
  • Karma: 3
  • Thank you received: 17
Well that settled that. ran out of resin with only 2 layers, one chop and one cloth. I think I am over it. For this project this is going to have to be enough. Tomorrow I will do some light sanding, prime and paint the interior of the hull.

Attachments:

Please Log in or Create an account to join the conversation.

restoration project make/mode/year unknown 1 year 11 months ago #147526

  • Fatlenny
  • Fatlenny's Avatar Topic Author
  • Offline
  • Senior Boarder
  • Senior Boarder
  • Posts: 241
  • Karma: 3
  • Thank you received: 17
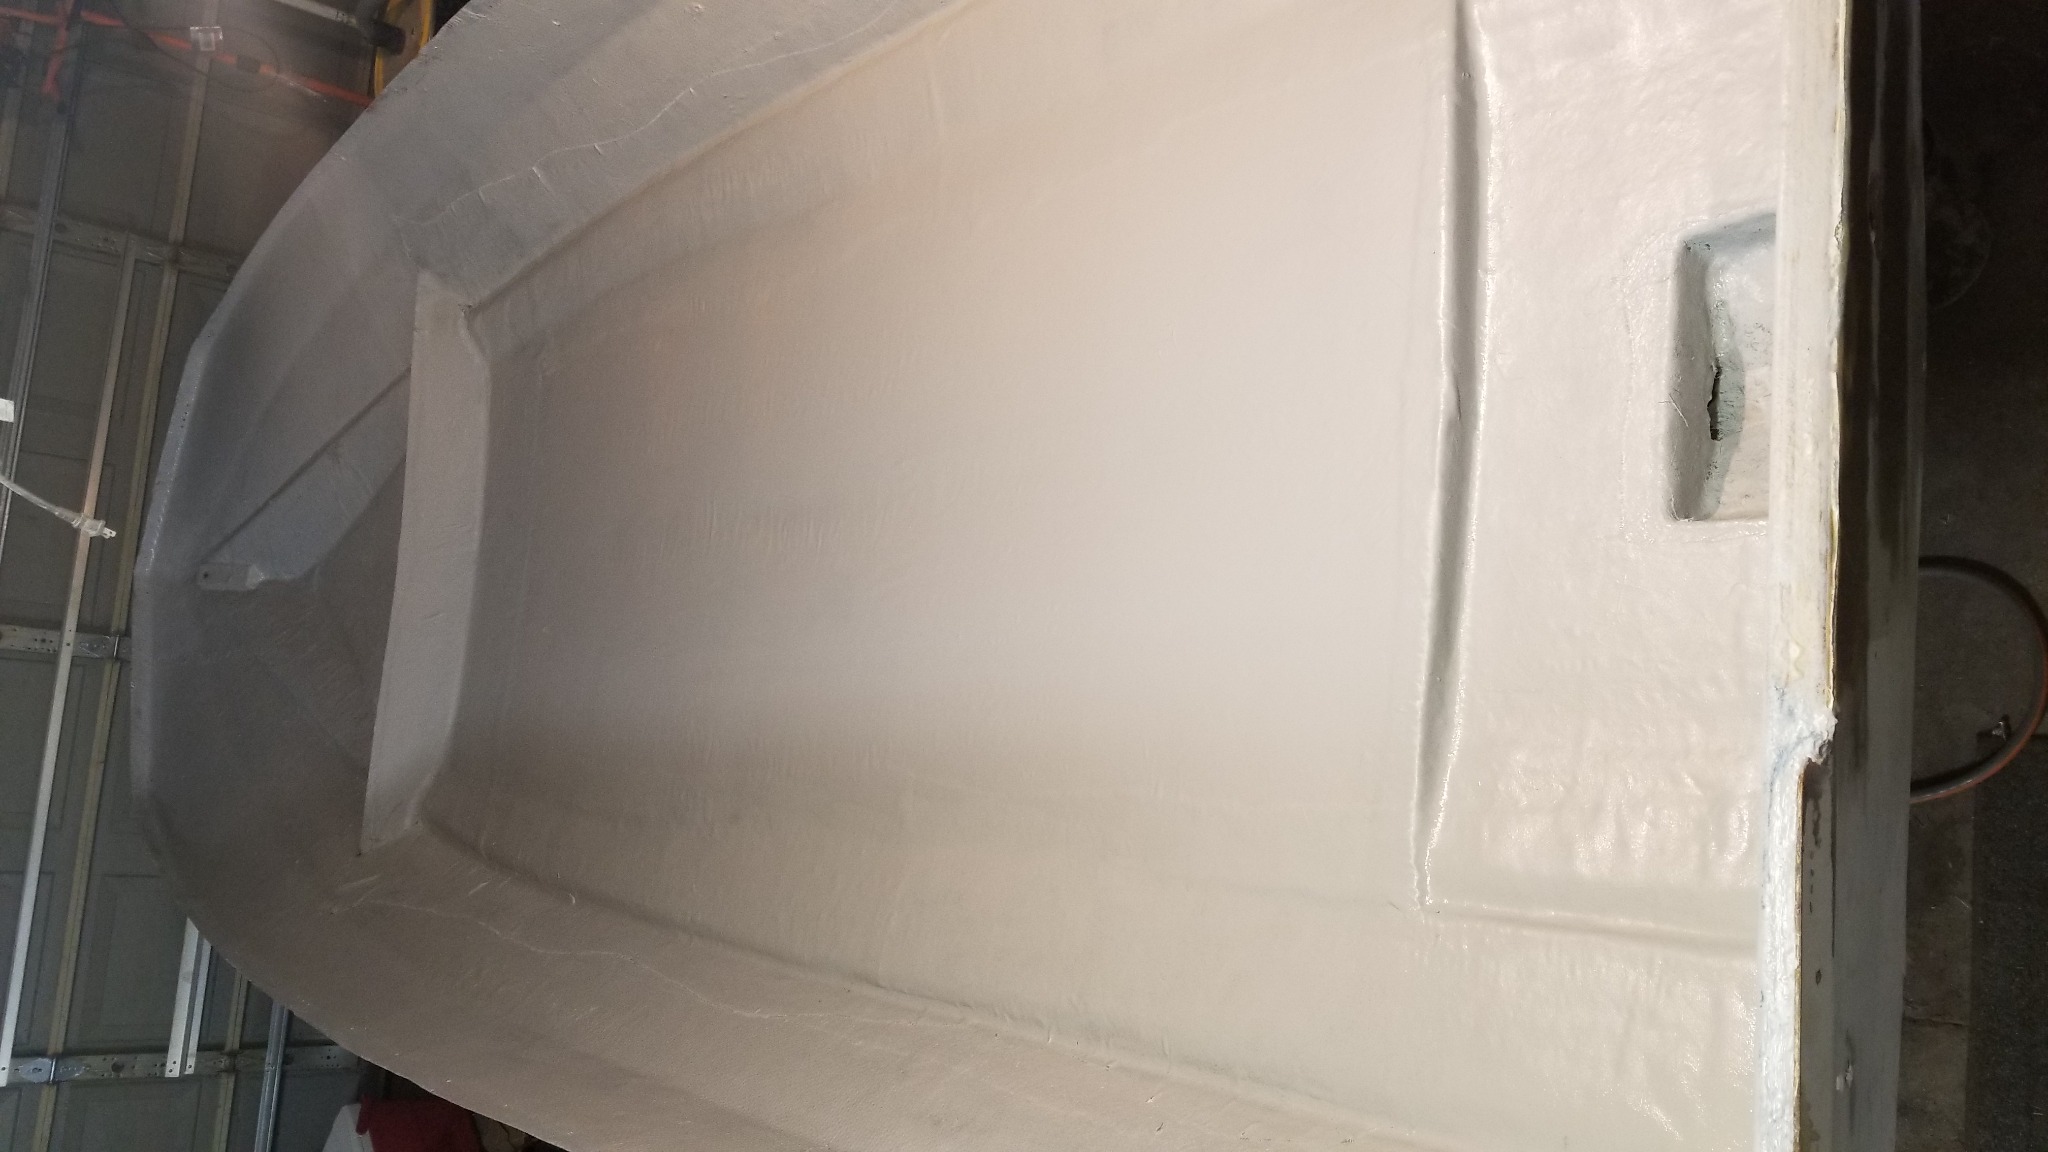
Got it primed this morning, going to let her set up in the garage a couple days then a light sanding and paint the interior. This old boat has gone a long way in the last year. Looking back, on one hand, I wish I had more time that I could have set aside this last summer, could have been done, but on the other hand, this gives me something to do this winter as I dont like the cold, not going to do any fishing until its back up into the 60s at least.
Attachments:

Please Log in or Create an account to join the conversation.

restoration project make/mode/year unknown 1 year 11 months ago #147527

Lookin great so far!

Please Log in or Create an account to join the conversation.

restoration project make/mode/year unknown 1 year 11 months ago #147528

  • 63 Sabre
  • 63 Sabre's Avatar
  • Offline
  • Contributing Member
  • Contributing Member
  • Posts: 4676
  • Karma: 147
  • Thank you received: 167
I can appreciate all of your work.
Looks like you have a good handle on it

Please Log in or Create an account to join the conversation.

restoration project make/mode/year unknown 1 year 11 months ago #147529

Looks great she's coming along nicely!!!

Bob

Please Log in or Create an account to join the conversation.

restoration project make/mode/year unknown 1 year 11 months ago #147539

  • Fatlenny
  • Fatlenny's Avatar Topic Author
  • Offline
  • Senior Boarder
  • Senior Boarder
  • Posts: 241
  • Karma: 3
  • Thank you received: 17
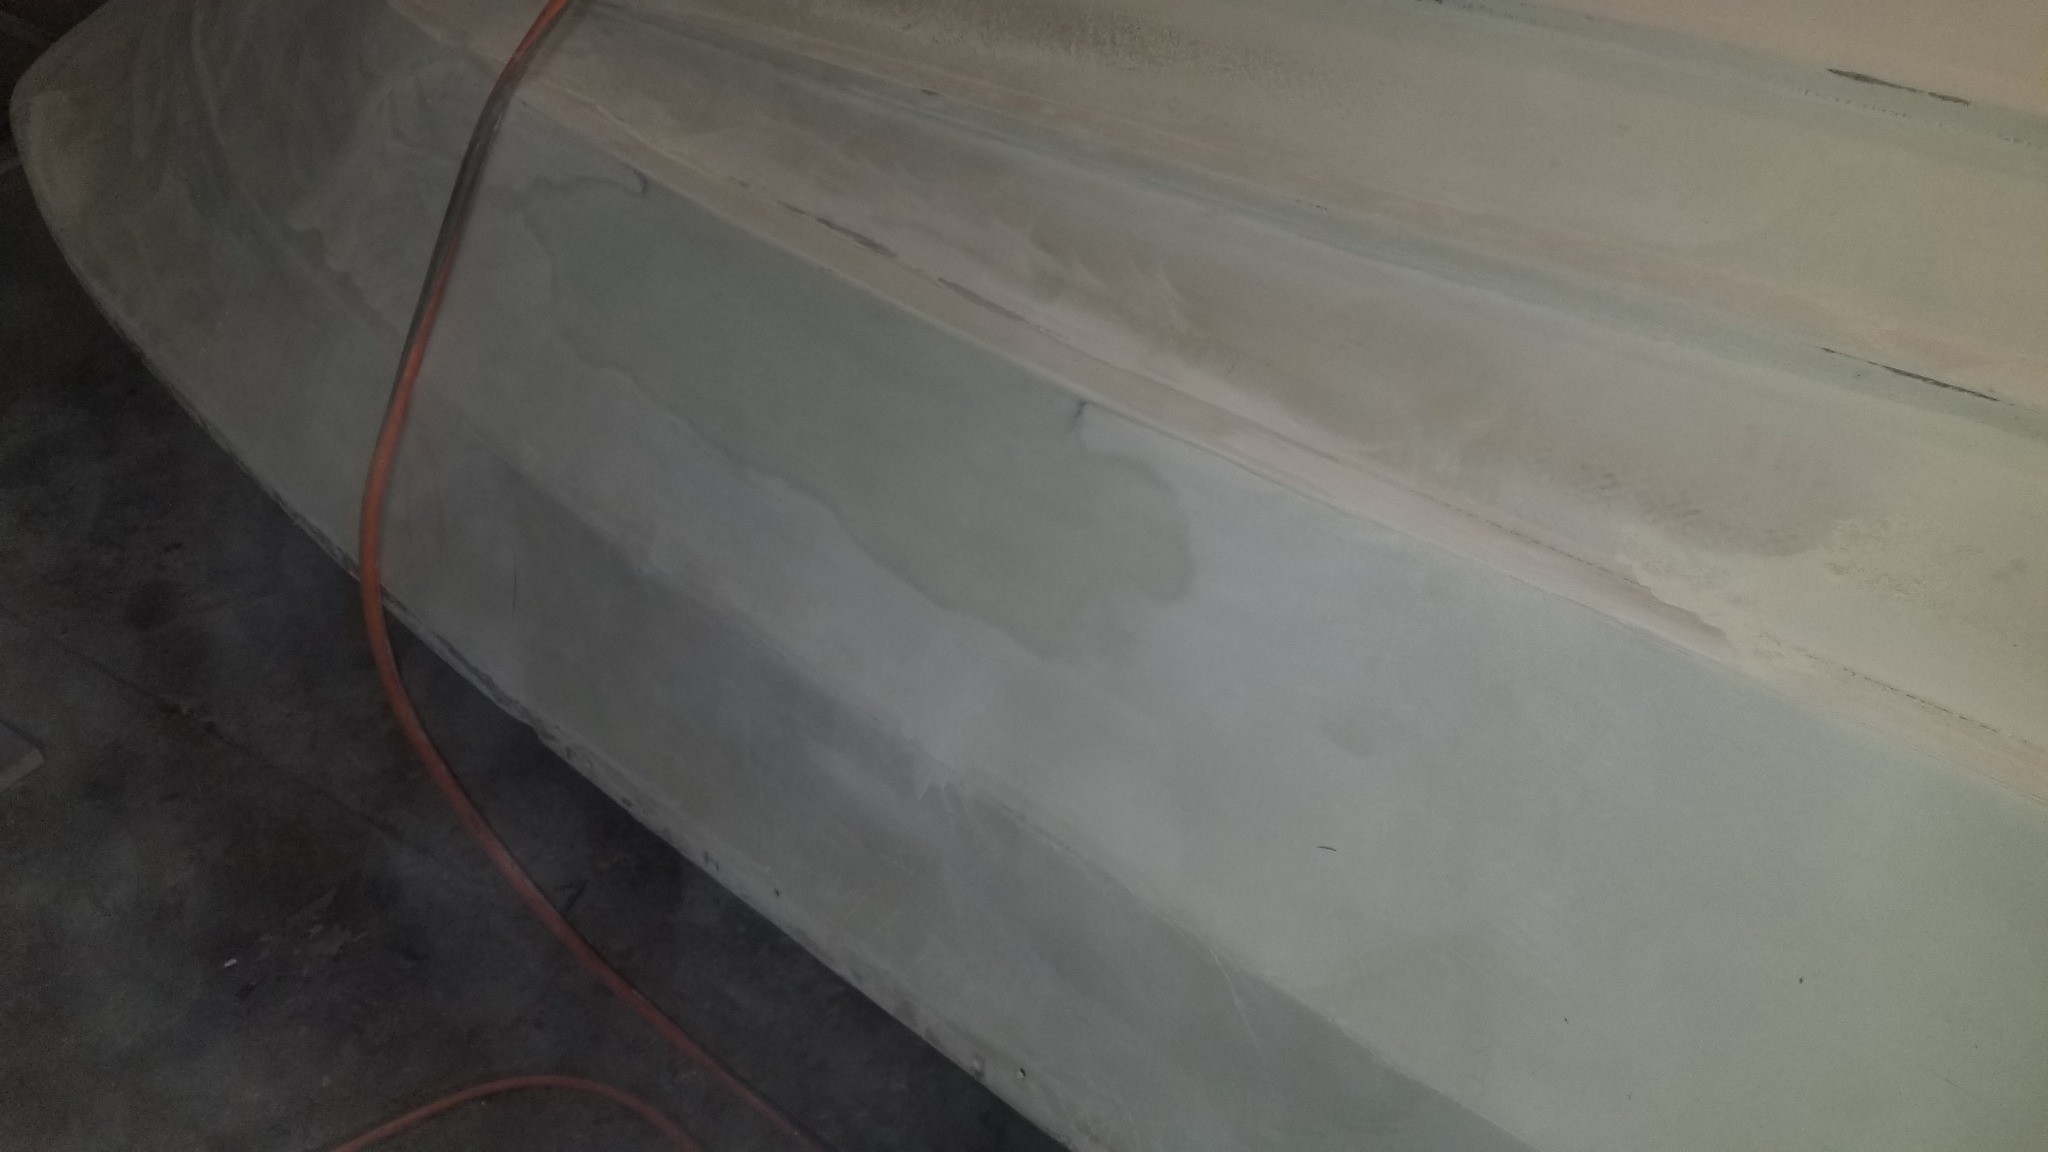
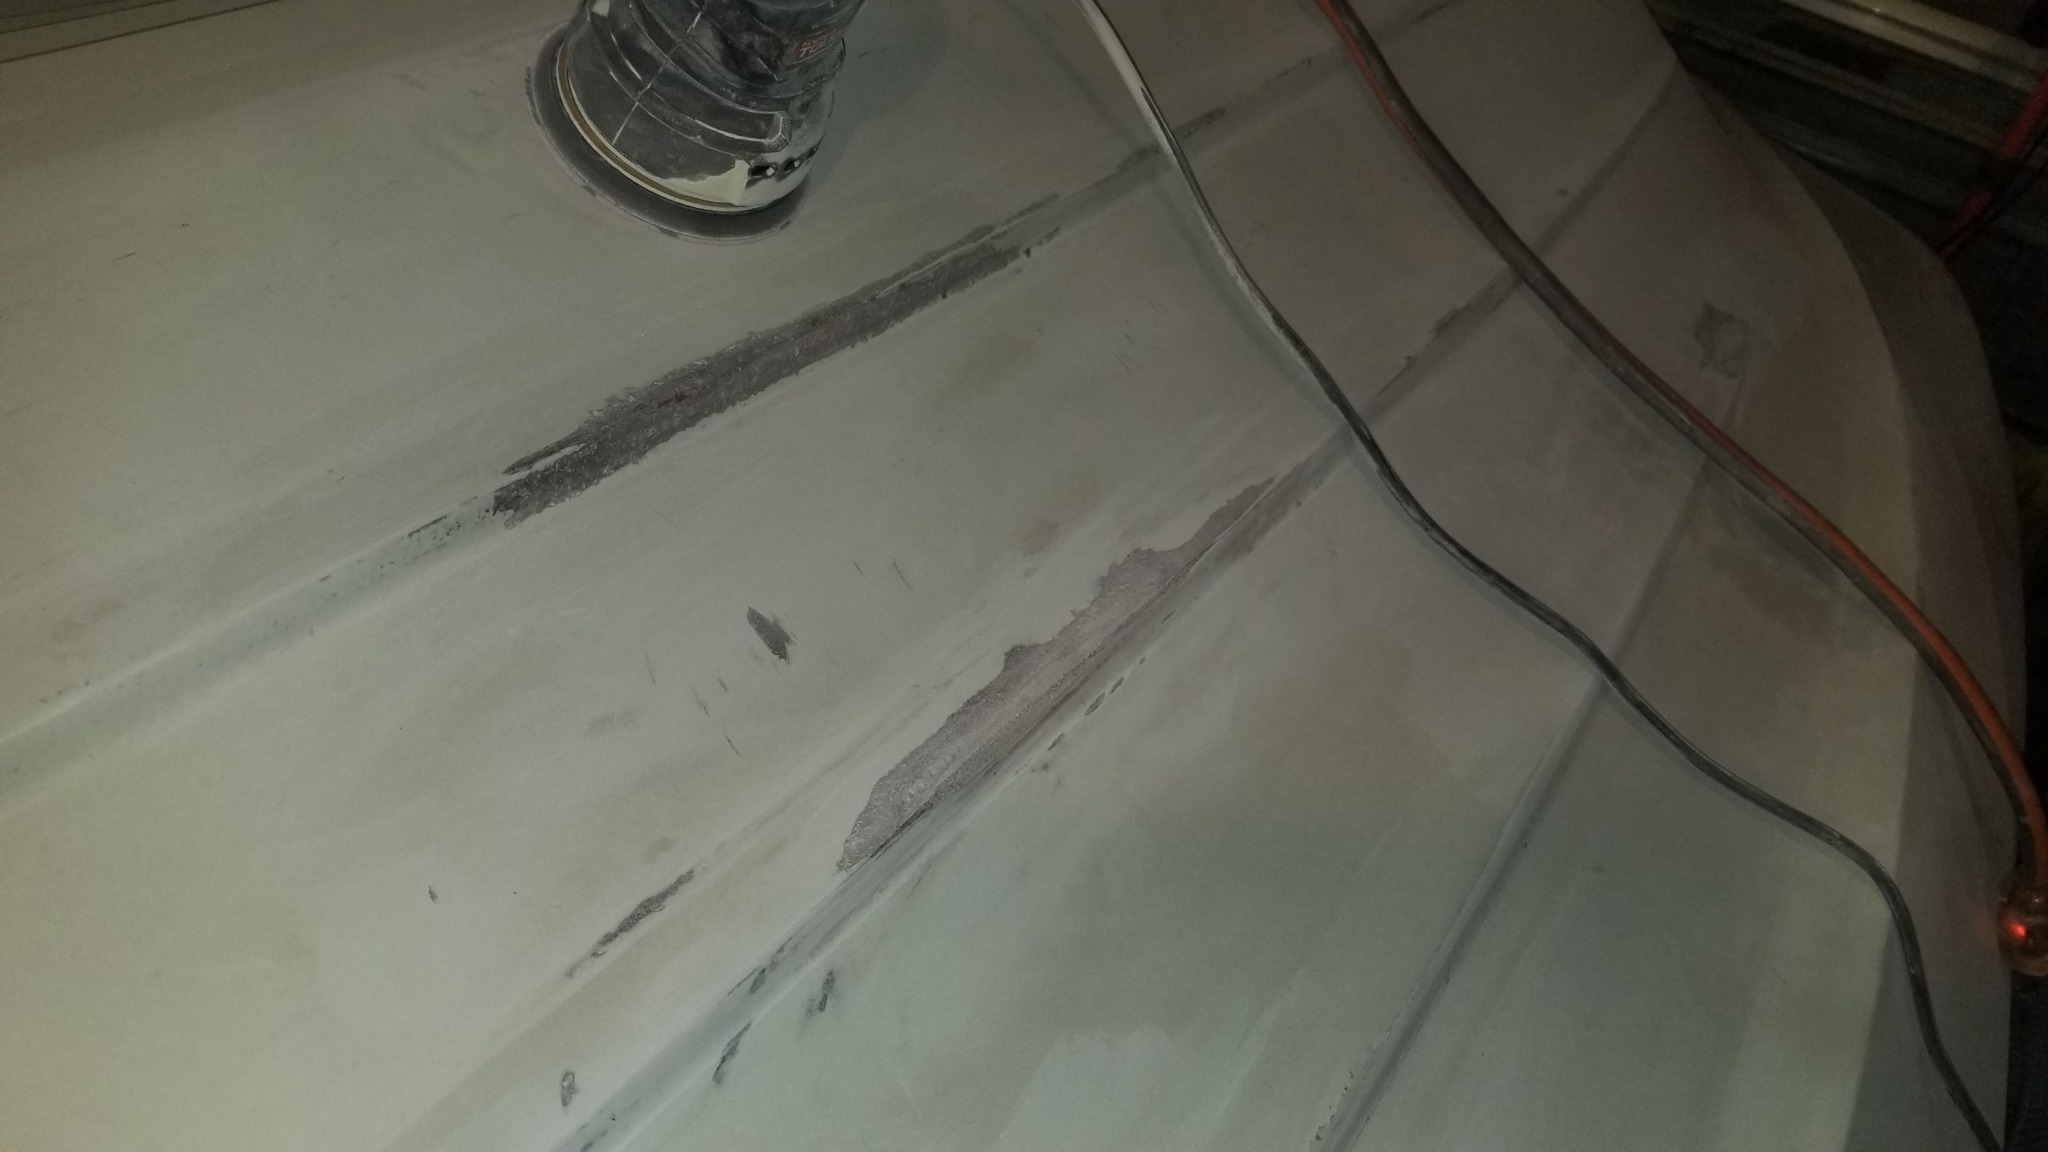
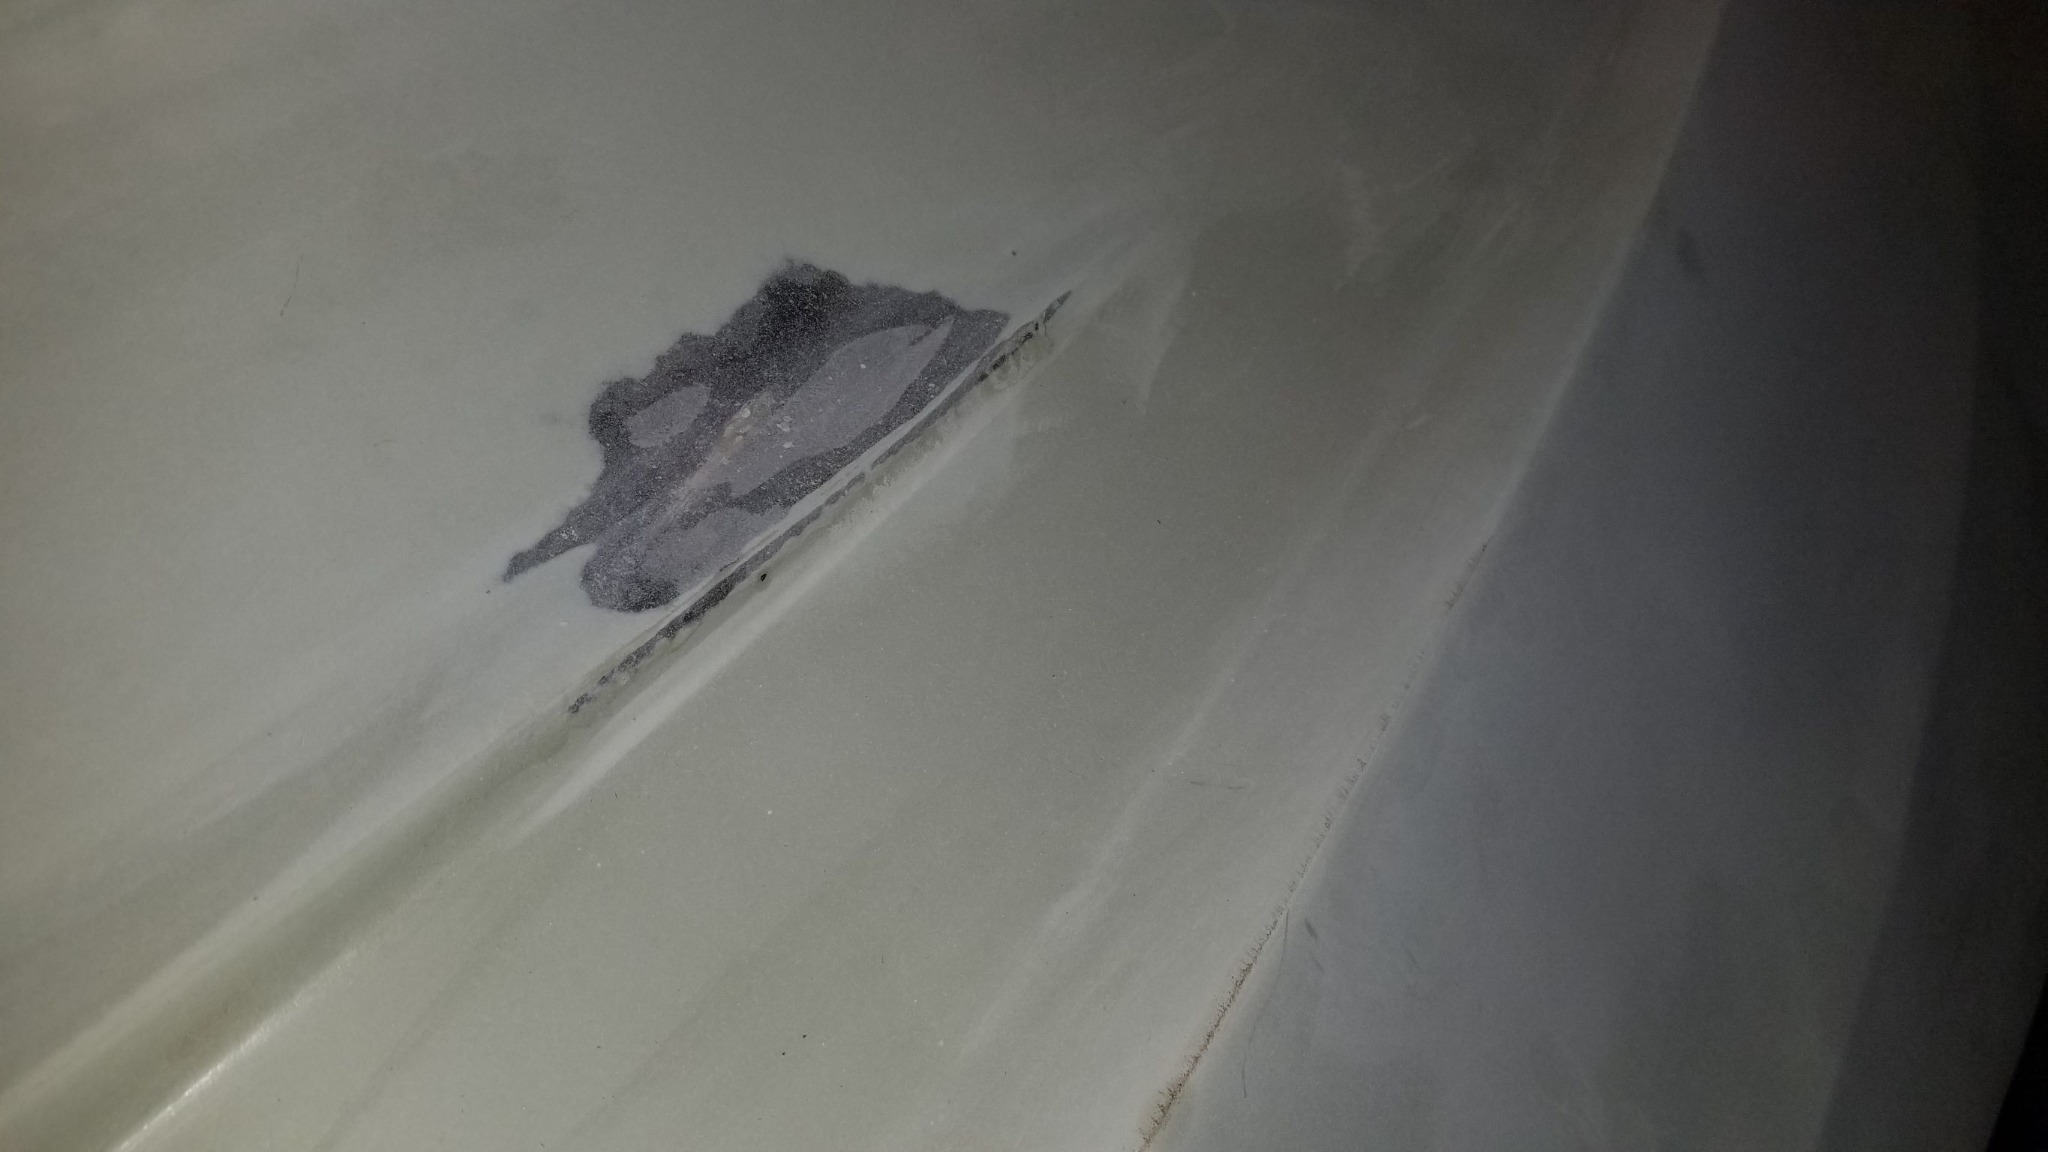
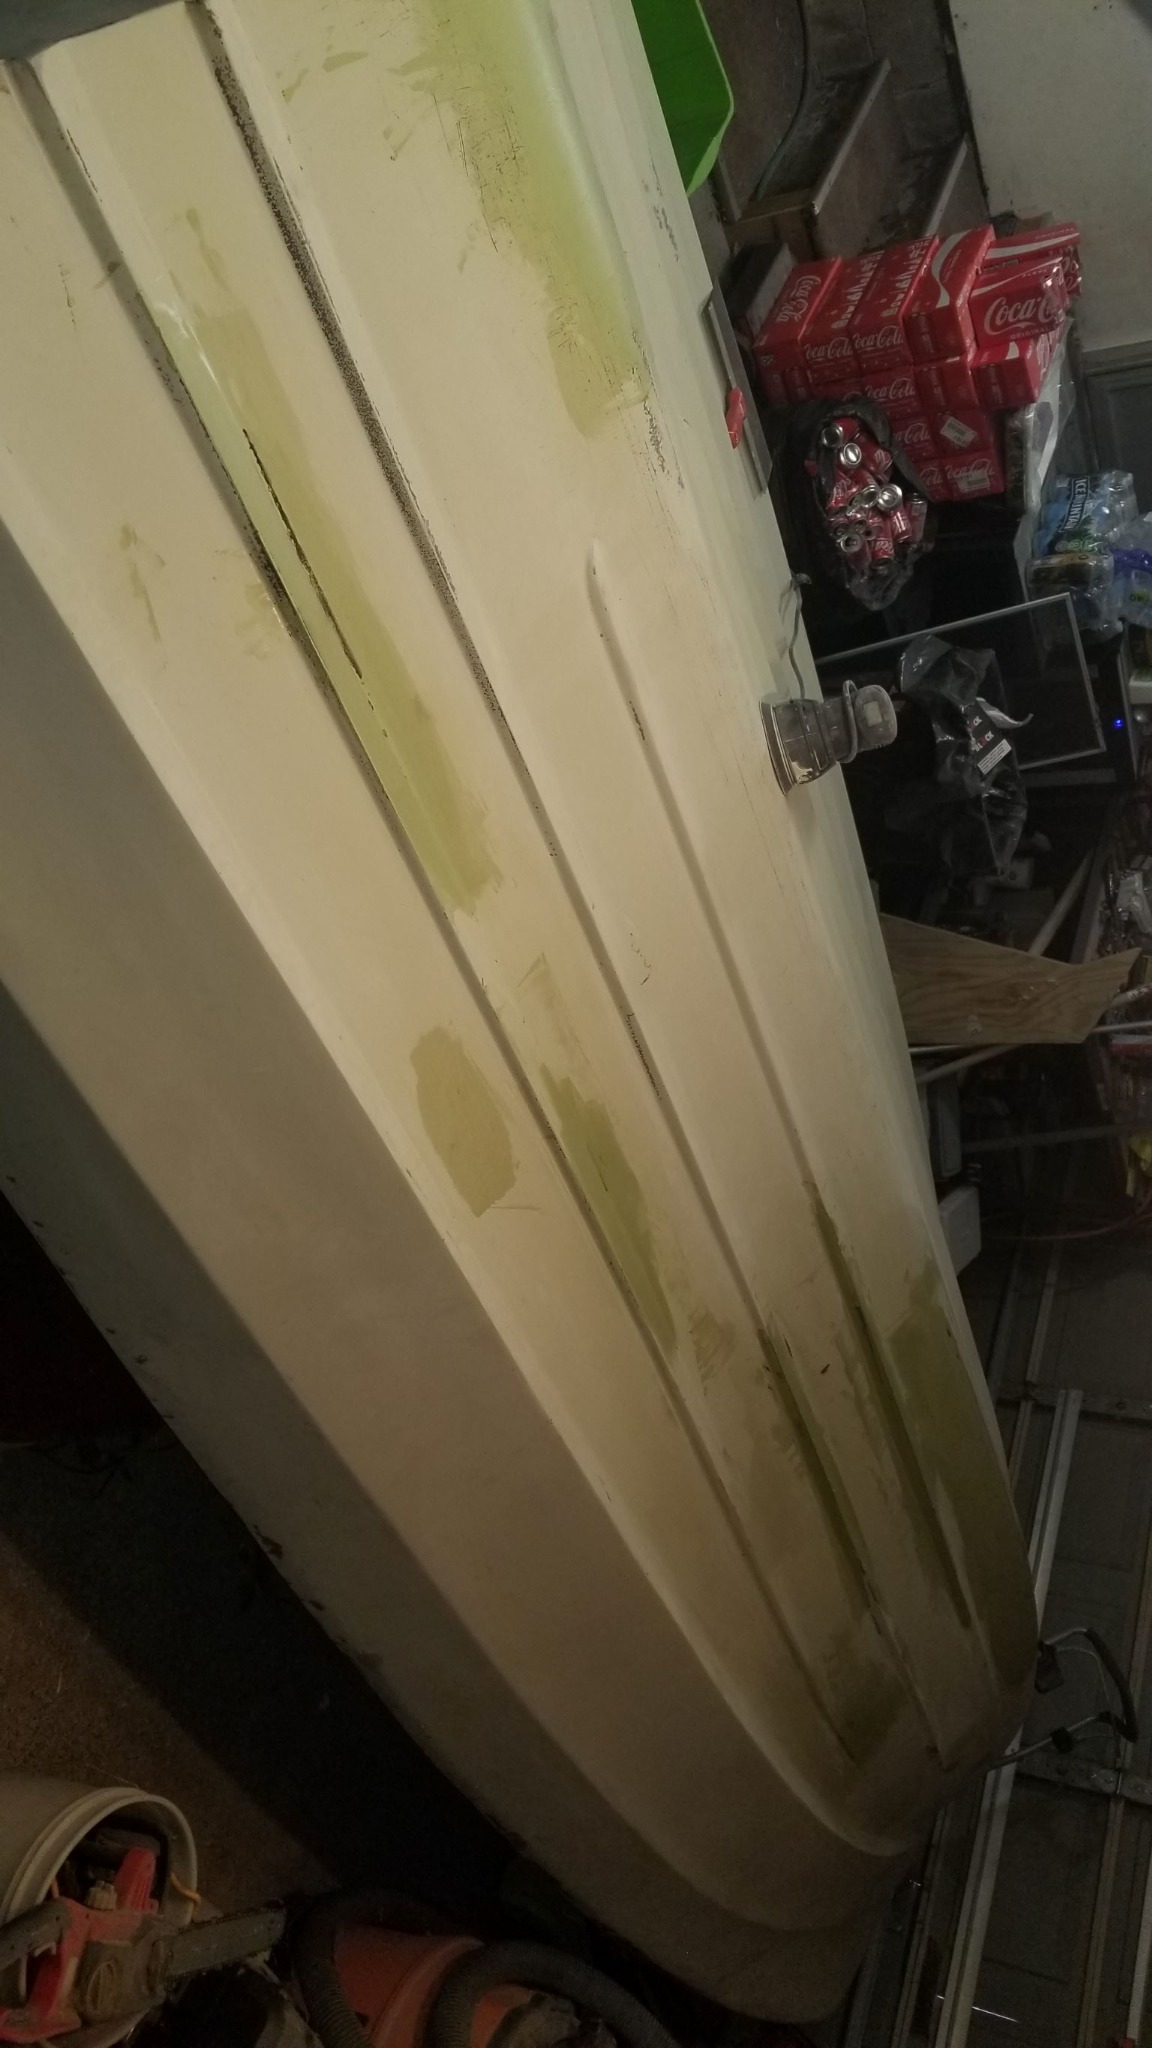
Good morning everyone. We got the project flipped over in the garage. This was a fun task. Used a tiedown strap and a come along attached to the bow and transom and the ceiling. Lifted it up and flipped it over on to a 8 foot table that I set the legs on some old carts so I can still roll it around the garage as needed. Yesterday I re-sanded and cleaned off some repaired areas on the starboard side of the hull and and transom, using total boat total fair, faired out the transom and star board side. I have come back and finish sanded the fairing smooth this morning. Today I am repeating the process on the port side. Paint is on order and should receive this week. cant wait to try our hand on rolling and tipping. I figure the bottom side of the hull is a great practice point to see what kind of finish we will get, then I can determine if I am going to roll and tip the topside or get the sprayer out.


Attachments:

Please Log in or Create an account to join the conversation.

restoration project make/mode/year unknown 1 year 11 months ago #147541

  • Fatlenny
  • Fatlenny's Avatar Topic Author
  • Offline
  • Senior Boarder
  • Senior Boarder
  • Posts: 241
  • Karma: 3
  • Thank you received: 17
Just finished up applying fairing to the port side. Just have to wait for this to set up and sand down. Then we can scuff up and wipe down the whole thing and prime it. Fingers crossed that we dont find too much more that needs to be faired out after the prime. More to come this next week or weekend.

Attachments:

Please Log in or Create an account to join the conversation.

Time to create page: 0.402 seconds

Donate

Please consider supporting our efforts.

Glassified Ads

Mercury outboard
( / Engines)

noimage
11-03-2024

Classic Mercury Outboard Motors
( / Engines)

Classic Mercury Outboard Motors
10-18-2024

1958 Skagit Sportster
( / Boats)

1958 Skagit Sportster
09-25-2024

FG Login

FiberGoogle

Who's Online

We have 7655 guests and one member online