Welcome, Guest
Username: Password: Remember me

TOPIC: 115 lower unit changes started

115 lower unit changes started 5 years 11 months ago #138424

  • Dr.Go!
  • Dr.Go!'s Avatar Topic Author
  • Offline
  • Contributing Member
  • Contributing Member
  • Posts: 1719
  • Karma: 19
  • Thank you received: 125
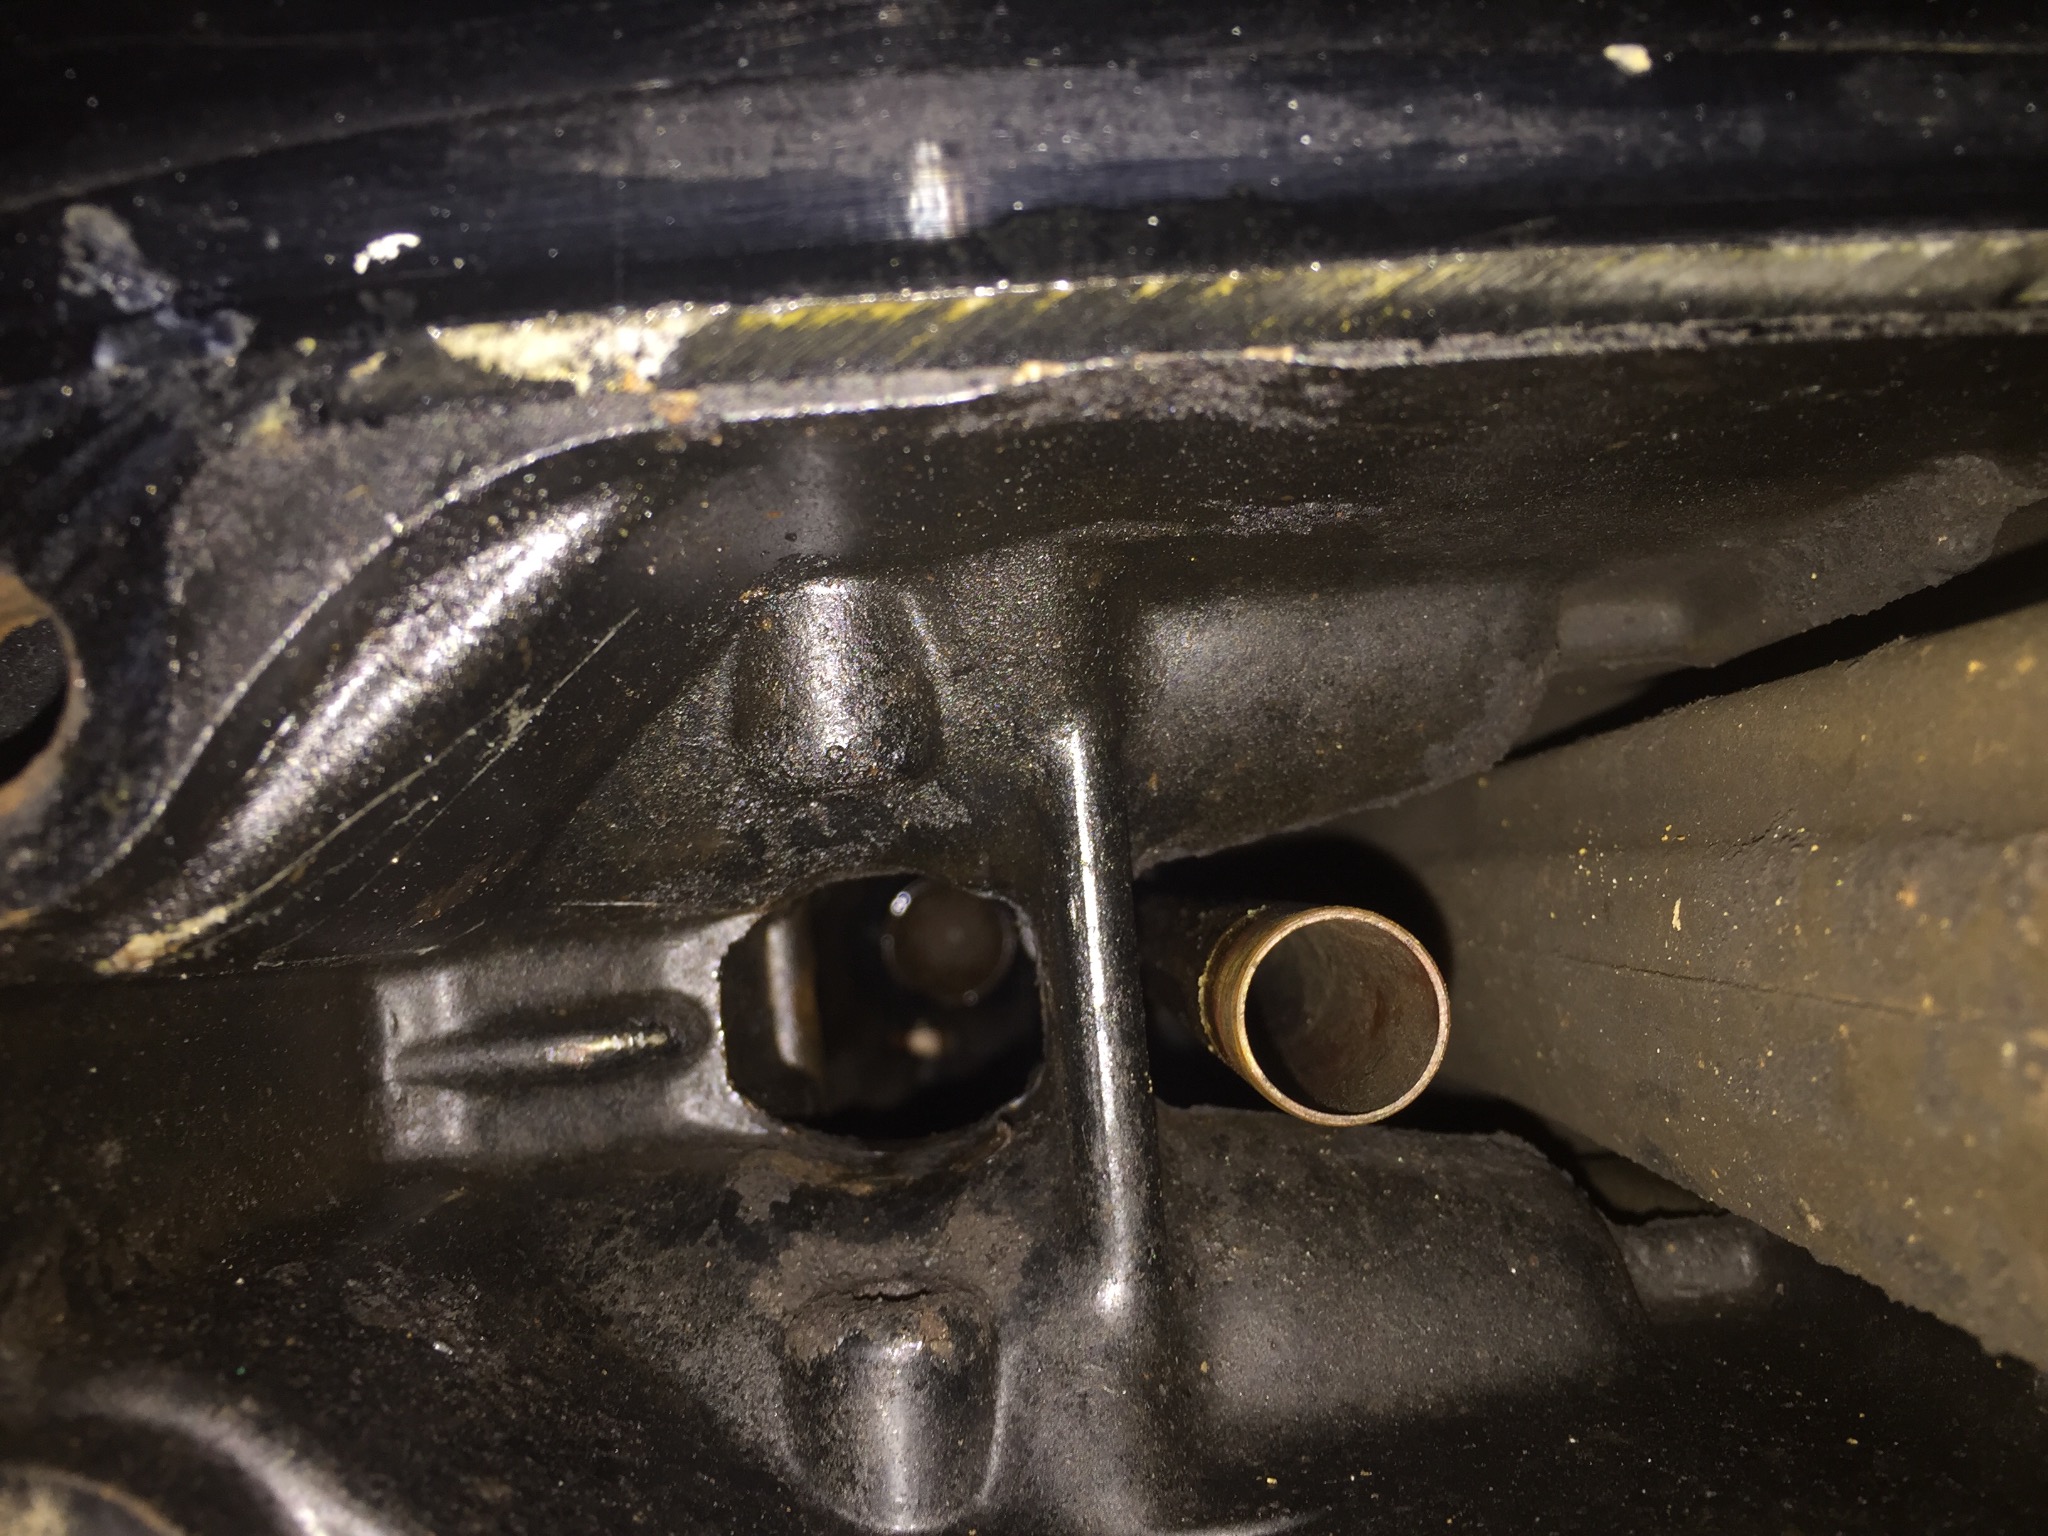
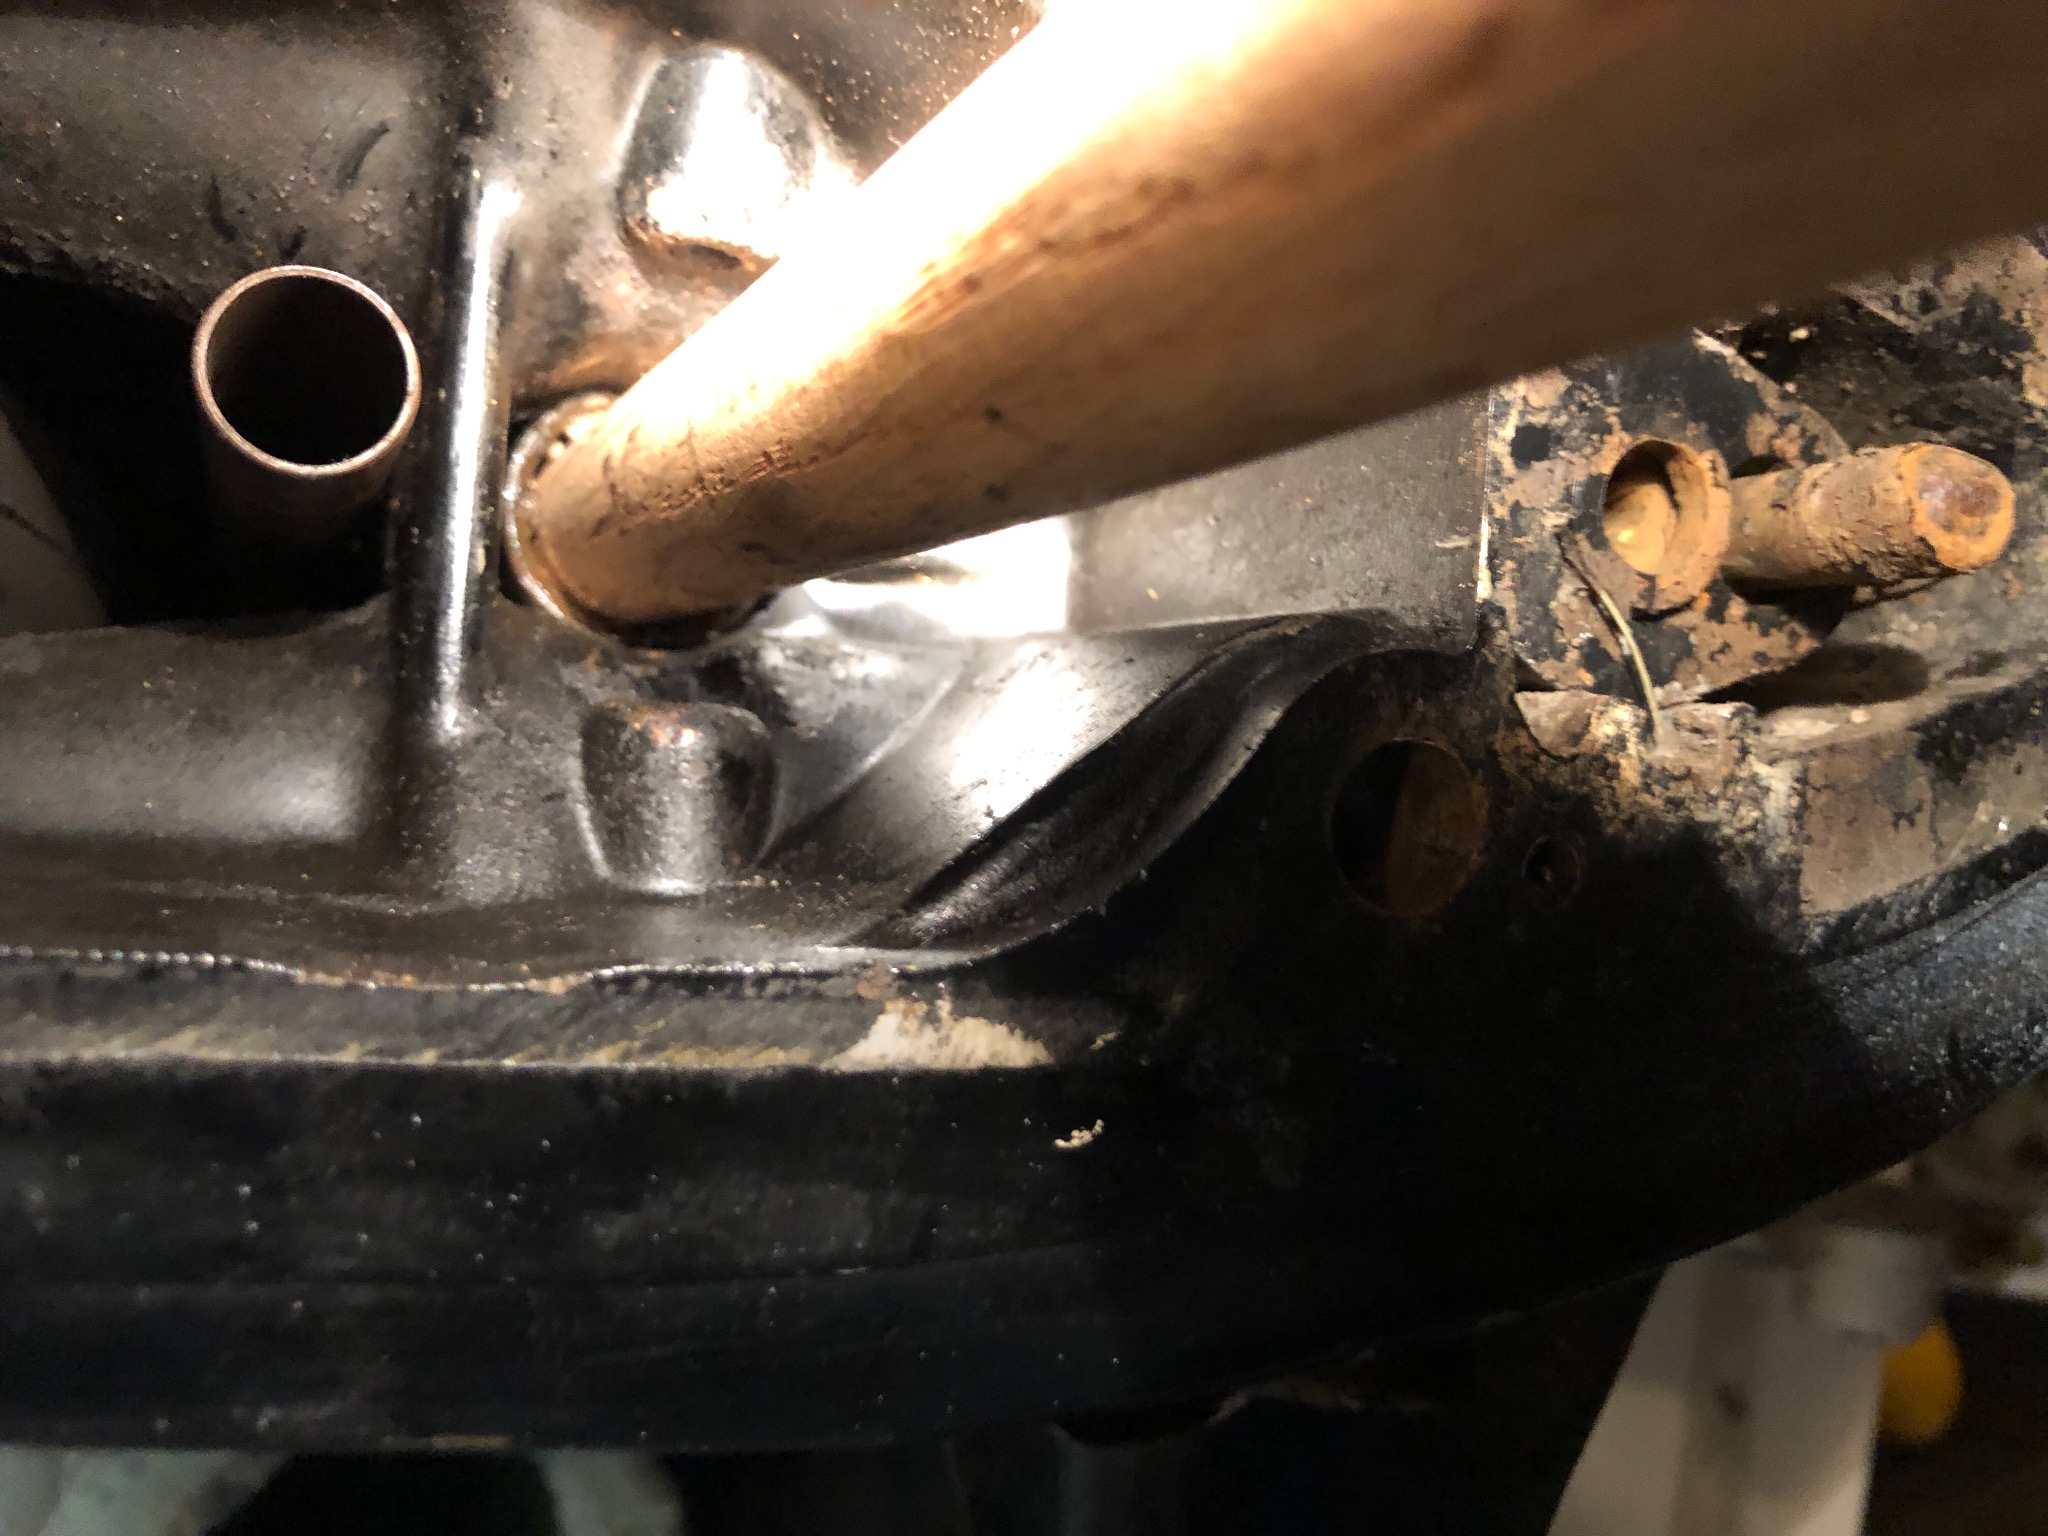
Sorry for the hasty picture. It did not focus up inside but I do think I see the female end of that extension. I couldn’t get my fat head in there at the same time fitting a flashlight and camera up there. I just tried a random picture without looking.
Attachments:

Please Log in or Create an account to join the conversation.

Dr.Go!

115 lower unit changes started 5 years 11 months ago #138426

get a extra drive shaft and use heavy grease in it to hold the extention on so you ca turn it to remove it.

Please Log in or Create an account to join the conversation.

115 lower unit changes started 5 years 11 months ago #138427

  • Dr.Go!
  • Dr.Go!'s Avatar Topic Author
  • Offline
  • Contributing Member
  • Contributing Member
  • Posts: 1719
  • Karma: 19
  • Thank you received: 125
That sounds like plan A. I believe I may have a loose shaft in a parts box on my high storage shelf. Since I do not have new thick grease, would it be ok to use some old grease from some ten year old buddy bearings laying in a box? Seems pretty thick and gooey last time I looked.

Please Log in or Create an account to join the conversation.

Dr.Go!

115 lower unit changes started 5 years 11 months ago #138437

  • Dr.Go!
  • Dr.Go!'s Avatar Topic Author
  • Offline
  • Contributing Member
  • Contributing Member
  • Posts: 1719
  • Karma: 19
  • Thank you received: 125
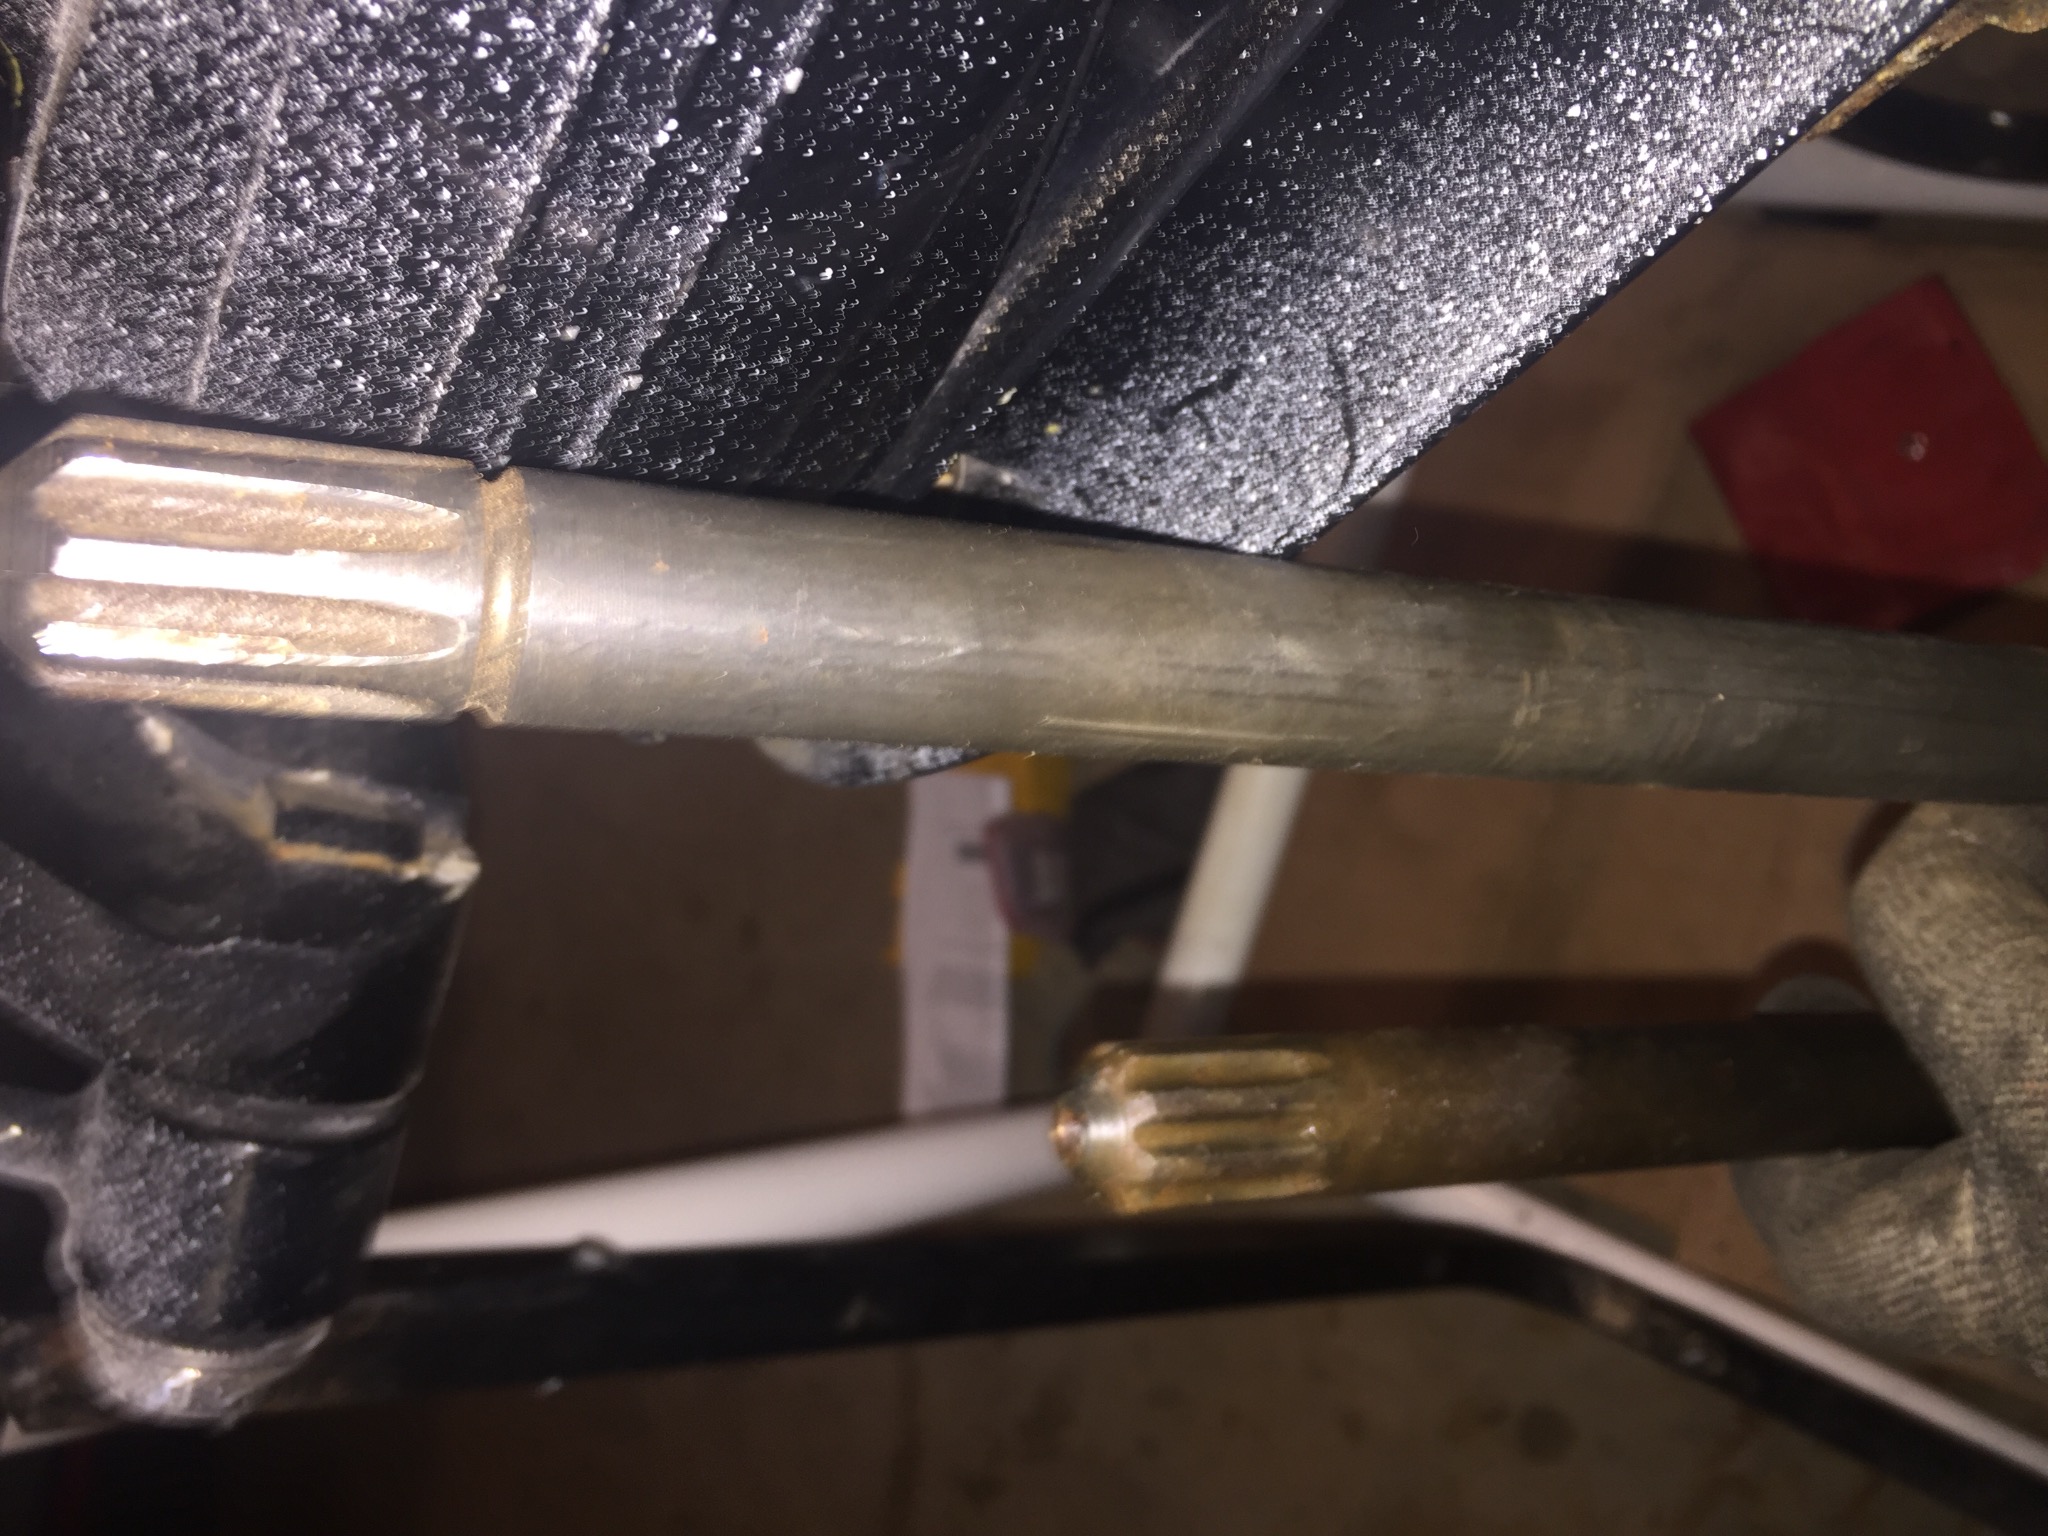
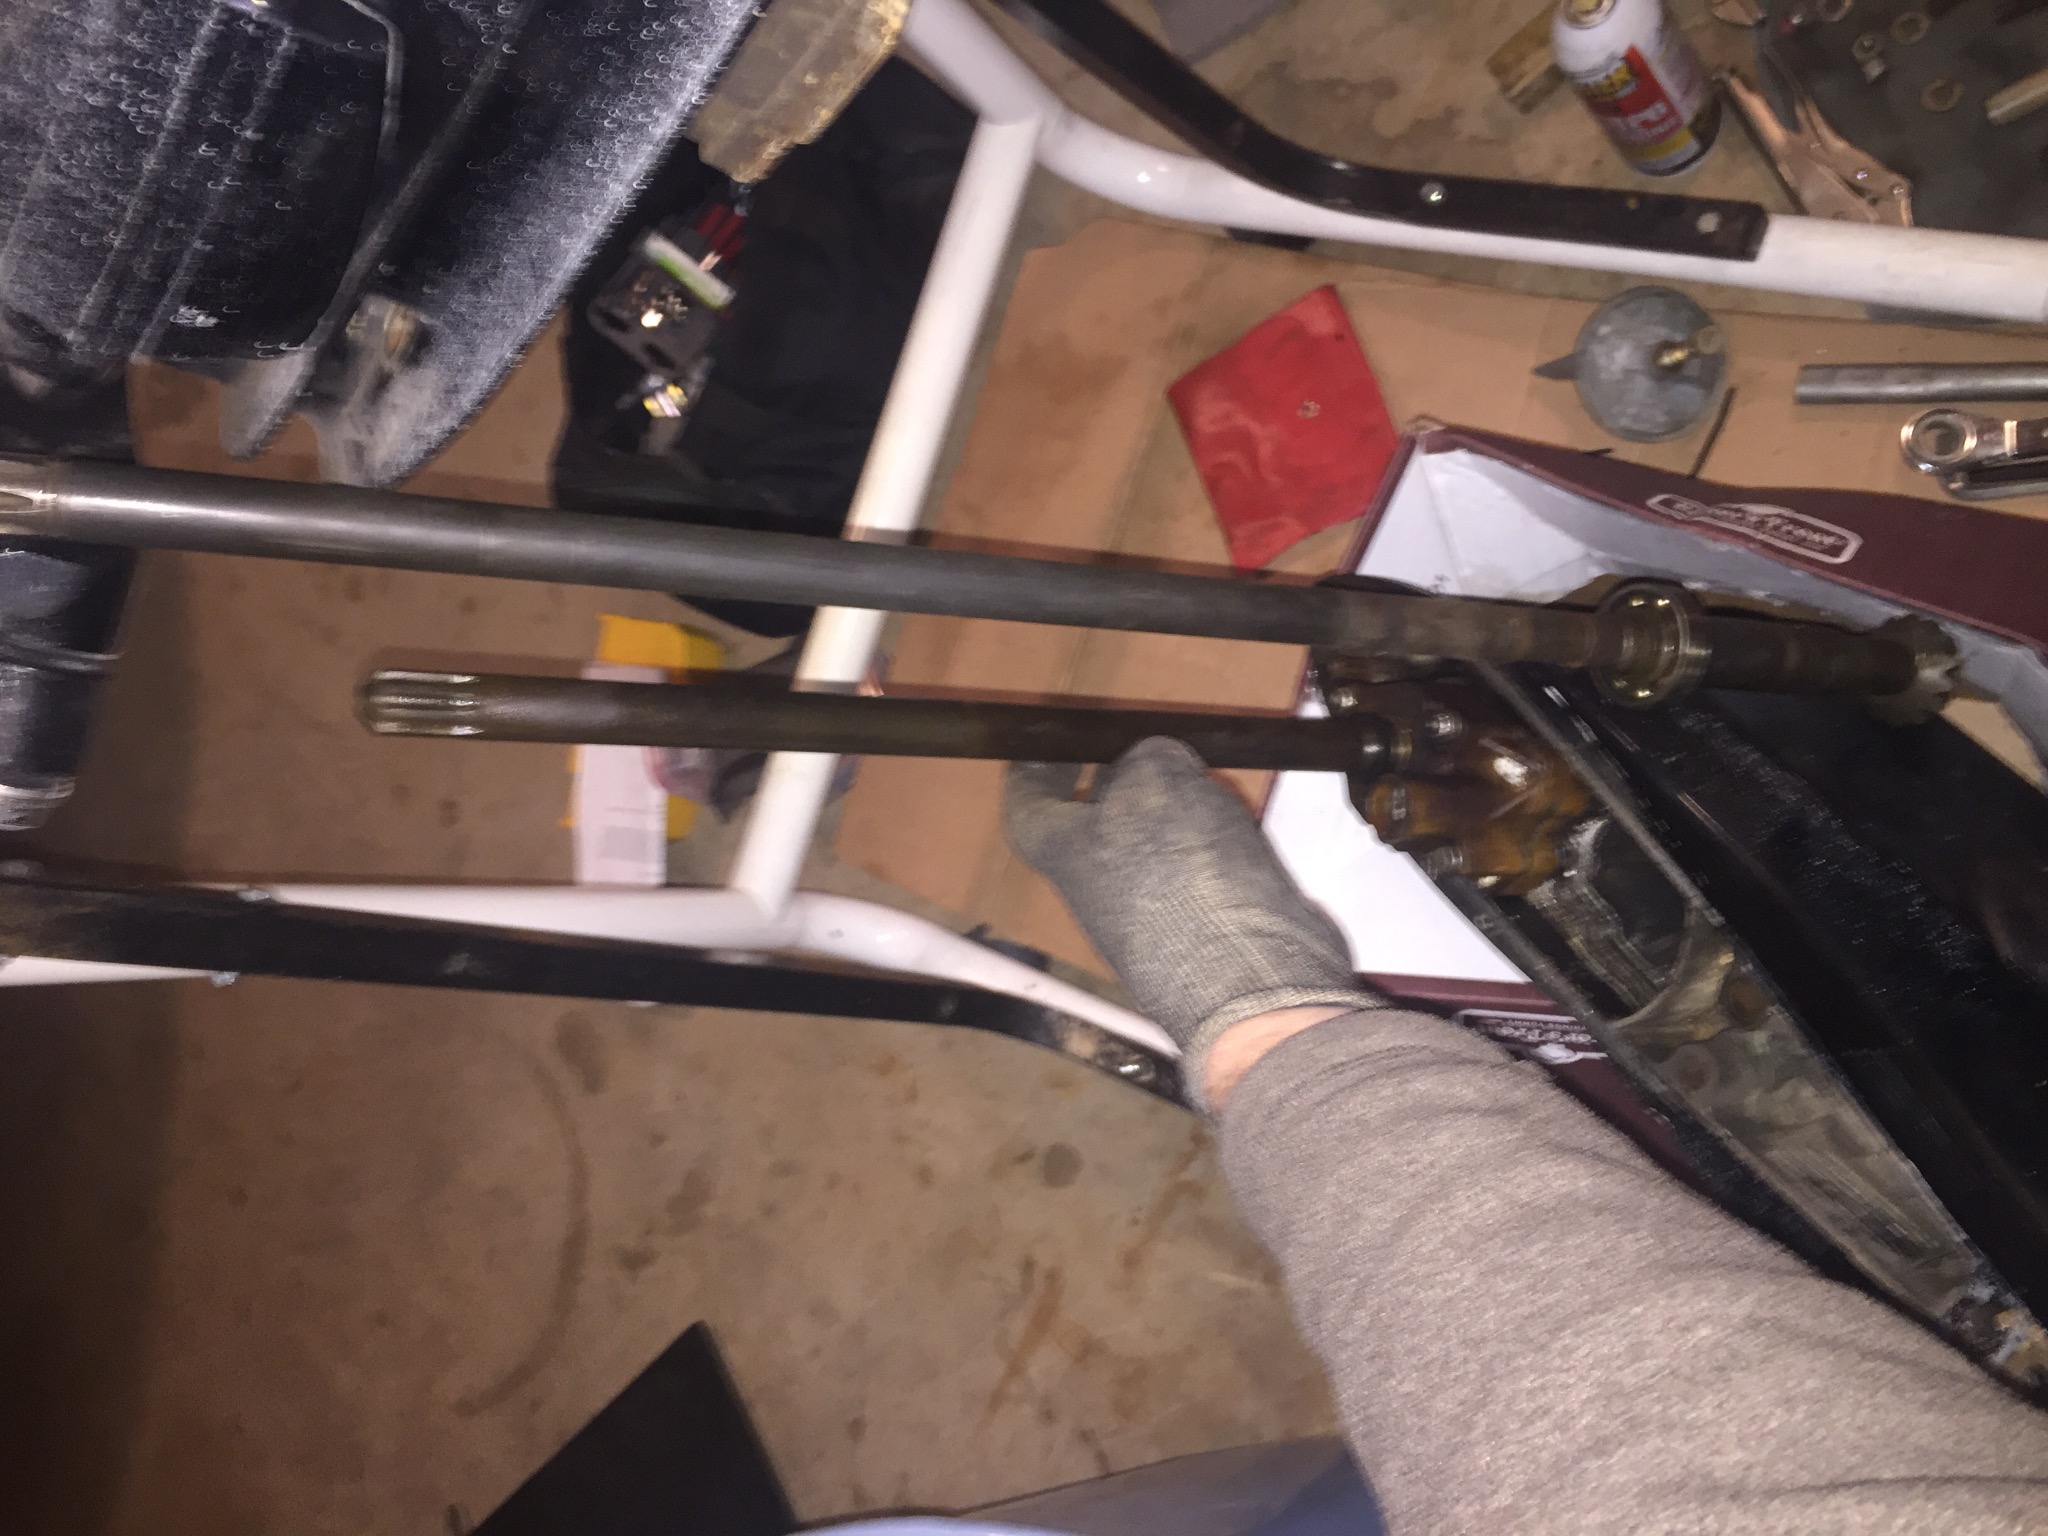
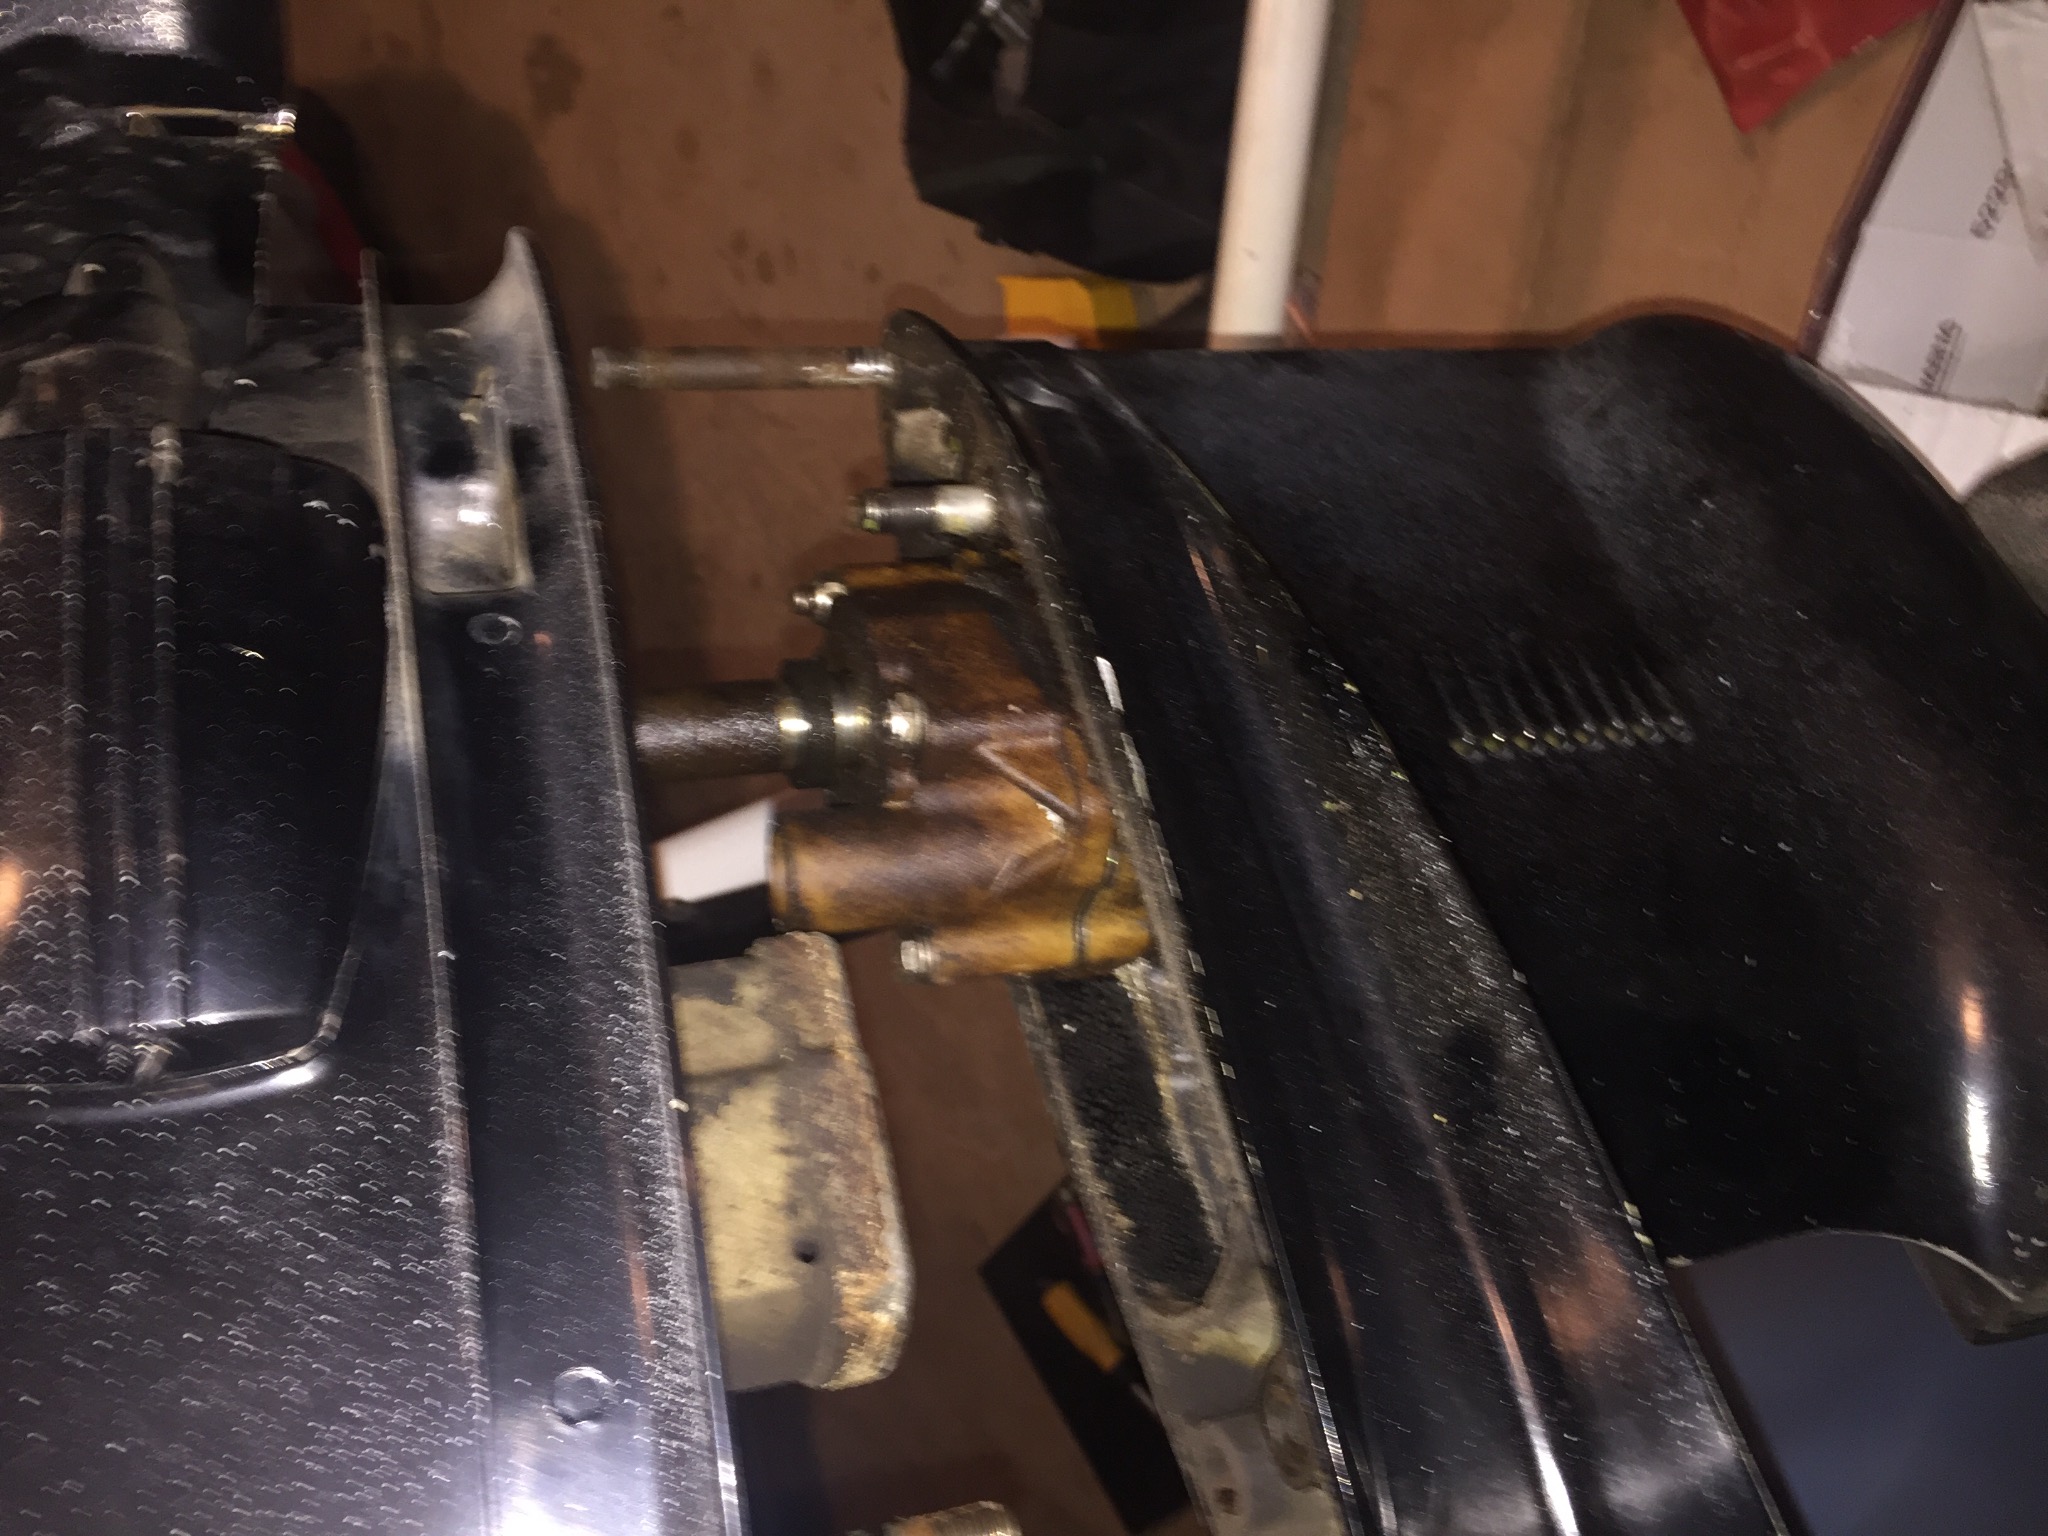
Here is a picture using Ed’s advice to reinstall lower unit shaft unit it seats into female upper splines and see if you still have the 4 inch gap. It does. I then removed the lower unit. Then I planted my Christmas cookie weight on the back of the stand and tilted motor up. Using a flashlight, I can see that shaft extension. I dug through the parts box and found my loose long shaft. I slipped it up in there dry just to see if I could easily seat it and turn over engine. That works... but when I wiggle side to side, it hits the mid sections housing casting on all sides before it puts any load or bind on the shaft connection to the crank. I will have to try putting on thick grease and then a few gentle but firm upward strikes straight up to see if small shock will listen its grip. Maybe I can spray some pb blaster up into that joining point???
Attachments:

Please Log in or Create an account to join the conversation.

Dr.Go!

115 lower unit changes started 5 years 11 months ago #138438

  • ed-mc
  • Away
  • Platinum Boarder
  • Platinum Boarder
  • Posts: 1410
  • Karma: 232
  • Thank you received: 115
If you want to really get Wild and Crazy, spray some carb cleaner up into those splines, so it's as thoroughly degreased as possible. You could run a hunk of fuel line or other suitable tubing up the exhaust tower to help direct the spray. Clean the splines on your loose driveshaft, too. Smear some epoxy glue or J-B Weld on the splines & cram it up into the crankshaft splines. Let it cure for a couple of days. Then hopefully when you wiggle the shaft, it'll transmit more motion to the driveshaft stub. It might even hold enough for you to tap the loose shaft downwards.

If the glue holds tight, and you get the shafts out in one big lump, you can heat the spines with a heat gun or torch to release the glue. Nothing to lose, elsewise you're pulling the powerhead. HTH.......ed

Please Log in or Create an account to join the conversation.

115 lower unit changes started 5 years 11 months ago #138439

  • Dr.Go!
  • Dr.Go!'s Avatar Topic Author
  • Offline
  • Contributing Member
  • Contributing Member
  • Posts: 1719
  • Karma: 19
  • Thank you received: 125
Thanks Ed. I have Carb cleaner and think I have some clear snowmobile fuel line I could use for an extension delivery tube. I also have some West System 2 part epoxy, or 3M 5200, or also have JB weld...which would be best (I may have to read which will work in 40 degree temperatures)? I had wondered about this technique, but had no experience if I could later separate those 2 shafts. If I pretend to try, but not really try hard, I would be forced to pull Powerhead...that would likely lead to a year delay while the temptation to convert it to a 135 would be likely changing my original plan.

Please Log in or Create an account to join the conversation.

Dr.Go!

115 lower unit changes started 5 years 11 months ago #138442

  • ed-mc
  • Away
  • Platinum Boarder
  • Platinum Boarder
  • Posts: 1410
  • Karma: 232
  • Thank you received: 115
I found this info posted on JB Weld, they were talking about gluing a car door mirror:

At temperatures below 50 F and above 32F the cure time is about double, 10 to 30 Minutes as compared to the 5 to 15 min at room temperature but the finished bond strength is not affected.

At temperatures below freezing it may take 1 to 2 hours to fully cure and may never reach it's normal full strength but is still quite strong once cured.

For best results warm the parts with a hair dryer before assembling and allow the epoxy to form a bead around the joint then hold in place nice and steady for at least 15 minutes then avoid putting any stress on it ( driving or slamming the door! ) for at least 30 minutes.


Found this info on 3M 5200 posted at the Home Depot site:

Hello, the minimum application temperature for the 3M™ Marine Adhesive Sealant 5200 is 40 Degrees F. Do not apply at temperatures below 40°F (4°C) or on frost covered surfaces. Suggested application temperature should be 70 Degrees F. Applying at lower than recommend temperatures will cause for a slower than normal cure.

So perhaps you can heat up the parts somewhat to aid the cure time. 5200 is pretty dang sticky, and once cured the shafts should stay together good enough to get some force on the parts. Normal cure time might be a week or so with that stuff. 5200 Fast Cure works in 24 hours but it'll take longer in the cold.

Perhaps a torch on the driveshaft splines, and if you have a hot air dryer or heat gun, point the blast up the exhaust tower for a few minutes and try to warm up the stub shaft a bit. Should help with the cure times.

Here's an interesting fact:

JB Weld, fully cured, has a tensile strength of 3960 PSI; 3M 5200, tensile strengh of 700 psi. It's primarily a very sticky sealer but I reckon the JB weld cures a lot harder.

Which is better for your application? Anybody's guess. Try the JB Weld and see what happens. It'll have a much shorter cure time than 5200.

West System has a bunch of Cold Cure info on their website:

www.westsystem.com/instruction-2/epoxy-basics/cold-temperature-bonding/

Their product does have a quite high tensile strength:

www.westsystem.com/products/compare-epoxy-physical-properties/

There ya go, more fun!............ed

Please Log in or Create an account to join the conversation.

115 lower unit changes started 5 years 11 months ago #138443

  • 63 Sabre
  • 63 Sabre's Avatar
  • Offline
  • Contributing Member
  • Contributing Member
  • Posts: 4676
  • Karma: 147
  • Thank you received: 167
:laugh:

oh GEESH..

When I first started reading Ed's post about the carb cleaner sprayed up the hole my first thought was that he was going to say "Lite 'er up" :ohmy:


JB Weld without question.
Show us pictures with the shaft out.

Please Log in or Create an account to join the conversation.

115 lower unit changes started 5 years 11 months ago #138447

  • Dr.Go!
  • Dr.Go!'s Avatar Topic Author
  • Offline
  • Contributing Member
  • Contributing Member
  • Posts: 1719
  • Karma: 19
  • Thank you received: 125
Wow - great information for me to ponder. Looks like maybe I will save my 5200 for summer boat work. Likely the JB weld sounds promising and using all of the preheating should help. I just realized I need to do one more thing in case everything bonds well yet maybe the stub stays stuck. I need to remove the lower bearing on that shaft... because if everything sticks and my last resort is to pull the powerhead, it doesn’t look like the diameter of that bearing will fit past the casting throat near the bottom. I will look at that next. I really appreciate all of the help thus far. I will stay positive and hopefully patient to ensure the stub shaft comes out the bottom with the fused bottom long shaft. Honey do list today... also putting the repaired dash cluster of gauges back in my wife’s 2005 Ford. All gauges stopped working except one. For anyone interested, I used Circuitboarddoctors.com for amazing service from North Carolina. Maybe they can fix electronics for boats? Fair price, full warranty, and do the work in one day from receiving. Ok - I better get my rear in gear and keep this rolling!
Attachments:

Please Log in or Create an account to join the conversation.

Dr.Go!

115 lower unit changes started 5 years 11 months ago #138449

  • ed-mc
  • Away
  • Platinum Boarder
  • Platinum Boarder
  • Posts: 1410
  • Karma: 232
  • Thank you received: 115
OK, "Lite 'er up"! It might take some C4 or a low-yield tactical nuke to get that stub shaft outta there!! :S

I don't think that the "loose" driveshaft would ever clear the tower innards, going upwards with a pulled powerhead. Pretty sure the larea below the ball bearing is much larger than the diameter of the stub shaft.

Which brings to mind, it's pretty tight in there and I can recall reinstalling one of these Bay Marine extension kits and the stub shaft wouldn't clear the tight part in the mid. I had to pull the stub off the shortie L/U's driveshaft, then push it up into place with an extension, wiggling the stub past the tight spot. So, depending on the "throat" of your mid, it might be the same thing going downwards.

You could get stuck right there with the stub shaft glued to the loose driveshaft. At which point you'd be forced to pull the powerhead anyway, then you could stick the driveshaft up as far as it would go and heat the stub with propane or MAPP torch until the glue releases.

So, we'd like to avoid that if possible! If you have a long, coarse-toothed file, maybe it'd be a good idea to "relieve" a bit of metal at the tight spot and then hopefully the stub shaft will pass.

Please Log in or Create an account to join the conversation.

115 lower unit changes started 5 years 11 months ago #138450

  • Dr.Go!
  • Dr.Go!'s Avatar Topic Author
  • Offline
  • Contributing Member
  • Contributing Member
  • Posts: 1719
  • Karma: 19
  • Thank you received: 125
Good points and I do understand what you are getting at. I did notice something when looking up inside at bottom of the stub shaft... even though the bottom end has a larger diameter due to it being the female receiving end, I notice that there are flat sides on the outside that are 180 degrees opposite of each other. I will look back in this thread as I think I remember Doc mentioning this and to rotate it so it fits down through the lower casting on the mid section. I can’t get a focused picture of it with my phone. I can see that if it were too fat, that I could file it. Trying to not modify anything. Though this project is hard to work on every day due to other things, I am trying to beat the clock as I will have shoulder surgery in less than 2 weeks and won’t be able to touch it for 2 months. I need to have the shaft out before then or it will drive me crazy. Which JBWeld to use? Original or 4 minute quick set? I would likely let either set up 24 hours.

Please Log in or Create an account to join the conversation.

Dr.Go!

115 lower unit changes started 5 years 11 months ago #138477

As you probably already know, I'm a bit of an outlaw when it comes to some of these procedures.
If you have a spare crankshaft, so you can determine just what diameter wooden round-stock will fit in it snugly, you can drive a tapered wooden dowel - perhaps a replacement broom handle, etc,...Into the female extension.
Then wiggle it around, and pull it down and out with the needed rotation required to fit through the oval area down low in the driveshaft housing.
doc

Please Log in or Create an account to join the conversation.

115 lower unit changes started 5 years 11 months ago #138478

  • ed-mc
  • Away
  • Platinum Boarder
  • Platinum Boarder
  • Posts: 1410
  • Karma: 232
  • Thank you received: 115
Once again the Doc is thinking outside the box! Great idea, and if you find a wooden dowel that's a slight interference fit into the splines, the wood will deform and lock-in to the stub even better!

HO-HO-HO and a Merry Mercury Christmas to one and all!

Please Log in or Create an account to join the conversation.

115 lower unit changes started 5 years 11 months ago #138480

  • Dr.Go!
  • Dr.Go!'s Avatar Topic Author
  • Offline
  • Contributing Member
  • Contributing Member
  • Posts: 1719
  • Karma: 19
  • Thank you received: 125
Thanks a ton for the last 2 comments. I had not had a chance to get back to it, but hope to they the wooden dowel Sunday night as my plan A first attempt. Sure would make me a happy camper to get this removed before my shoulder surgery Thursday. This method sounds promising. I have an old snow shovel wood handle from a 35 year old shovel that was too good to toss when the shovel head finally broke the bracket welds. It is stout and also tapered. Hey - I just realized that darn shovel is probably what wore out my shoulder ha ha. Merry Christmas all.

Please Log in or Create an account to join the conversation.

Dr.Go!

115 lower unit changes started 5 years 11 months ago #138486

  • 63 Sabre
  • 63 Sabre's Avatar
  • Offline
  • Contributing Member
  • Contributing Member
  • Posts: 4676
  • Karma: 147
  • Thank you received: 167
Each time I see a notice in my mail that there is a posting on this subject I expect to see a picture of the shaft removed. Wondering if you should return that item :cheer:

Getting ready for the surgery this week will be priority 1. Repair or replace?

The admiral has her last rehab Monday, did a complete replace and that failed because someone gave her a sympathy hug and tore the ligament :pinch: Then had to have another surgery to reverse the socket/ball, only option left.

Prayers going your way.

Please Log in or Create an account to join the conversation.

115 lower unit changes started 5 years 11 months ago #138492

  • Dr.Go!
  • Dr.Go!'s Avatar Topic Author
  • Offline
  • Contributing Member
  • Contributing Member
  • Posts: 1719
  • Karma: 19
  • Thank you received: 125
Sorry to here of setback! Yikes. Hope your significant heals up completely this time! Trying to keep shoulder parts and fix 3 tears. Fix damaged bicep tendon and grind off some bone...I should know better not to lift those tall Mercs by myself! It is too late tonight, but I really want to get in that garage and try a few removal attempts (with pictures) before Thursday.

Please Log in or Create an account to join the conversation.

Dr.Go!

115 lower unit changes started 5 years 11 months ago #138509

  • Dr.Go!
  • Dr.Go!'s Avatar Topic Author
  • Offline
  • Contributing Member
  • Contributing Member
  • Posts: 1719
  • Karma: 19
  • Thank you received: 125
Sorry I ran out of time before today’s surgery. I didn’t have a broom handle I could spare last minute. Tried one last time with the spare shaft jiggling quickly in both directions with no luck. I hope I can continue this thread after recovery, but I will have to be patient.

Please Log in or Create an account to join the conversation.

Dr.Go!

115 lower unit changes started 5 years 11 months ago #138511

  • 63 Sabre
  • 63 Sabre's Avatar
  • Offline
  • Contributing Member
  • Contributing Member
  • Posts: 4676
  • Karma: 147
  • Thank you received: 167
Priority #1 is yourself right now. For all our sakes please do not post anything while under the influence of pain killers. :laugh:

Don't want you to write anything you might regret in a few weeks.

While I write this you're probably under the knife so prayers going your way.

Please Log in or Create an account to join the conversation.

115 lower unit changes started 5 years 10 months ago #138517

  • Dr.Go!
  • Dr.Go!'s Avatar Topic Author
  • Offline
  • Contributing Member
  • Contributing Member
  • Posts: 1719
  • Karma: 19
  • Thank you received: 125
Home and recovering. Good advice Cal. No posting while medicated. Signing off so I can ease the slight discomfort as the Medical Doctors say when actually referring to pain. I will finish this thread when I can do I can share the technique that worked to help others if they ever buy one of these engines with the extension. Seems all of the Merc 85XS motors I have seen had this extension which would help that engine work on lots of boats. Twin short shaft 85XS motors would be cool on a small classic cat or other specialty performance boat that could handle the weight. Almost bought a rig that had one I wanted to shorten, but way too much wrong with everything. Rotten wiring, frozen lower unit, and 2 layers of rotted floor that owner ran screws right through the hull in 6 places screwing new seat bases down with drywall screws... it was NO classic so not worth the agrivation!

Please Log in or Create an account to join the conversation.

Dr.Go!

115 lower unit changes started 5 years 10 months ago #138521

  • curse
  • curse's Avatar
  • Offline
  • Contributing Member
  • Contributing Member
  • Posts: 445
  • Karma: 5
  • Thank you received: 2
Good to hear you're home recovering!

Please Log in or Create an account to join the conversation.

1960 slickcraft catalina
1963 g-w invader ski-bird
1972 g-w invader drag & ski 14
Portage Michigan

115 lower unit changes started 5 years 10 months ago #138526

  • Dr.Go!
  • Dr.Go!'s Avatar Topic Author
  • Offline
  • Contributing Member
  • Contributing Member
  • Posts: 1719
  • Karma: 19
  • Thank you received: 125
Thanks. Now I just need to behave and take it easy and slow. Hope you get your project rolling in time for some progress by summer. A shorty with power trim should be sweet!

Please Log in or Create an account to join the conversation.

Dr.Go!

115 lower unit changes started 5 years 8 months ago #138957

  • Dr.Go!
  • Dr.Go!'s Avatar Topic Author
  • Offline
  • Contributing Member
  • Contributing Member
  • Posts: 1719
  • Karma: 19
  • Thank you received: 125
Sorry I have been unable to advance this thread and finish the project. I still plan to pick it up when I can. Doctor told me today that the shoulder is frozen up with scar tissue 9 weeks after surgery and 3 weeks of therapy... so out came his long needle of cortisone into the joint. He will give me 2 weeks to break it free with therapy... if no luck he will knock me out and wrench that arm and shoulder like an ore coming down the Colorado river until he breaks that scar tissue up. I guess I have 2 weeks to stop rowing like a kid in a blow up raft and toughen up a bit. I guess I need to remember no pain, no gain. I just want to finish my Merc project without breaking something on the engine. Hopefully more another day but likely a month or 2 away.

Please Log in or Create an account to join the conversation.

Dr.Go!

115 lower unit changes started 5 years 8 months ago #138964

  • 63 Sabre
  • 63 Sabre's Avatar
  • Offline
  • Contributing Member
  • Contributing Member
  • Posts: 4676
  • Karma: 147
  • Thank you received: 167
Oh Man! When it rains (snows) it pours. Do whatcha gotta do. I'll see you on the circuit :laugh:

Please Log in or Create an account to join the conversation.

115 lower unit changes started 5 years 6 months ago #139428

  • Dr.Go!
  • Dr.Go!'s Avatar Topic Author
  • Offline
  • Contributing Member
  • Contributing Member
  • Posts: 1719
  • Karma: 19
  • Thank you received: 125
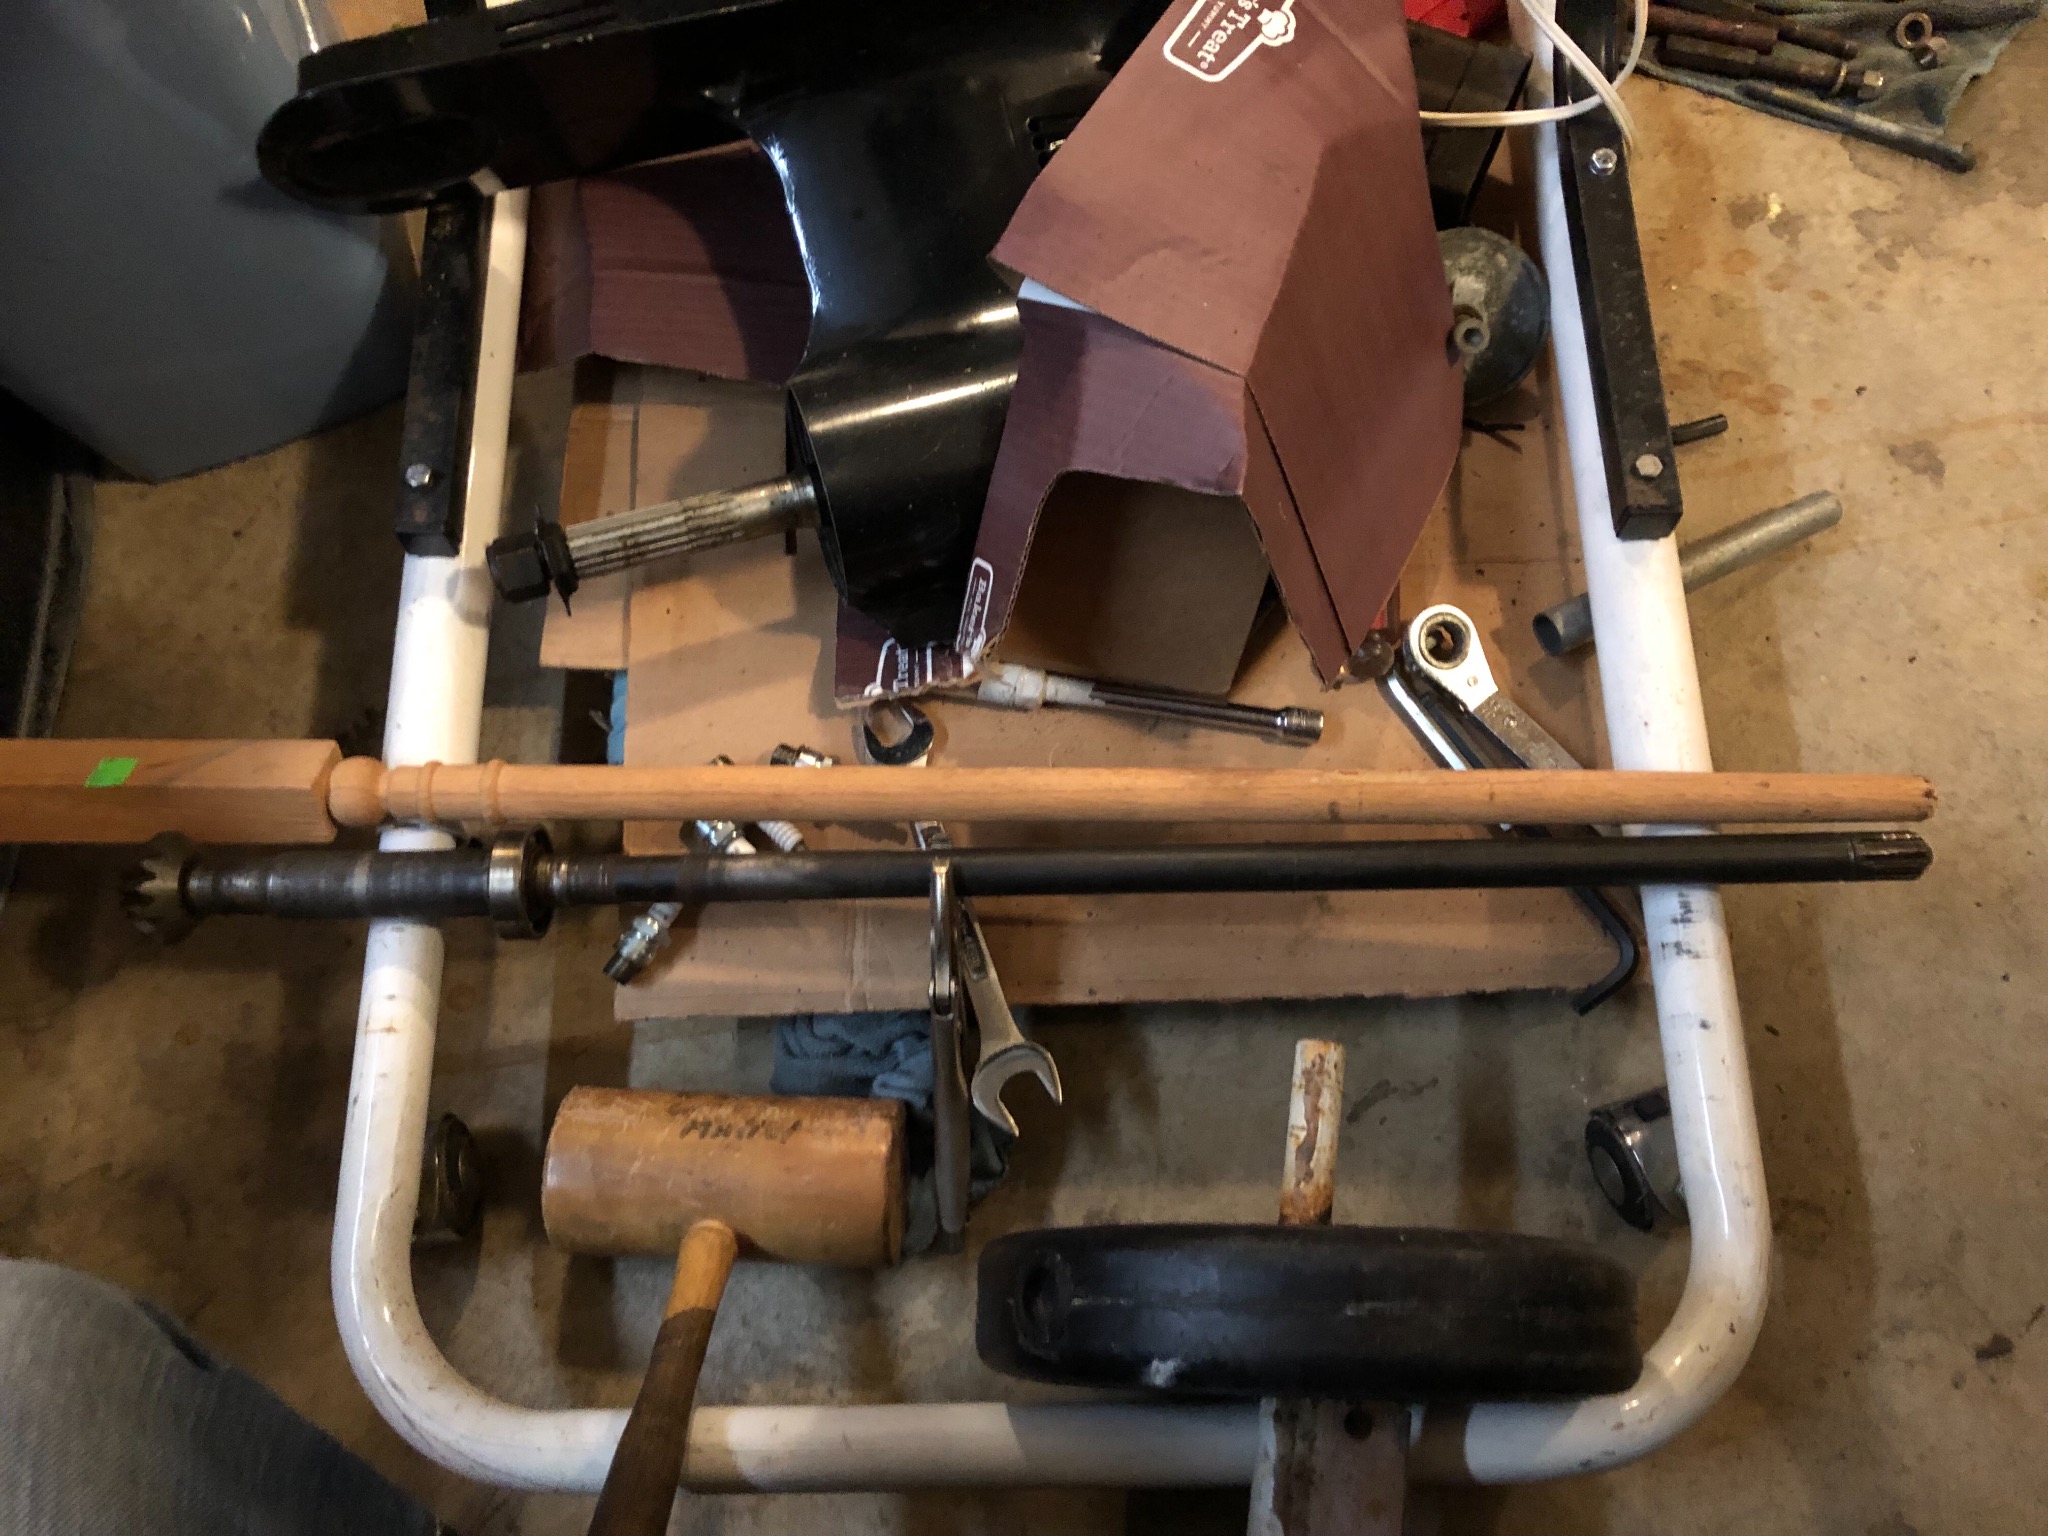
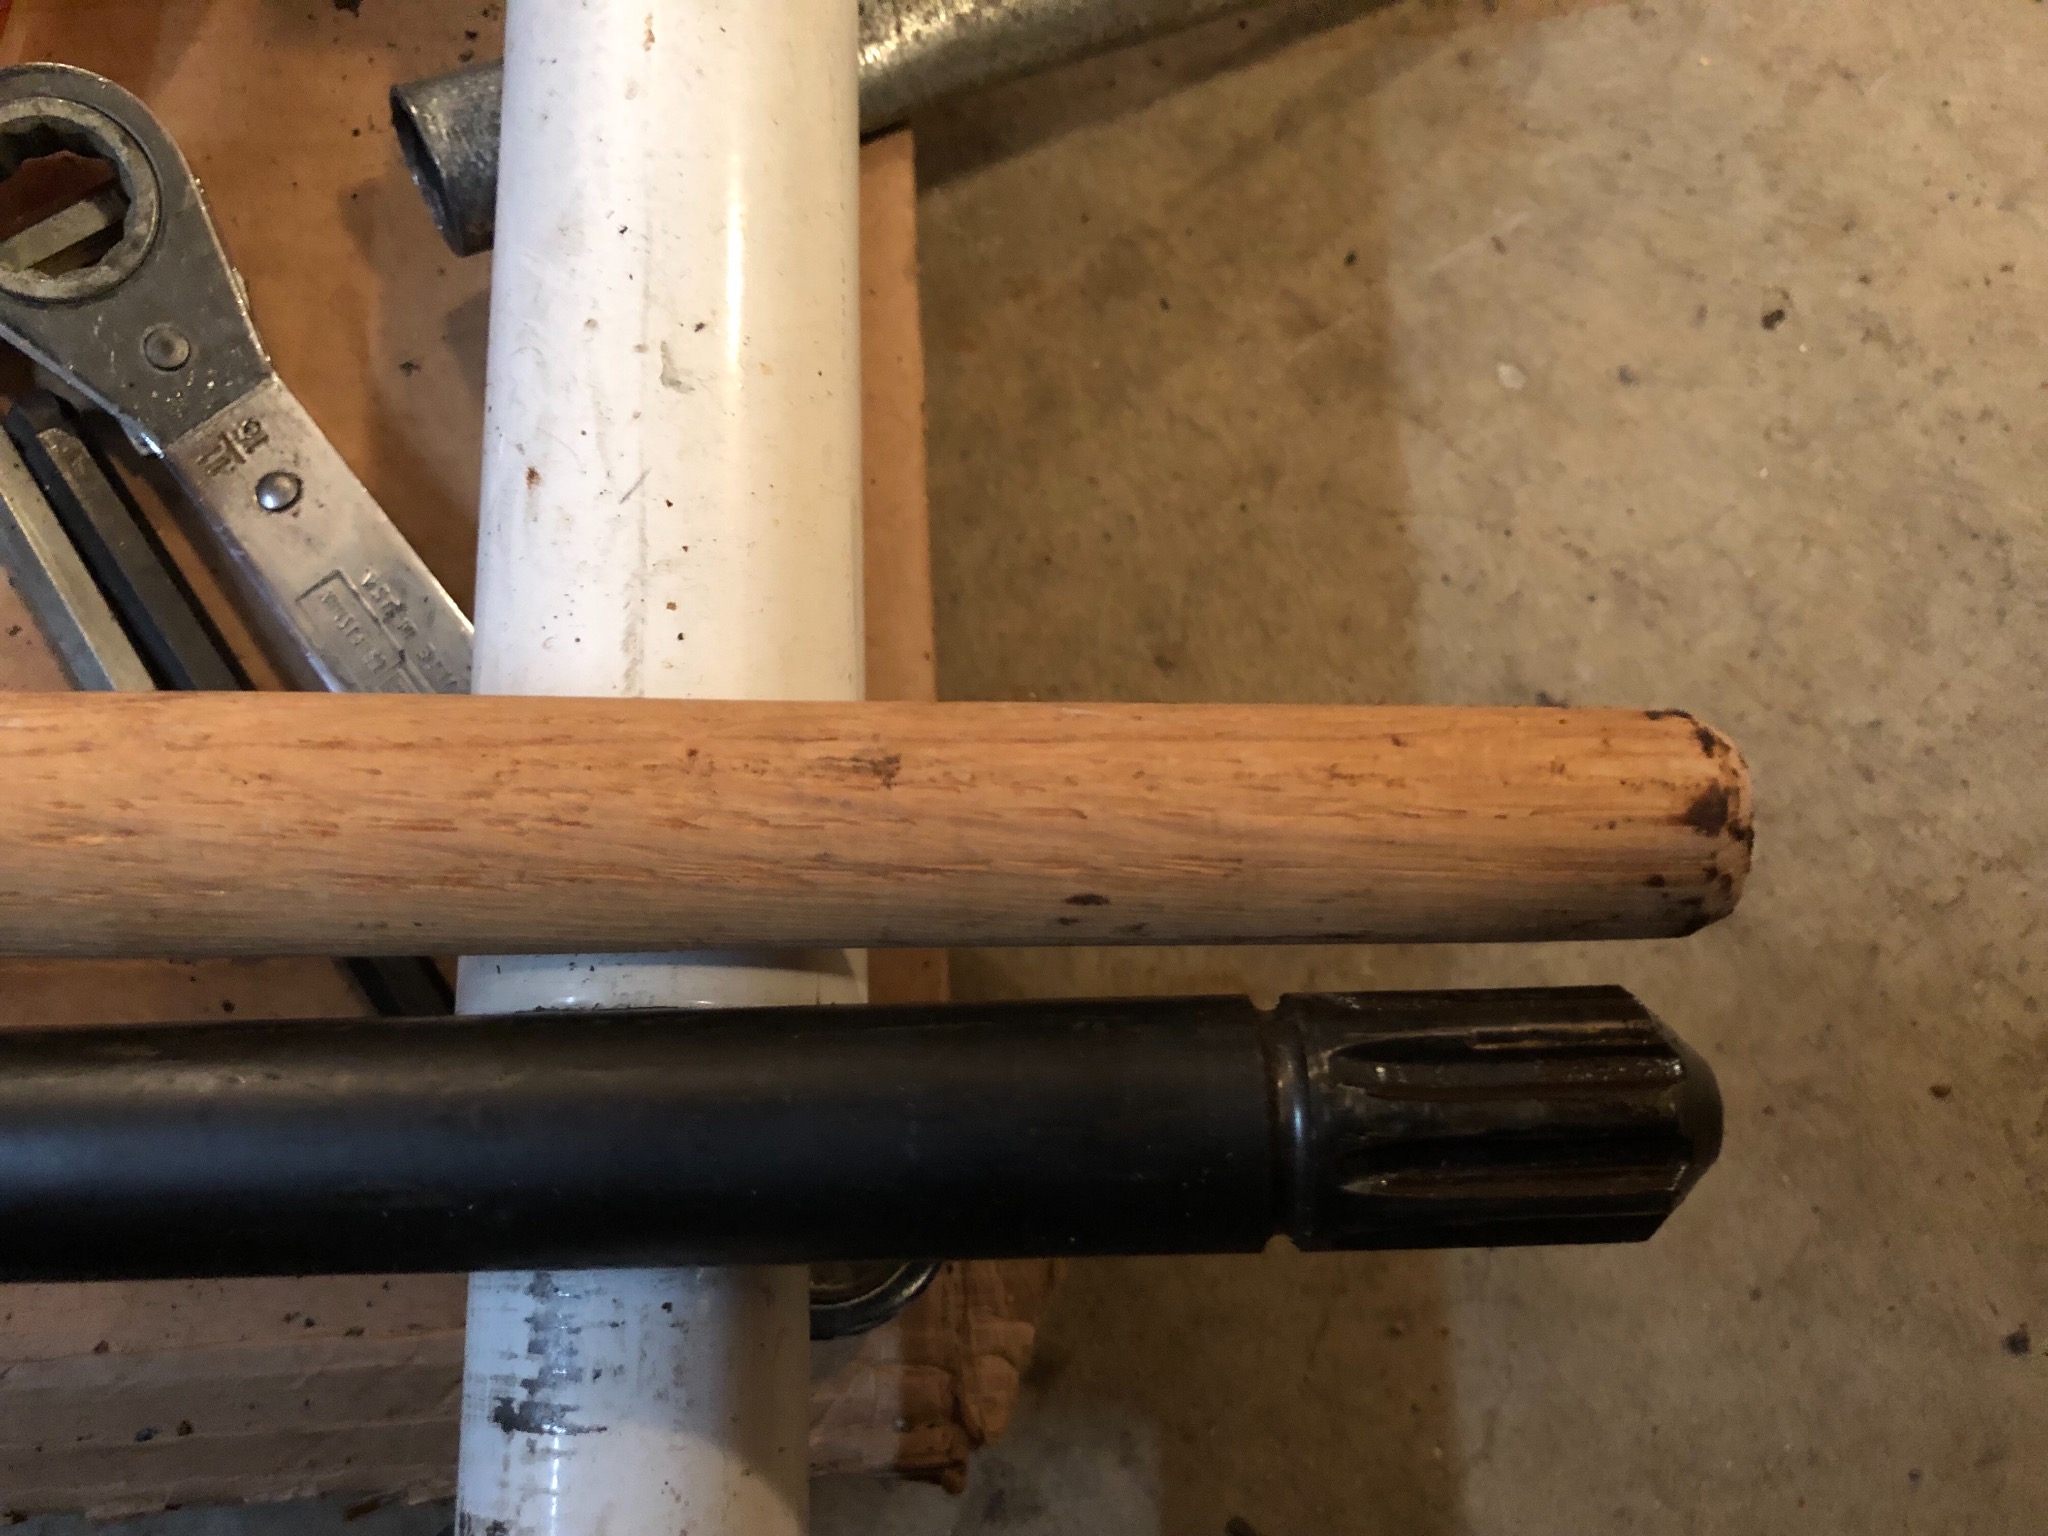
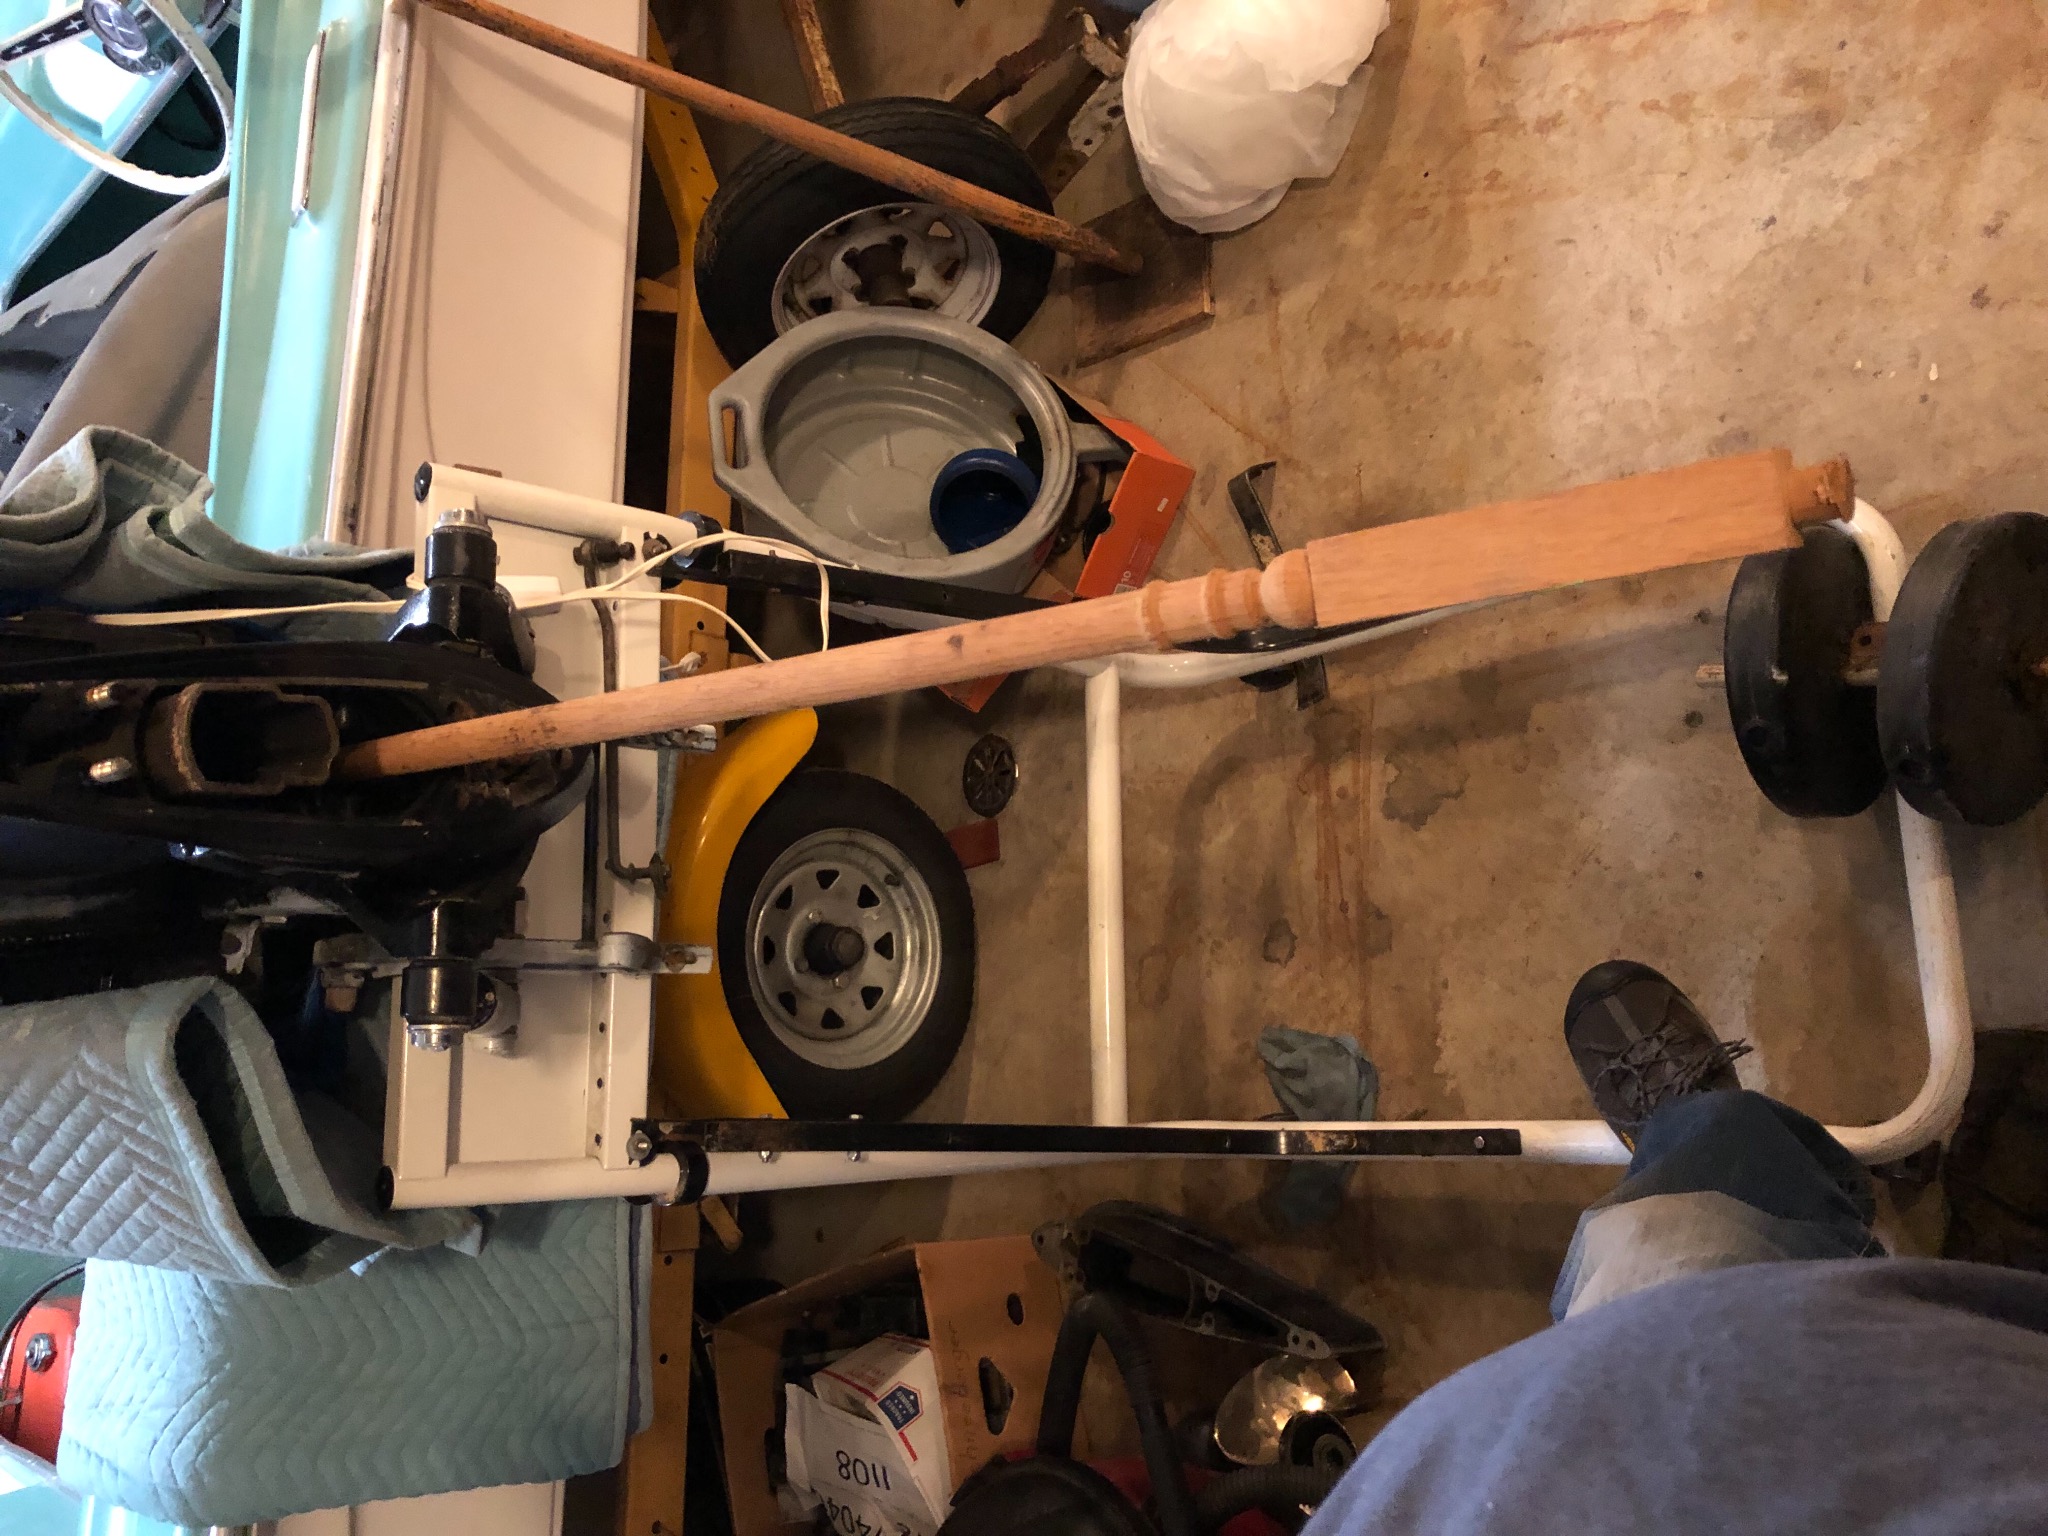
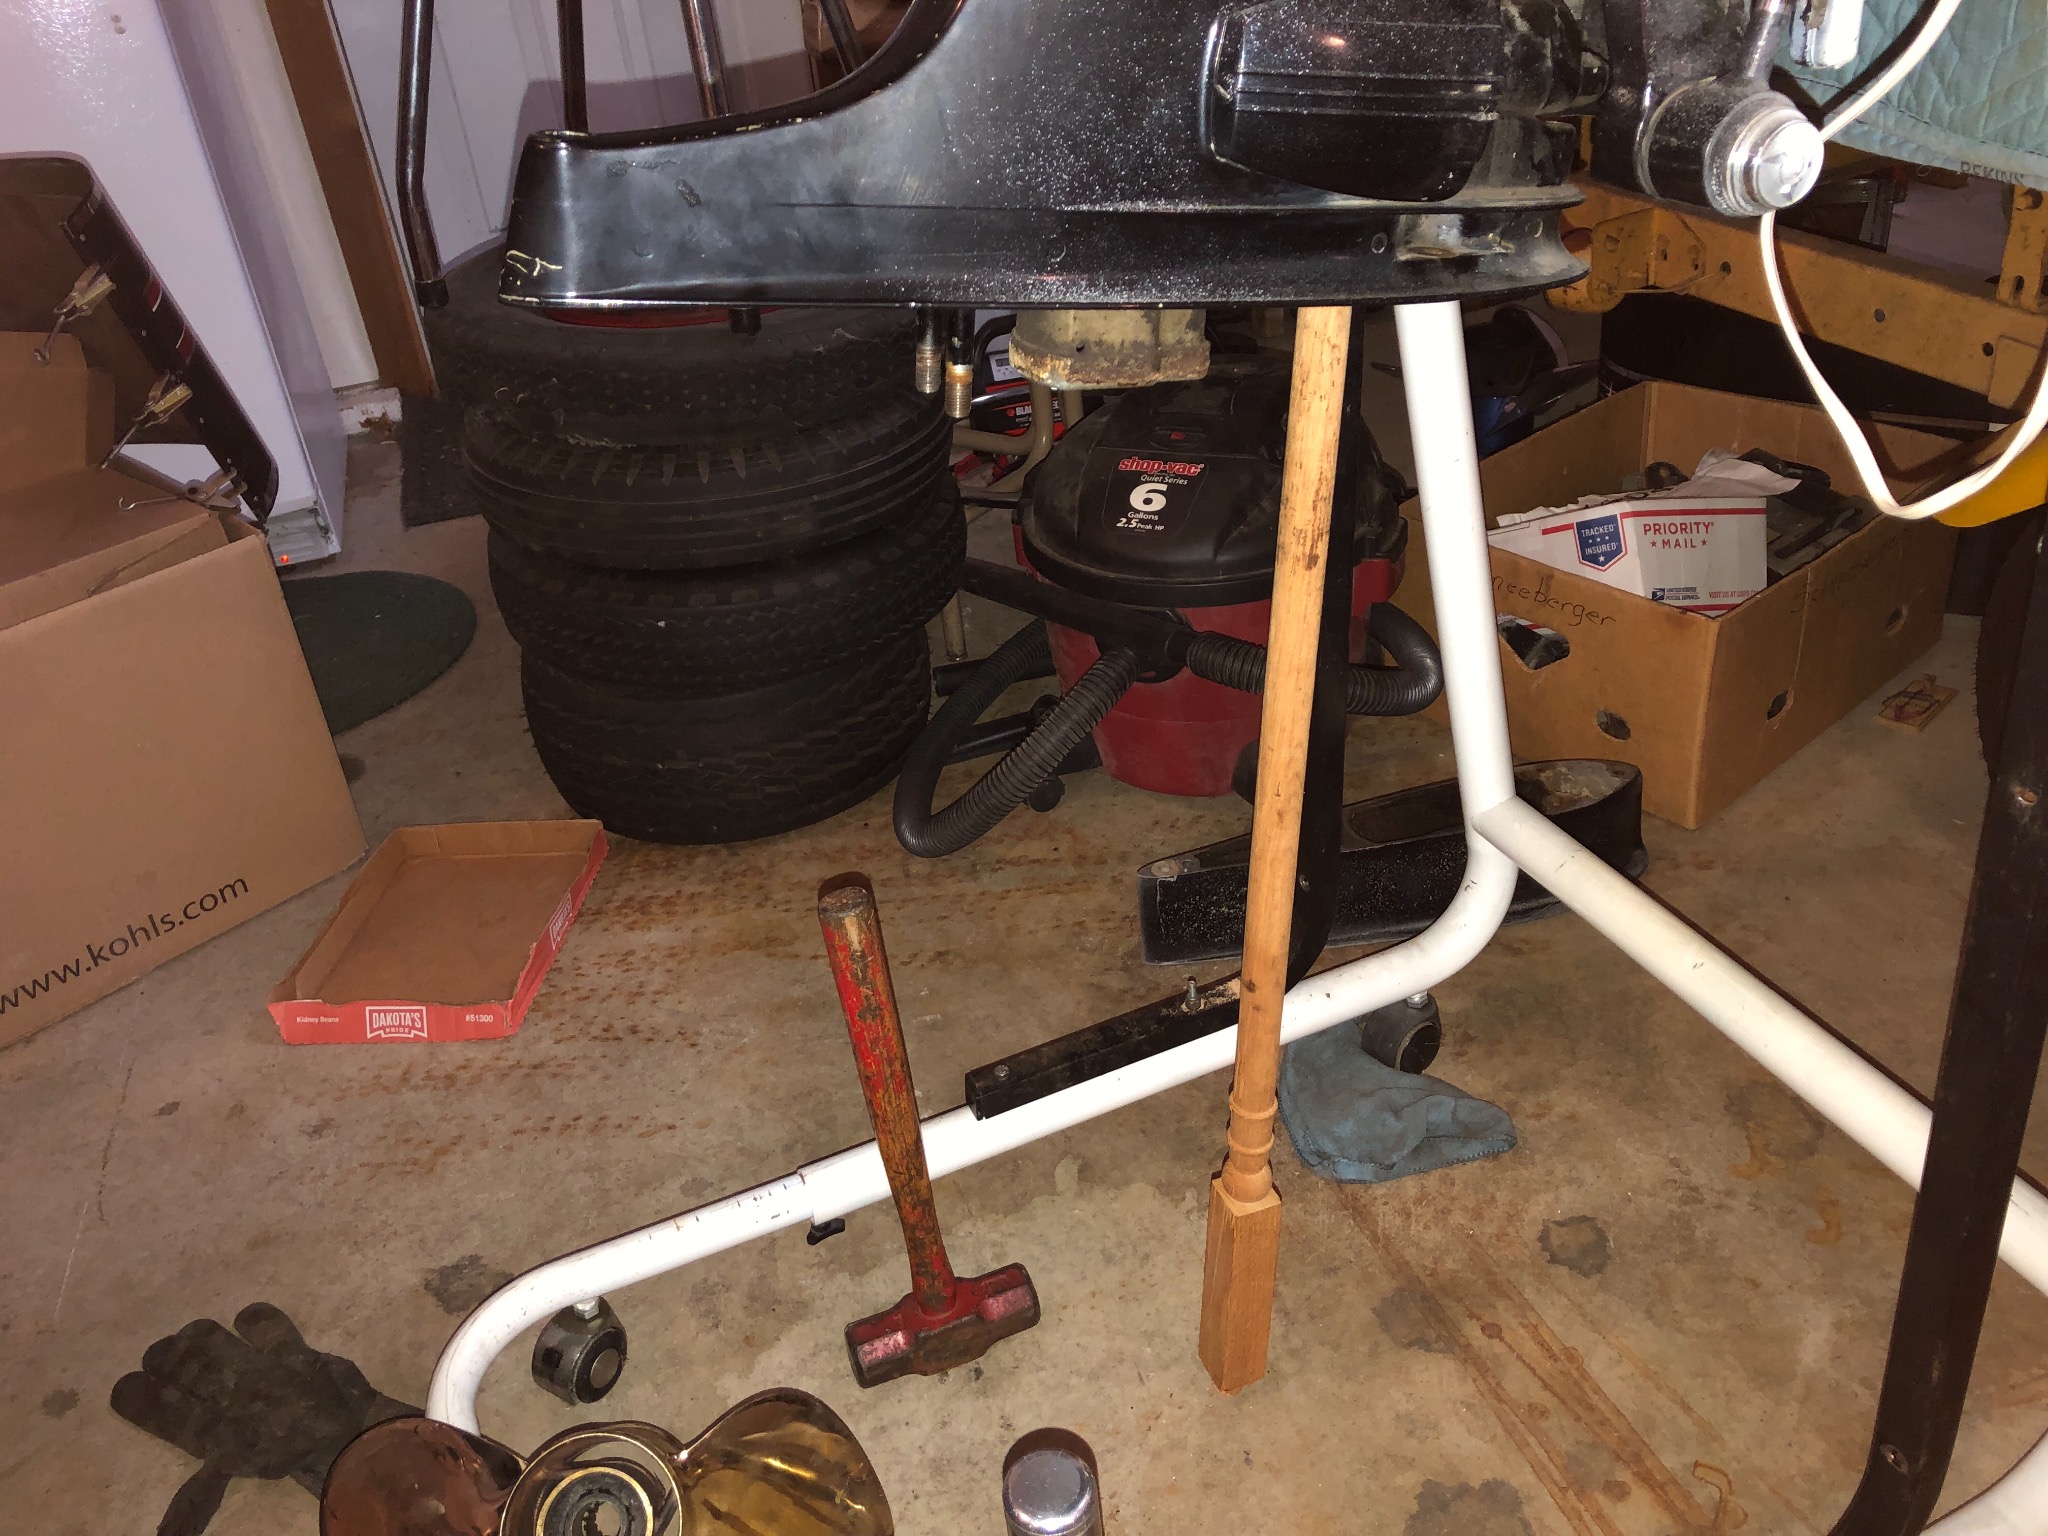
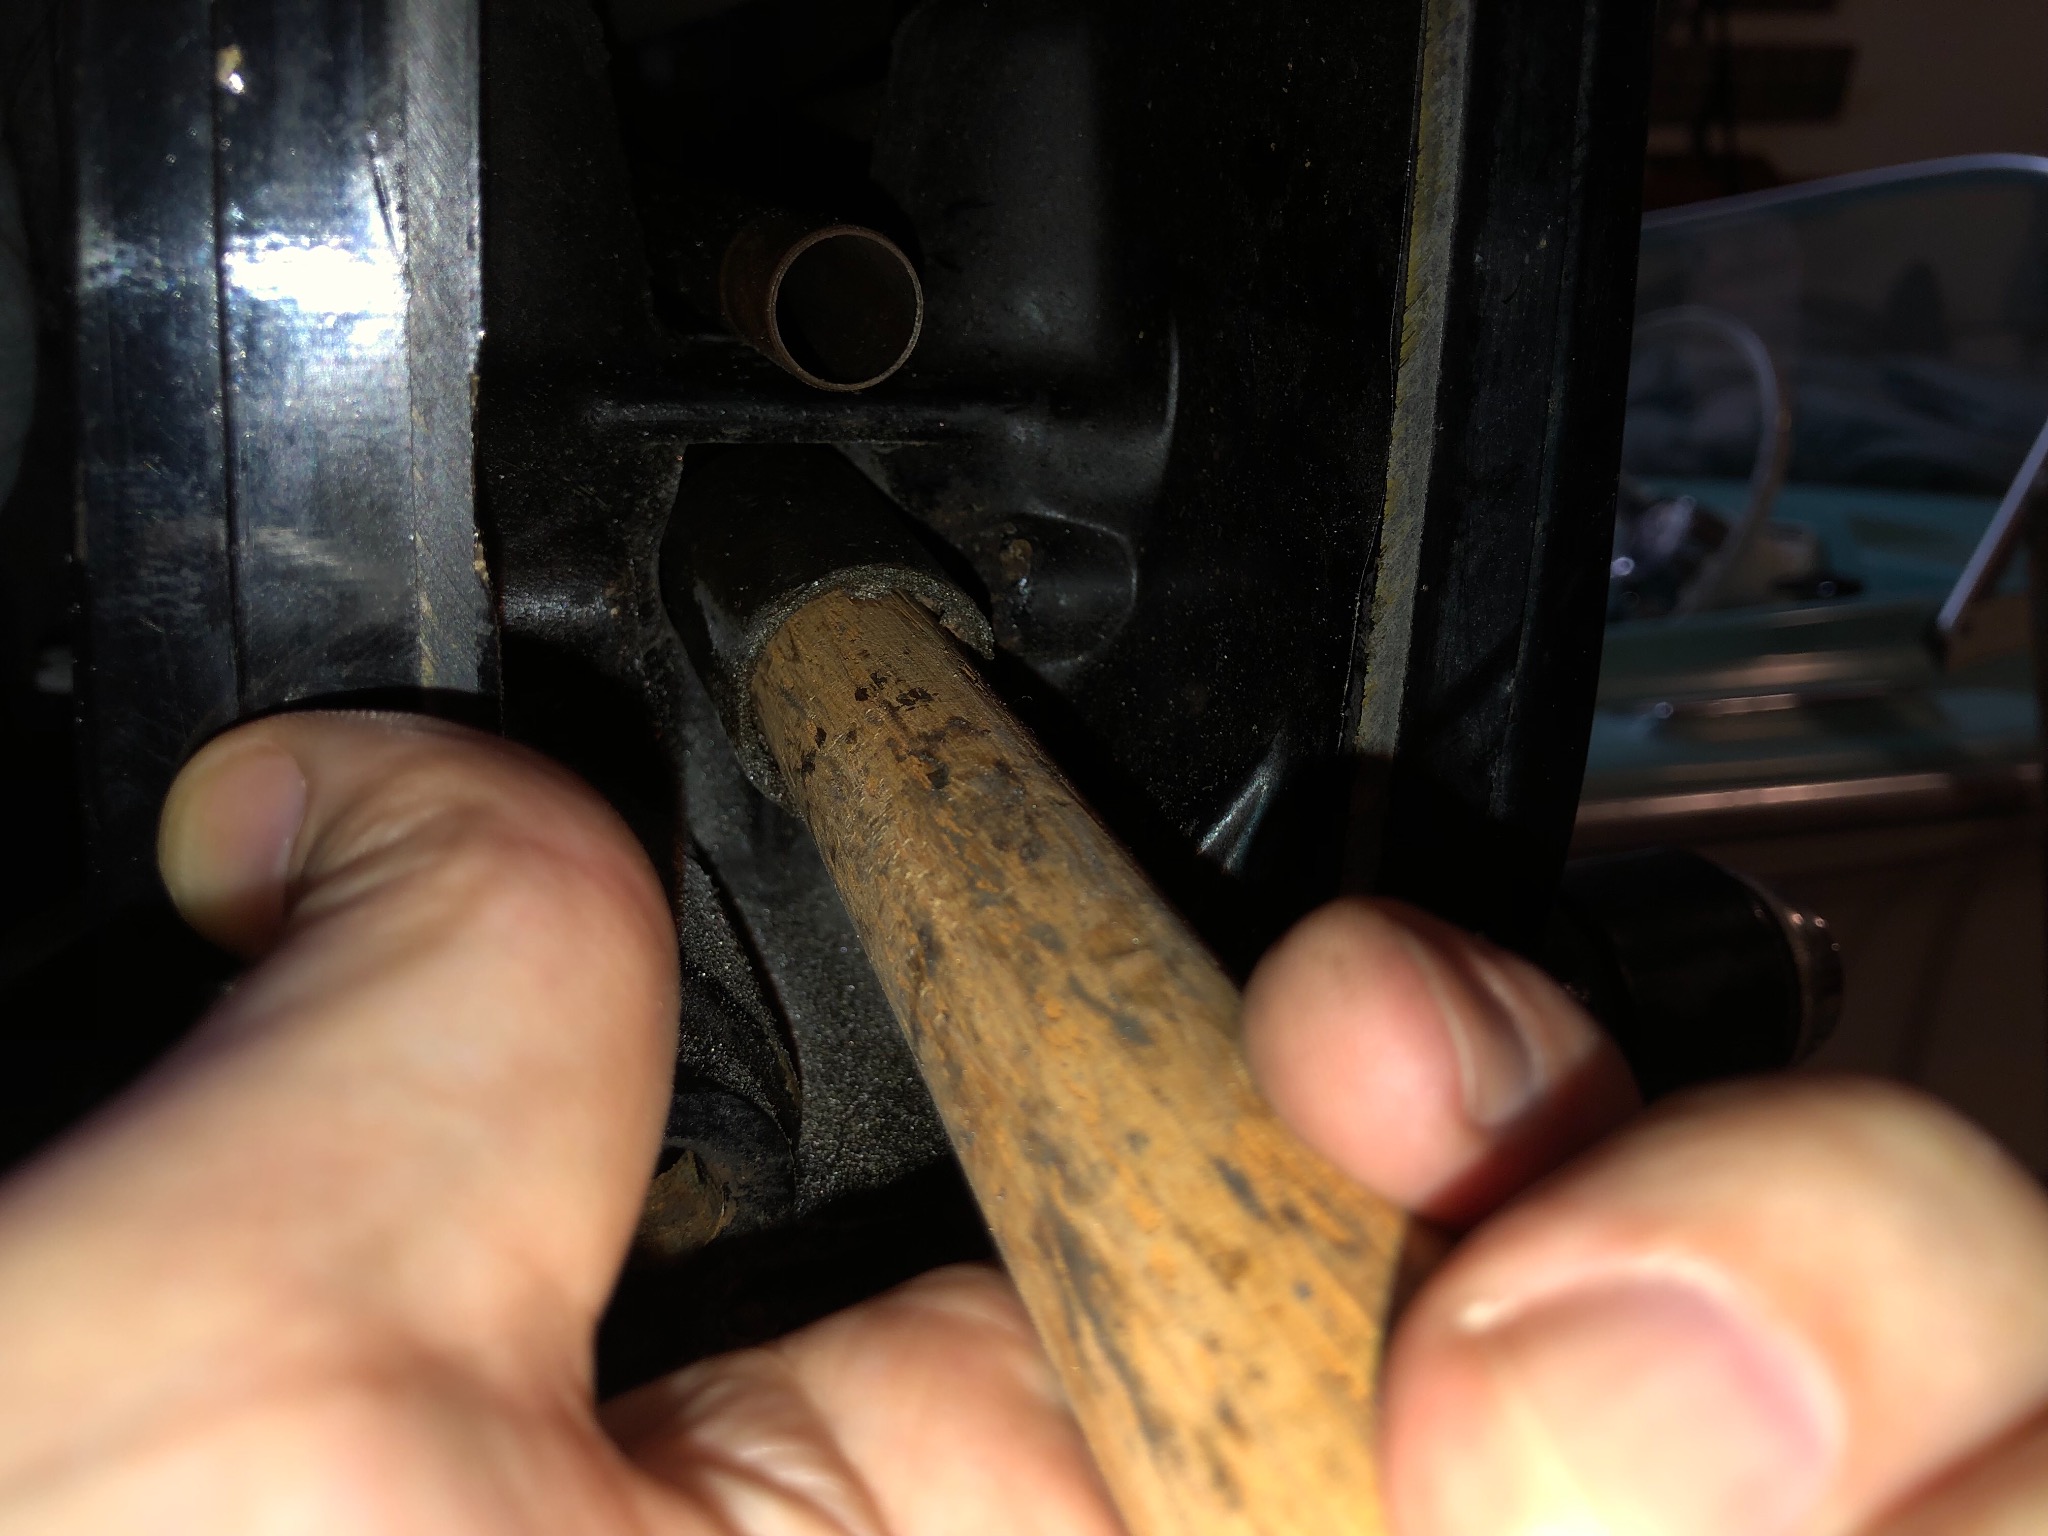
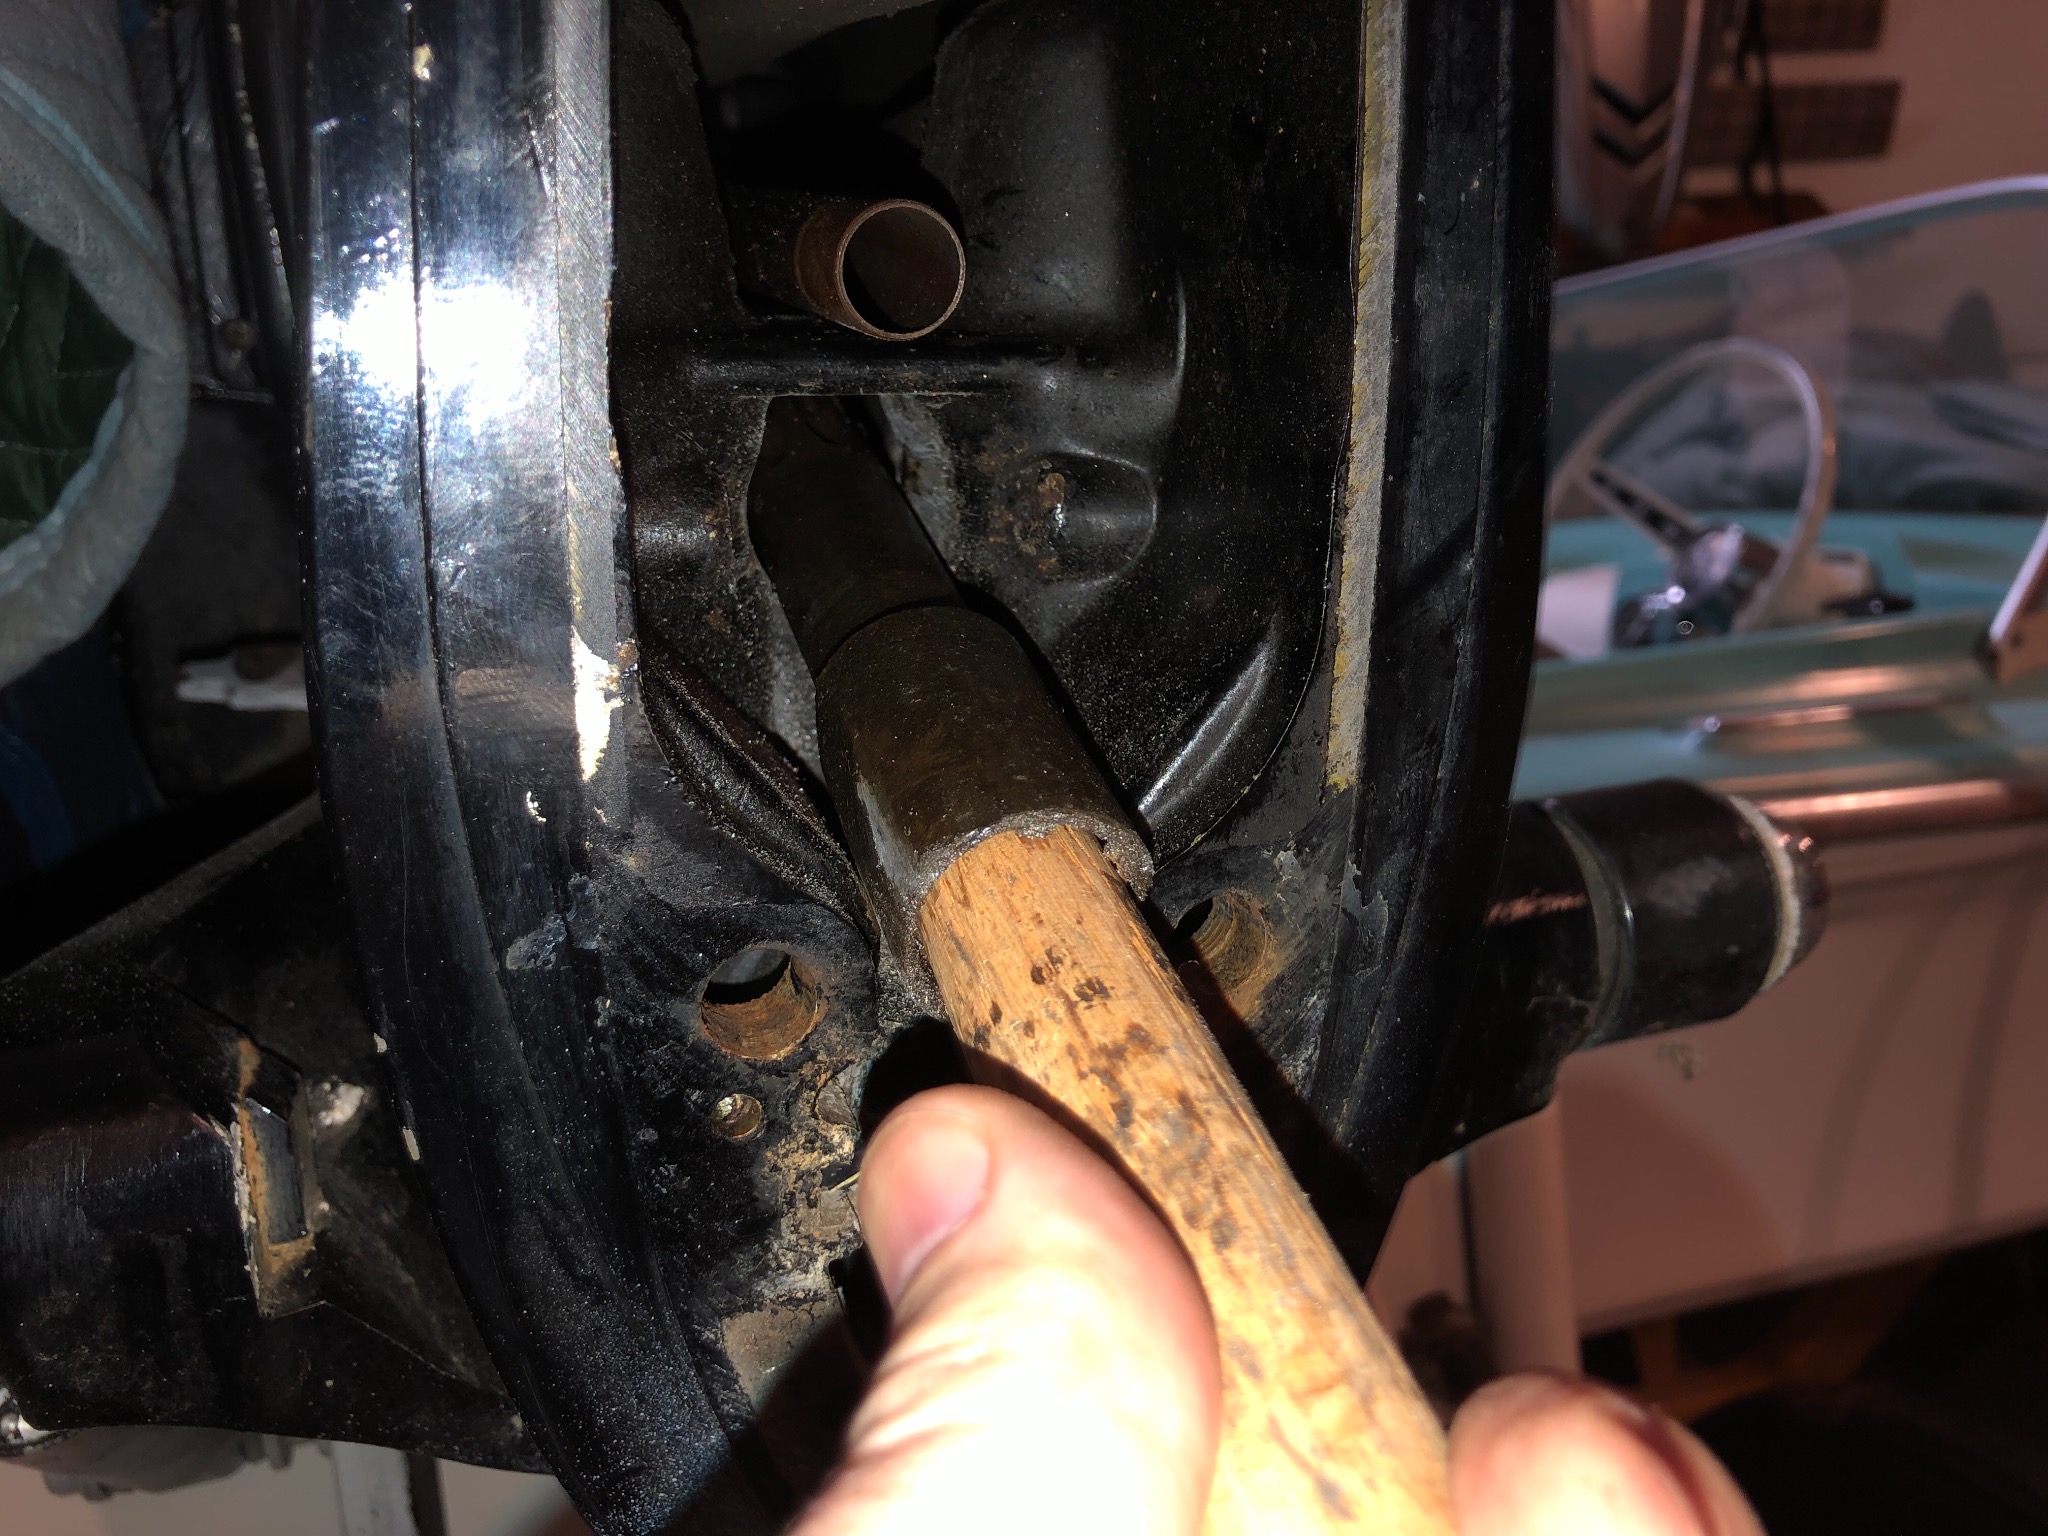
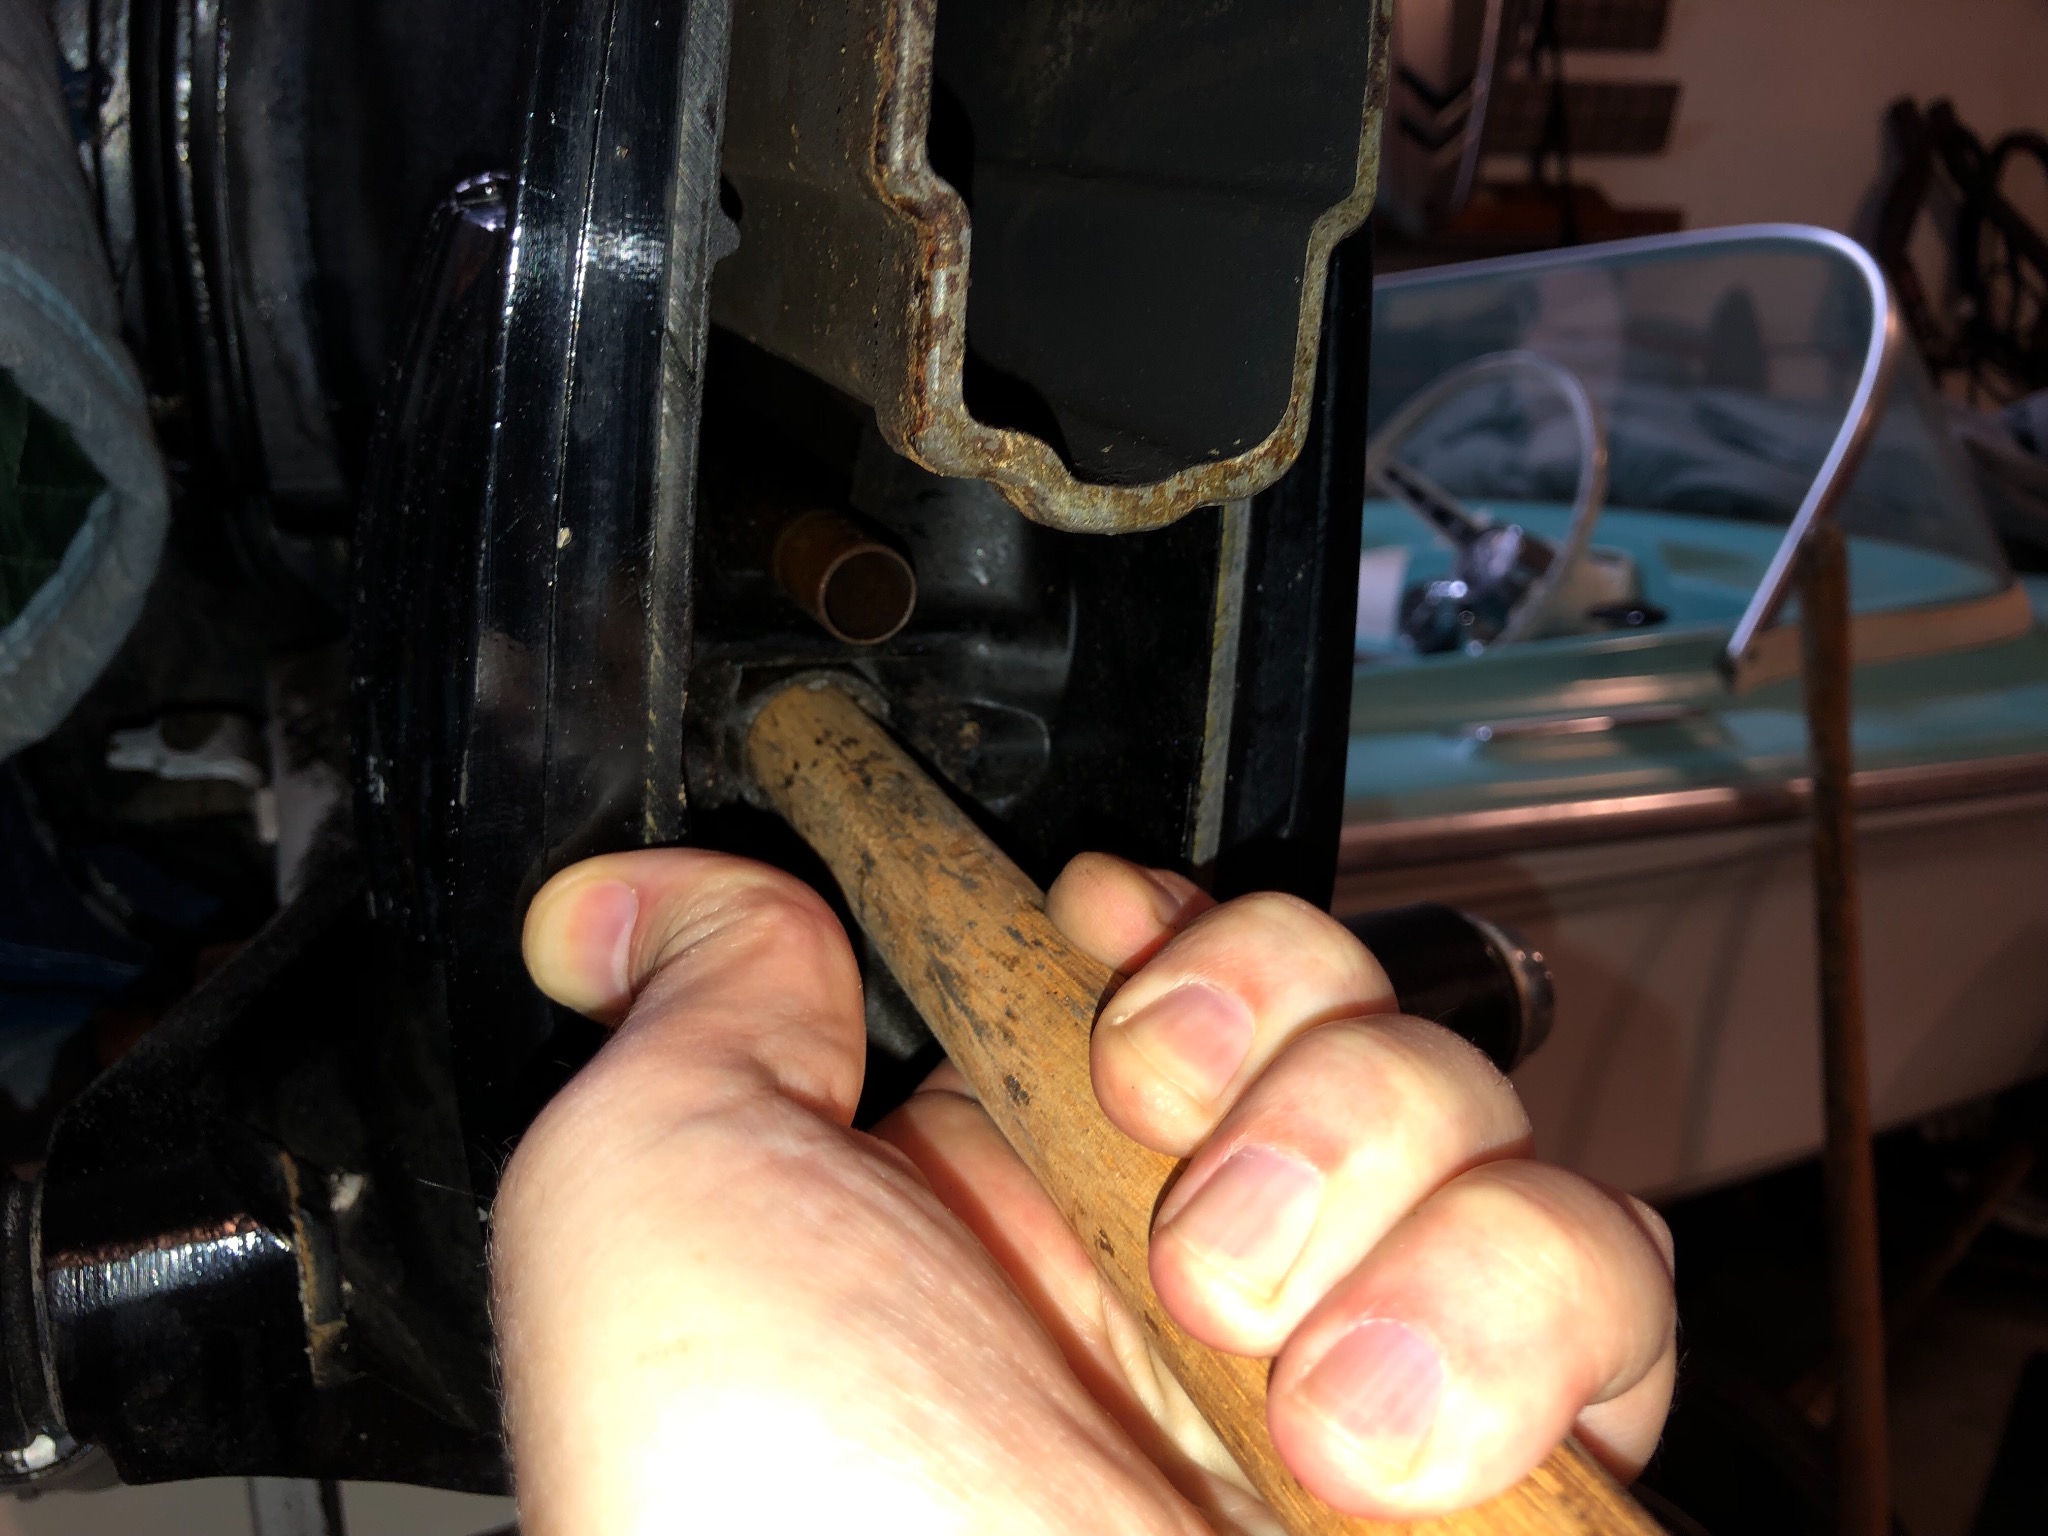
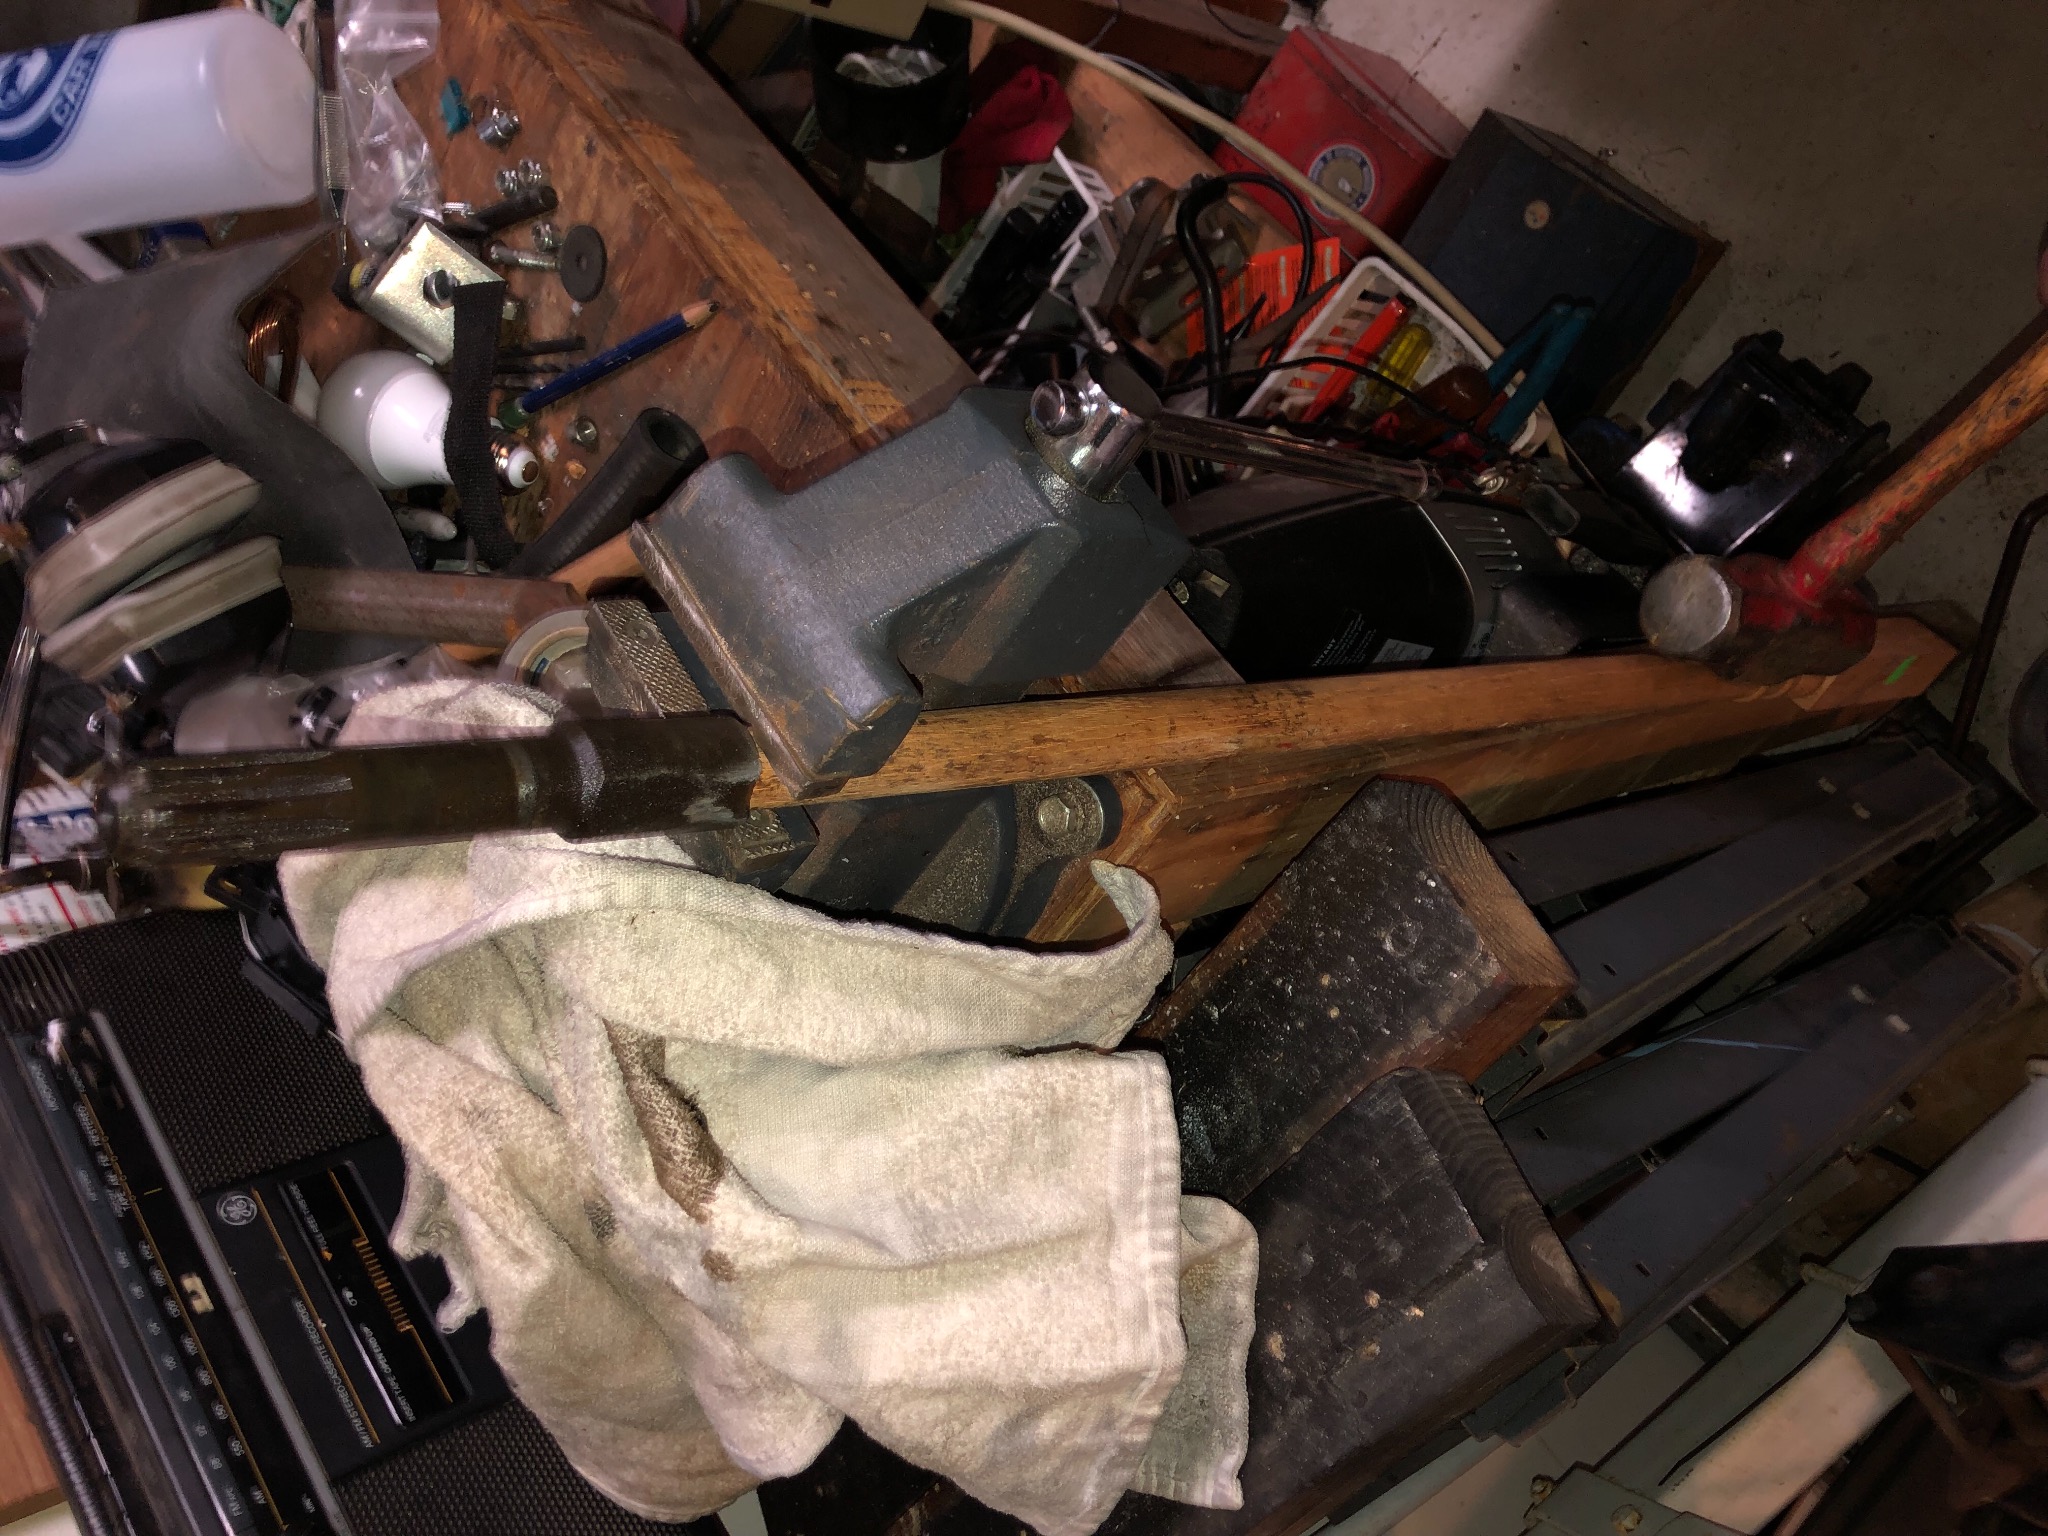
As you all can see, my shoulder surgery recovery estimate is like my restoration estimates... instead of 2 months it has turned out to be over 4 months. I am almost done, but I need to exercise it. Amazing how much muscle shrivels up when you don’t use it for 4 months. A few weeks back I was getting antsy, so when it was still cold I tried another approach since I didn’t have Dr. release. I took my old electric heating pad and put it on the metal engine block. Then I wrapped the whole power head in 2 insulated shipping blankets and left the lower unit in the cold. I put it on high for several hours checking on it often. I was hoping it would migrate heat to the engine crank and expand it ever so slightly compared to the shaft extension. It worked somewhat. I now was able to feel it raise up and down about an inch now, but it still had a snag before falling completely out. Well finally tonight I was able to jury rig another approach. Since I am not totally able to work from under a standing engine, I padded the gunnel of my boat and tilted the big Merc to rest on it. With it horizontal, I was able to try Doc’s wooden dowel idea first before resorting to the fusing methods. I had an oak spindle that was tapered. I cut it to match outer shaft diameter so that when I pounded it in as suggested by Doc and Ed, it cut in its own splines for a tight fit. Almost full success! The shaft extension is now free from the crank shaft by just lightly pulling down on the spindle. NEXT: of course it is just slightly larger than the lower casting. If I had a good eye, I should have done some light filing before having that spindle pounded in there and now limiting my file access. I will evaluate another day. Either a little tight space filing, or maybe pull the water tube and try to push it up and over the casting wall partition since it looks bigger. Maybe I will look for a long extension dremel bit, or a tiny flat file since it looks like it is very close to coming out. If I don’t add pictures tonight, I will try to add them in a week. Sorry if this is way too long and boring for anyone, but figured if it helps one member do the same project and saves them headaches, then hopefully it will be worth posting.

Please Log in or Create an account to join the conversation.

Dr.Go!

115 lower unit changes started 5 years 6 months ago #139430

  • ed-mc
  • Away
  • Platinum Boarder
  • Platinum Boarder
  • Posts: 1410
  • Karma: 232
  • Thank you received: 115
Man! It sure makes you wonder how they got it in there in the 1st place!! Maybe they pulled the powerhead, who knows?
I wonder if you can raise up on the broomstick and then pull it down like a slide hammer, and get it free from the extension stub? Then you'll have room to get a Dremel (or a coarse file) up there and clearance the mid-section so that stub will drop out. What a pain! Not to mention the pain in the shoulder! Easy does it, though!!
The following user(s) said Thank You: Dr.Go!

Please Log in or Create an account to join the conversation.

115 lower unit changes started 5 years 6 months ago #139431

  • 63 Sabre
  • 63 Sabre's Avatar
  • Offline
  • Contributing Member
  • Contributing Member
  • Posts: 4676
  • Karma: 147
  • Thank you received: 167
Great news on both fronts. That extension work is good therapy.
I like the counter balance on the motor stand. A few weights and a brass prop, add a foot and you're good to go
Dremel makes a flexible cable attachment that could probably get you there. Lowes, Fleet, have them.
Attachments:
The following user(s) said Thank You: Dr.Go!

Please Log in or Create an account to join the conversation.

115 lower unit changes started 5 years 6 months ago #139432

  • Dr.Go!
  • Dr.Go!'s Avatar Topic Author
  • Offline
  • Contributing Member
  • Contributing Member
  • Posts: 1719
  • Karma: 19
  • Thank you received: 125
Thanks Ed and Cal. Now I don’t think I can get back to it before evenings next week. Because the outside of that extension had 2 flat sides and the casting opening was somewhat rectangular , I was hoping it would slip through. Because it won’t hurt anything, I should have just filed a bit before pounding in the spindle. Oh well, patience on my part will get me there.

Please Log in or Create an account to join the conversation.

Dr.Go!

115 lower unit changes started 5 years 6 months ago #139437

Unless it is an early 1150 (1970-1972) the stub shaft had to have been inserted up from the bottom of the DSH (drive shaft housing), as the top half of the '73-'88 exhaust extension plate only has a hole big enough for the stock drive shaft - not the over-size female end of an extension (stub shaft).
You will just have to rotate the stub shaft with your wood round stock until the shaved sides of the stub shaft align with the opening carved into the DSH at the lower mounts.
doc
The following user(s) said Thank You: Dr.Go!

Please Log in or Create an account to join the conversation.

115 lower unit changes started 5 years 6 months ago #139444

  • Dr.Go!
  • Dr.Go!'s Avatar Topic Author
  • Offline
  • Contributing Member
  • Contributing Member
  • Posts: 1719
  • Karma: 19
  • Thank you received: 125
Thanks Doc. Mine is a 1971 115. I thought I had rotated the loose extension to align those flat sides with the somewhat rectangular shaped opening, but I did not have my cheater glasses on and was pressed for time and feeling a bit worried that I might accidentally have the motor stand tip when I was fumbling a bit without having full strength from my other arm. I am hoping to slow down a bit and take a more clear look at things with my magnifiers and a good flashlight after putting a little more counter weight on the stand so I don’t drop the motor or hurt myself. Would be great if I find a slight rotation will allow it to fall out. Eventually once out I will take some measurements to share. I hope to also compare the mid section casting openings at the bottom between the 1971 115 and my 1965 100 to see if they are the same or different. I think I will only have either Tuesday or Wednesday due to life demands on my schedule. Then I would have to wait another week. I just need to get at it before yard work, etc get in the way. More later.

Please Log in or Create an account to join the conversation.

Dr.Go!

115 lower unit changes started 5 years 6 months ago #139470

  • Dr.Go!
  • Dr.Go!'s Avatar Topic Author
  • Offline
  • Contributing Member
  • Contributing Member
  • Posts: 1719
  • Karma: 19
  • Thank you received: 125
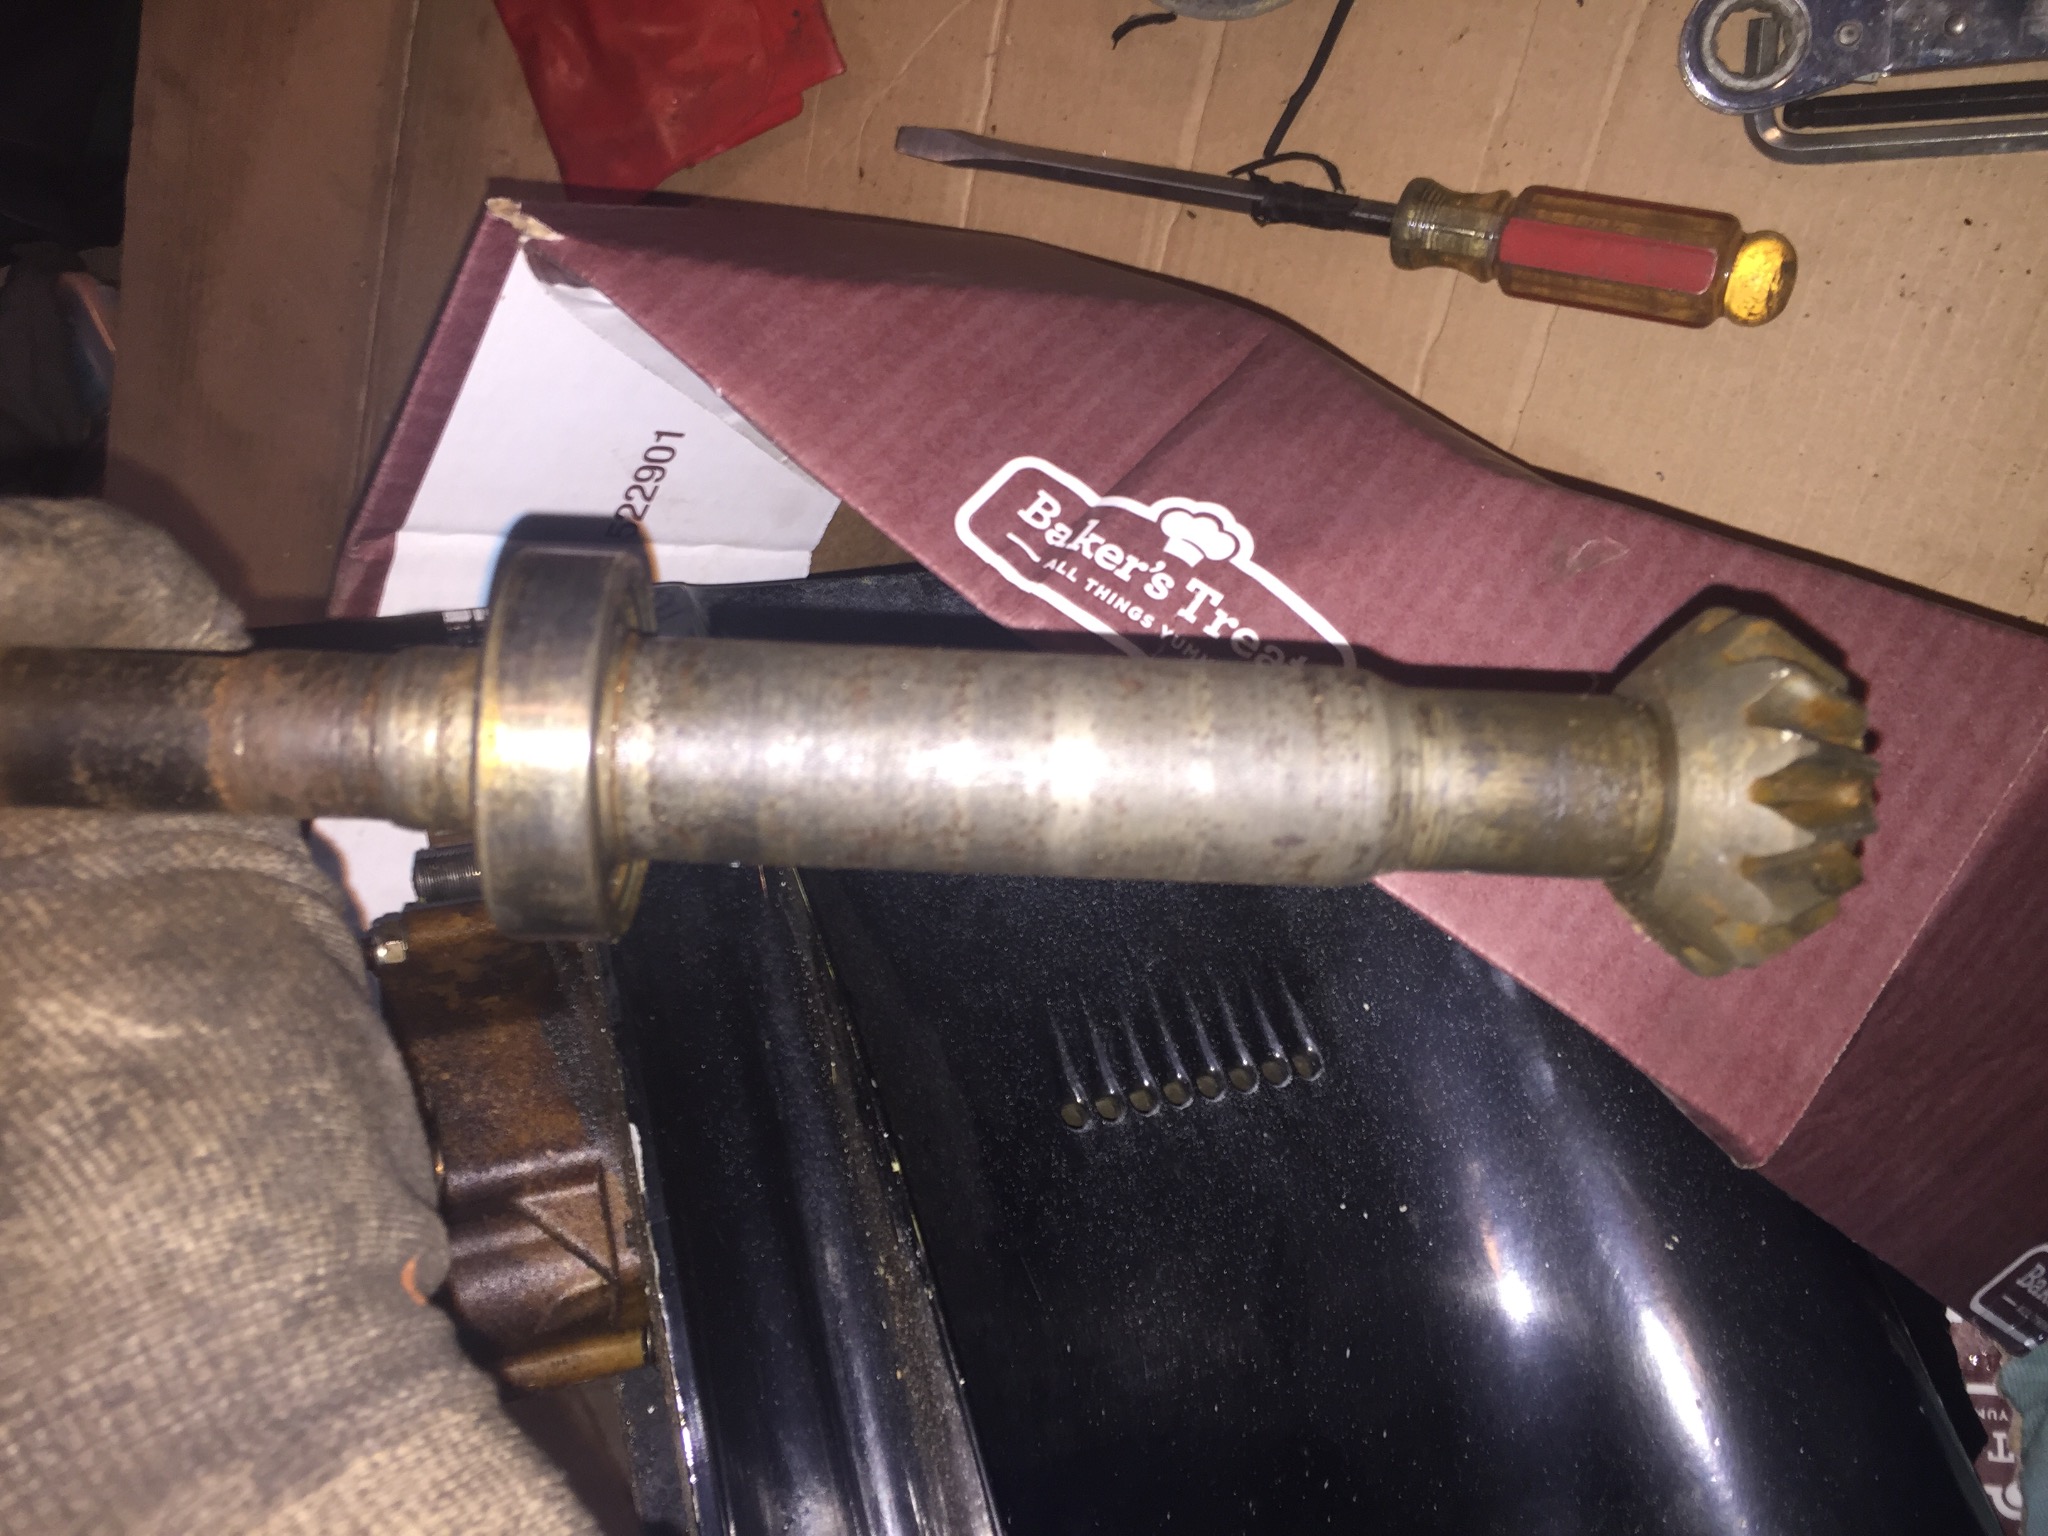
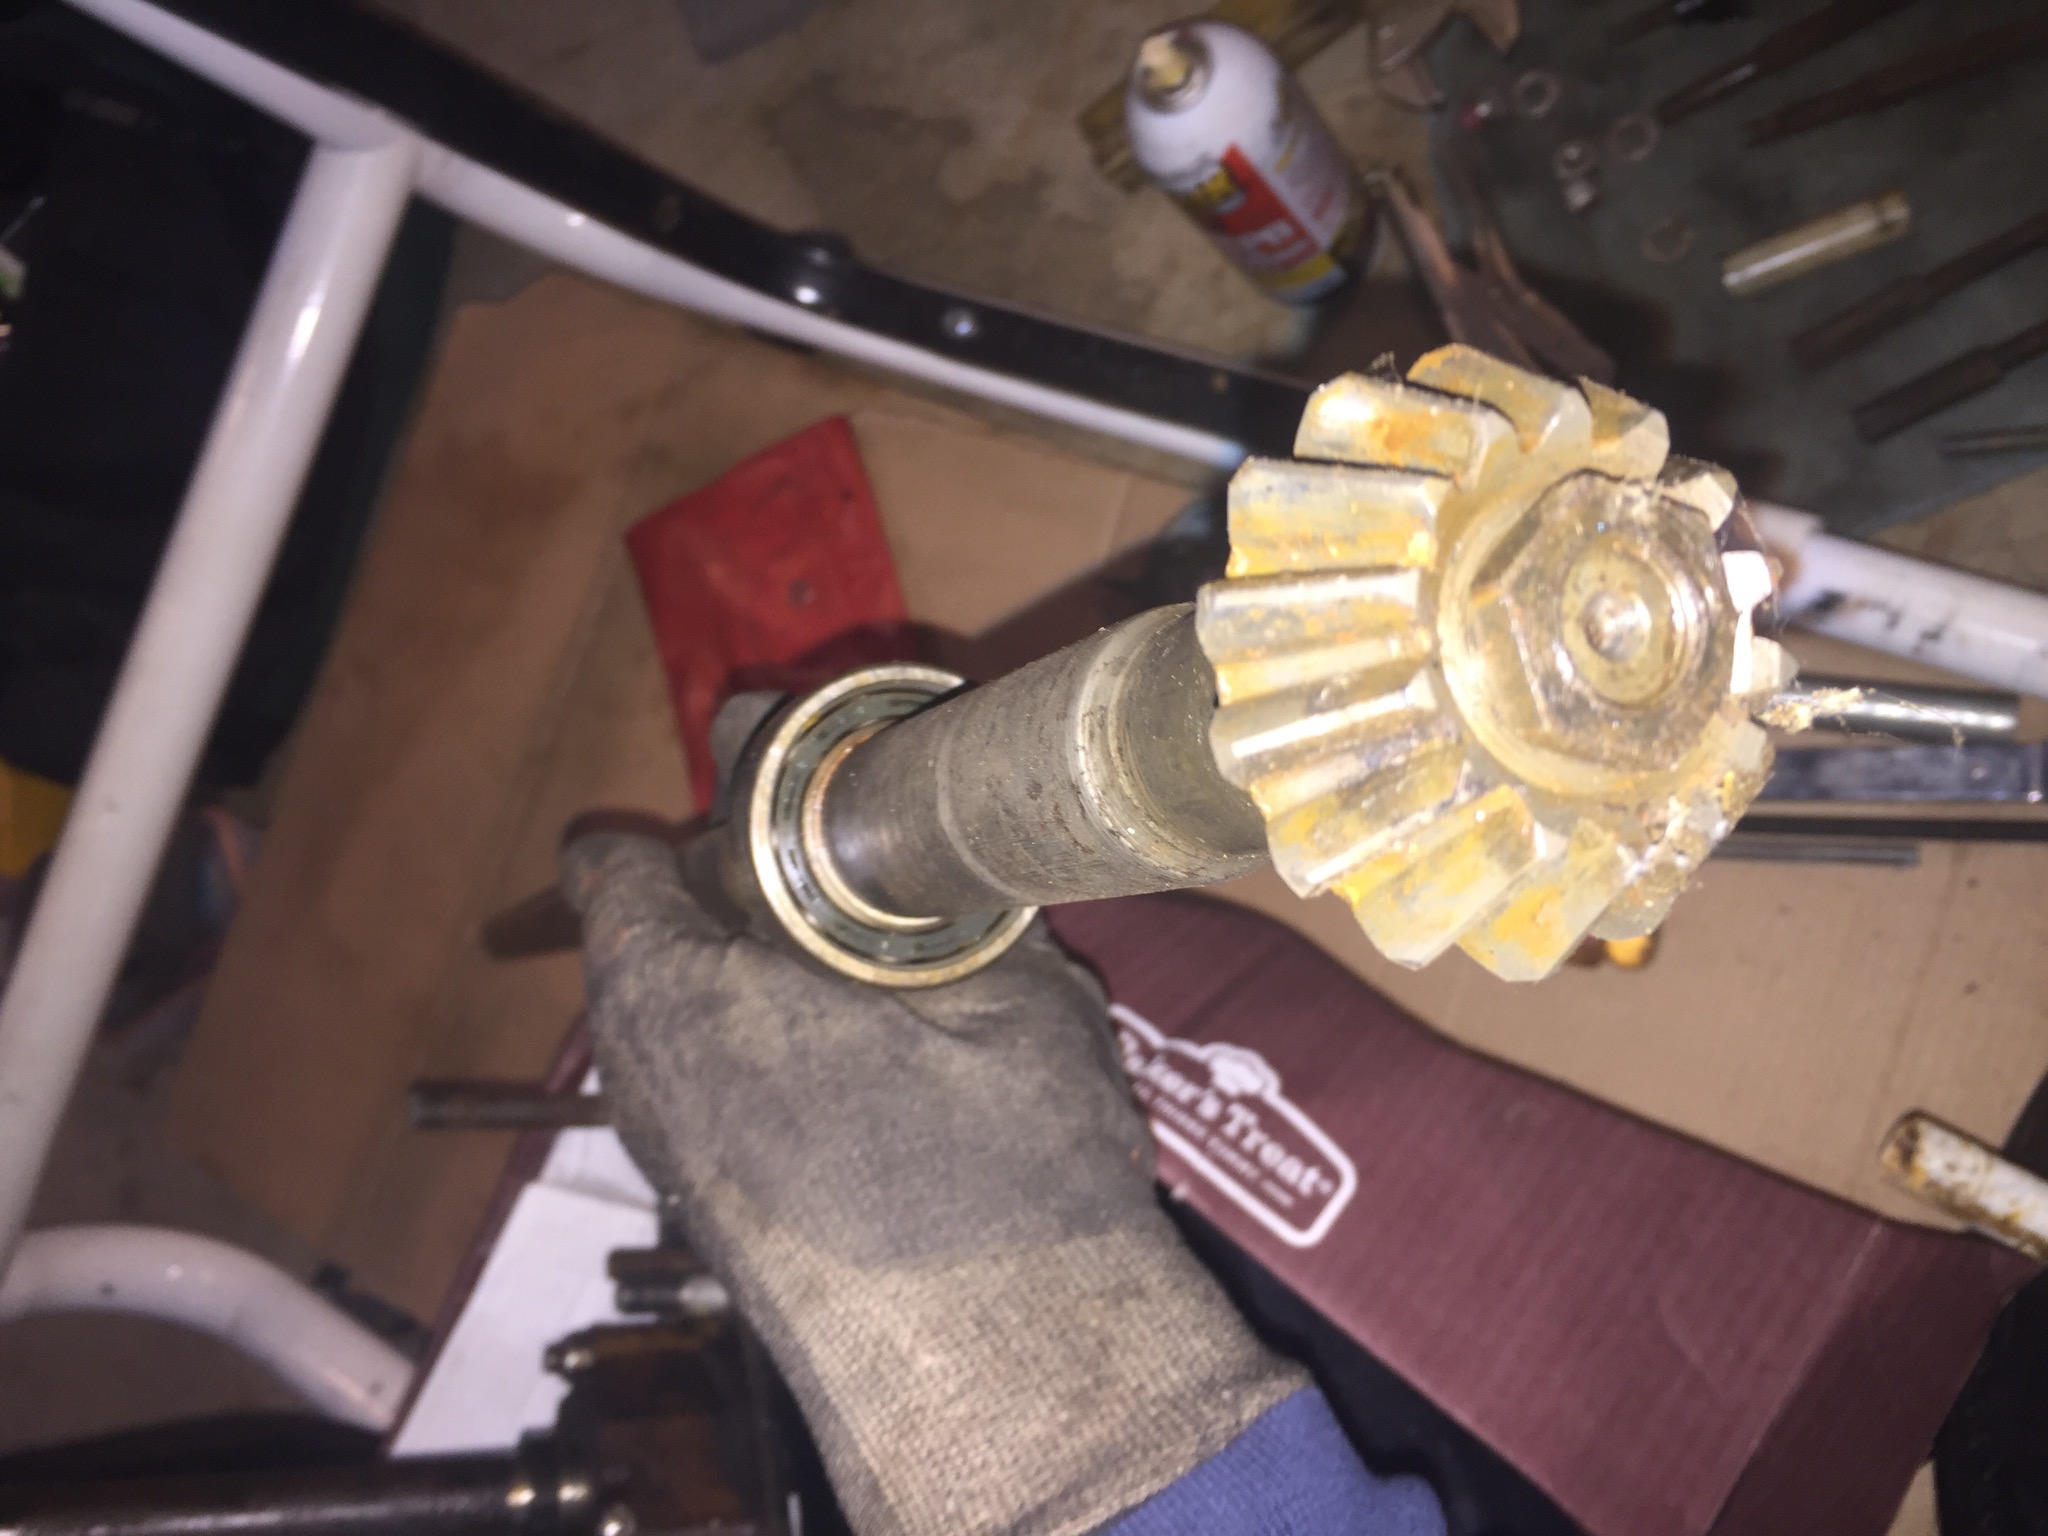
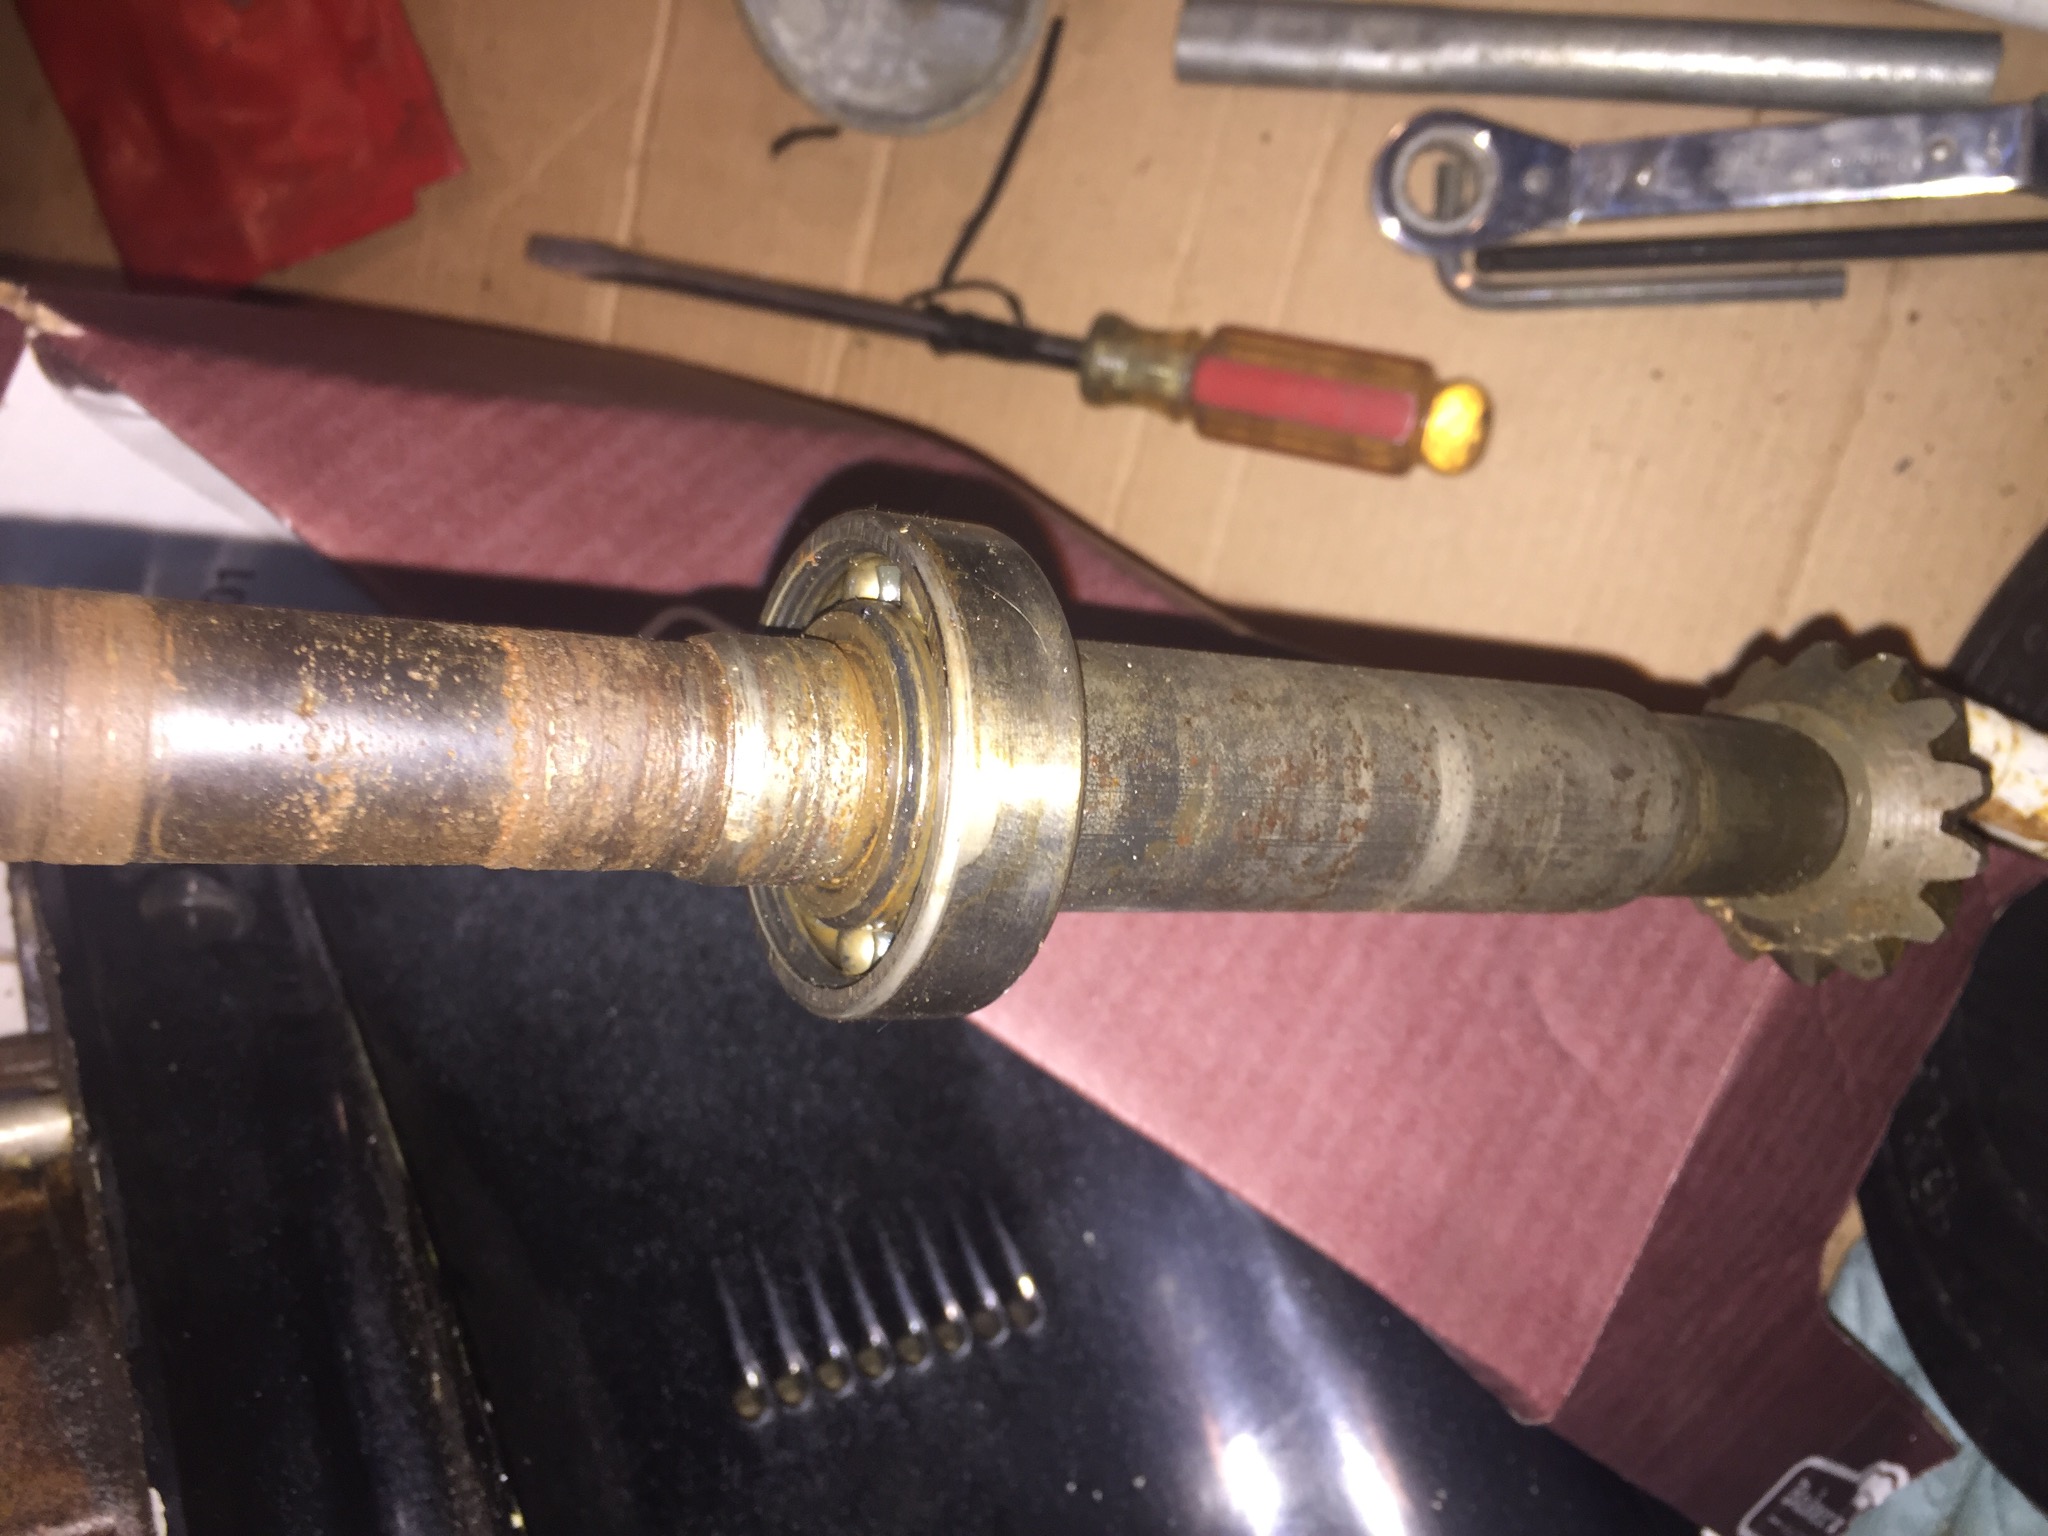
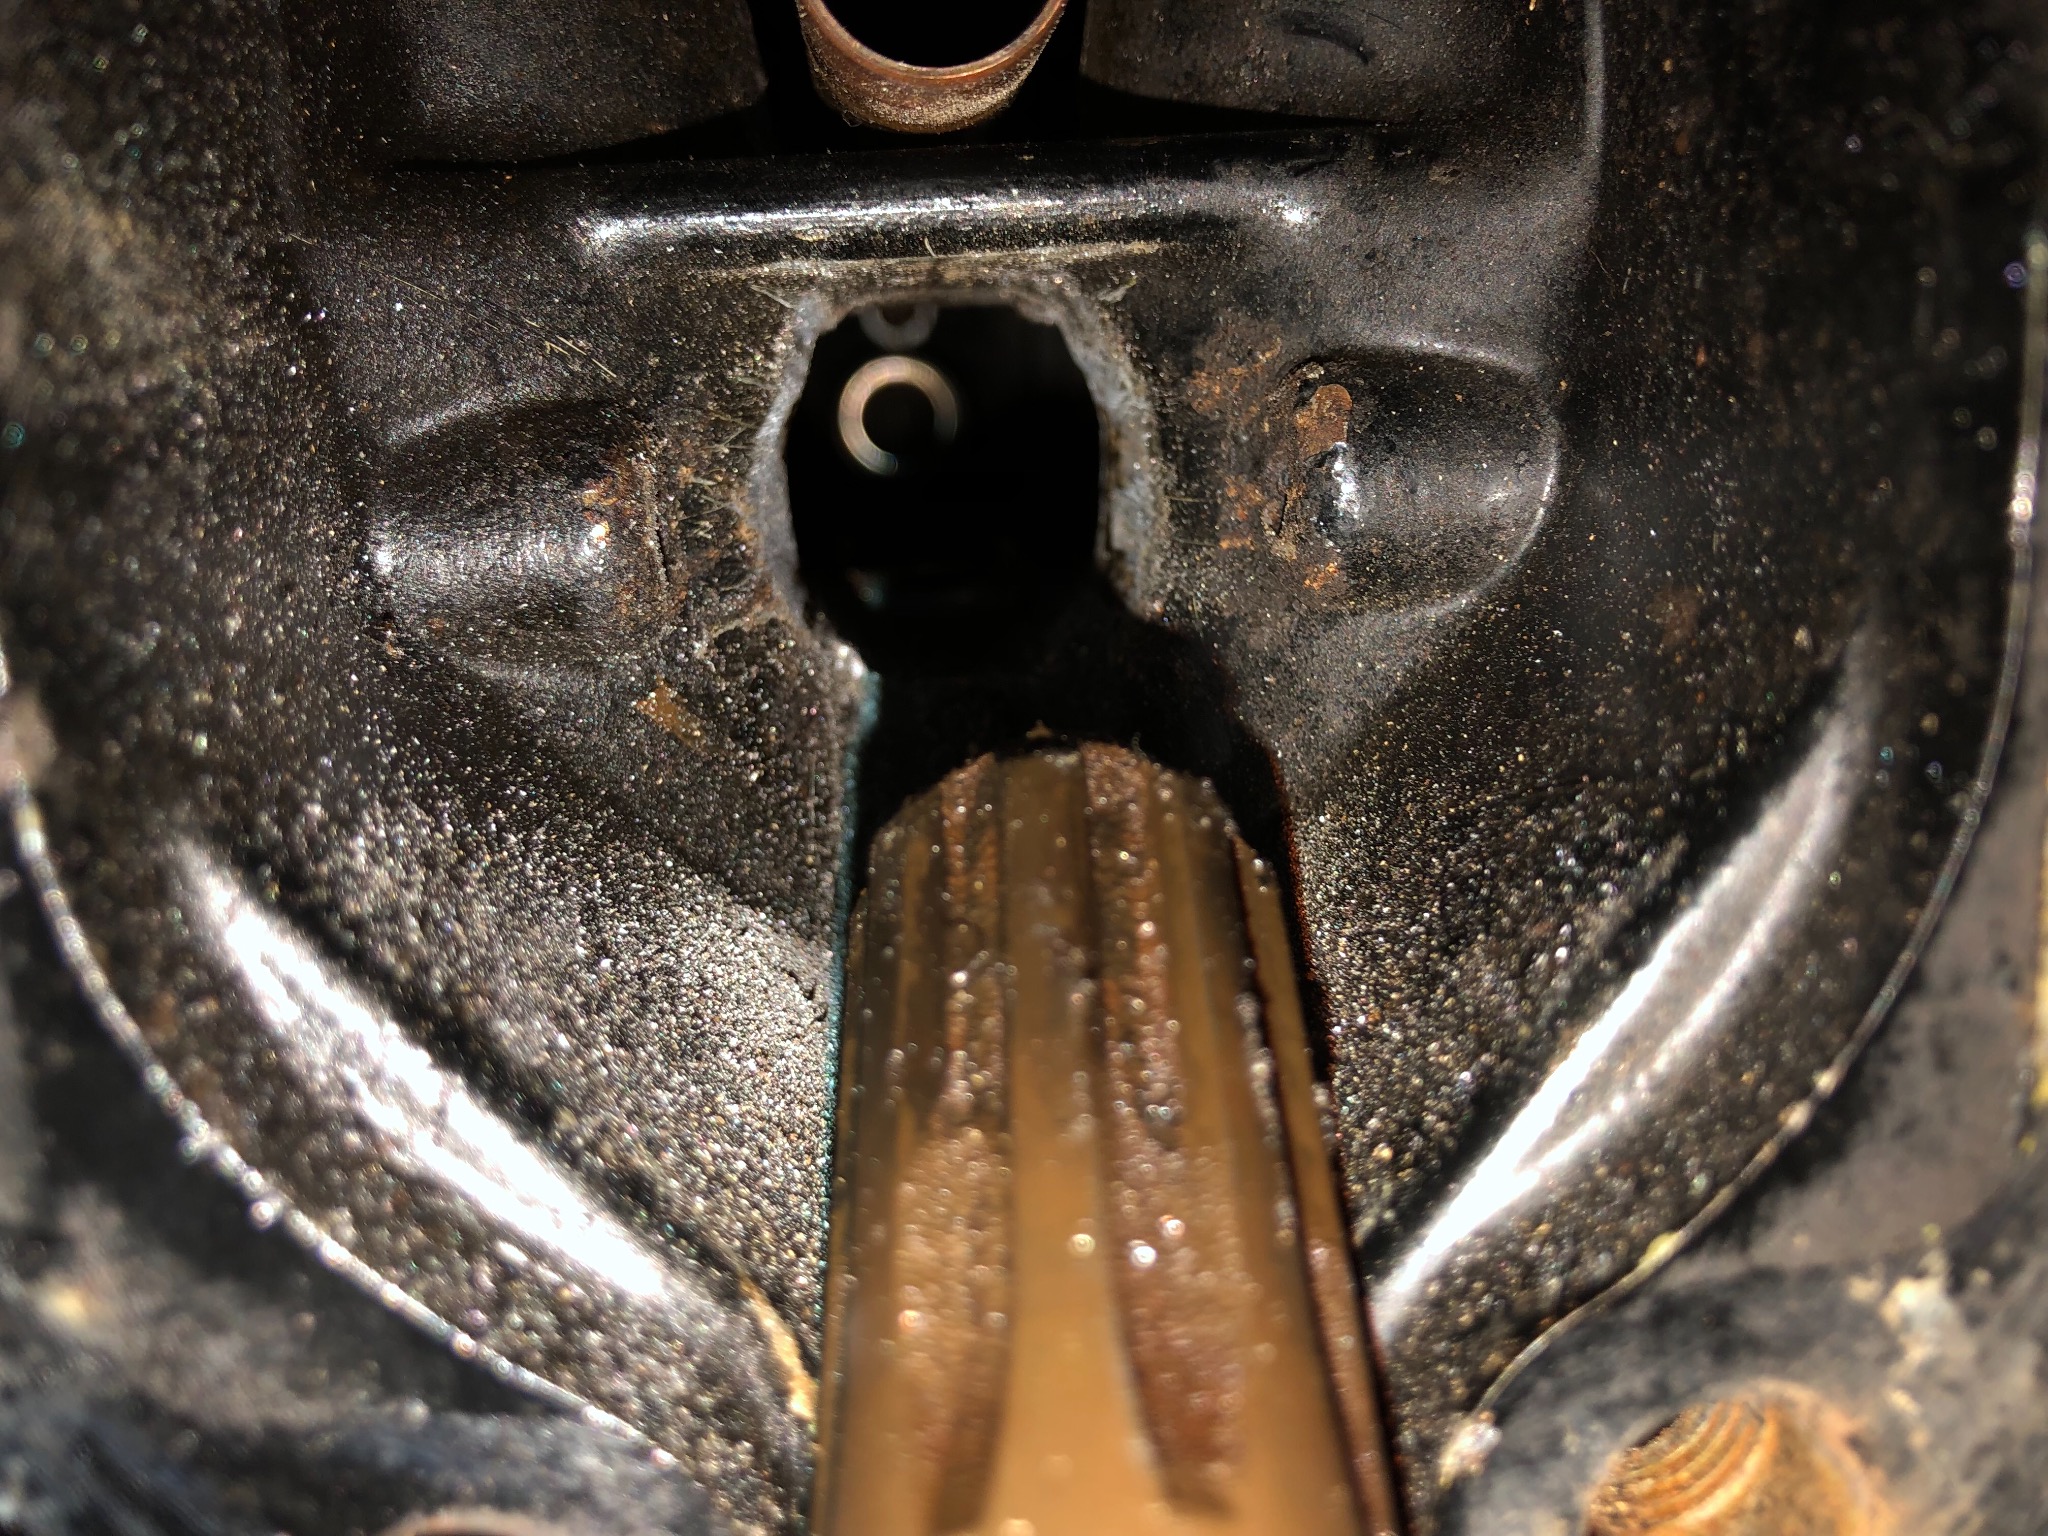
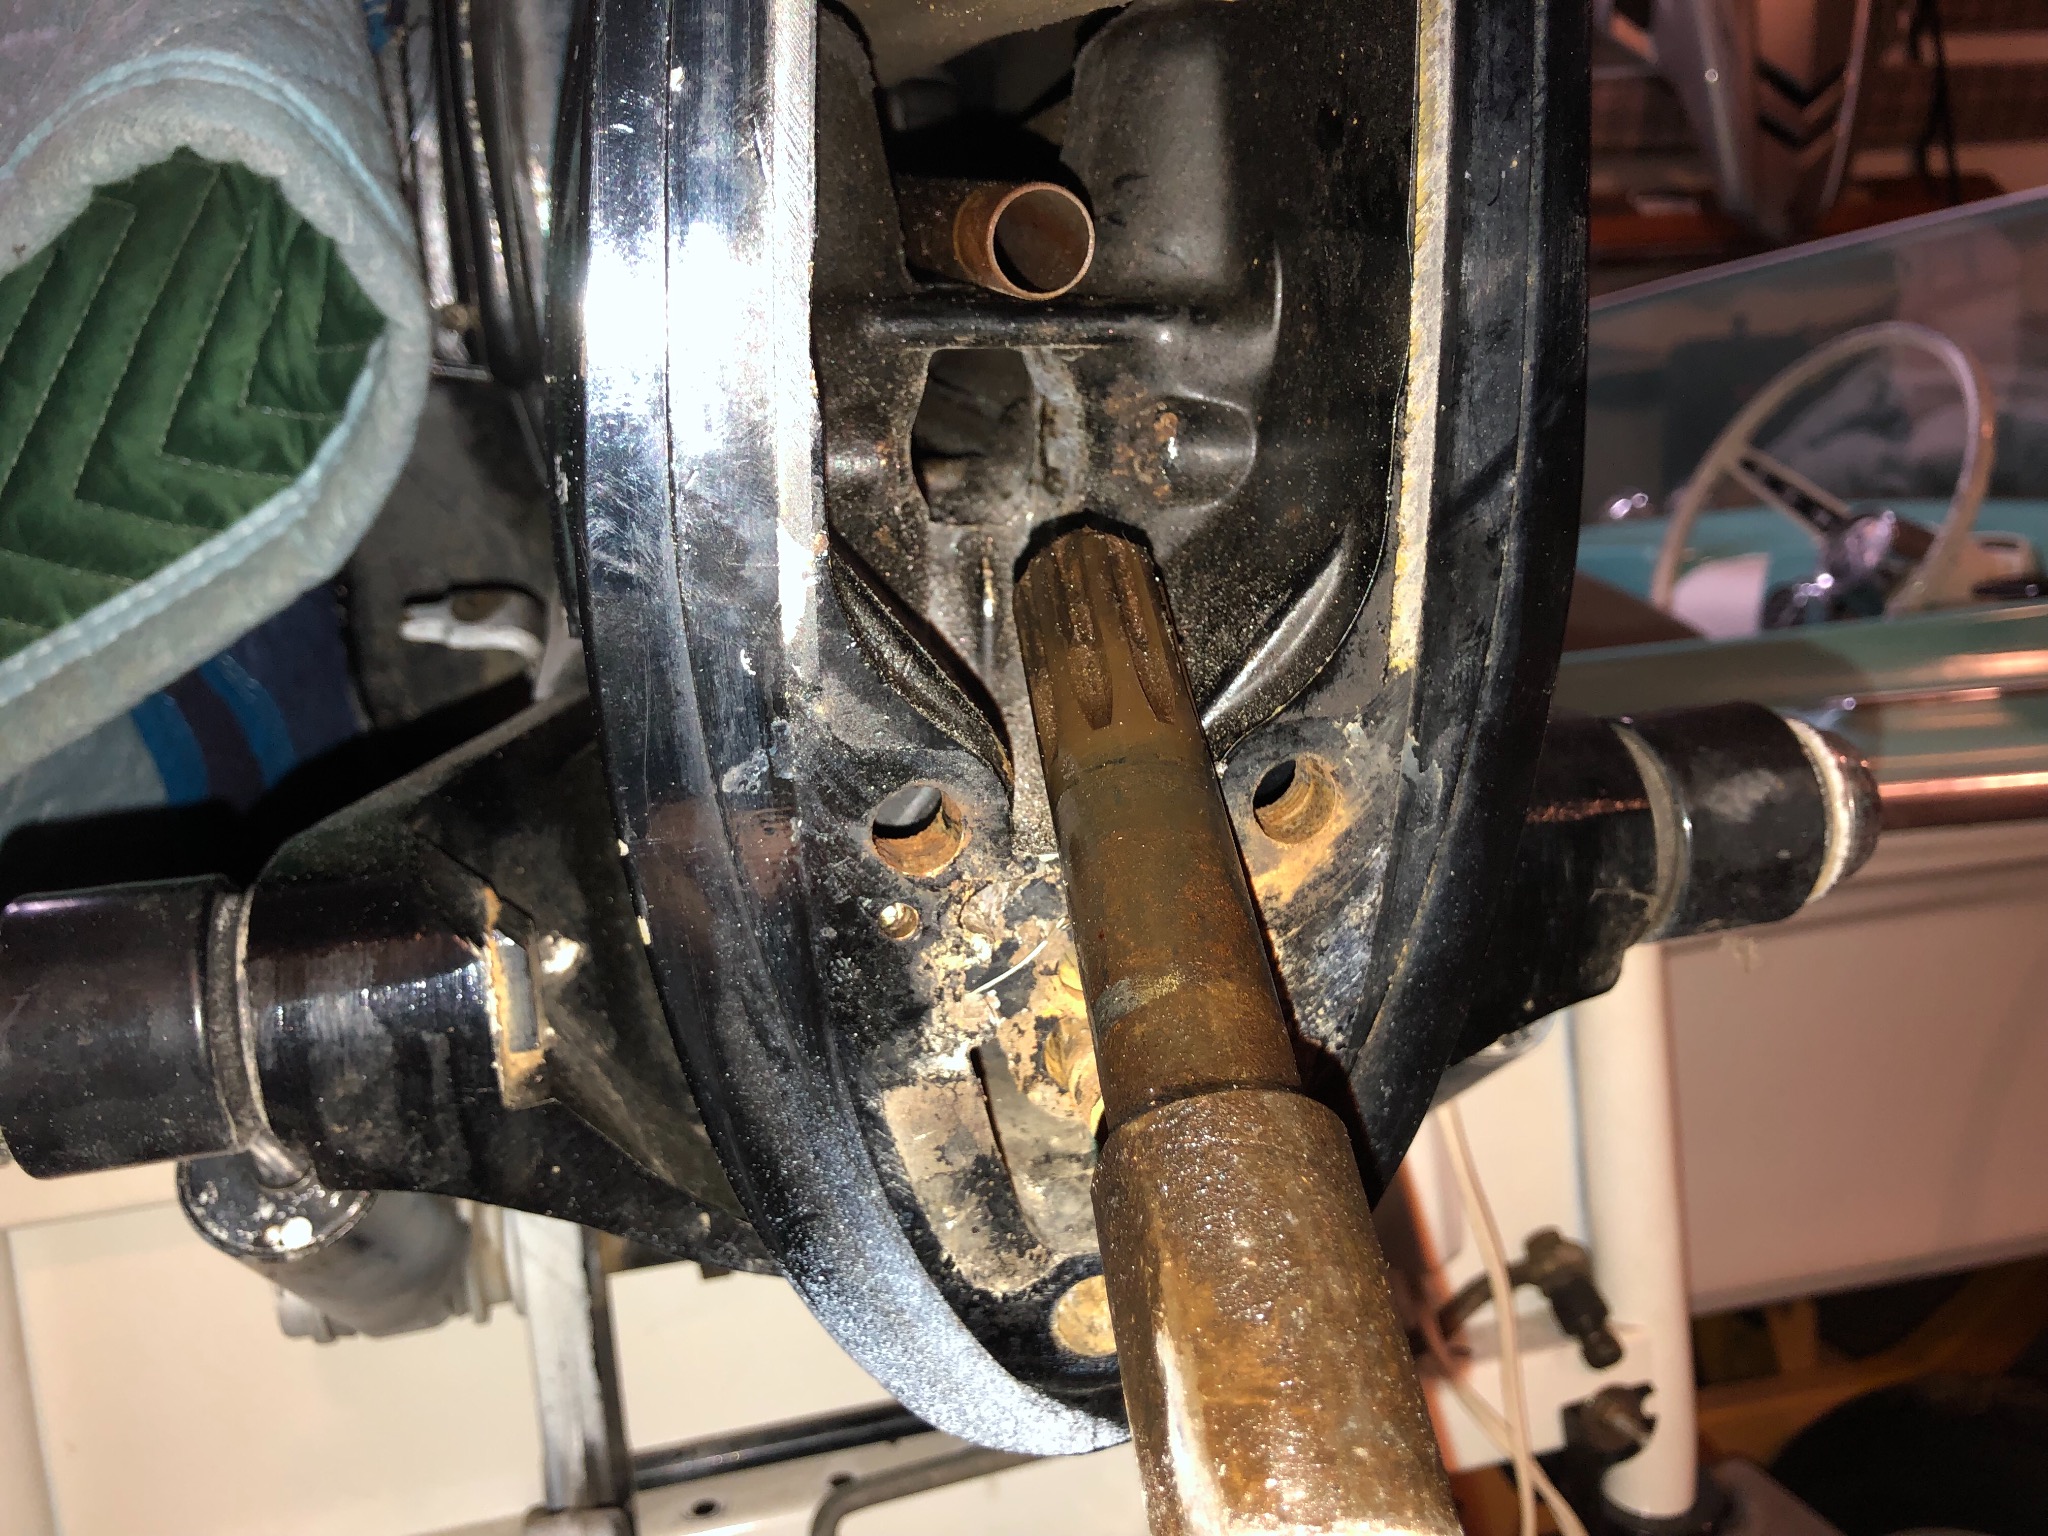
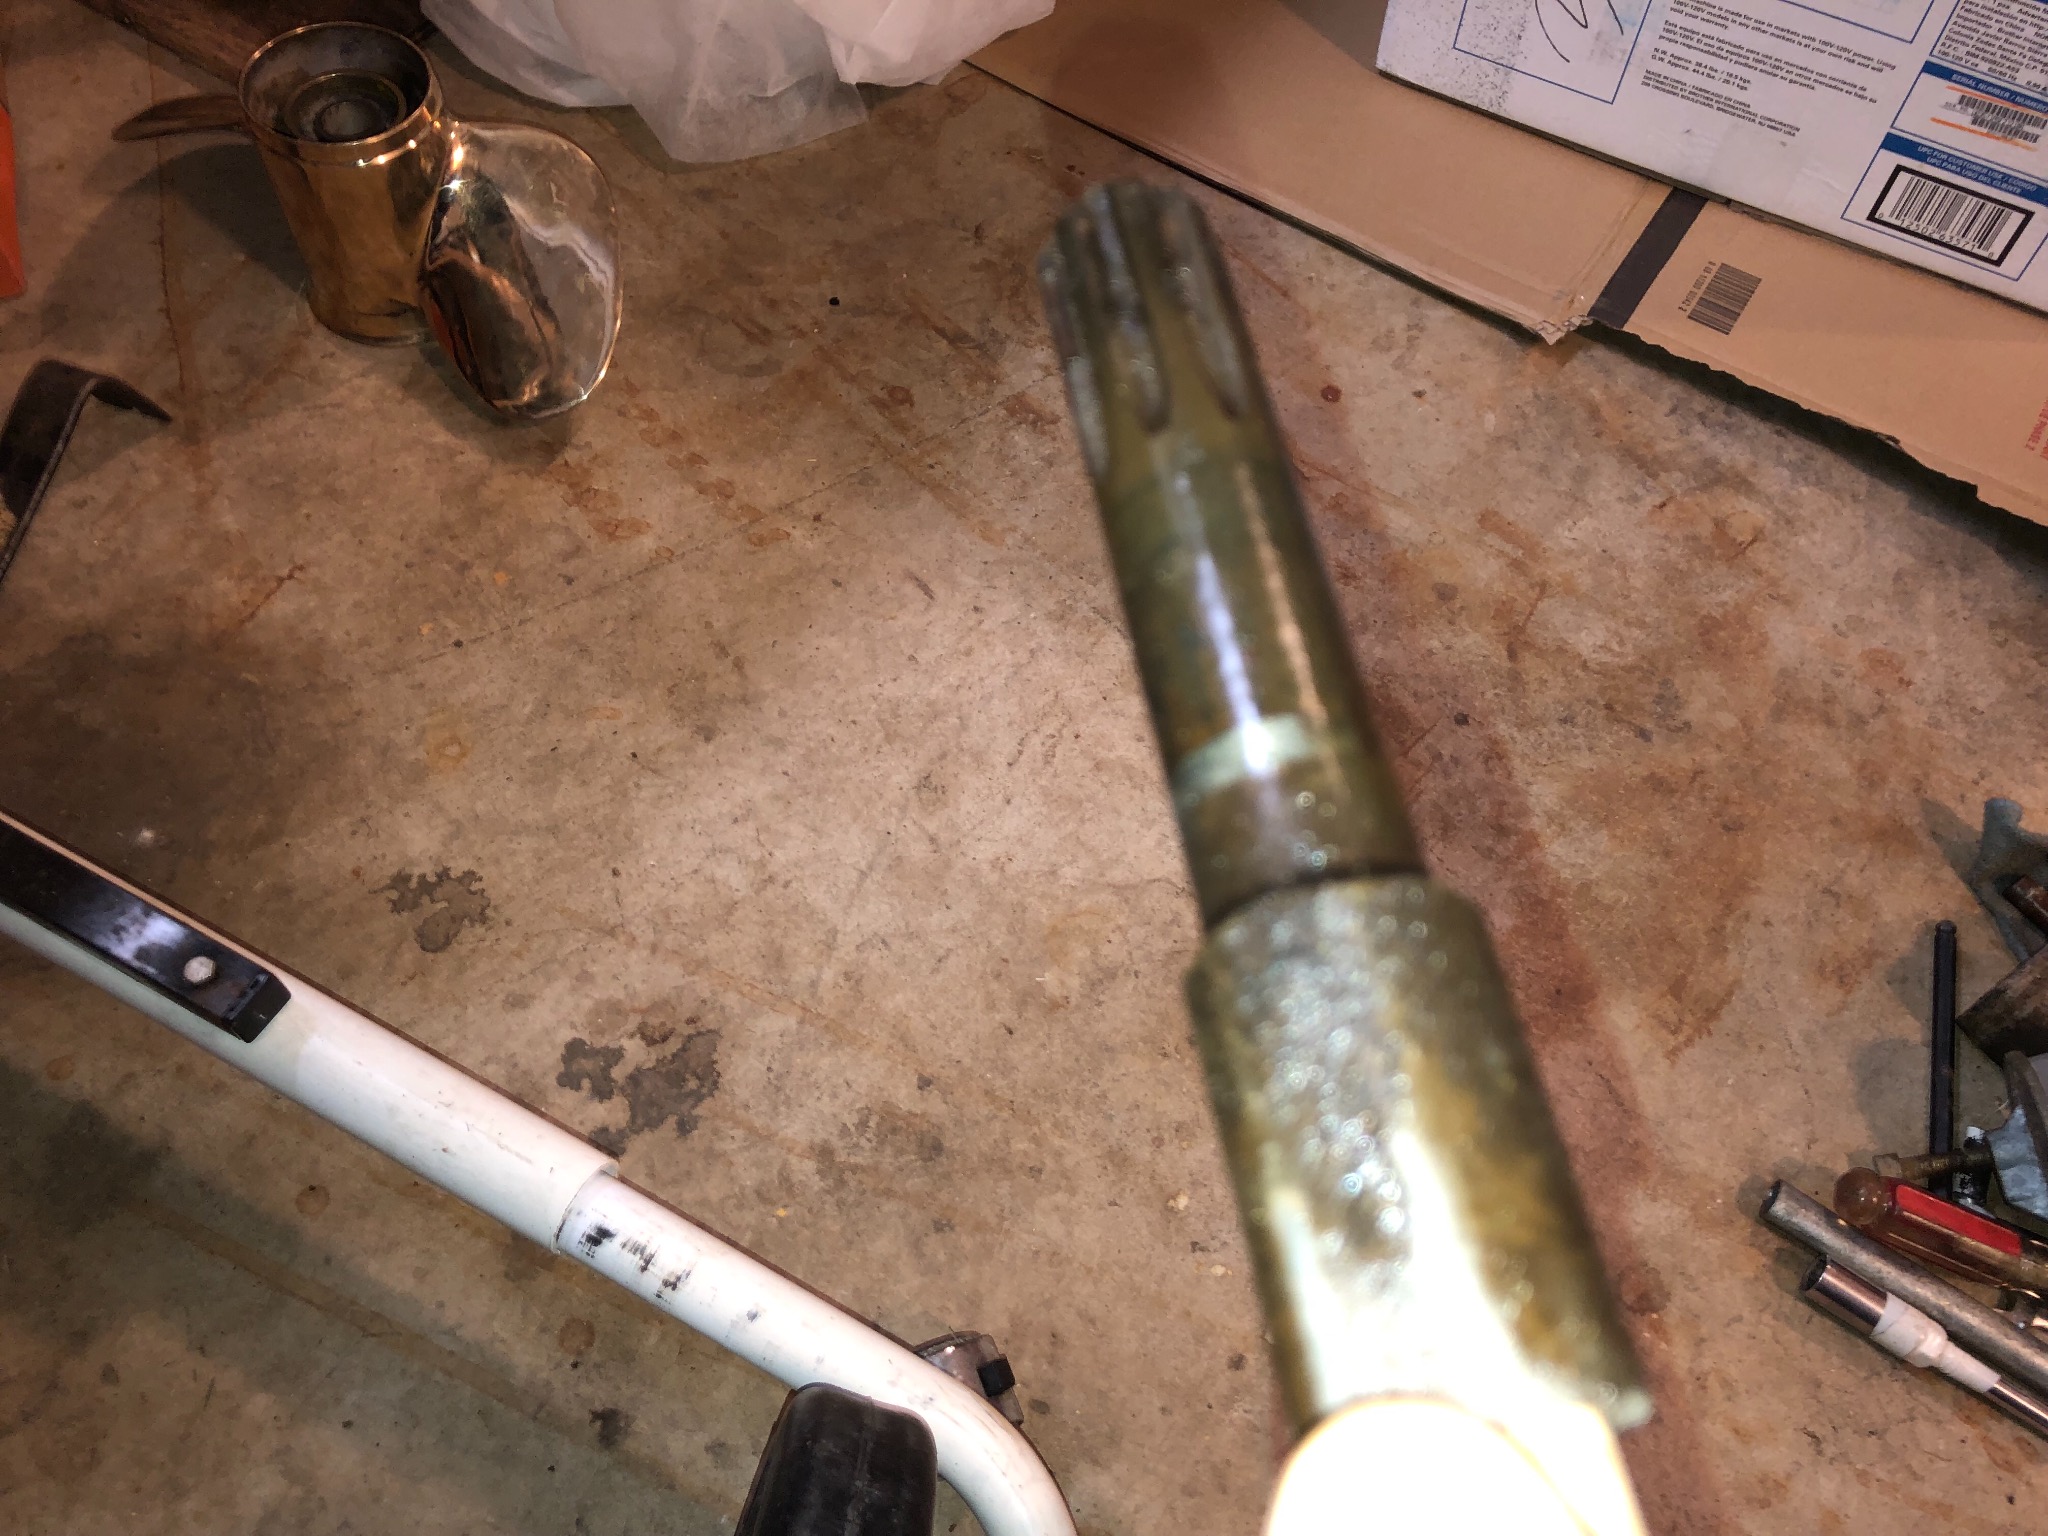
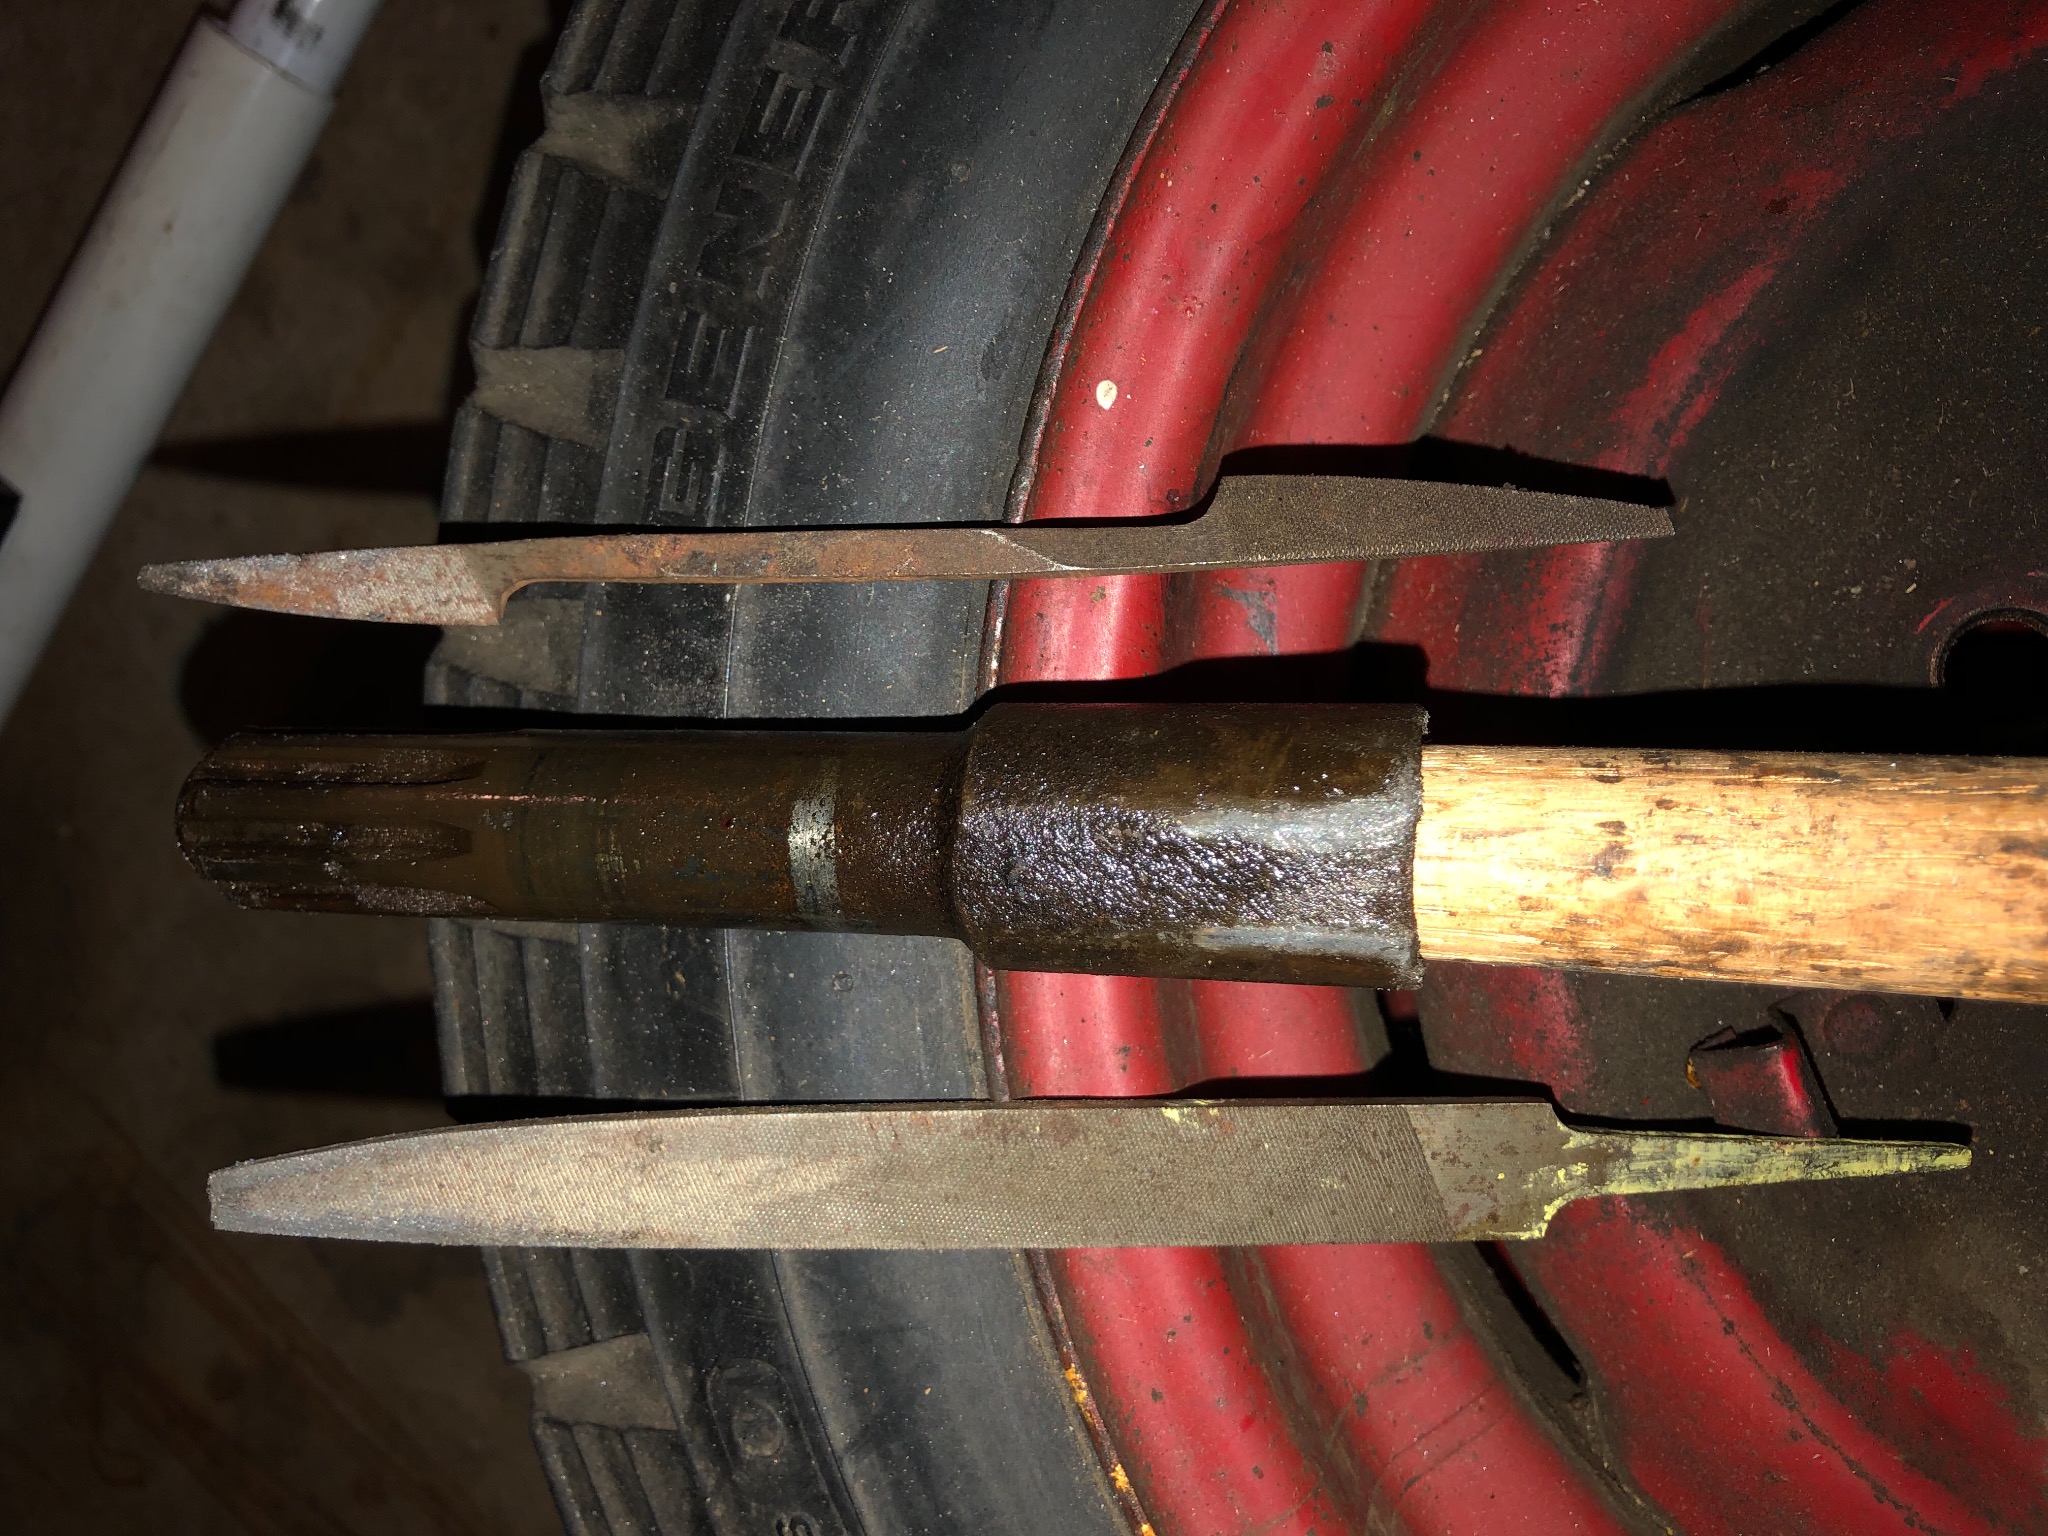
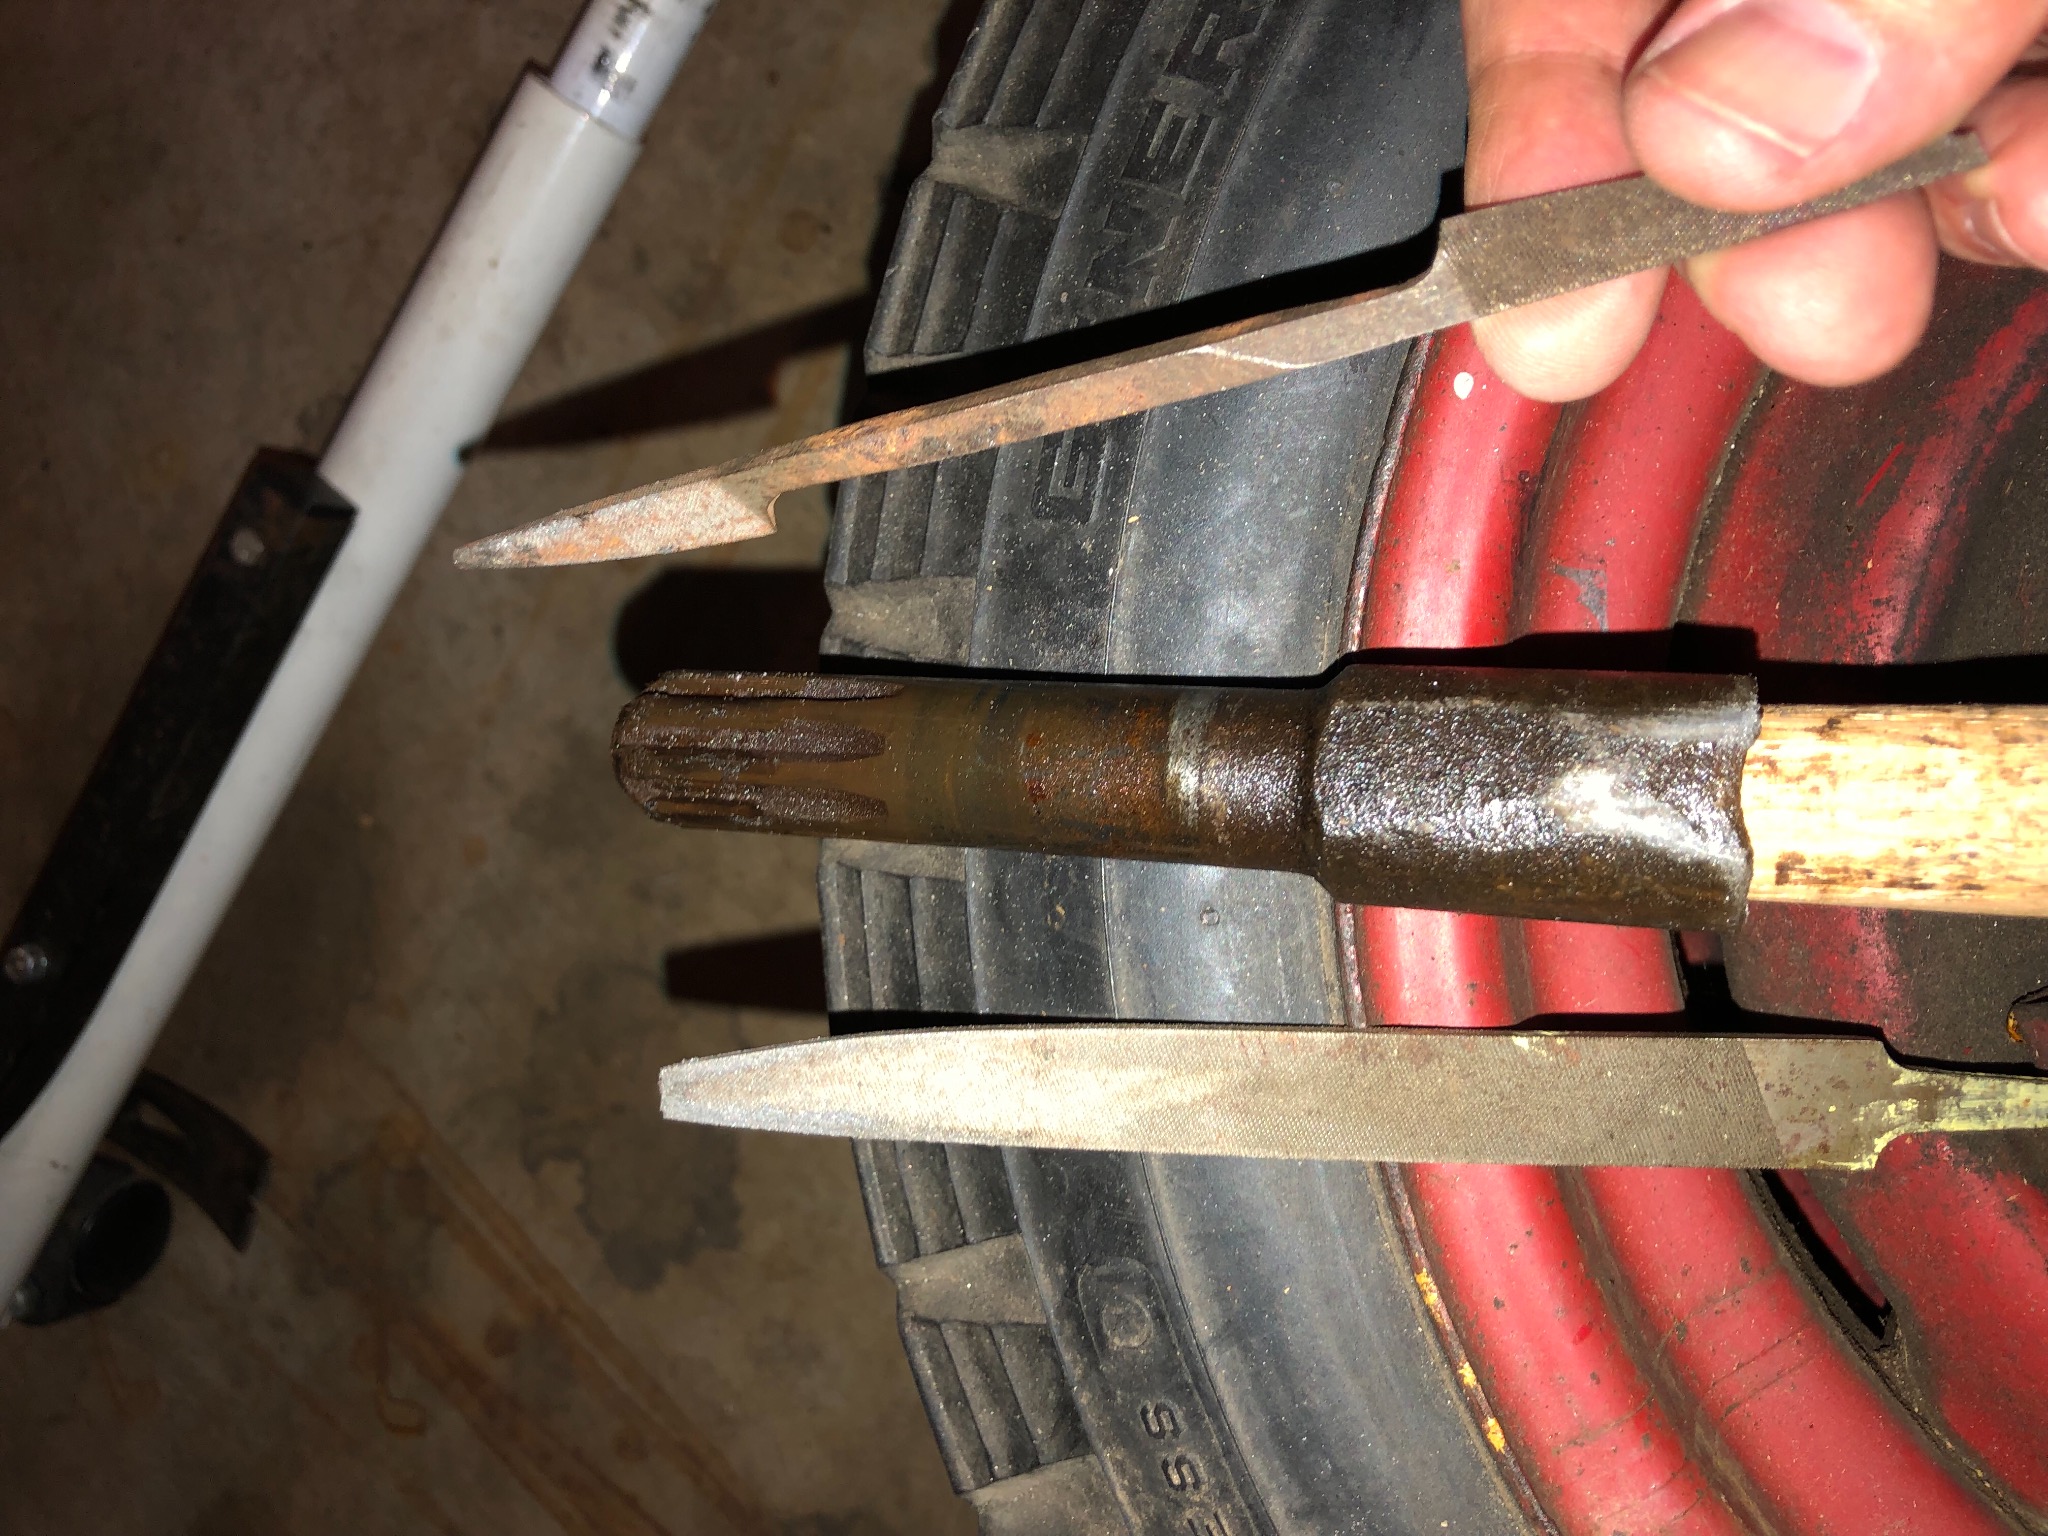
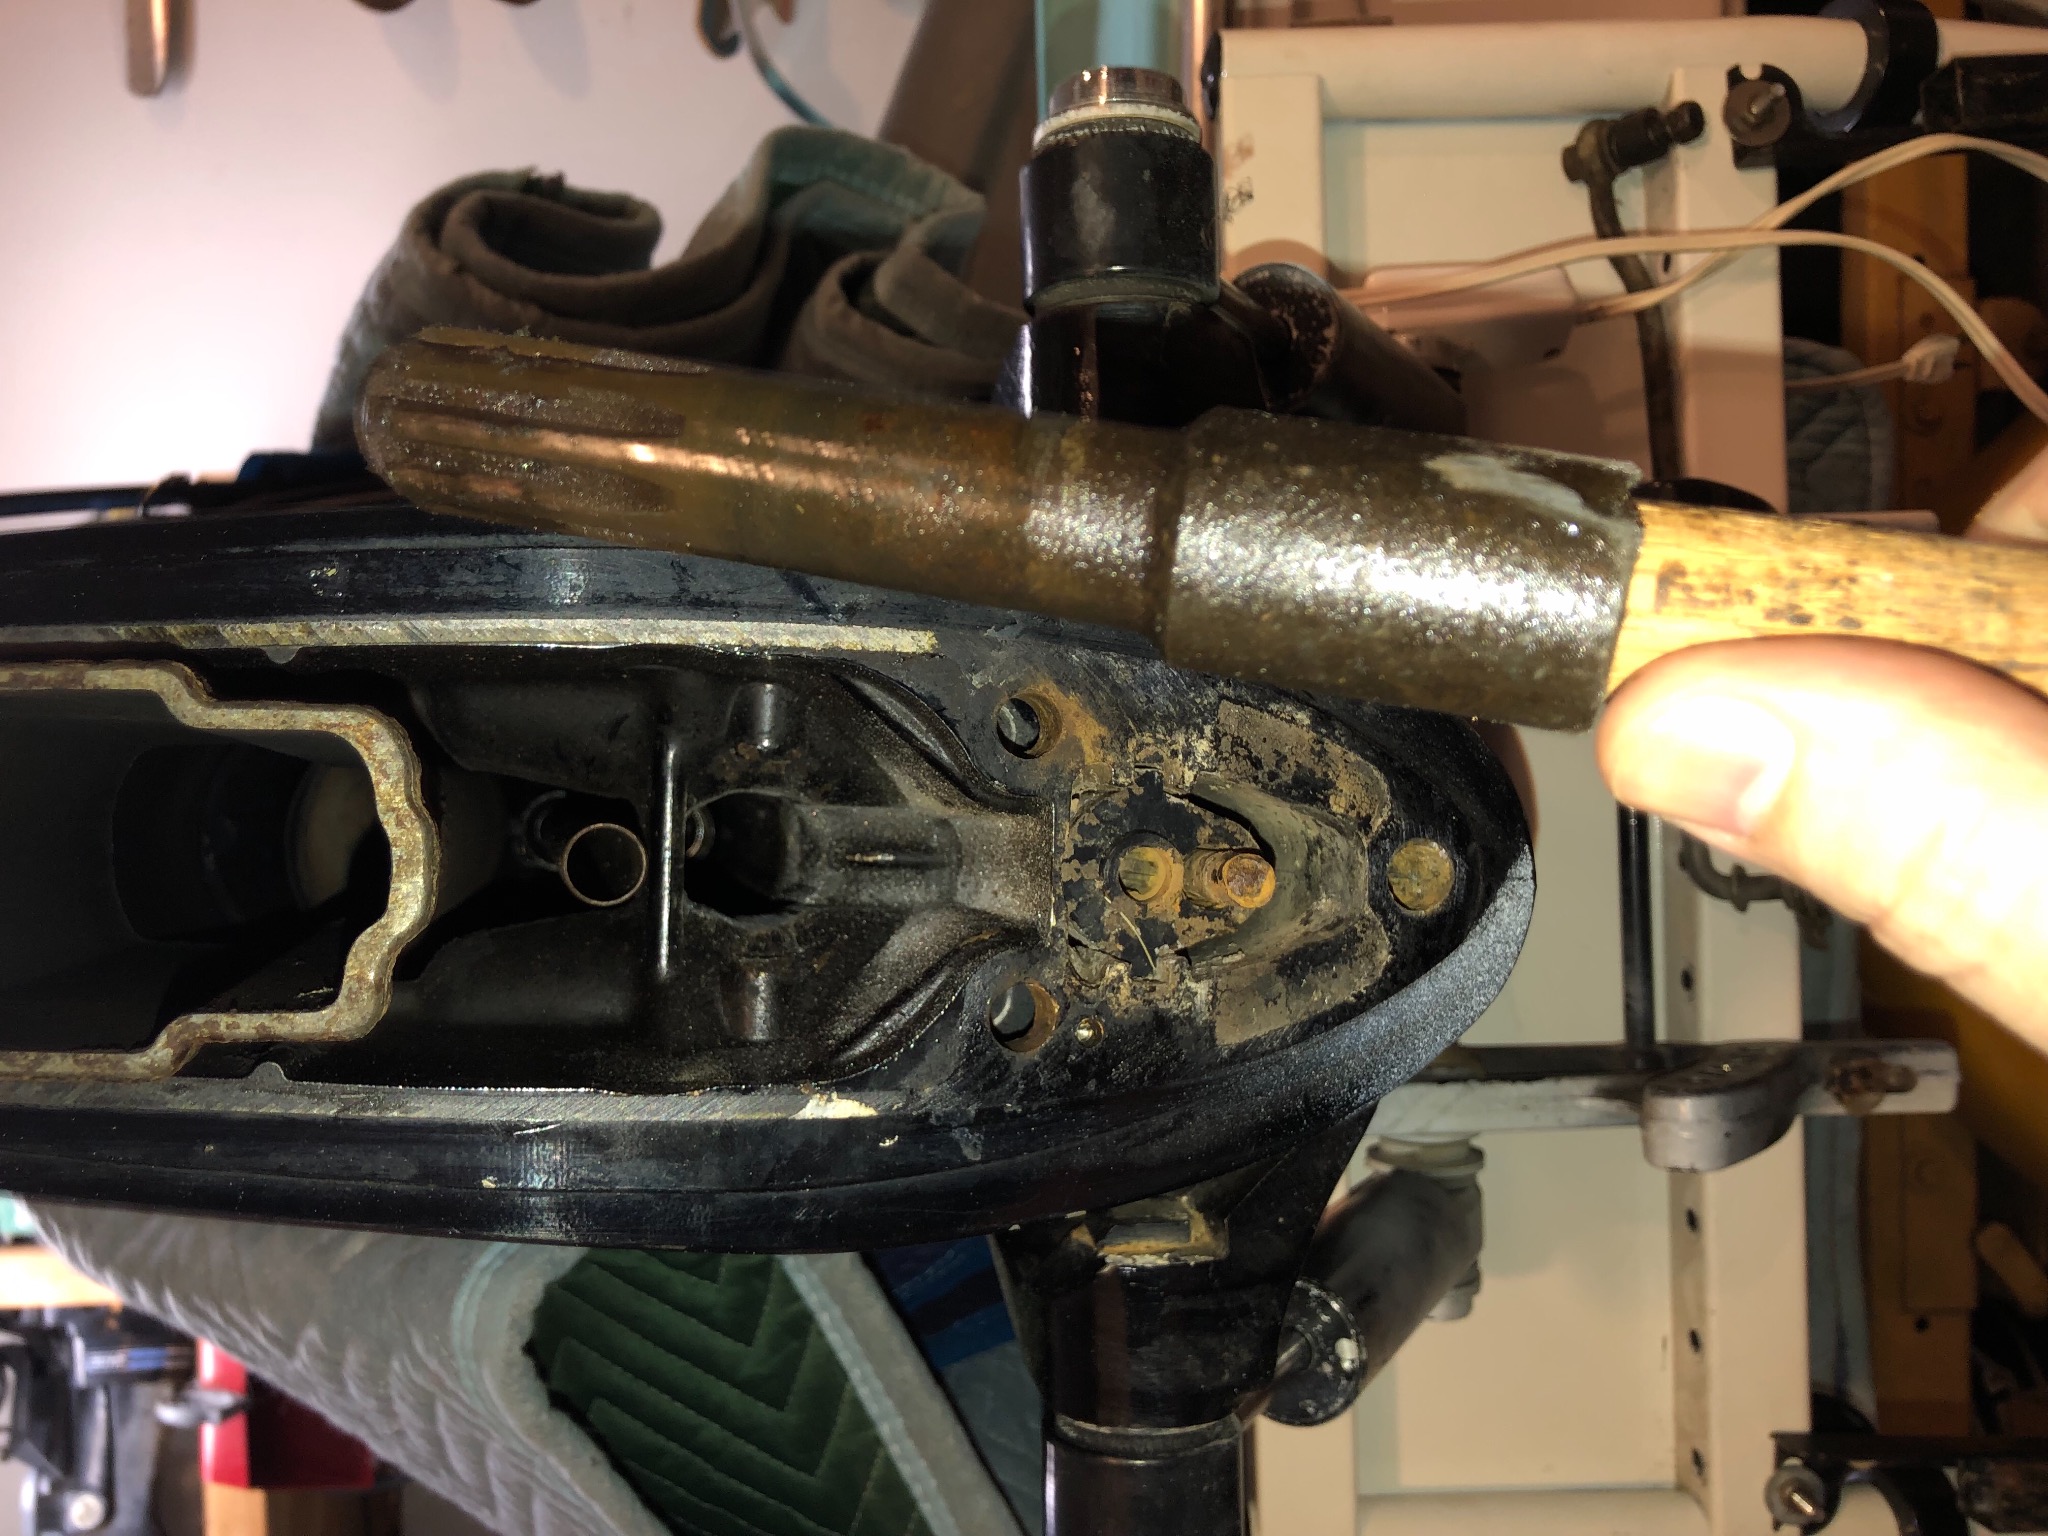
It’s OUT! Had to do filing at 2, 4, 8, and 10 o’clock. Thanks to finding one of Dad’s and one of Grandpa’s unique files, I was able to remove just enough to wiggle it about 40 times with slight pressure so it would walk with every motion. Since original opening had no scars from going in, I can only assume it was put in through the larger opening for the cooling tube and then moved over. You can see the grey filing remains on the 4 corners of the extension where it defines the 2 flat sides. That spindle has a firm grip on the extension as a few hammer strikes on the wood haven’t budged it. No concern for now. Now I am comfortable taking the lower leg and 2 blade to the local prop shop to get the skeg repaired and get a new hub installed as I spun the old one. Sorry this removal took me so long... life just sometimes throws in its own curves. Thanks so much to all who have helped me get this far. I have a new impeller waiting for when I get the lower back. I need to also remove some white over spray from previous owner. Will eventually inspect and replace a few wires I also will need to clean up the controls and repair any wire issues. I will buy new throttle and shift cables once I get proper measurements. The plan is to use this year to get it fully ready and hope to mount and use the following year. I just don’t think I am fast enough to get it on the water this year and I don’t want to take short cuts I can’t live with. This won’t be a perfect restoration, just hoping for a clean survivor since it all ran when I got it.

Please Log in or Create an account to join the conversation.

Dr.Go!

115 lower unit changes started 5 years 6 months ago #139475

  • 63 Sabre
  • 63 Sabre's Avatar
  • Offline
  • Contributing Member
  • Contributing Member
  • Posts: 4676
  • Karma: 147
  • Thank you received: 167
WOOOT WOOT! Congratulations. Persistence paid off. Glad you got over that hump with some help from the old bastard.

Now you can tip the motor back in an upright position and not worry about it falling forward. :ohmy:
Attachments:

Please Log in or Create an account to join the conversation.

115 lower unit changes started 5 years 5 months ago #139726

  • Dr.Go!
  • Dr.Go!'s Avatar Topic Author
  • Offline
  • Contributing Member
  • Contributing Member
  • Posts: 1719
  • Karma: 19
  • Thank you received: 125
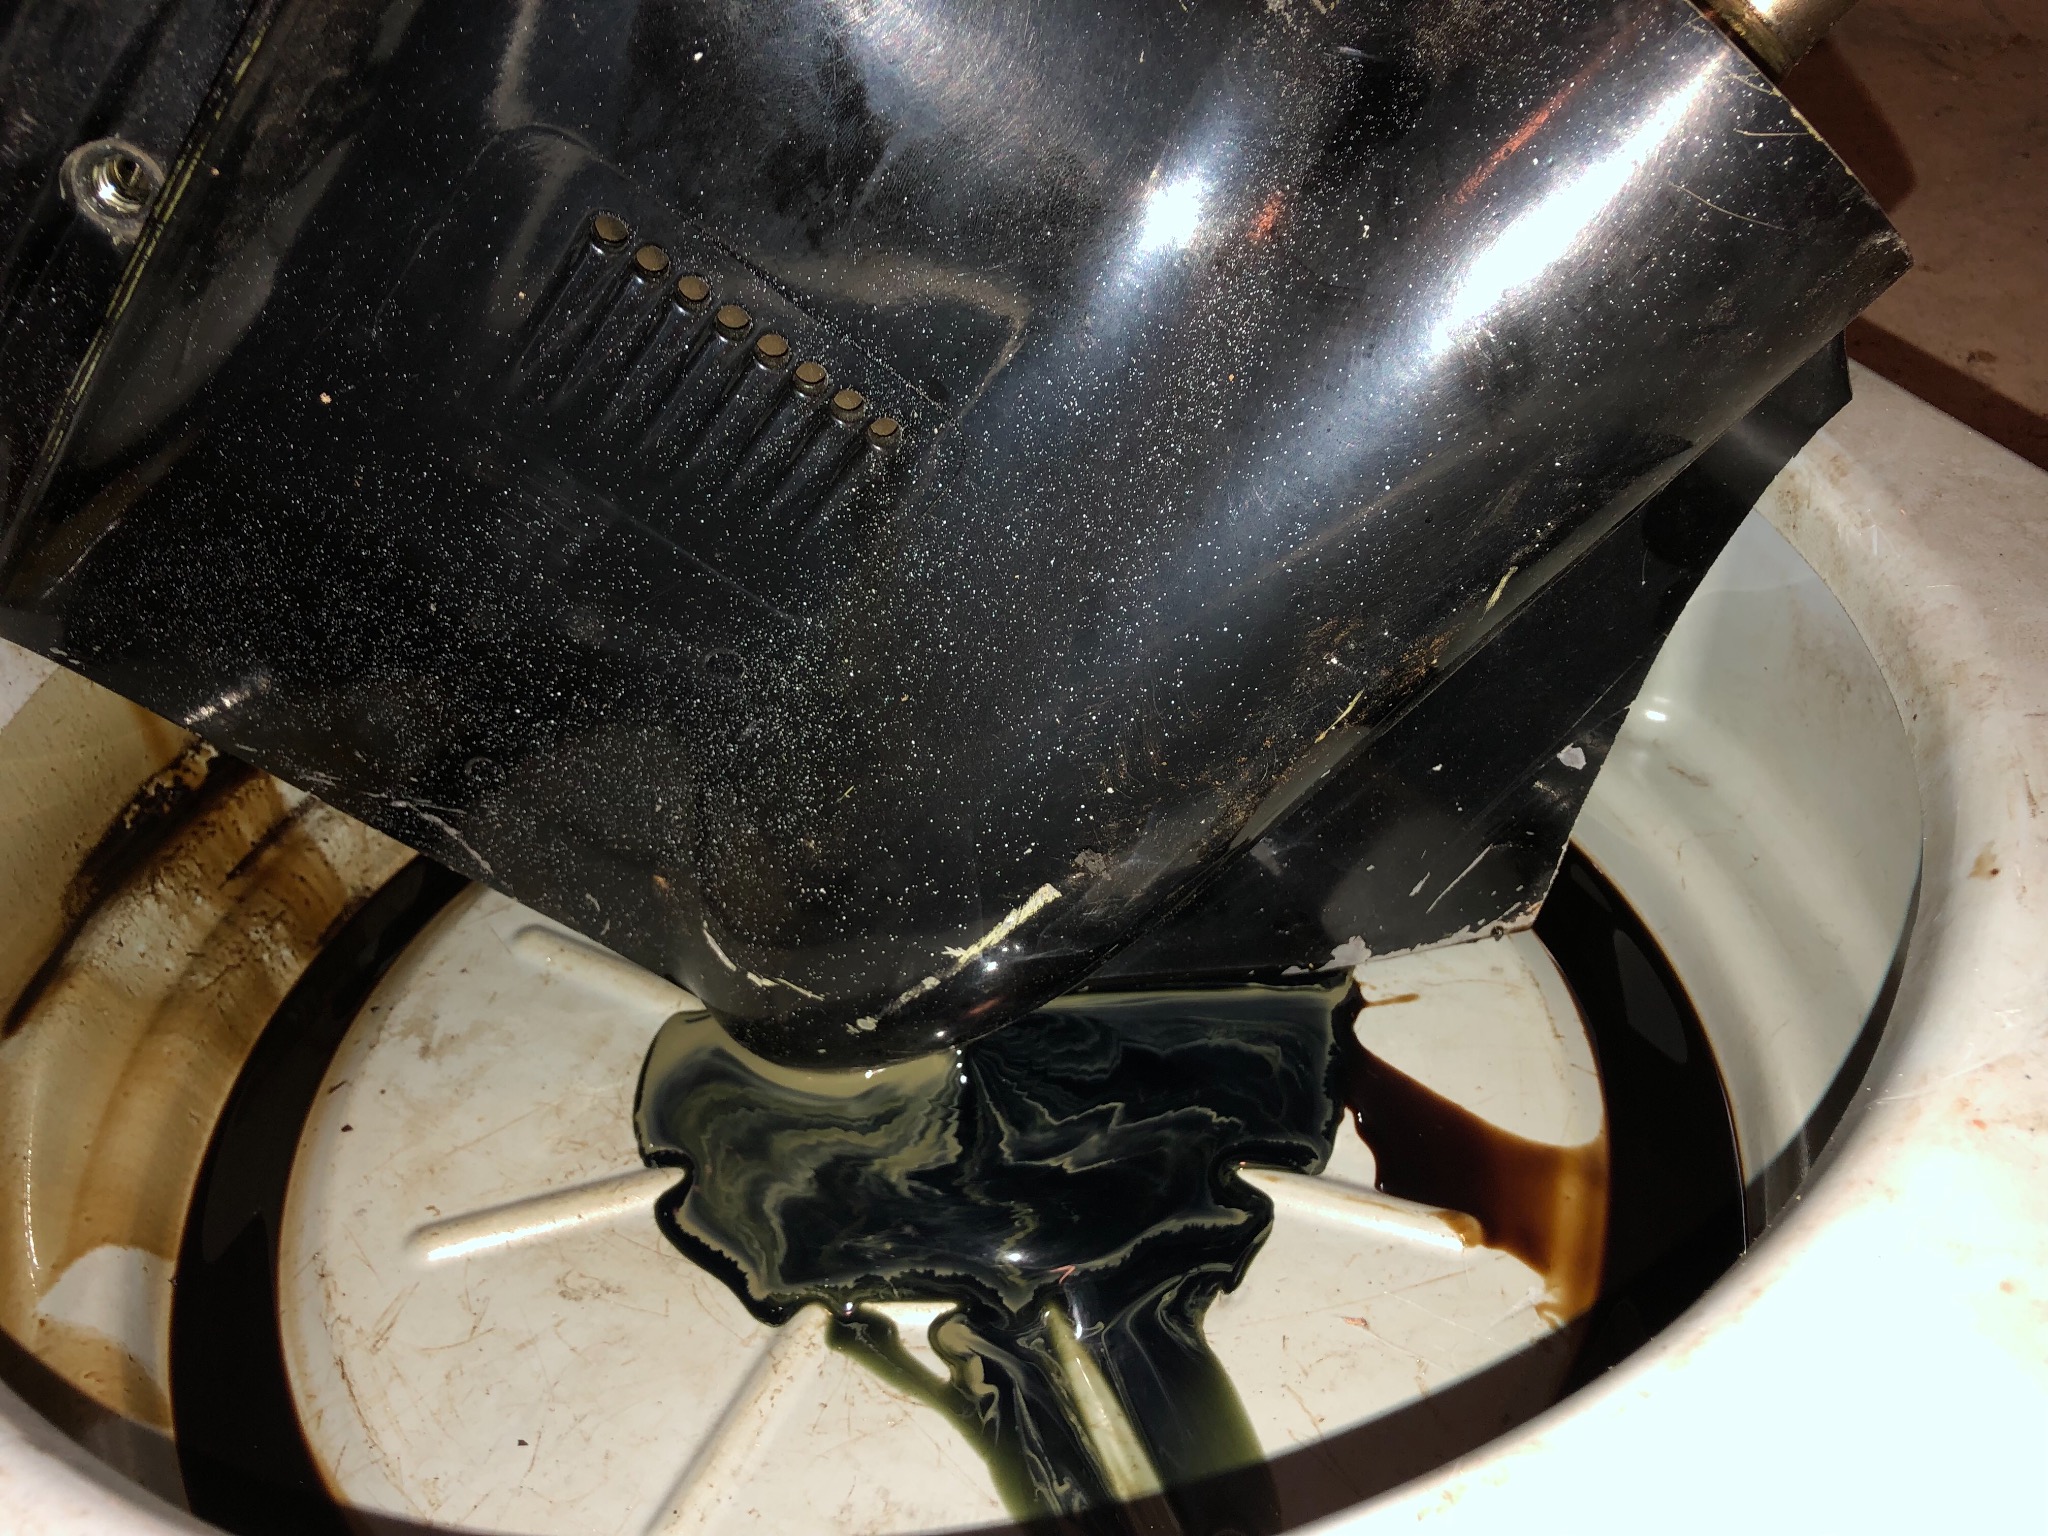
Drained the gear lube. Had a little line of milkyness. The plan is to take the lower unit to Northern Wisconsin Propeller and have them repair the broken skeg. Then I will replace the impeller. I was glad to see the previous one still looked excellent. When I get everything put back together I will refill with new gear lube and check it for water after each use. Hoping I don’t need to replace seal as motor was in use before purchase and came with a good checklist including good water pumping and good compression. Also going to get my 2 blade prop re-hubbed because I spun it last year.
Attachments:

Please Log in or Create an account to join the conversation.

Dr.Go!

115 lower unit changes started 5 years 5 months ago #139727

  • ed-mc
  • Away
  • Platinum Boarder
  • Platinum Boarder
  • Posts: 1410
  • Karma: 232
  • Thank you received: 115
Here's a Sierra-Brand impeller in OE packaging for less than $15 on eBay:

www.ebay . com /itm/Sierra-18-3017-Water-Pump-Impeller-Force-MARINER-Mercury-47-89984-47-694065-47-3/372450577625?hash=item56b7c8ccd9:g:mNYAAOSwBdRbWdea

You'll have to copy the link and put it back together (remove the spaces) when you paste into an address bar; this site still parses eBay links.

Or get an OEM Mercury impeller in the original box for $15.95 shipped:

www.ebay .com /itm/OEM-Mercury-Outboard-Water-Pump-Impeller-47-65960-47-89984-47-30221-47-89984T4/312255371580?hash=item48b3ded93c:g:jmMAAOSwHctbtjub

For the most likely source of your water intrusion, the water pump oil seals, there's a replacement lower pump body from Sierra (18-3414) on eBay for $28.11:

https://www. ebay .com /itm/18-3414-Water-Pump-Base-Mercury-Mariner-46-9674605/283416722110?hash=item41fcf3fabe:g:HwAAAOSw~9Jcinwp

Besides the driveshaft oil seals, other leak areas to check are the gaskets for vent and drain plugs (stupid-simple fix), and the shift shaft bushing seal, which can be carefully replaced by unscrewing the bushing with a special tool, and making sure the shift shaft is NOT pulled out of the lower unit. Very seldom have I seen propshaft seals leak, but it does happen and they are pretty easy to spot when they do.

I'd say the majority of leaks I've found in many years working on various models of outboards, came from the driveshaft oil seals. If you have access to a pressure tester you can check the integrity of the gearcase seals that way. No more than 12psi and make sure the gearcase is fully drained before pressurizing, or you'll be in for a messy surprise!!

HTH..............ed
The following user(s) said Thank You: Dr.Go!

Please Log in or Create an account to join the conversation.

115 lower unit changes started 5 years 5 months ago #139730

  • Dr.Go!
  • Dr.Go!'s Avatar Topic Author
  • Offline
  • Contributing Member
  • Contributing Member
  • Posts: 1719
  • Karma: 19
  • Thank you received: 125
Thanks for the ton of info that covers all the possible culprits. I feel like doing a forehead slap with the palm of my hand because it my focus to drain the unit and throw in the Jeep, I realize there were no washer seals in either screw. If you hadn’t mentioned it, I may have again overlooked it when it is time to refill it. Where is the easiest place to get the seals for those 2 screws? Or should I just buy new screws with seals... then I could start with clean and un burred screwdriver slots. I did get the Mercury brand impeller. Since I don’t have a way to pressure test, should I just try the washer seals first or not risk it? If I make it to the prop shop today, I will see if they pressure test them after repairing the skeg. Does the lower pump housing gently pry out after removing the flushing screw that enters the side? My screw was black plastic... would that be correct? Thanks.

Please Log in or Create an account to join the conversation.

Dr.Go!

115 lower unit changes started 5 years 5 months ago #139731

merc dealer has them. the screw and washer are separate parts.

Please Log in or Create an account to join the conversation.

115 lower unit changes started 5 years 5 months ago #139733

  • ed-mc
  • Away
  • Platinum Boarder
  • Platinum Boarder
  • Posts: 1410
  • Karma: 232
  • Thank you received: 115
Well, I'd say that since they were missing, and you don't have a lot of water in the oil, that the washers likely are the problem. Just refill with clean oil and keep an eye on it.

Merc's P/N for the washers is 12-19183K02; Sierra Marine, 18-2945.

www.marineengine.com/newparts/part_details.php?pnum=MER++12+19183K02

www.marineengine.com/newparts/part_details.php?pnum=SIE18-2945

Please Log in or Create an account to join the conversation.

115 lower unit changes started 5 years 5 months ago #139734

  • Dr.Go!
  • Dr.Go!'s Avatar Topic Author
  • Offline
  • Contributing Member
  • Contributing Member
  • Posts: 1719
  • Karma: 19
  • Thank you received: 125
Thanks. I had just dropped off the lower unit at the prop shop and he had the washers in stock luckily. I will do as you say. Hope to have it running on the stand with muffs later this summer after I replace the leaking fuel line inside the cowl. I will also inspect wiring insulation and replace any that has broken insulation with marine rated wire. Once I know it runs and pumps water, I can start the cosmetic stuff like removing some white paint overspray from PO. Also will grind and sand away a nasty wire weld repair previously done on the lower protective wrap around where it was broken out from cobbling on a bracket to steer a kicker outboard. The motor doesn’t have to be showroom, but I would like to make it respectable but welding holes shut and grinding smooth the excessive grape piles. The prop shop is filling the lower unit hole also used to steer the second motor. Time to fix up the loose hardware on the boat Sunday and also try to fix the twin bugle horn. It was funny at my first show a child asked me to blast the powerful horn. I had just gotten the boat and not yet tested it. It barely squeaked when I hit the button and the child laughed. Time to address all of the little things.

Please Log in or Create an account to join the conversation.

Dr.Go!

115 lower unit changes started 5 years 5 months ago #139792

  • Dr.Go!
  • Dr.Go!'s Avatar Topic Author
  • Offline
  • Contributing Member
  • Contributing Member
  • Posts: 1719
  • Karma: 19
  • Thank you received: 125
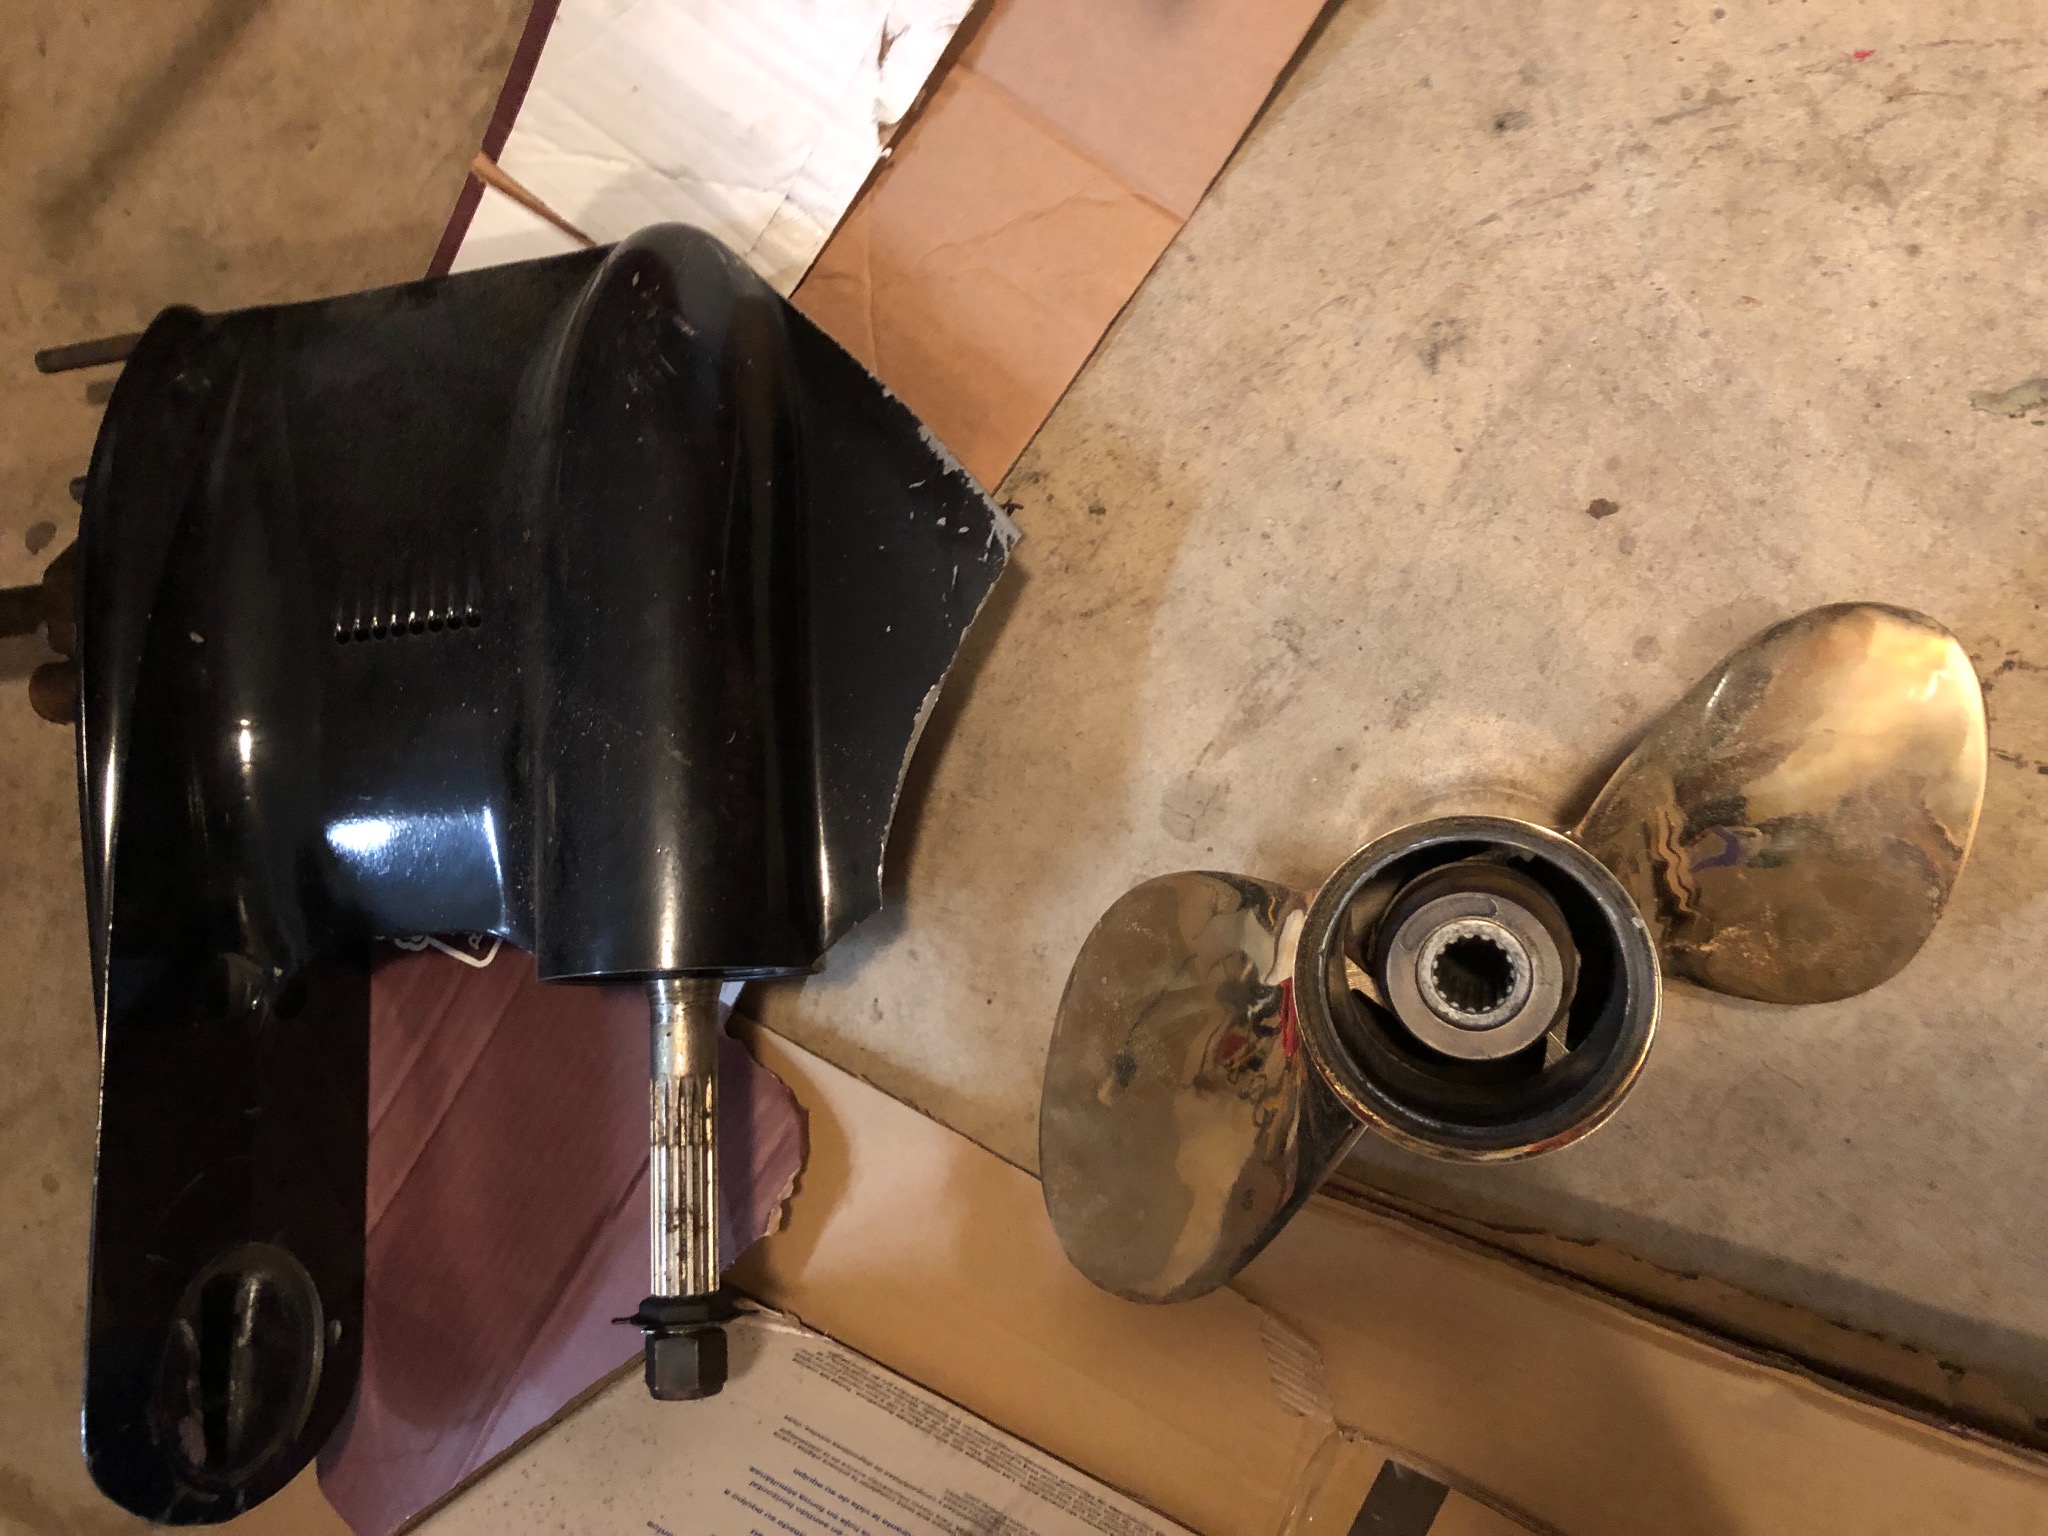
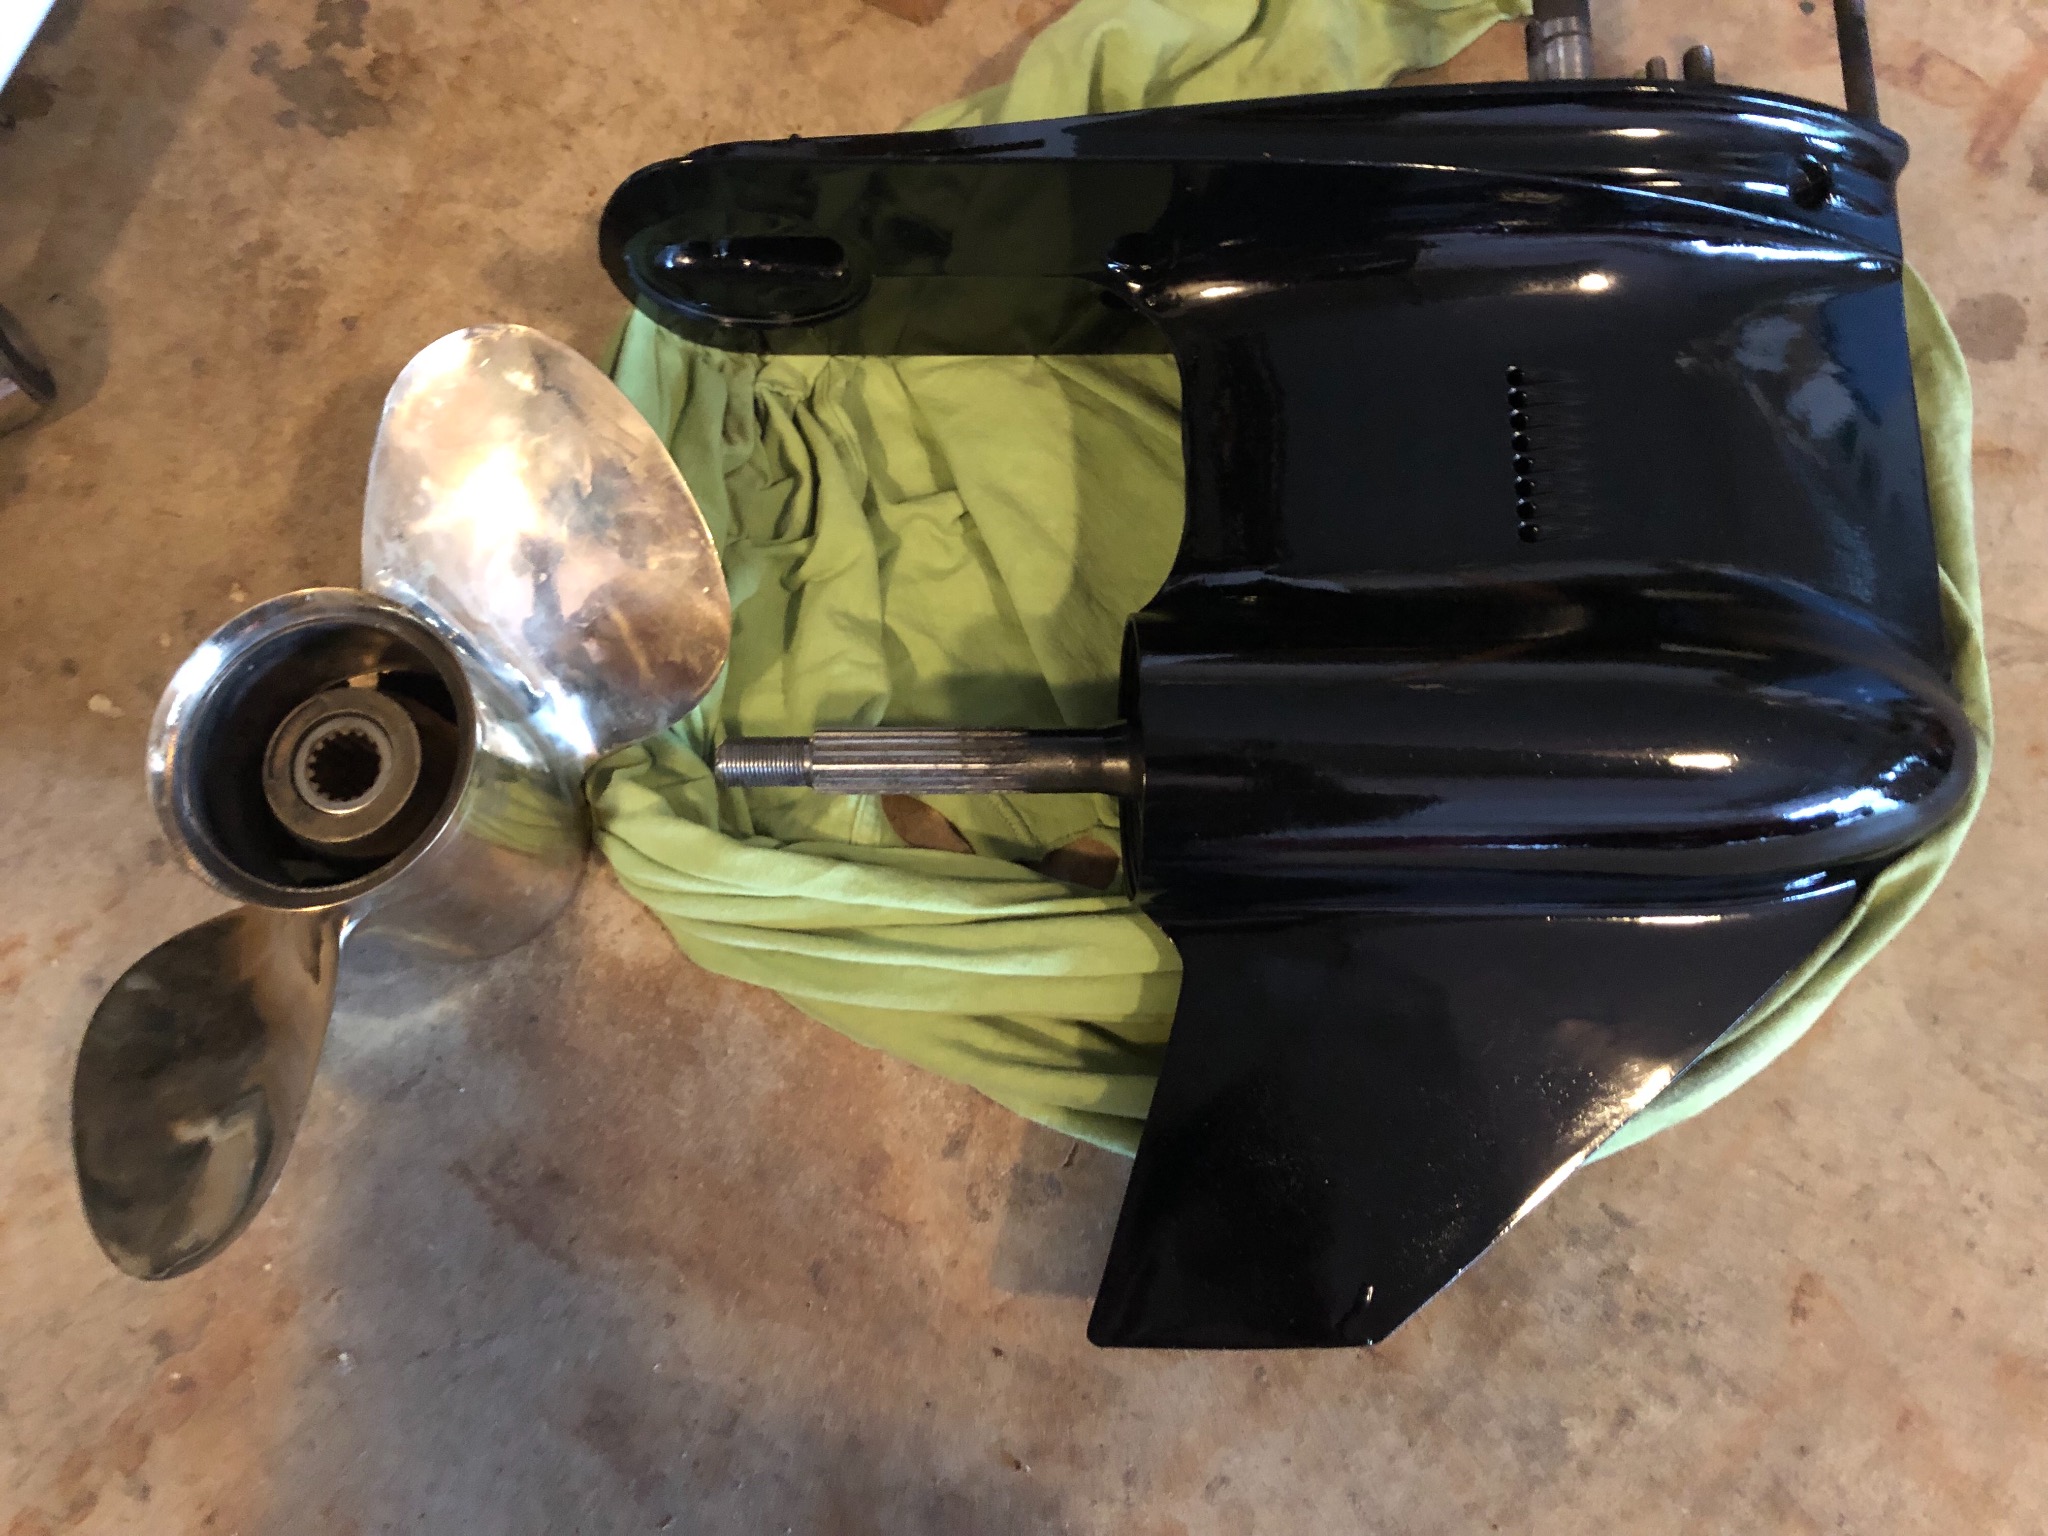
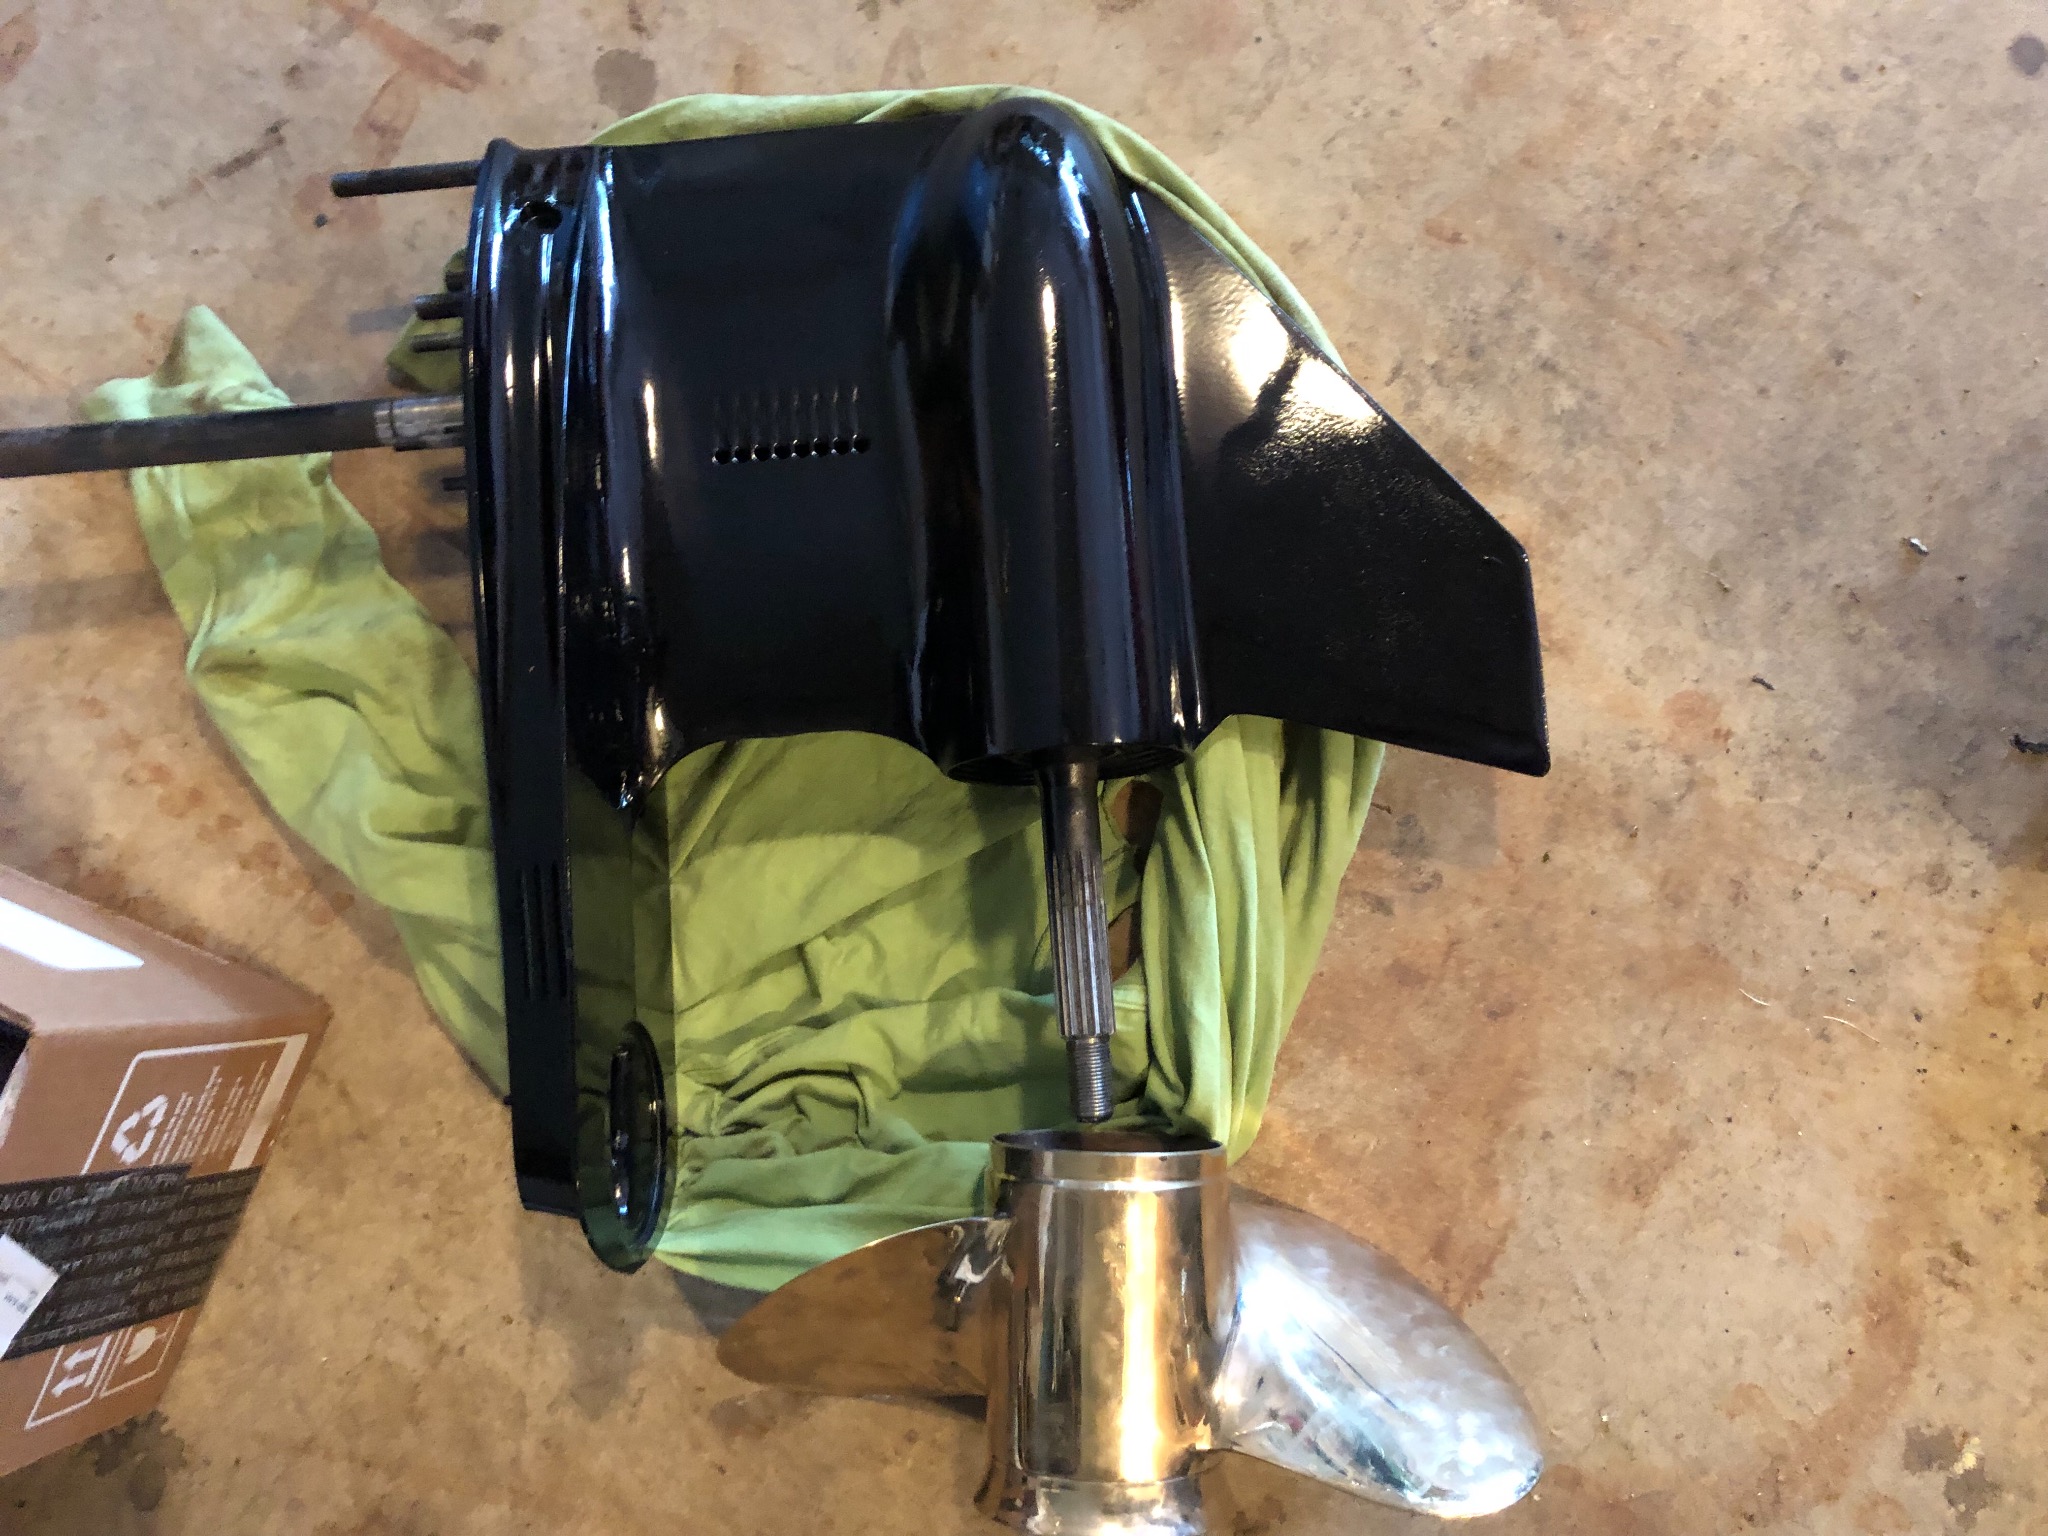
Got my lower unit and 2 blade prop back from North American Propeller. The repaired my broken skeg which only had 50 percent left. They also welded a drilled hole and chip on the ventilation plate and painted it. Also got a new hub put in the 2 blade. Here are a couple pictures. Now I will have to clean the white overspray on the mid section, shocks, and clamp and eventually find time to paint the whole motor since the lower now looks like new.
Attachments:

Please Log in or Create an account to join the conversation.

Dr.Go!

115 lower unit changes started 5 years 5 months ago #139793

  • ed-mc
  • Away
  • Platinum Boarder
  • Platinum Boarder
  • Posts: 1410
  • Karma: 232
  • Thank you received: 115
Looks great!

Please Log in or Create an account to join the conversation.

115 lower unit changes started 5 years 5 months ago #139794

  • Dr.Go!
  • Dr.Go!'s Avatar Topic Author
  • Offline
  • Contributing Member
  • Contributing Member
  • Posts: 1719
  • Karma: 19
  • Thank you received: 125
Thanks. Every time I try to do something without short cuts, the disease makes me end up slowing down and doing more work elsewhere in hopes I will be happier with everything if I can practice patience. I hope to use my old Running boat on weekends and need to start being more ambitious on weeknights on projects . I used to think I could hit a project hard and quickly get done, but the projects are a little bigger and I am not a kid on summer break from high school anymore. I guess it is time I learn to paint a little. Luckily I have some extra case parts I can practice on before I try the actual motor and mess up the one I want to use.

Please Log in or Create an account to join the conversation.

Dr.Go!
Time to create page: 0.336 seconds

Donate

Please consider supporting our efforts.

Glassified Ads

1967 23 ft powercat flybridge
( / Boats)

noimage
11-17-2024

Mercury outboard
( / Engines)

noimage
11-03-2024

Classic Mercury Outboard Motors
( / Engines)

Classic Mercury Outboard Motors
10-18-2024

FG Login

FiberGoogle

Who's Online

We have 5350 guests and one member online