Welcome, Guest
Username: Password: Remember me
  • Page:
  • 1

TOPIC: Water impeller posting

Water impeller posting 10 years 3 weeks ago #101887

  • 63 Sabre
  • 63 Sabre's Avatar Topic Author
  • Offline
  • Contributing Member
  • Contributing Member
  • Posts: 4676
  • Karma: 147
  • Thank you received: 167
Has anyone ever done a step=by=step picture procedure for changing an impeller on an OMC? If not, I'm about to do it for a '72 65hp Rude. and will make a string as I go at it with detailed pictures of where bolts are, how to get at them etc.
I know this is standard operating procedure for some of us "oldies" but might be useful for someone who has never done it before.
Cal

Please Log in or Create an account to join the conversation.

Re:Water impeller posting 10 years 3 weeks ago #101888

I'll be removing the lower end on my 67 60hp sportfour possibly this weekend or next. I'd be happy to take pics along the way. I've already done one in a 64 90hp starflite.

Please Log in or Create an account to join the conversation.

Re:Water impeller posting 10 years 3 weeks ago #101890

Great idea Cal, plenty of folks have no idea how easy it really can be.
Bob

Please Log in or Create an account to join the conversation.

Re:Water impeller posting 10 years 3 weeks ago #101892

  • 63 Sabre
  • 63 Sabre's Avatar Topic Author
  • Offline
  • Contributing Member
  • Contributing Member
  • Posts: 4676
  • Karma: 147
  • Thank you received: 167
Brandon, great idea! Post some pictures along the way on the same thread. A good way to show some of the subtle differences but basic procedure.

Bob, I'm not going to rush the job but I'll get into some pretty good detail and hope to simplify it
Attachments:

Please Log in or Create an account to join the conversation.

Re:Water impeller posting 10 years 3 weeks ago #101896

  • 63 Sabre
  • 63 Sabre's Avatar Topic Author
  • Offline
  • Contributing Member
  • Contributing Member
  • Posts: 4676
  • Karma: 147
  • Thank you received: 167
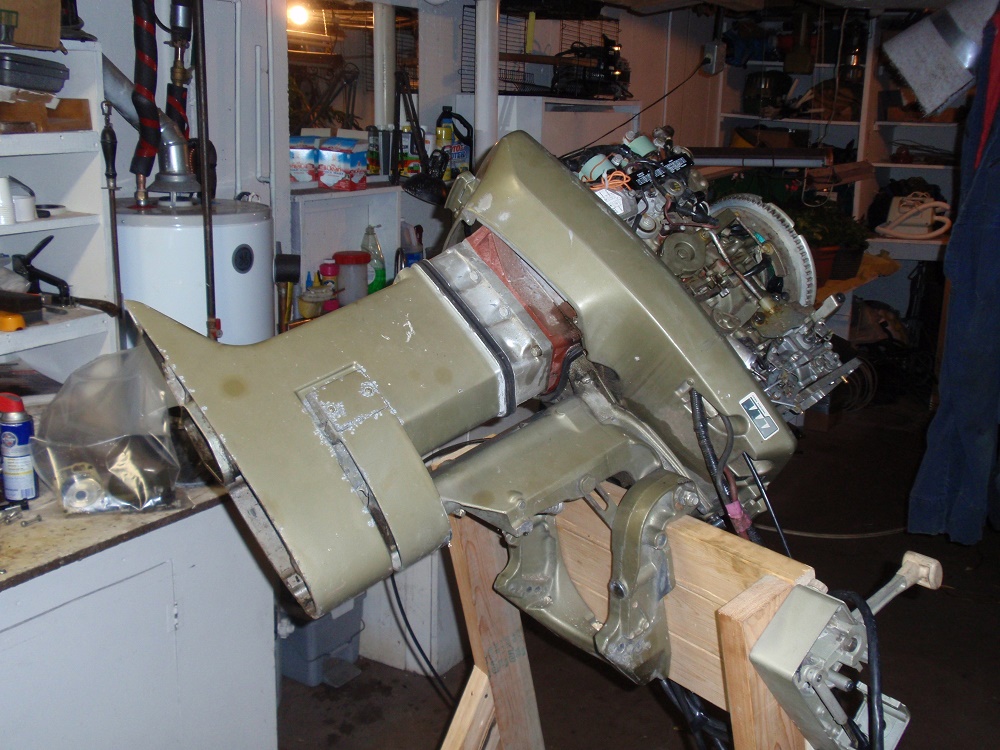
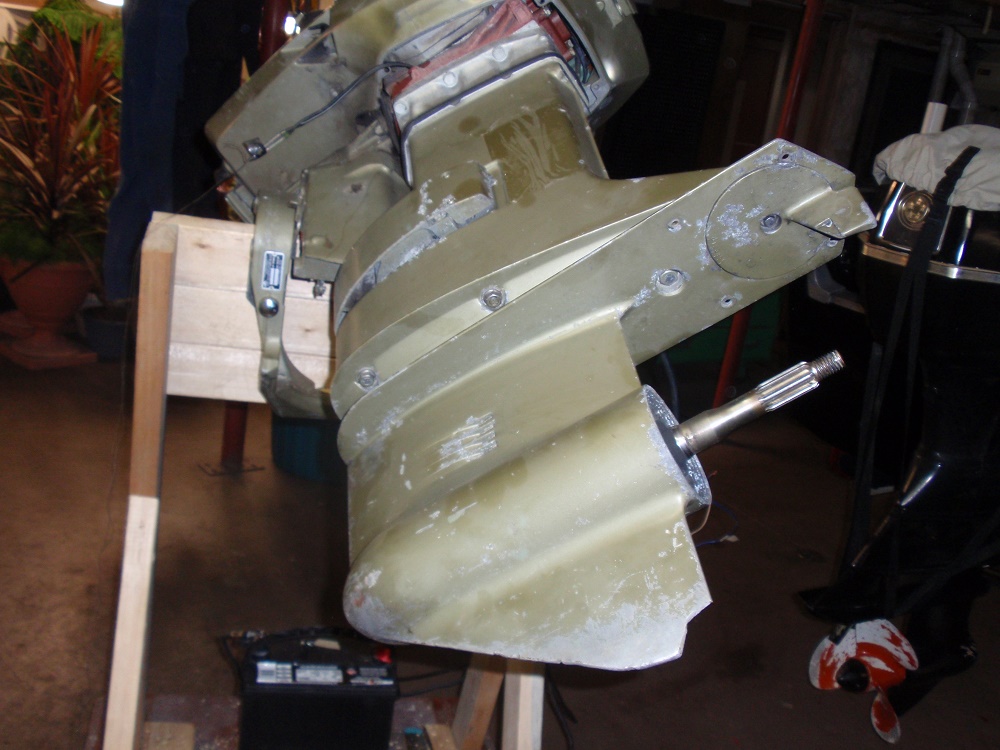
Step one is to evaluate the situation :laugh: Pretty easy to do if the motor is on a stand, just as easy if it's on the boat.
Take pictures so you know where things go when it comes time to reassemble.
This is an old motor that I saved from destruction, it was going to be junked and some parts were missing, nothing I couldn't find on ebay.
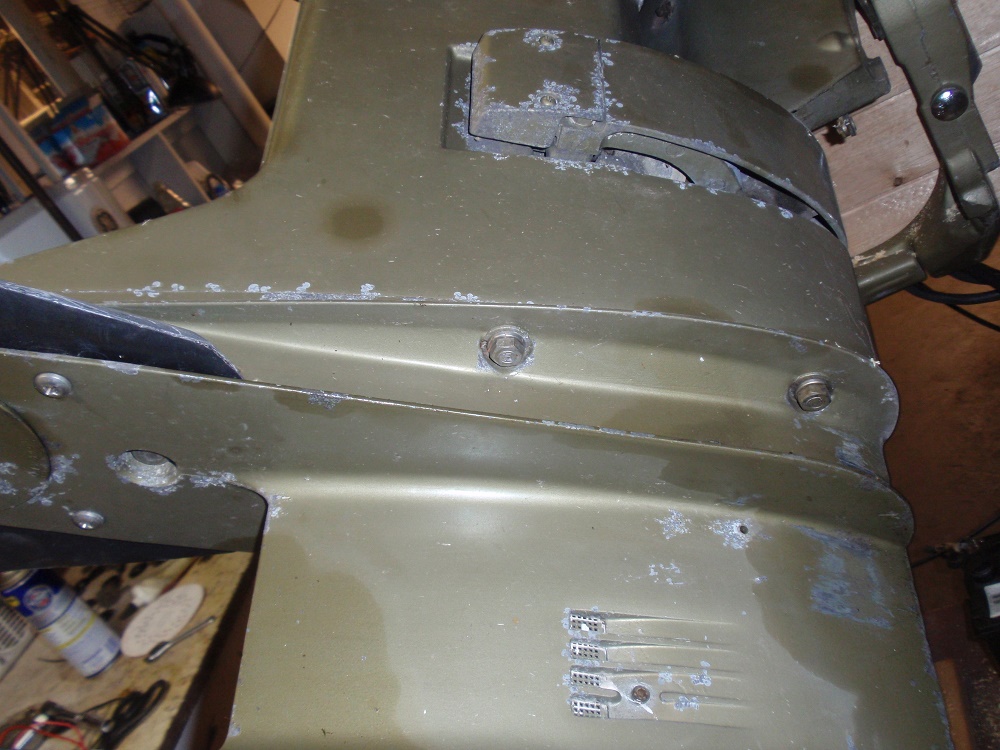
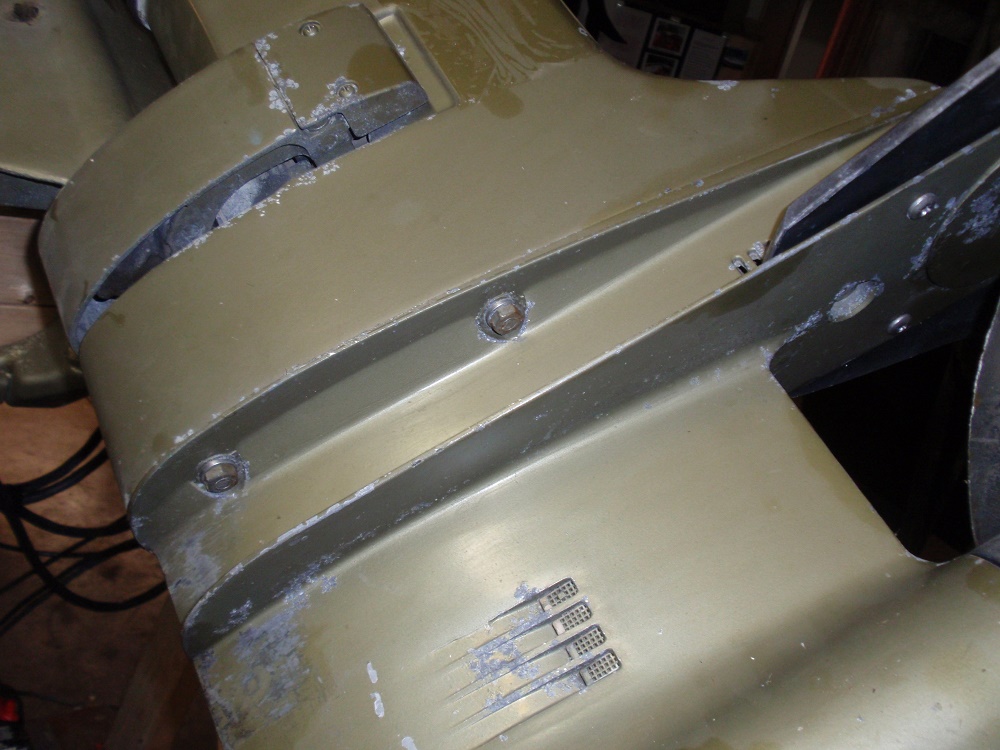
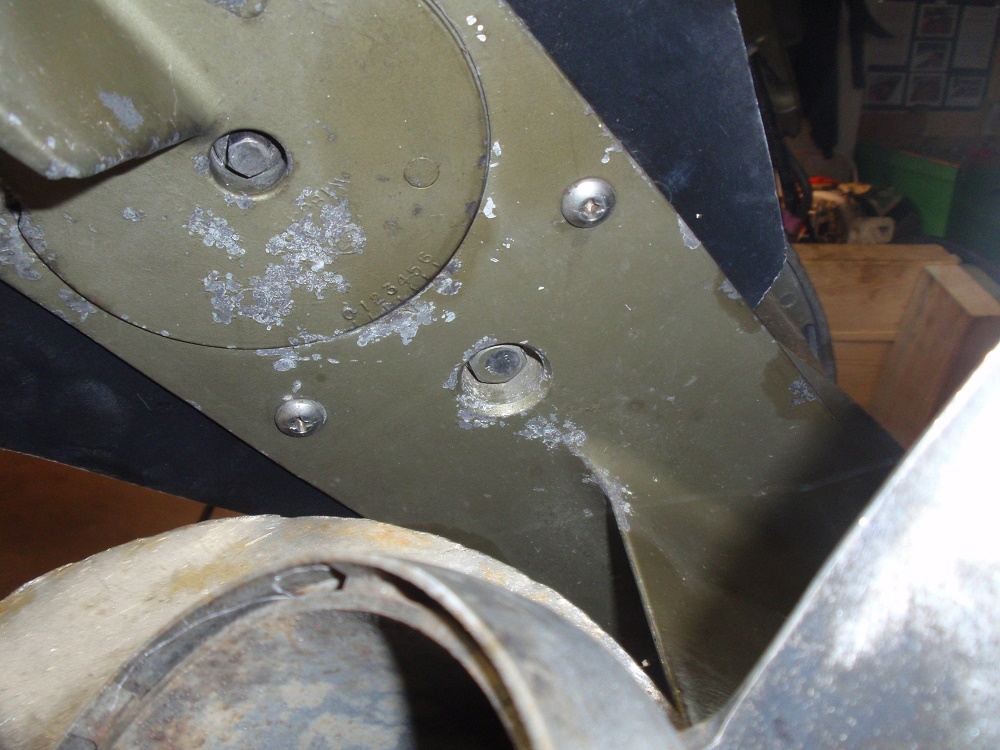
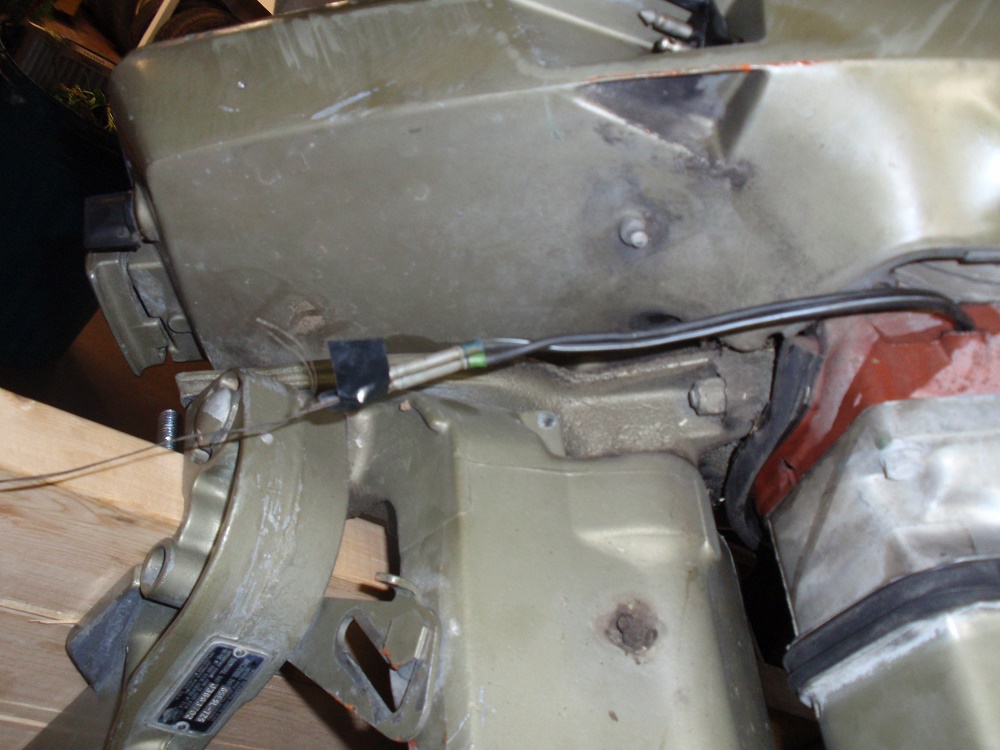
Where all 7, yes SEVEN bolts are that hold the lower unit in place.
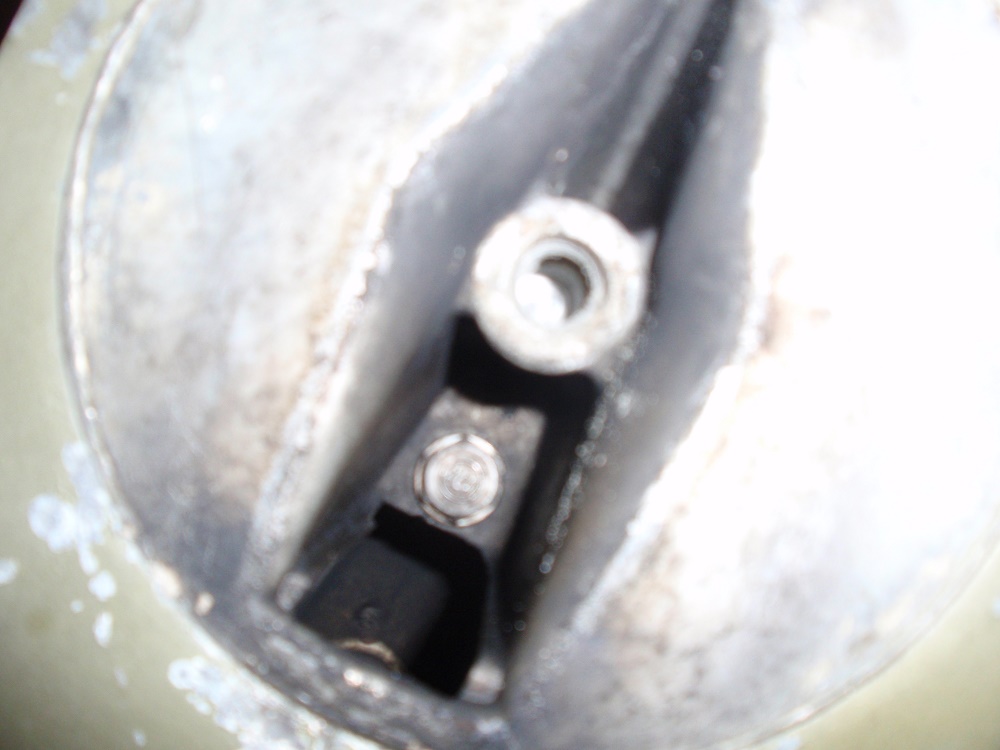
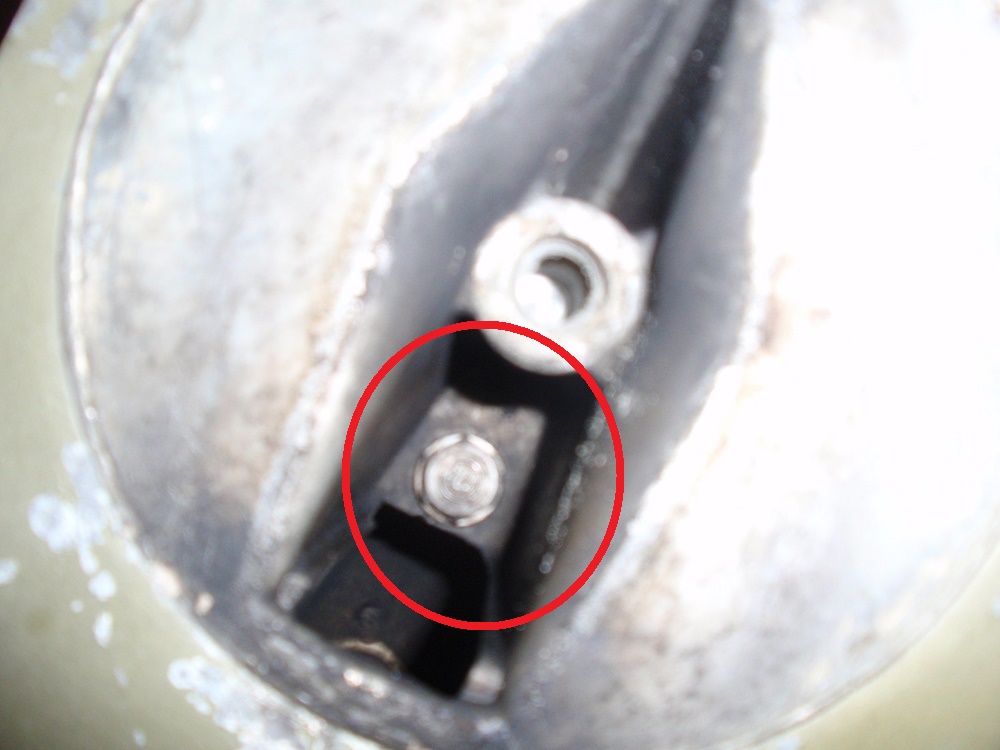
Only six are visible from the outside, the seventh bolt is hidden inside the LU under the trim tab. I'll get to that later.
Attachments:

Please Log in or Create an account to join the conversation.

Re:Water impeller posting 10 years 3 weeks ago #101898

  • 63 Sabre
  • 63 Sabre's Avatar Topic Author
  • Offline
  • Contributing Member
  • Contributing Member
  • Posts: 4676
  • Karma: 147
  • Thank you received: 167
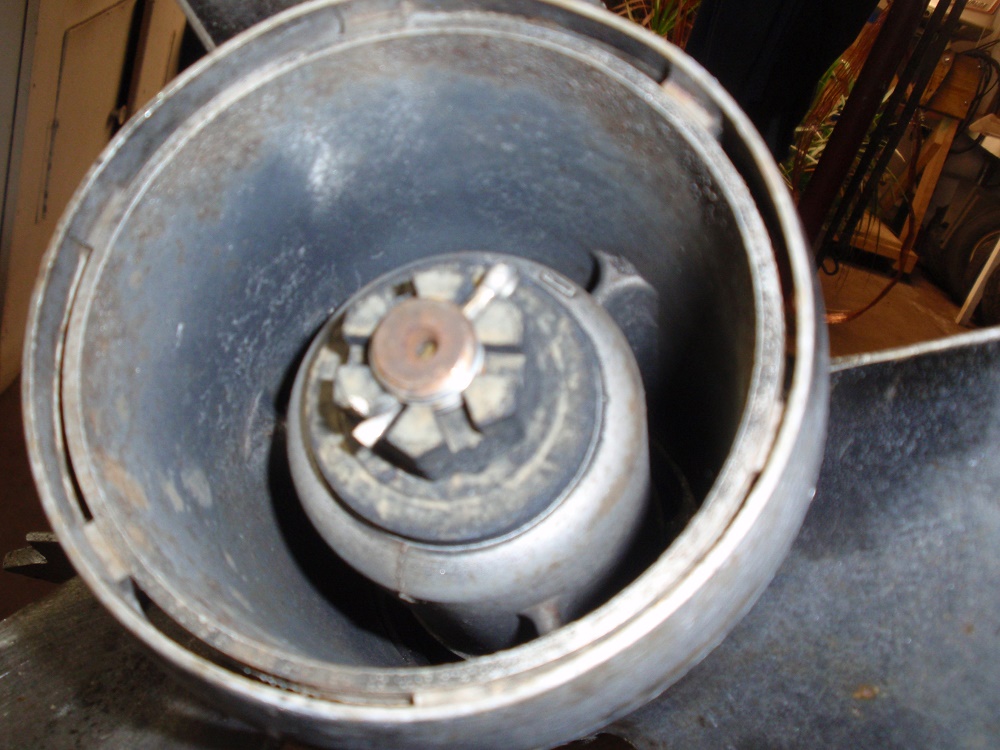
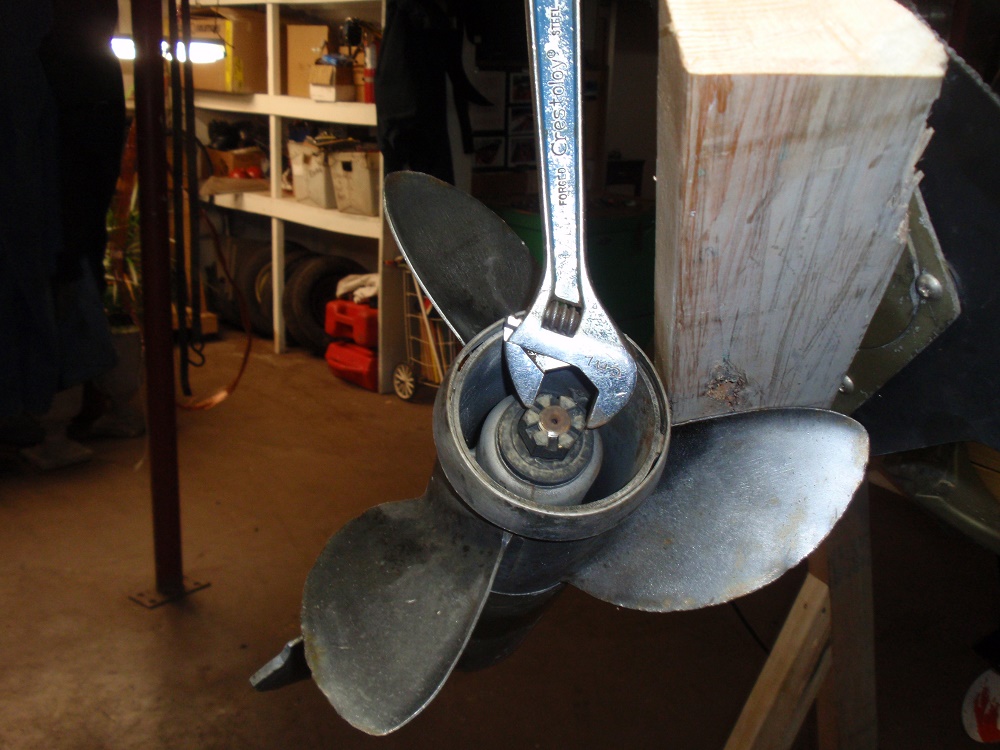
First remove the prop to make it easier to access the bolts. I used a piece of 2X4 to keep the motor from turning while loosening the prop nut. A socket wrench works better for this but The crescent works also since these nuts are not tightened to extreme. Keep in mind where all the thrust washers are and in which direction they are placed.

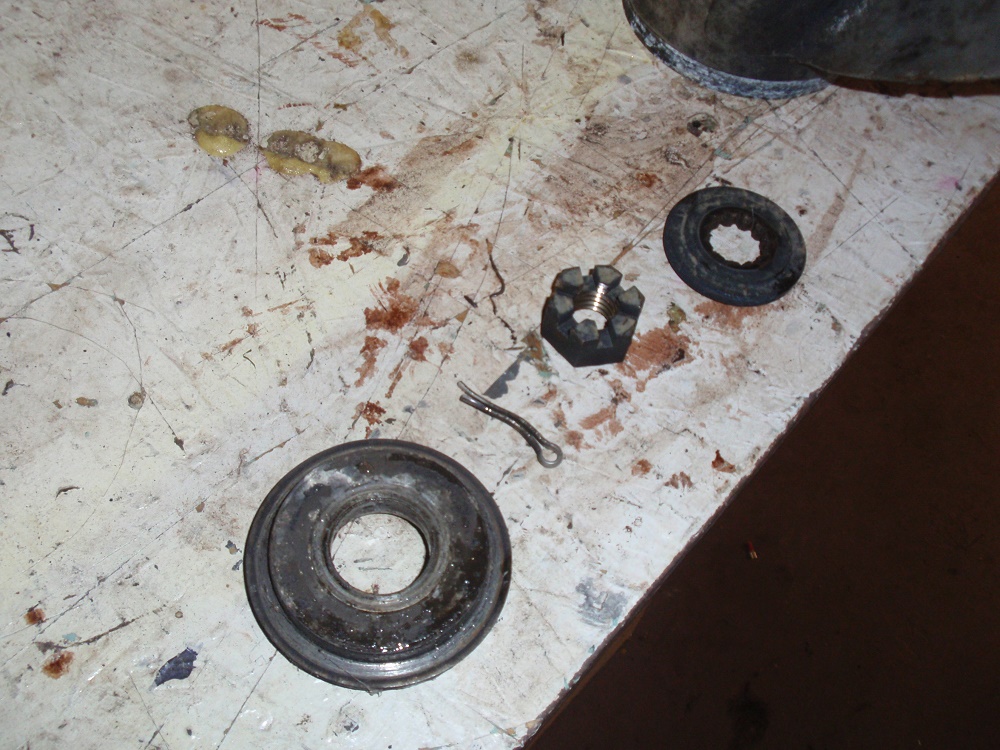
Remove the cotter pin, loosen the nut and remove the washer. Pull the prop off and then remove the thrust washer behind it.

This is what you should have.

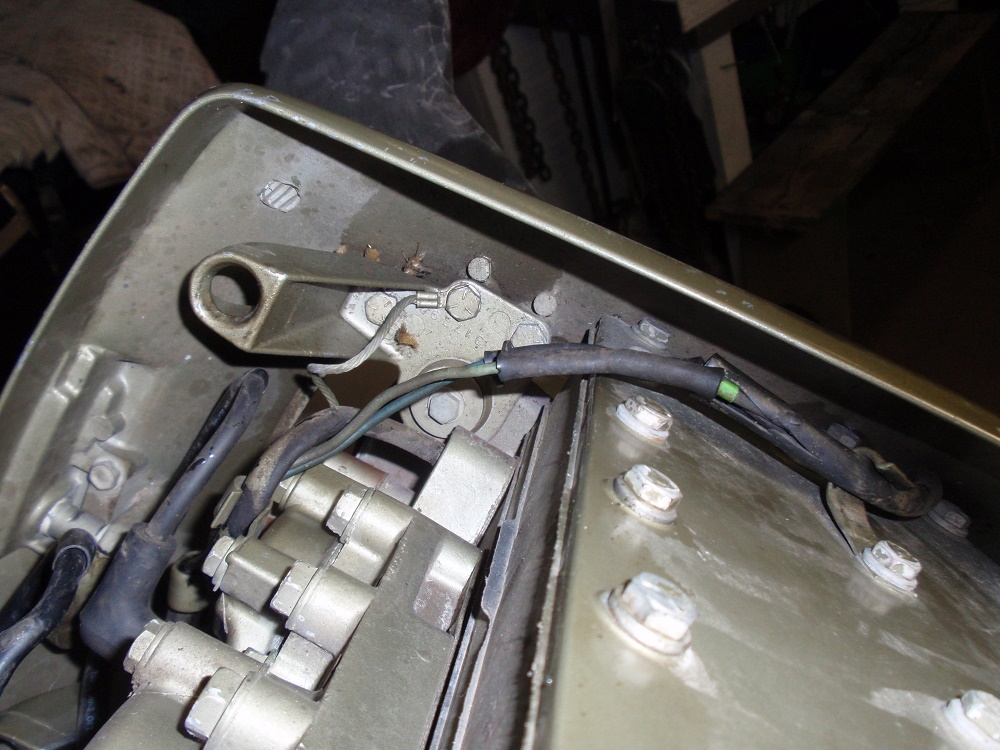
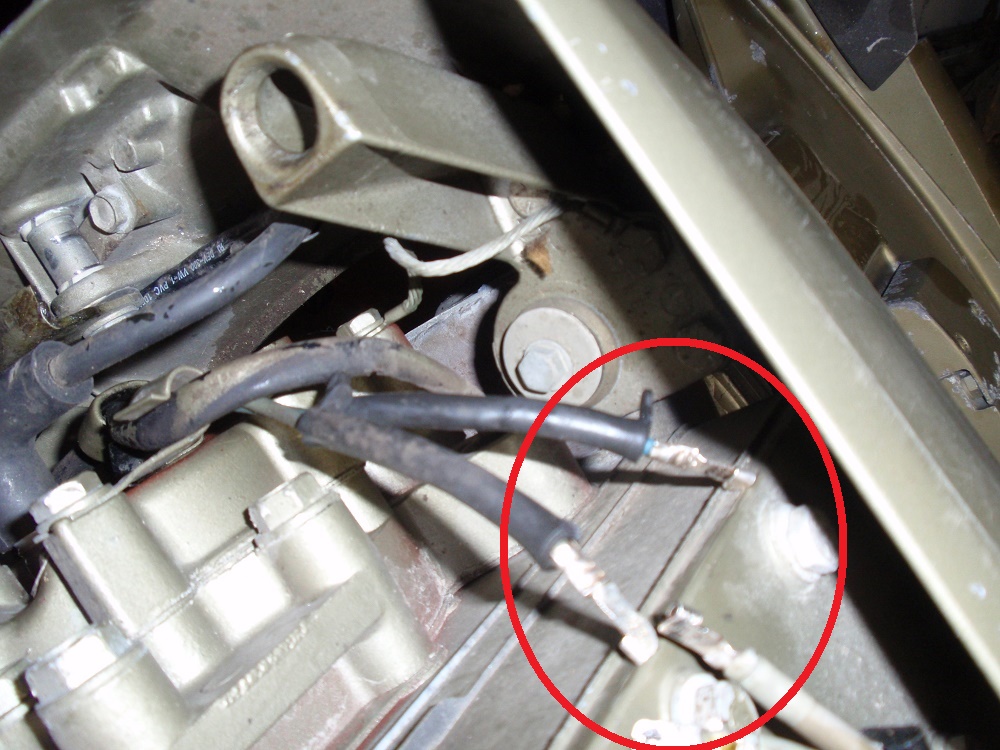
After taking the prop off I located and disconnected the blue and green wires that go to the lower unit to control the shift. These two wires are the same if you have the hydro shift or the selectric.

Disconnected by the knife connections.

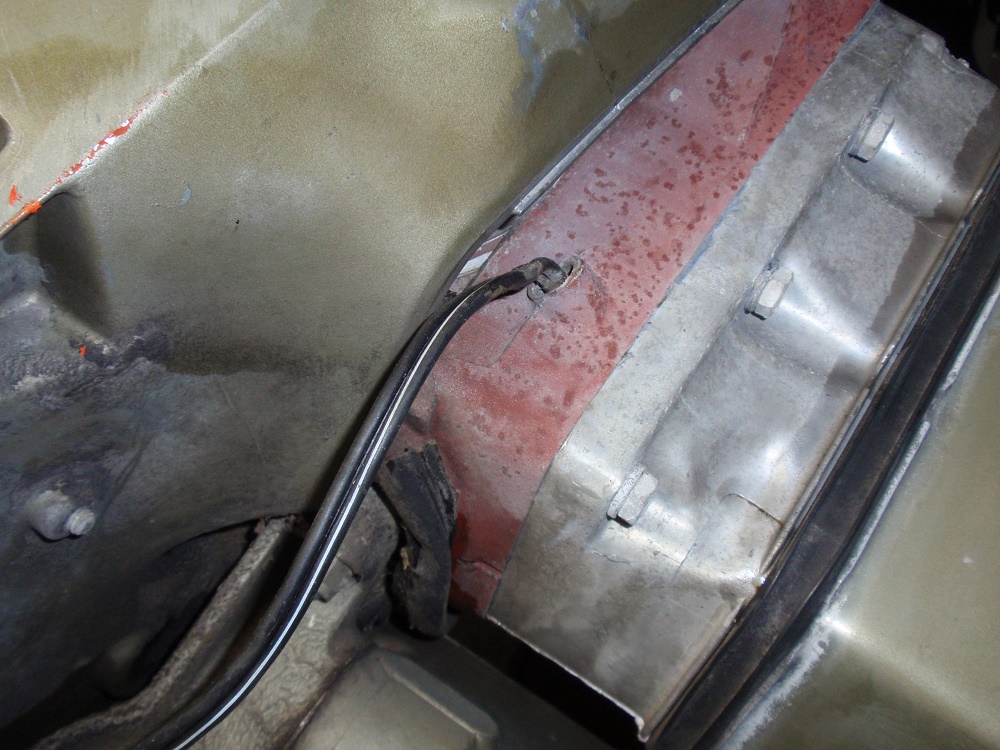
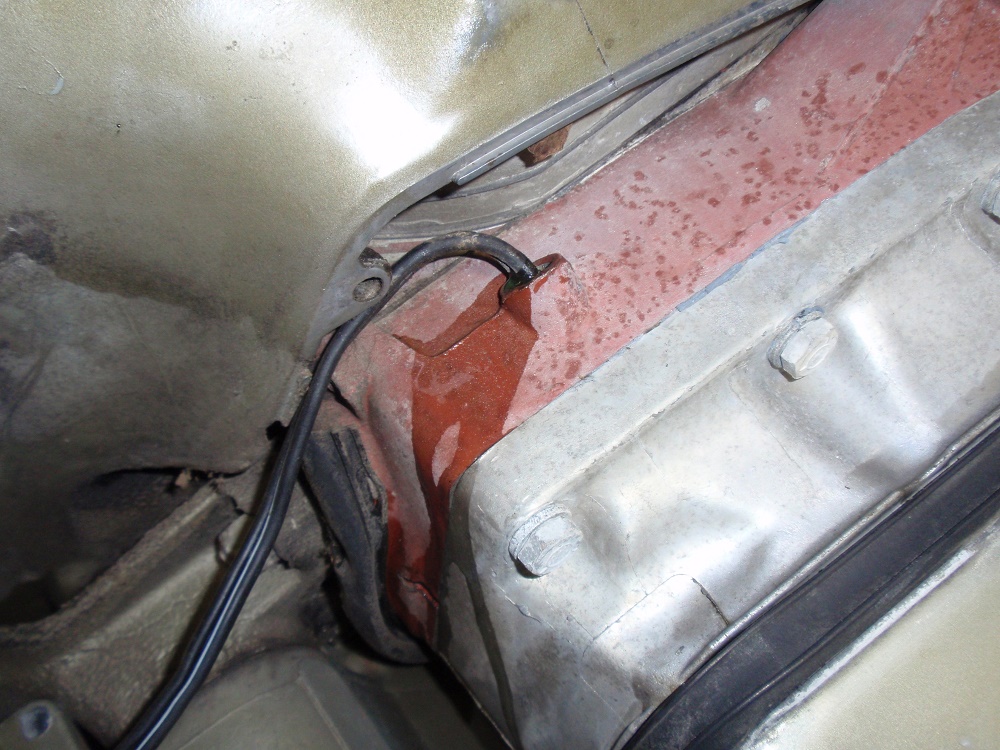
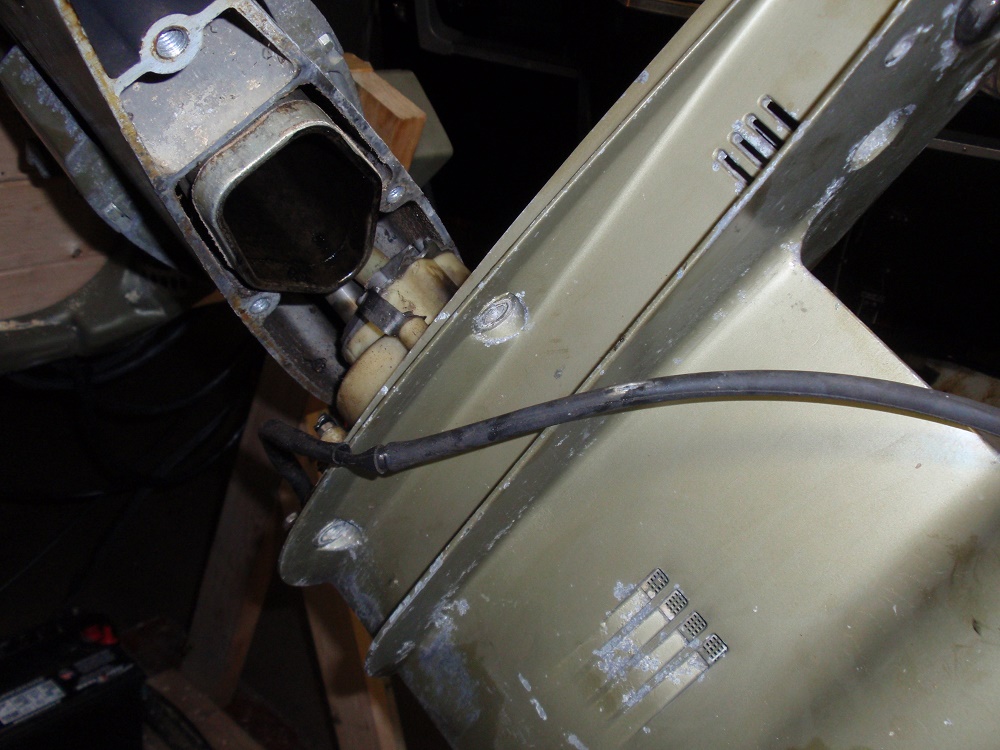
With this particular motor the lower engine cowl is missing so it's easy to see where the wires enter the lower leg.

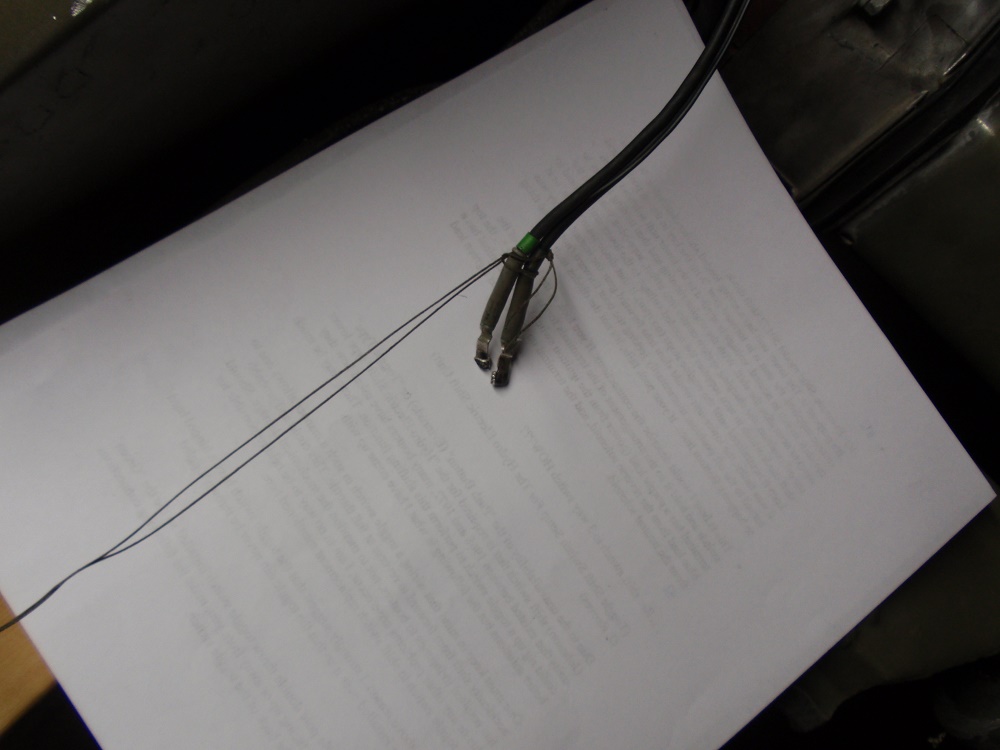
I tie string to the wires so when they are easier to retrieve when putting the unit back together.

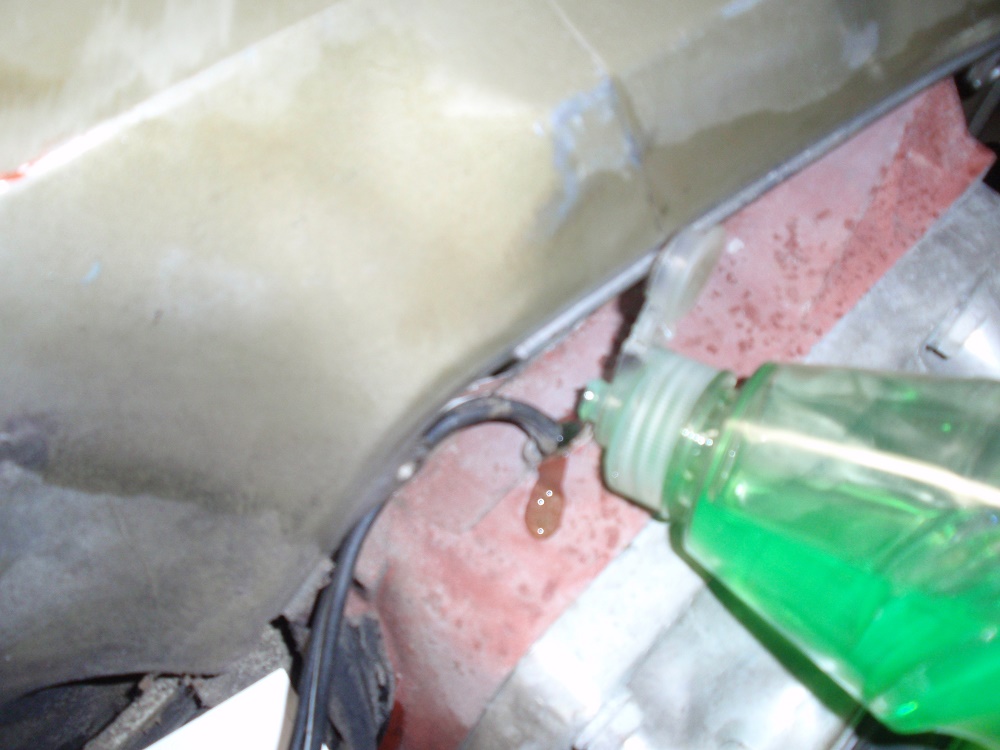
Then lubricate the wires by the entrance hole with liquid dish soap to easy pulling them through.

While the soap and wires are soaking up begin to dismantle the lower unit. First start by removing the trim tab using a 3/8" socket.

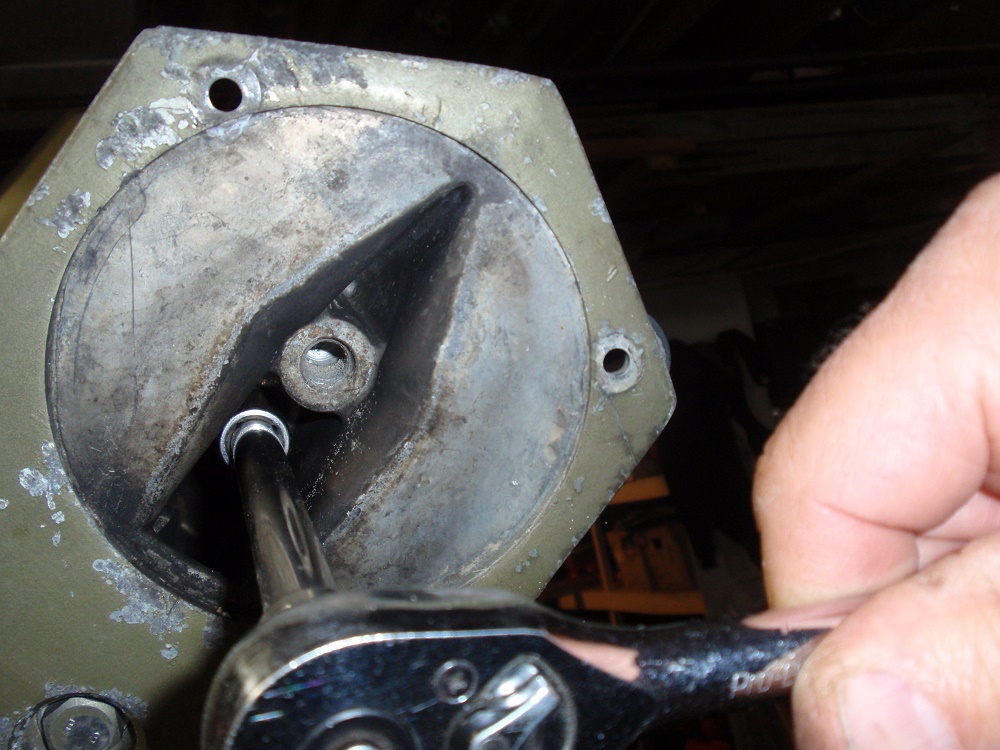
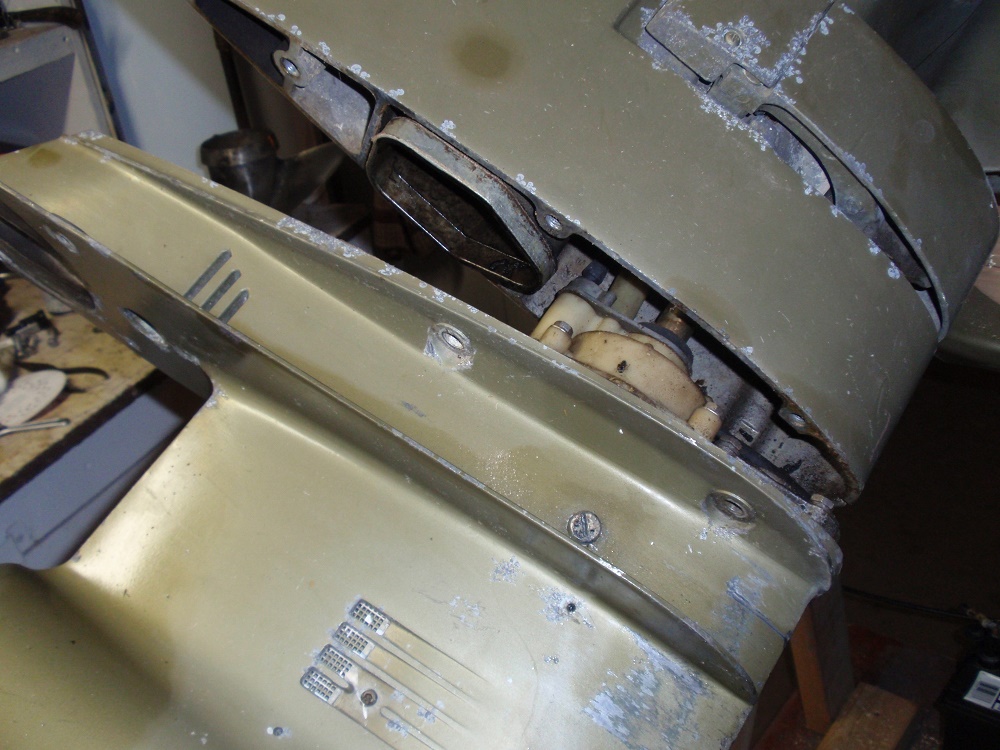
When the trim tab is removed you can see the hidden bolt inside the leg.

This bolt is 4" long and needs a 1/2" socket with an extension to remove.

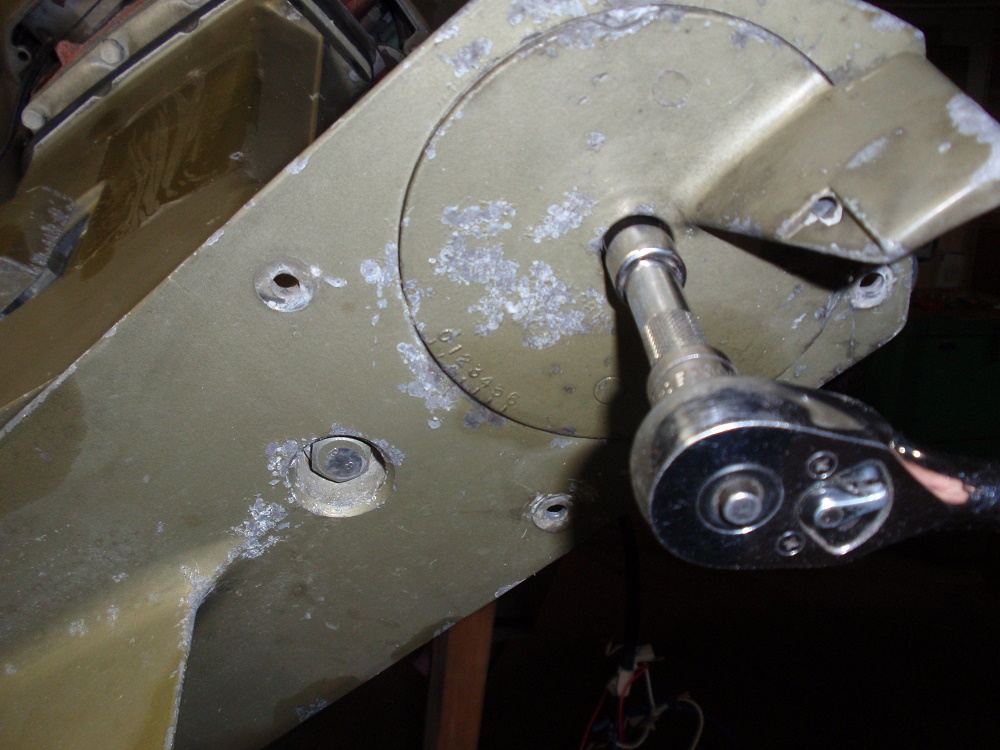
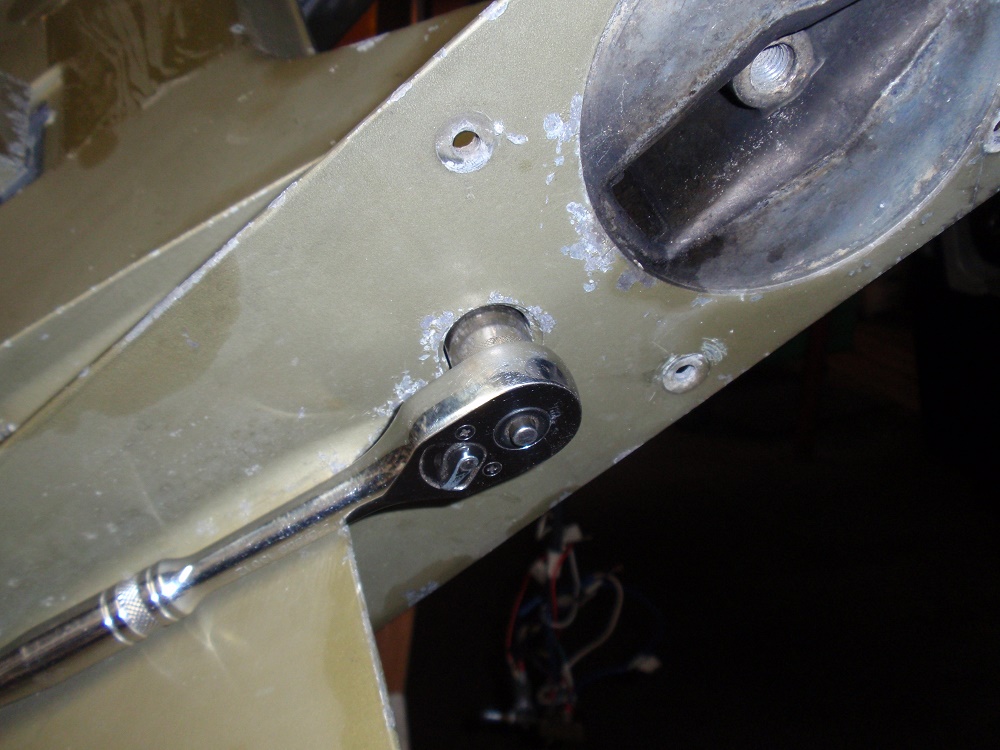
Next comes the obvious center bolt in the middle of the unit.
This takes a 5/8" socket.

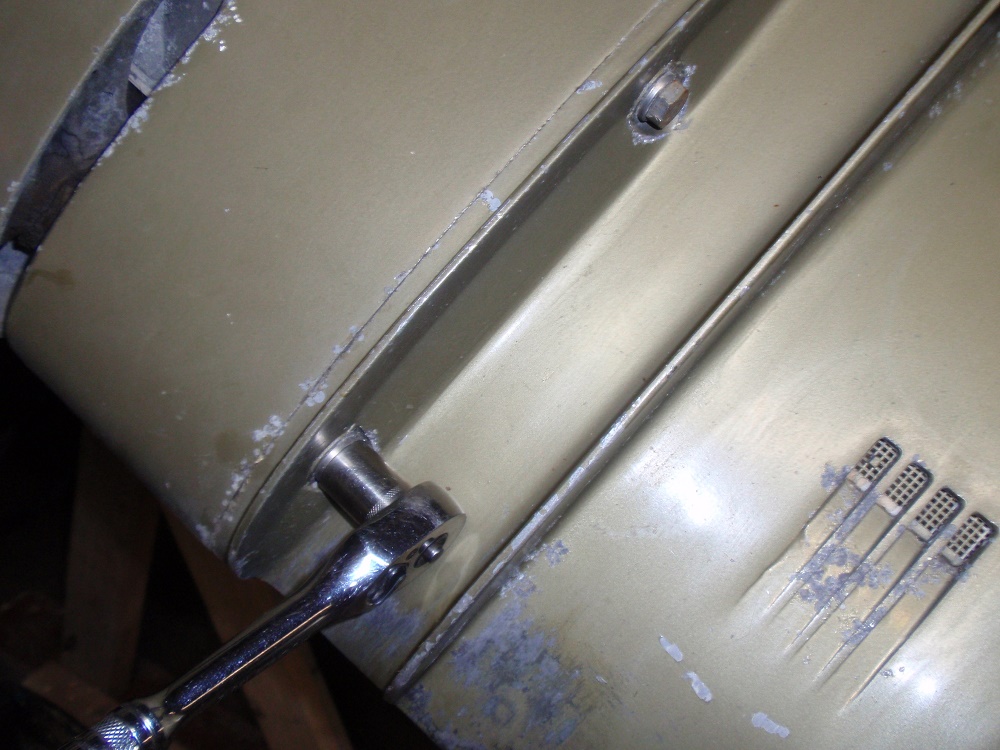
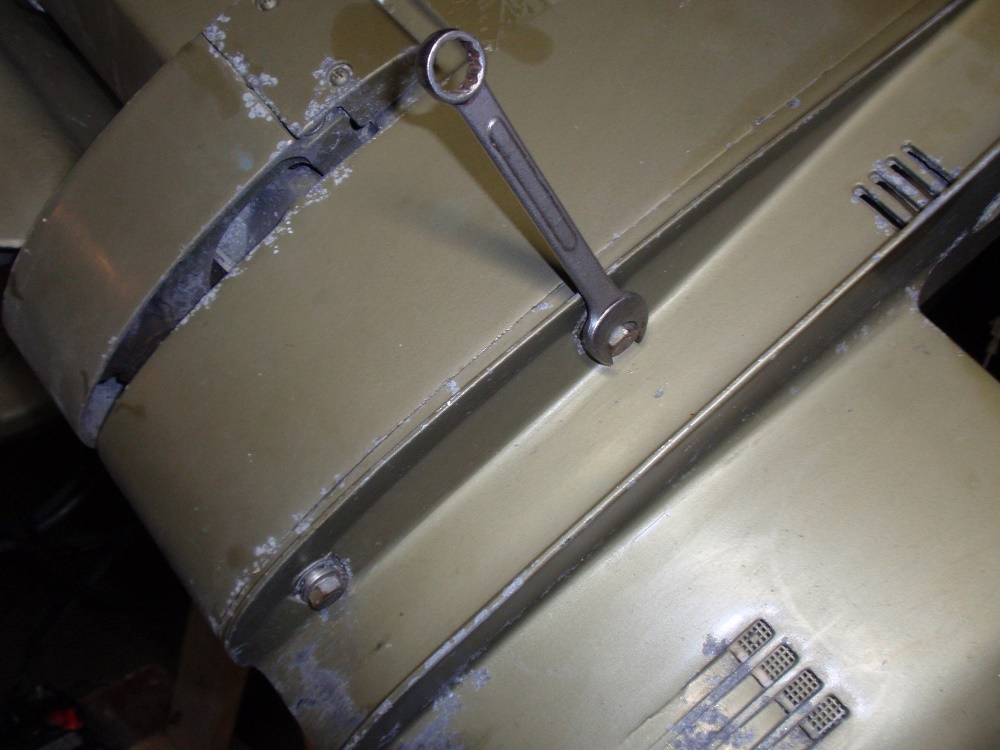
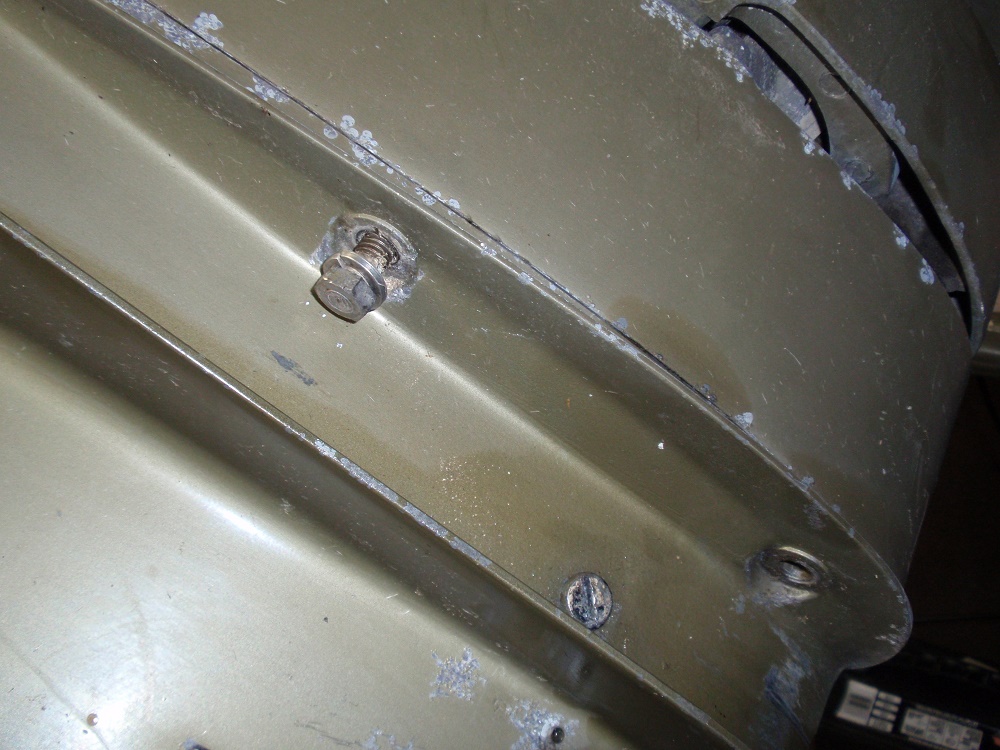
When that bolt is removed the only ones left are the ones on the sides, two on each side. These bolts take a 9/16" socket AND a open end wrench.

You will need the open end wrench because if you use a ratchet and unbolt too far you will jam the wrench into the bottom. I loosen all the bolts on both sides and then finish the job with the open ender.


Leave one of the remaining bolts in place but loose.

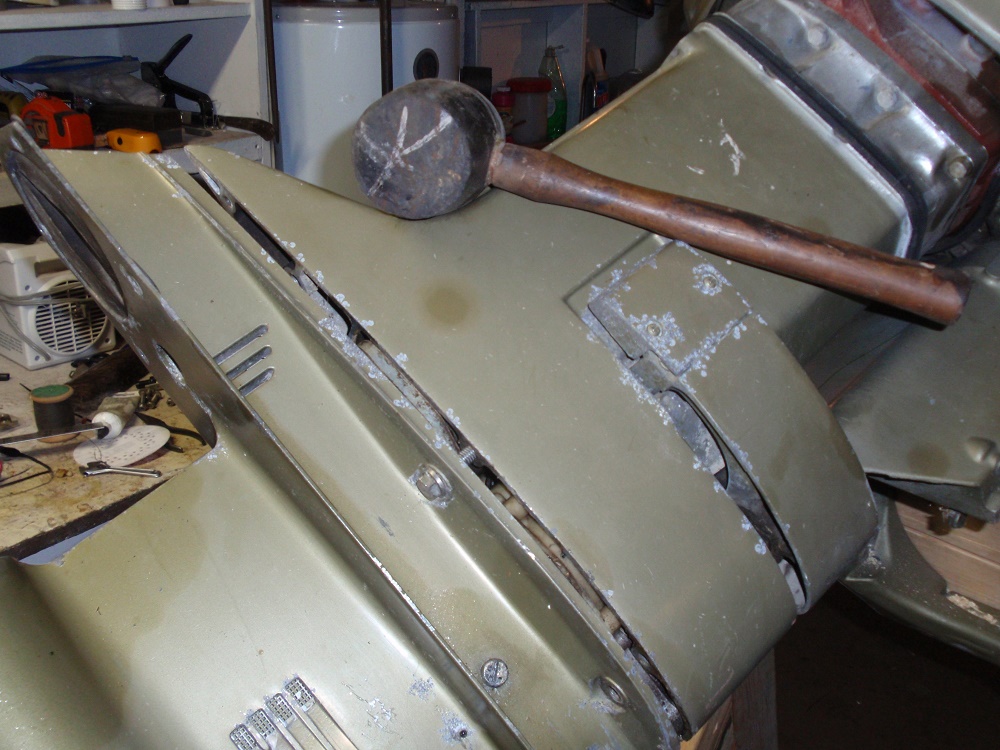
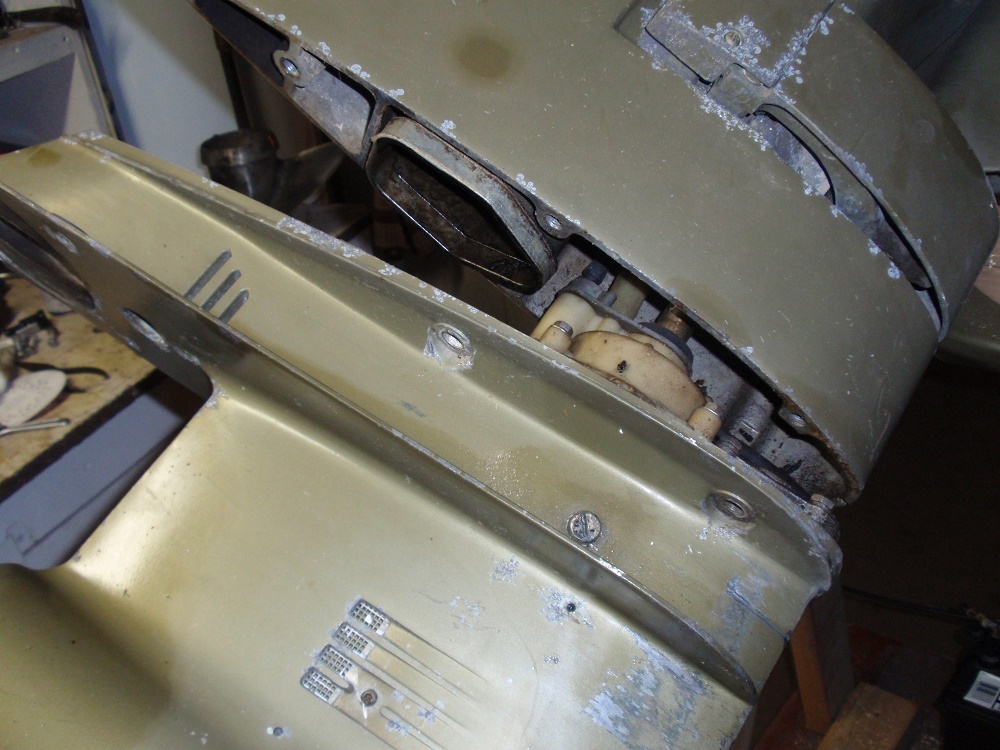
By this time the liquid soap has soaked into the wire opening. Sometimes the two unit pieces will stick together so you will need to do some persuading with a dead head hammer or I use a rubber mallet. Do not use a steel hammer...it's only aluminum. Gently nudge the two halves apart. The remaining bolt is to prevent the lower from actually falling off and causing damage to the unit itself, pulling wires apart or worse yet falling on your feet.

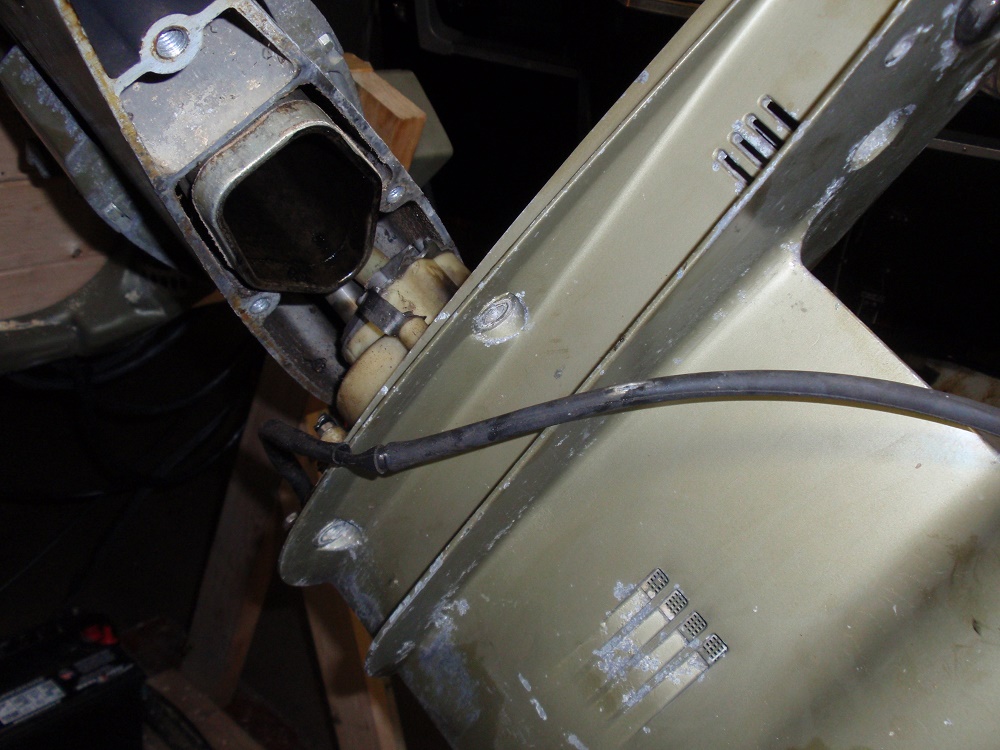
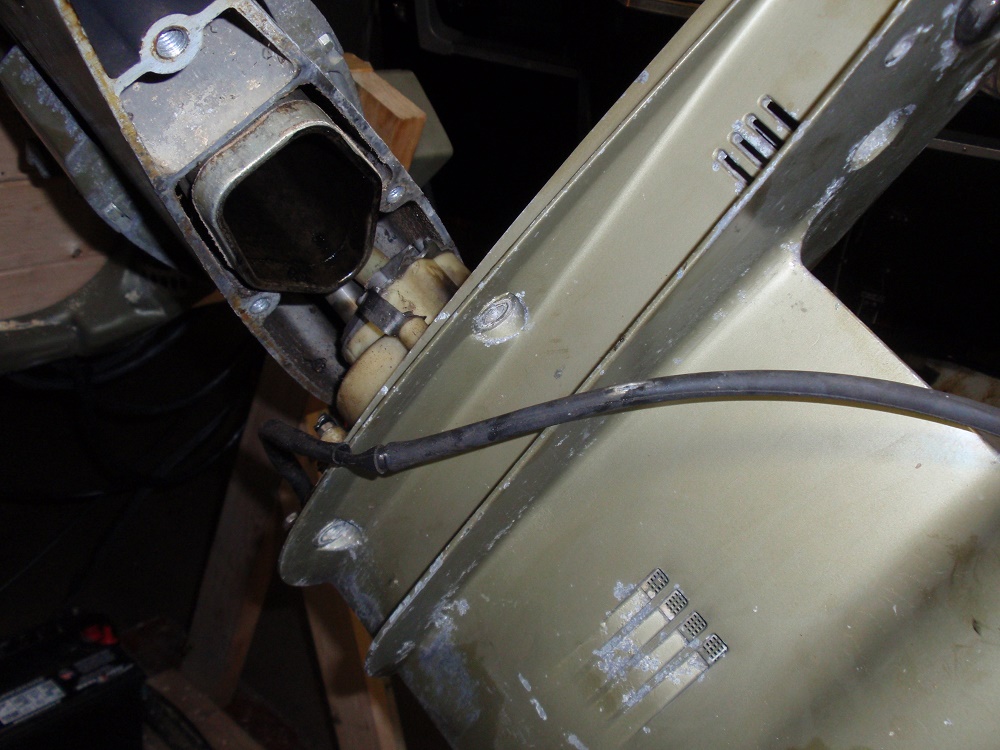
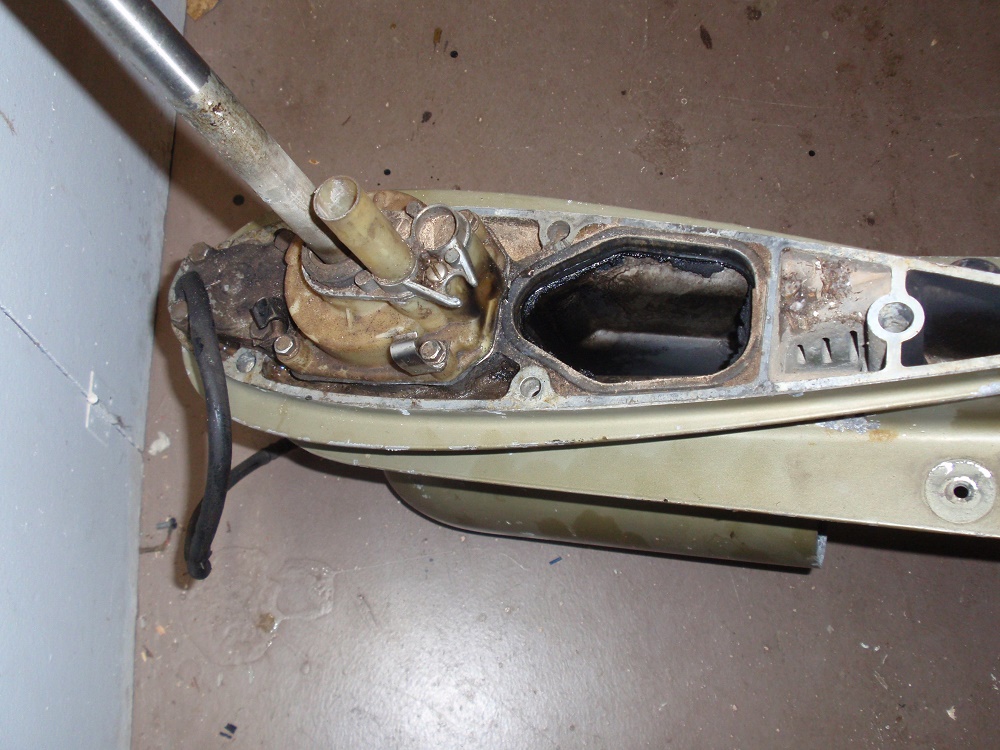
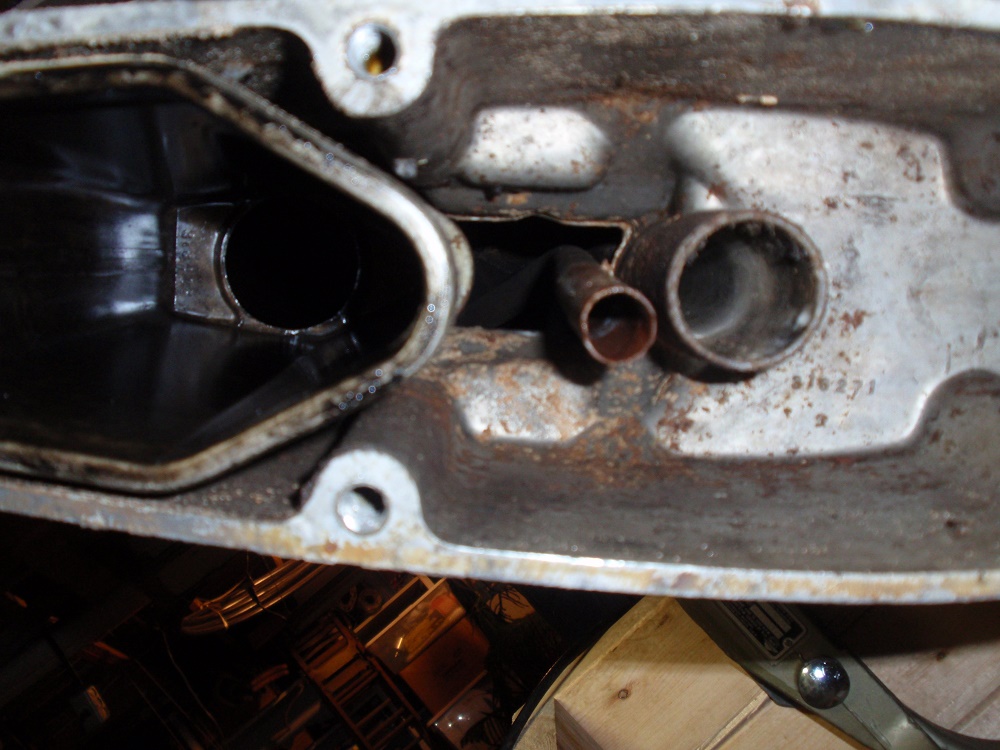
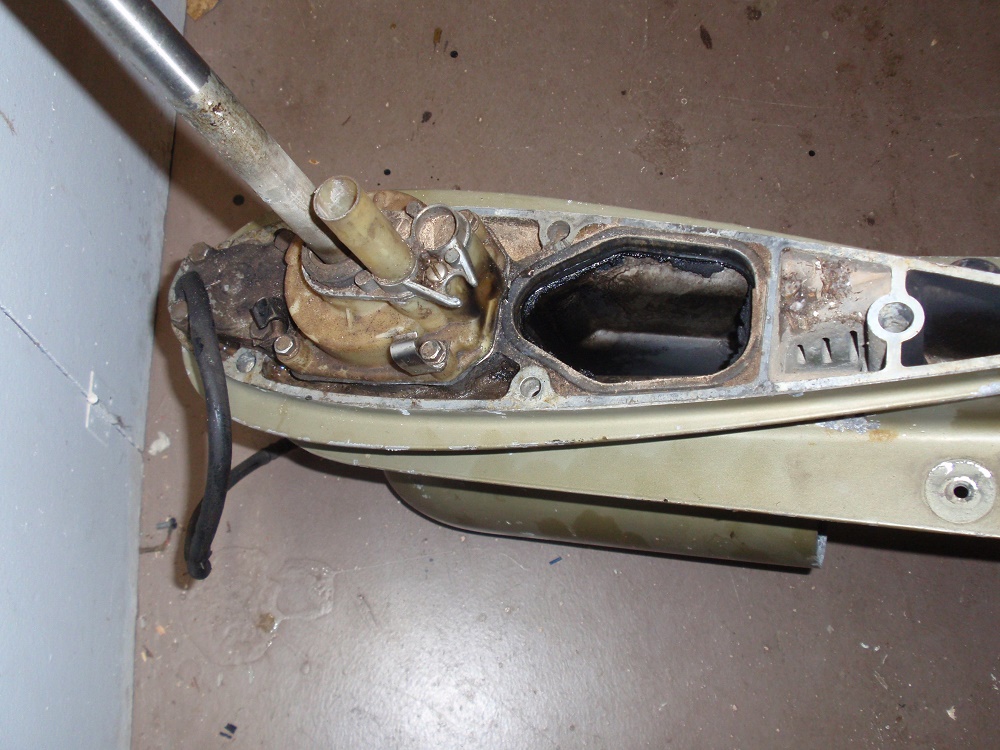
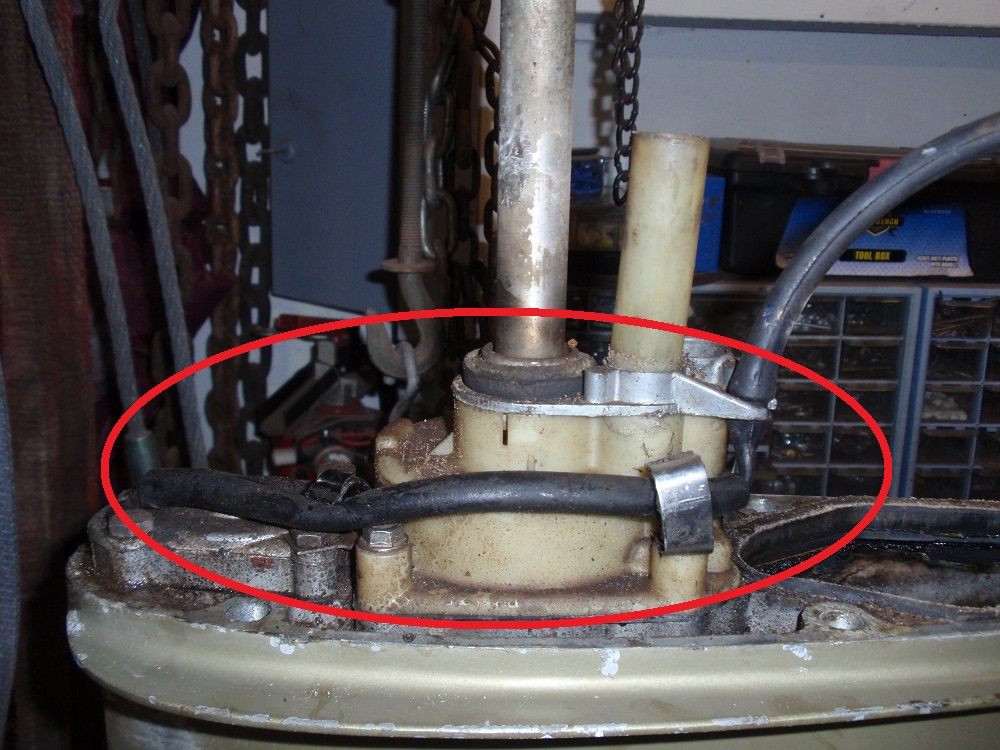
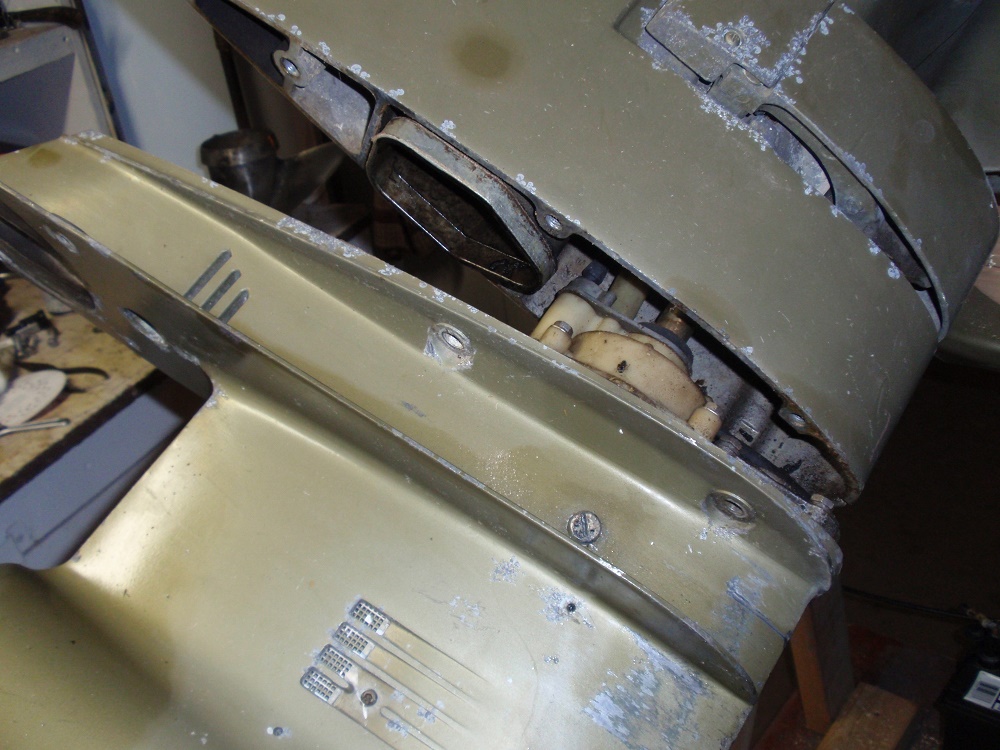
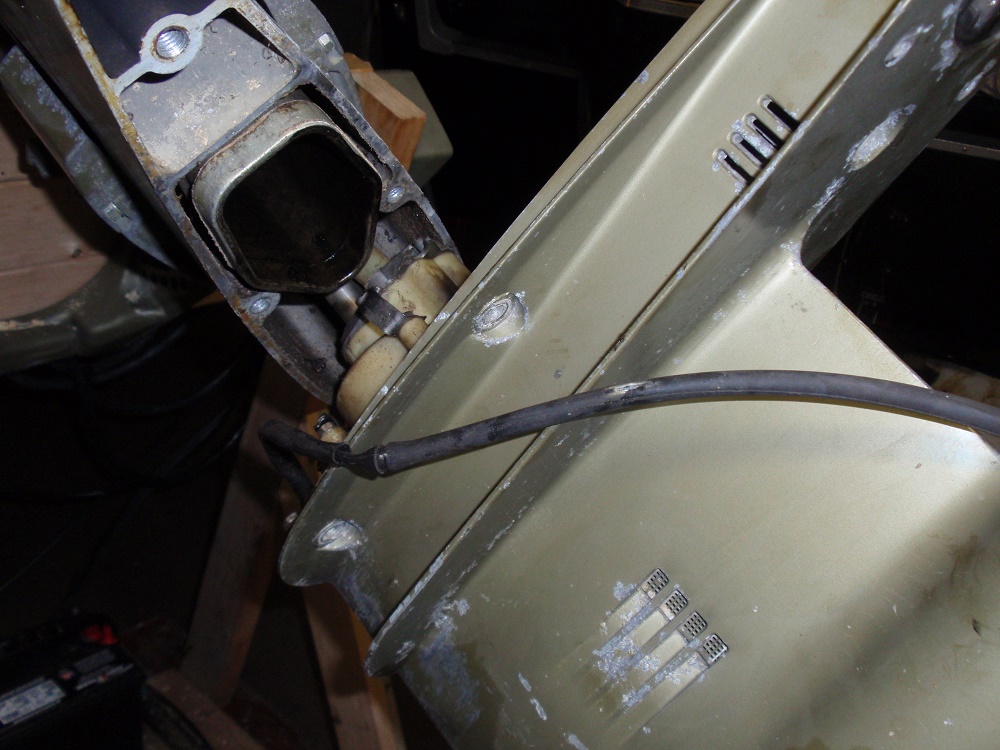
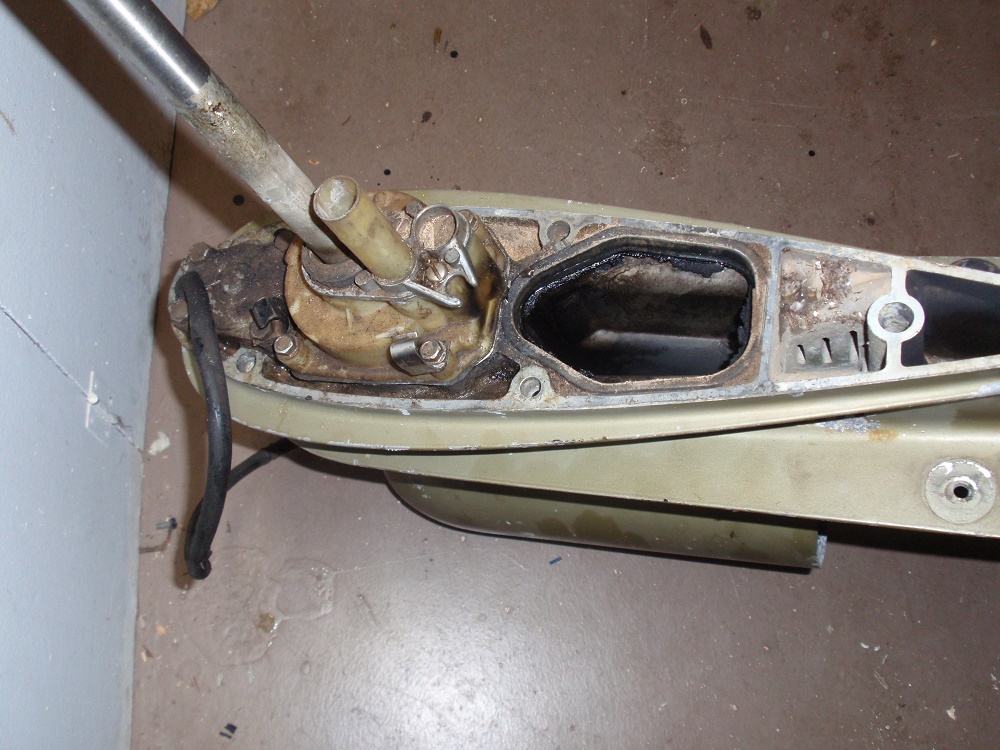
While holding onto the lower you can remove the remaining bolt and Gently pull the unit apart being careful not to damage either the water tube or the shift wires. [img]http://www.fiberglassics Once it's opened up you can see the wires for the shifter and the water tube connection. Looking at this picture you can see that the shift wires are not in their proper position. Whoever worked on this unit previously failed to put the wires in their holders. Lucky they weren't damaged during assembly. [img]http://www.fiberglassics.com/media/kunena/attachments/legacy/images/PA300060-20141104.JPG

Please Log in or Create an account to join the conversation.

Re:Water impeller posting 10 years 2 weeks ago #102047

  • 63 Sabre
  • 63 Sabre's Avatar Topic Author
  • Offline
  • Contributing Member
  • Contributing Member
  • Posts: 4676
  • Karma: 147
  • Thank you received: 167
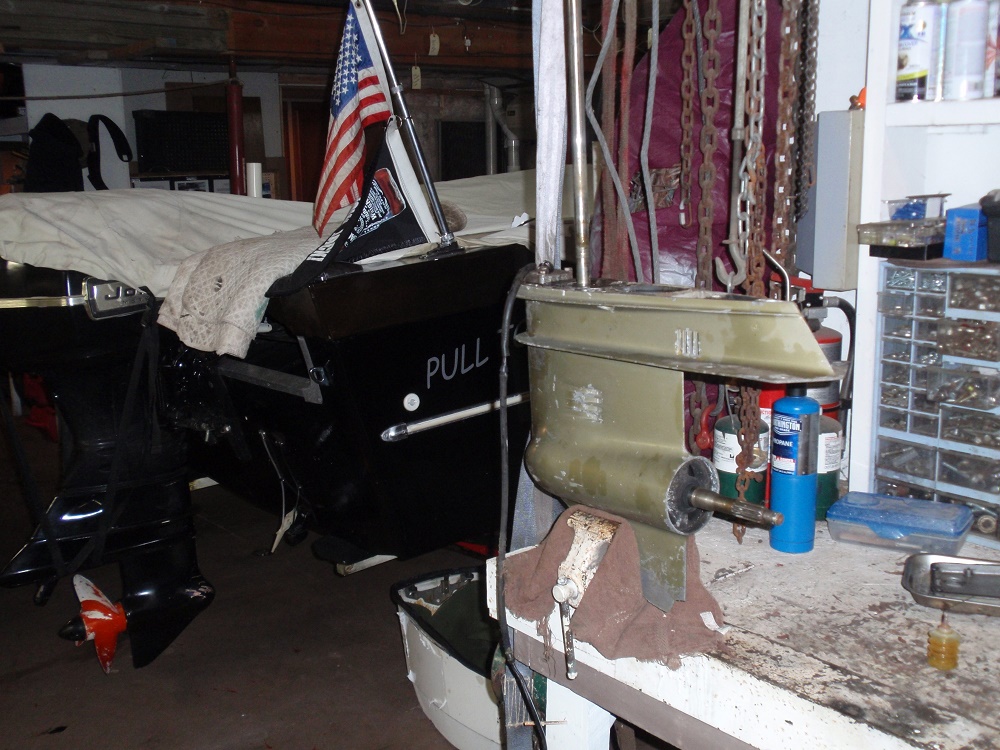
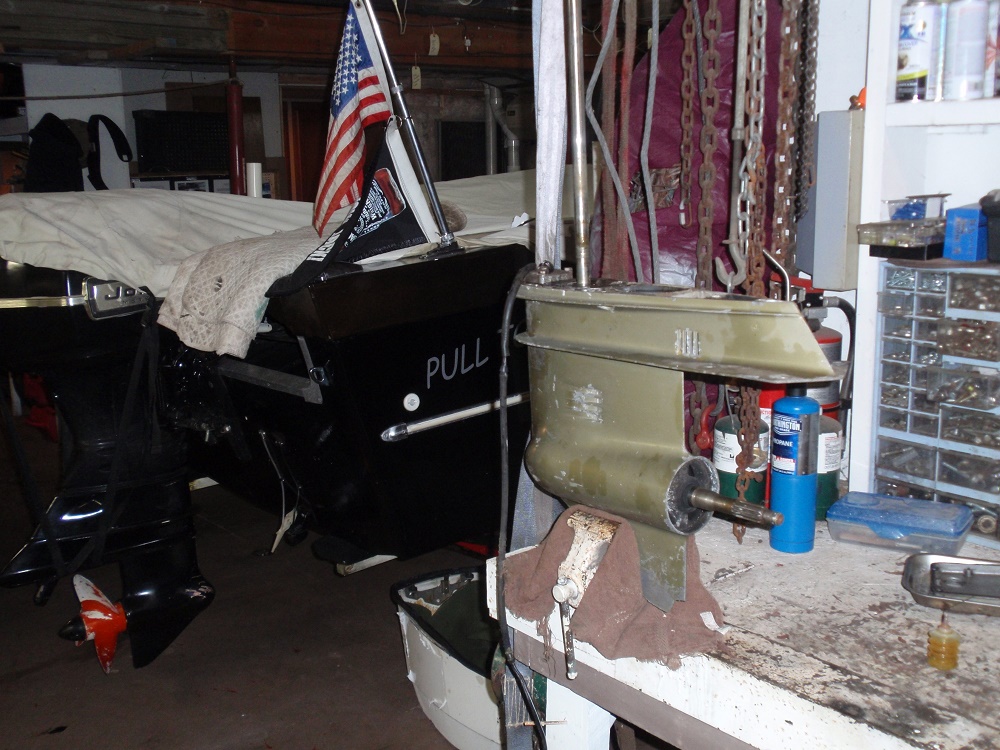
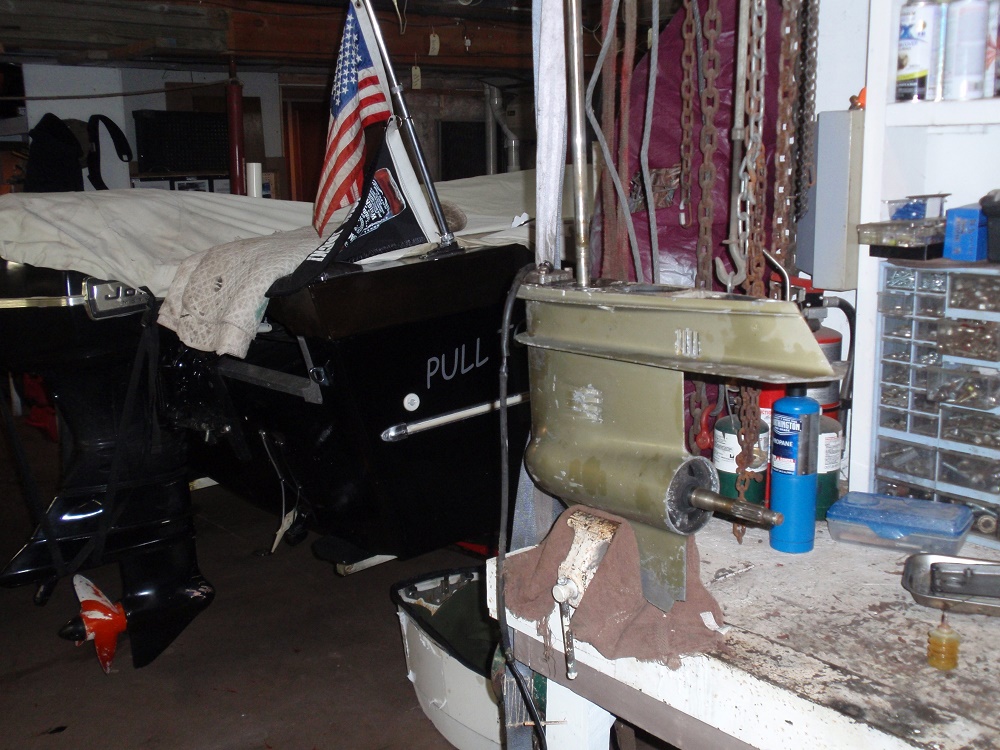
OK, Now the hard part is done, almost. Find a suitable place where you can work on the unit. I use a bench vise cushioned with a few rags. Make sure whatever you use is safe. If you are working on the ground or a garage floor put something underneath the unit because sooner or later something will drop and get lost.

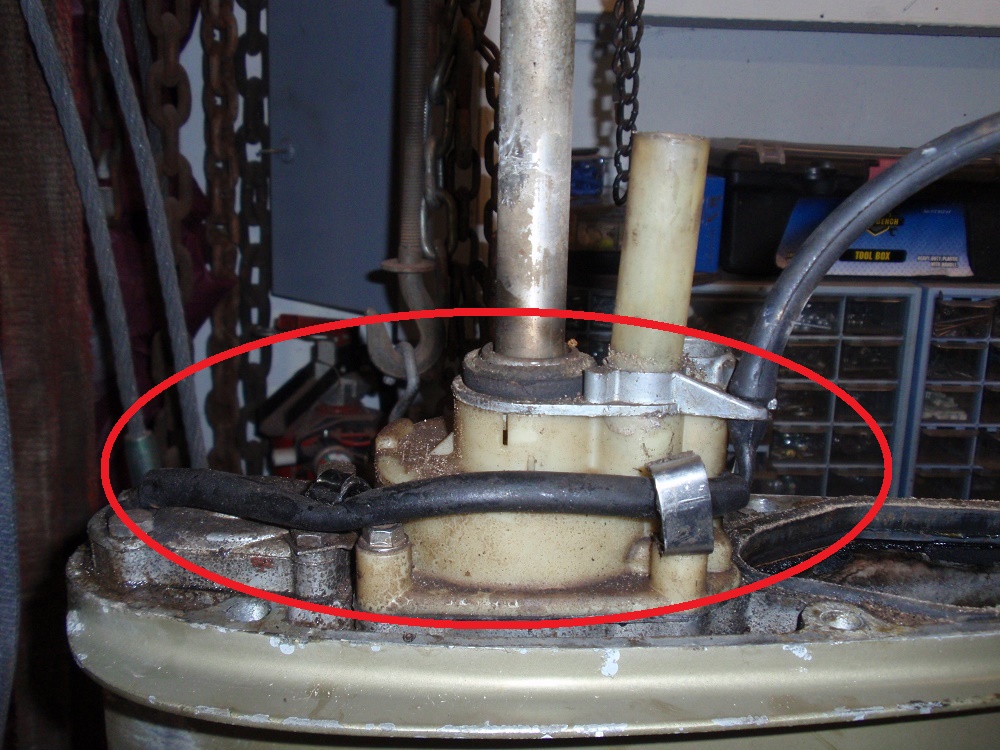
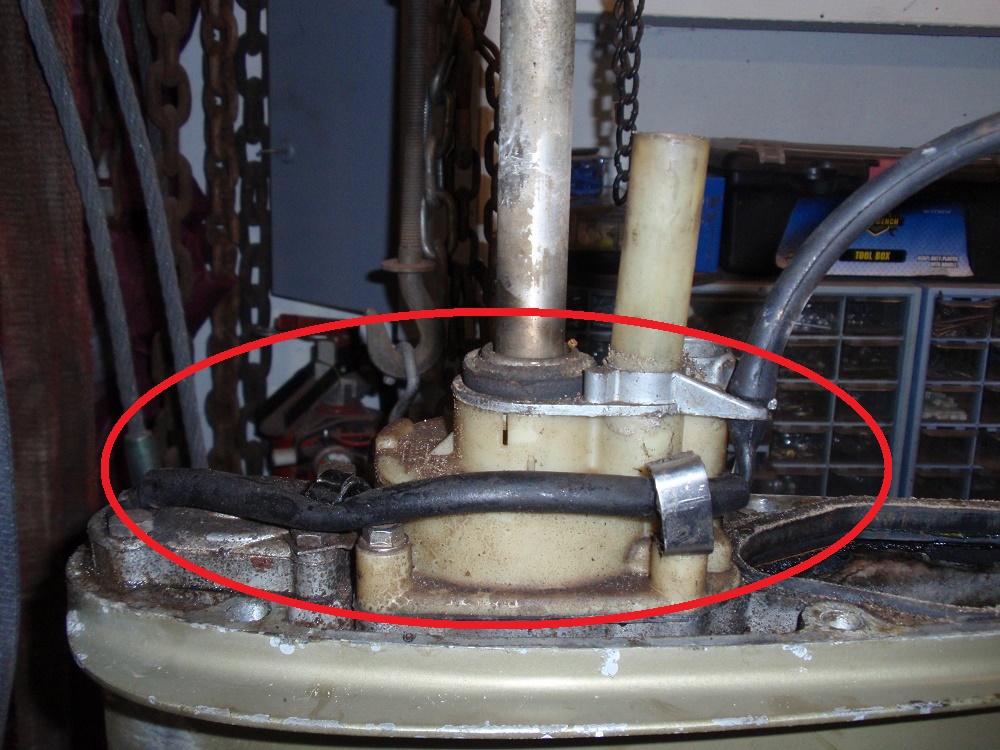
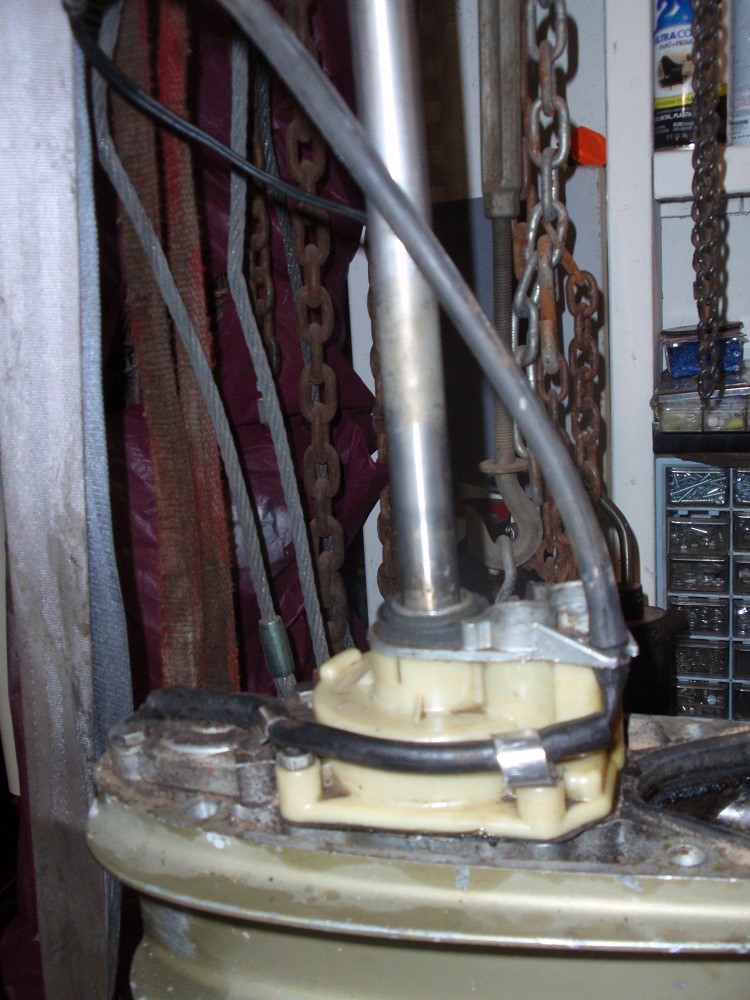
You can see where the shift wires are supposed to run in the clips and the notch on the pump unit.

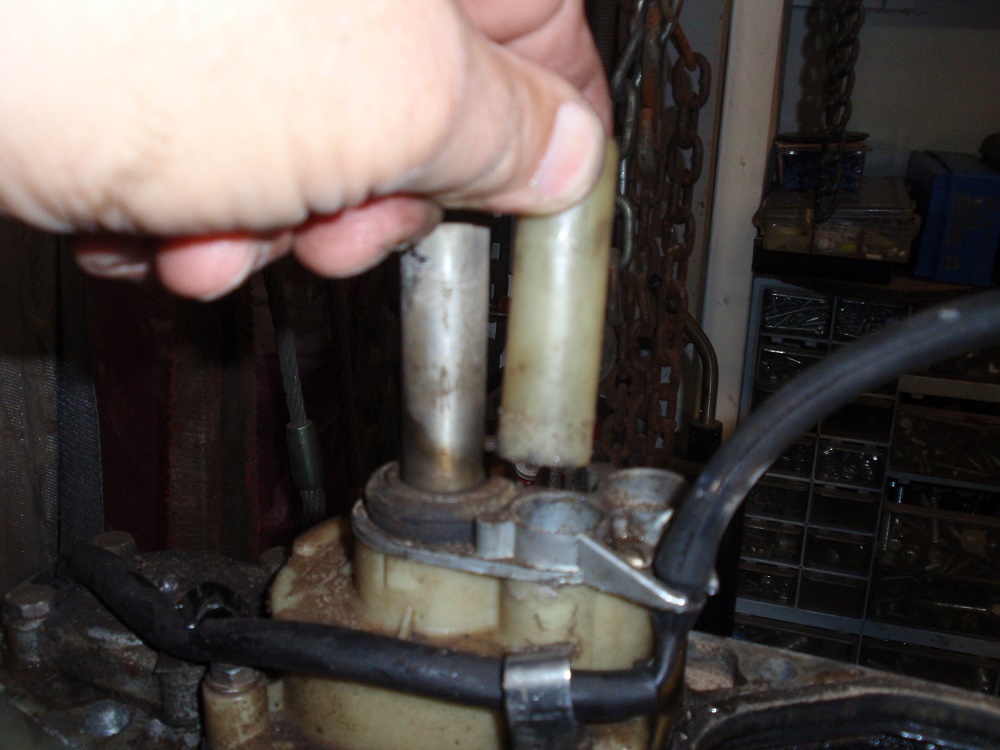
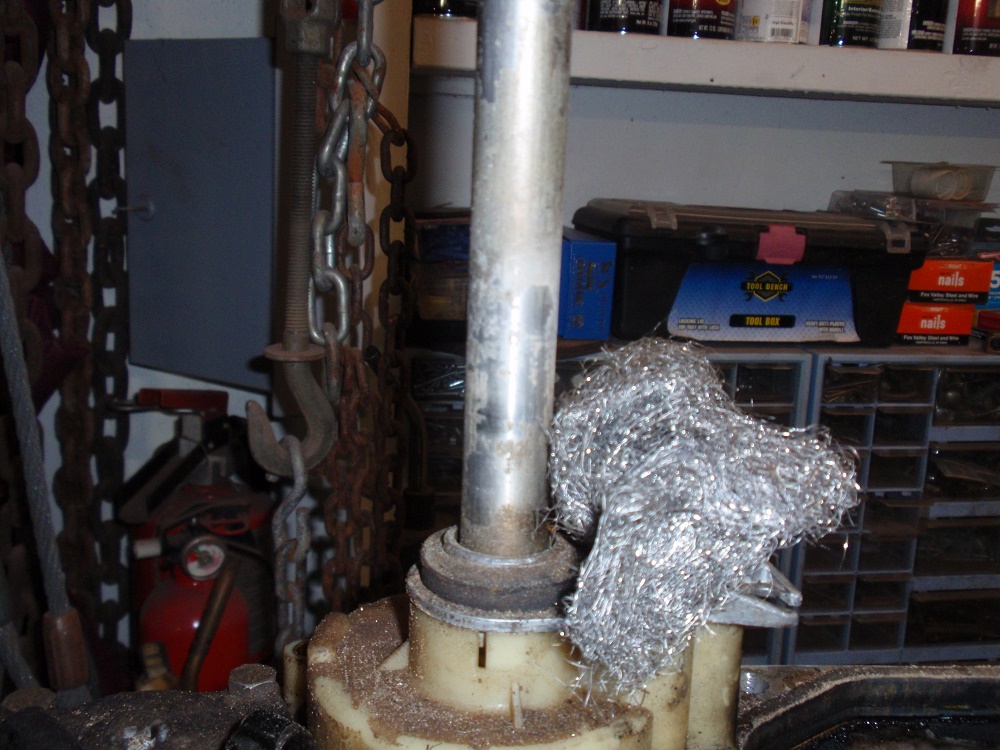
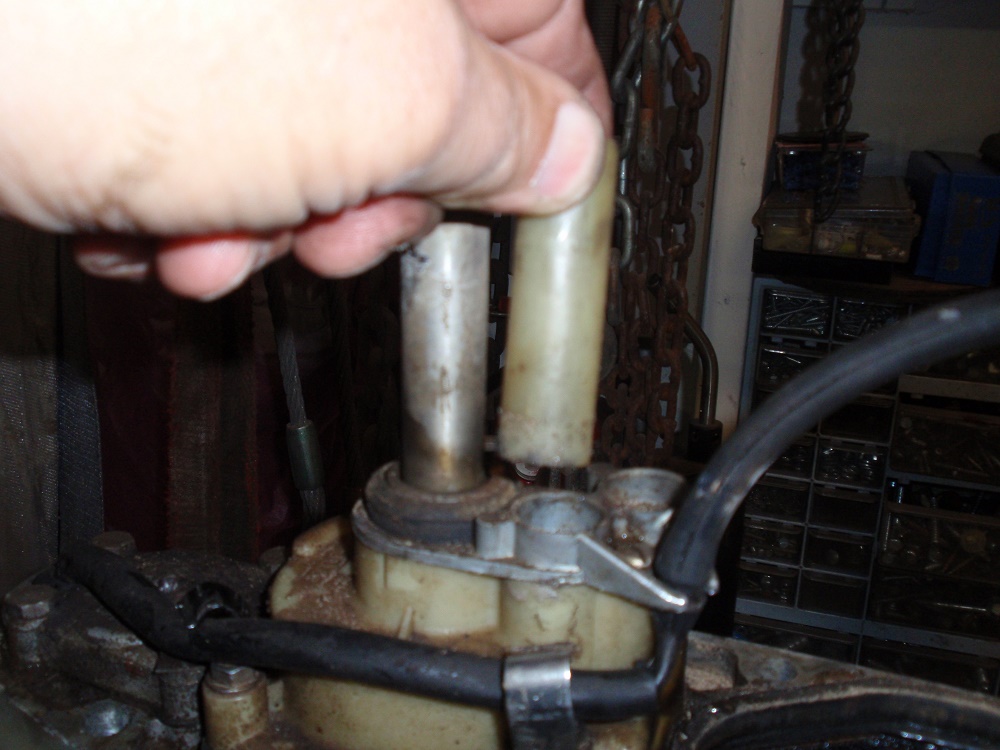
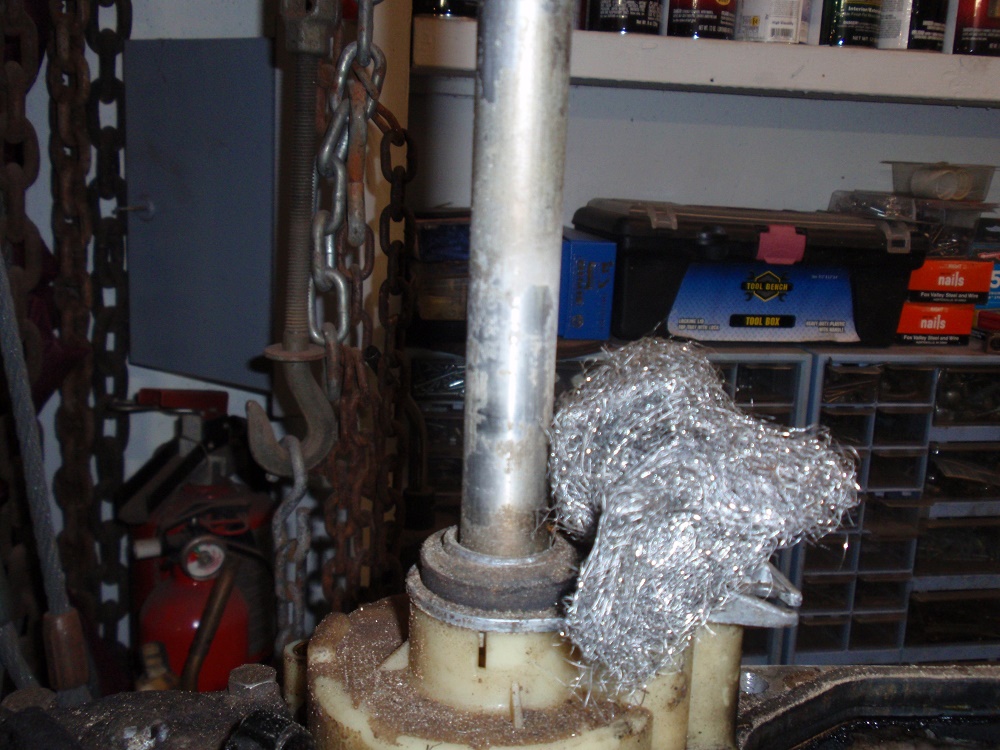
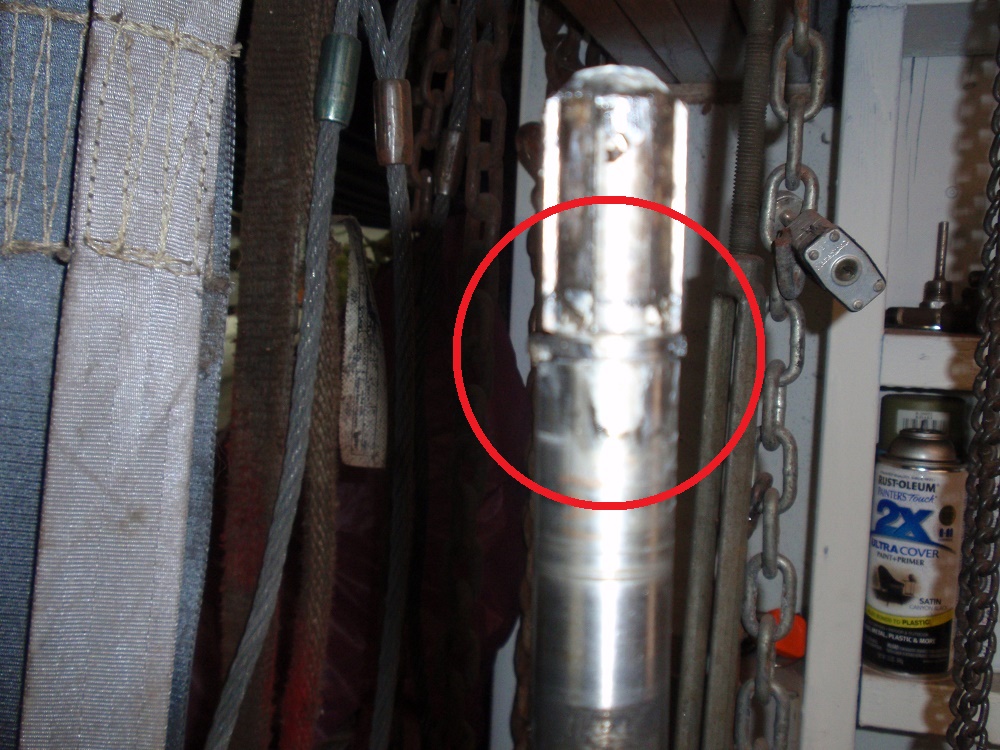
If it hasn't fallen off already this is the time to remove the water tube coupler, clean off any gunk from the drive shaft. I used some course steel wool.


Check the top end of the drive shaft that goes into the engine block. There should be a rubber "O" ring in a groove. On this unit the ring had a large section missing. The "0" ring must be removed.

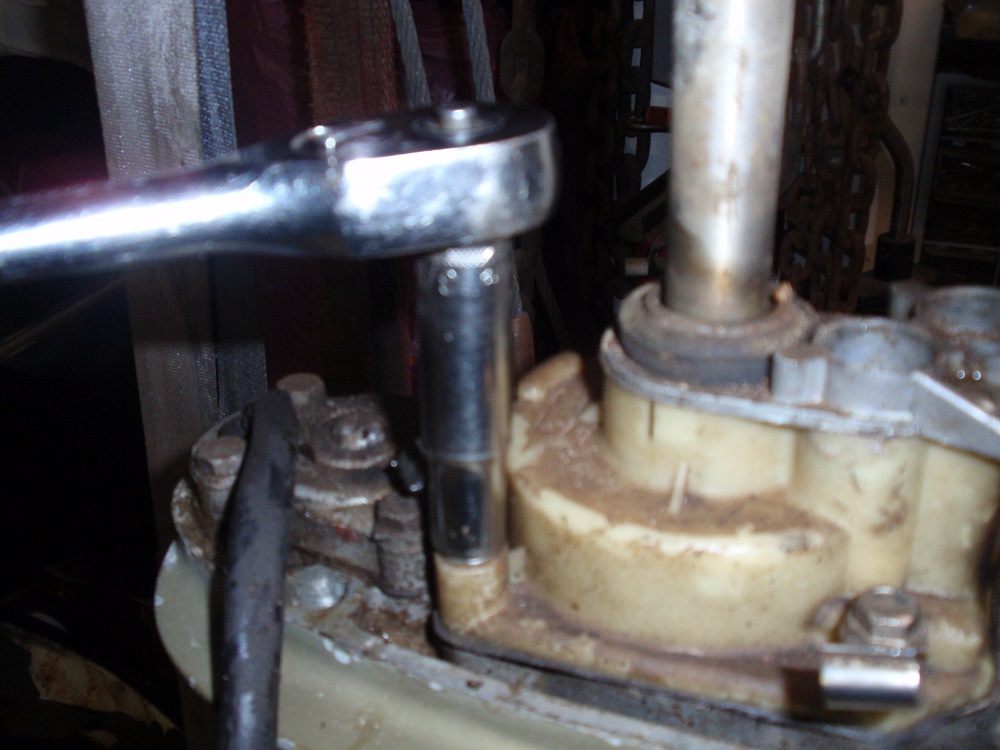
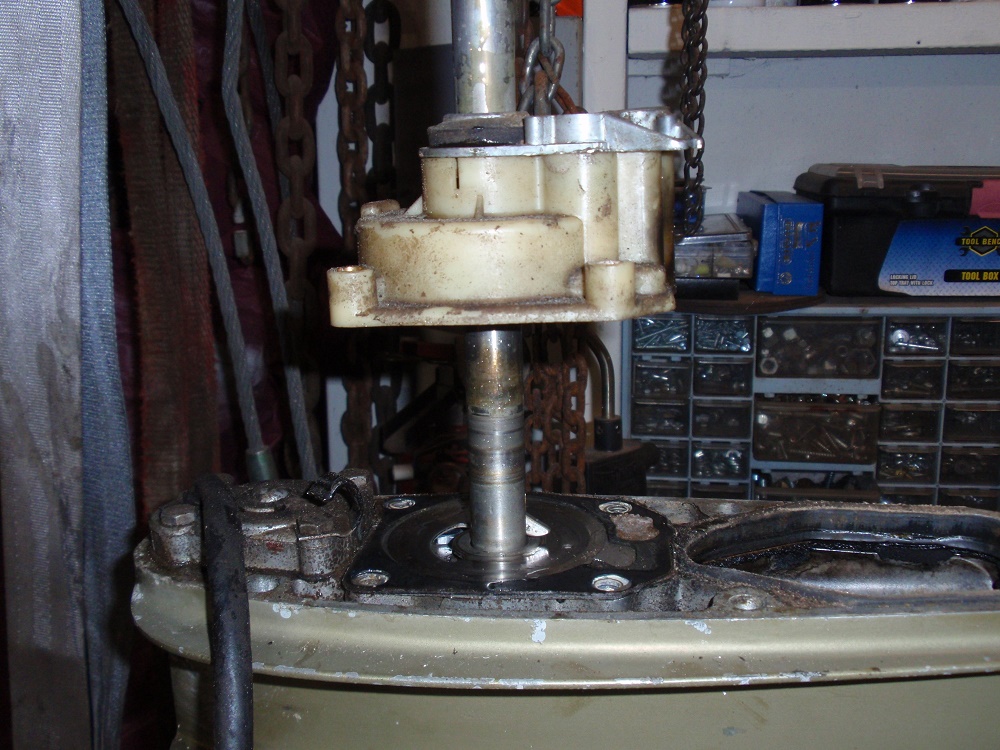
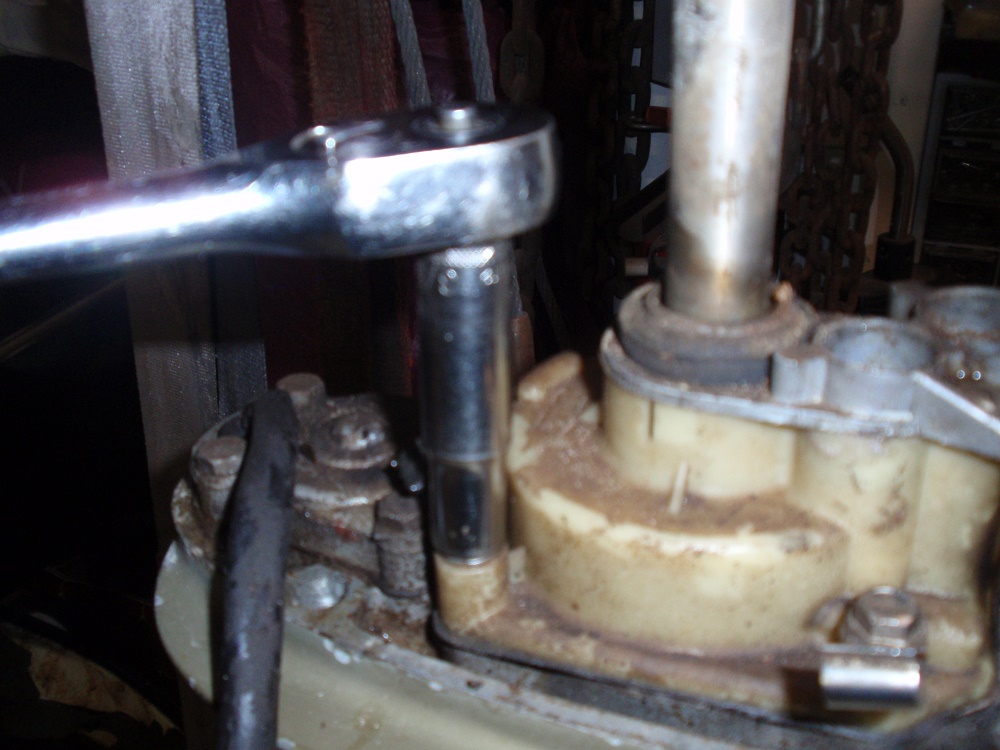
With the shaft cleaned up, and the ring removed you can begin removing the four 3/8" bolts that hold the pump assembly to the lower unit.

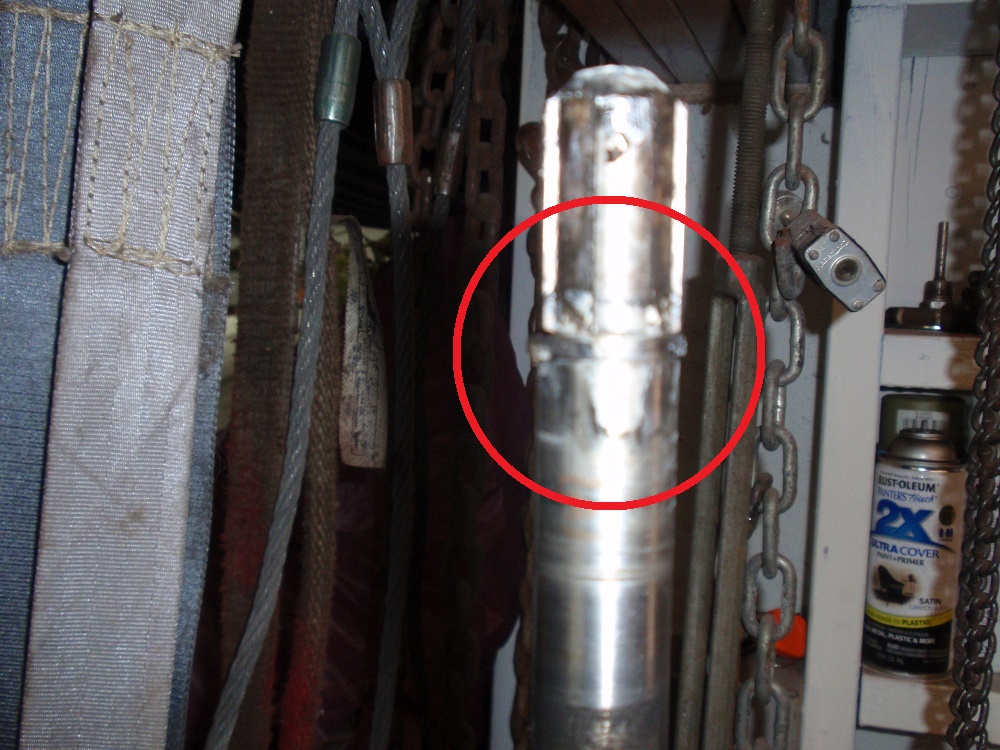
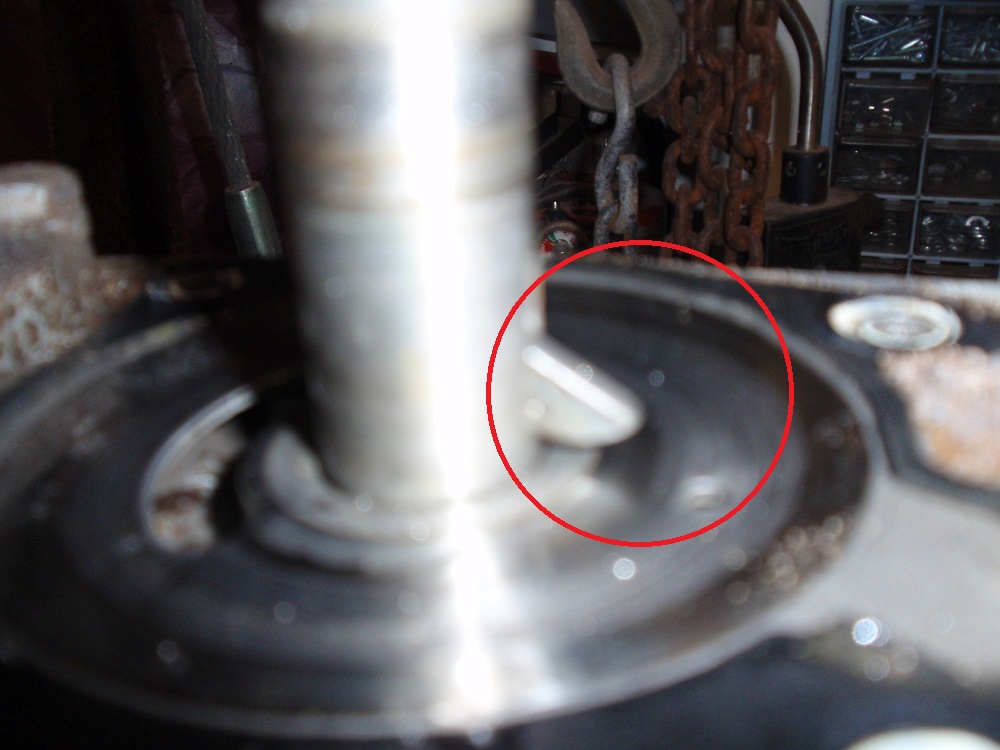
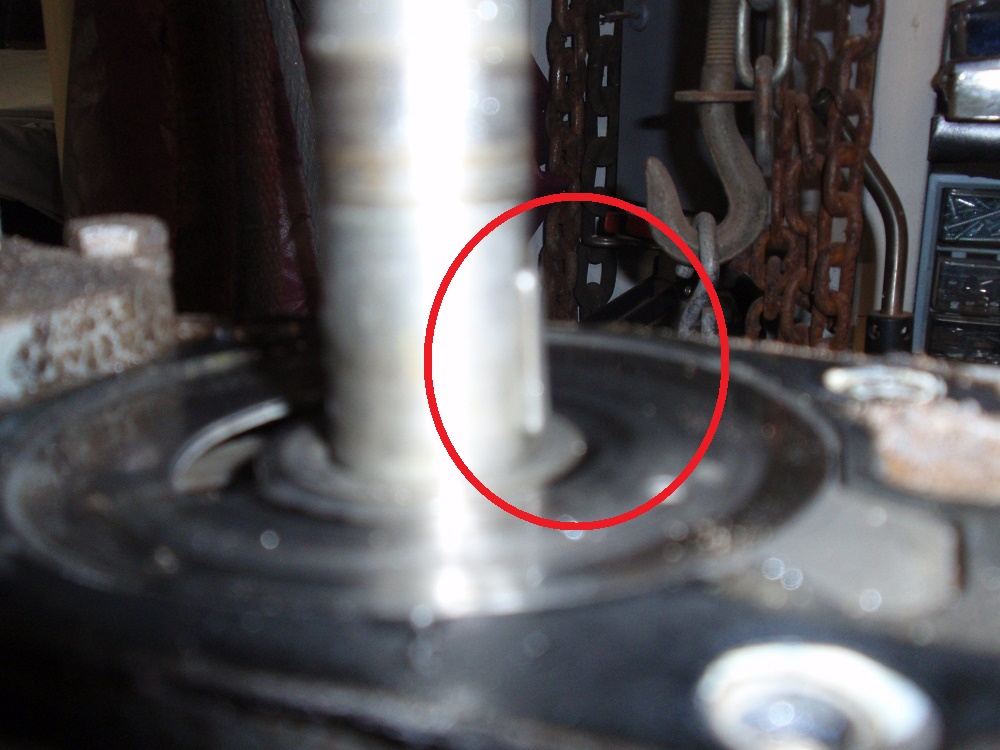
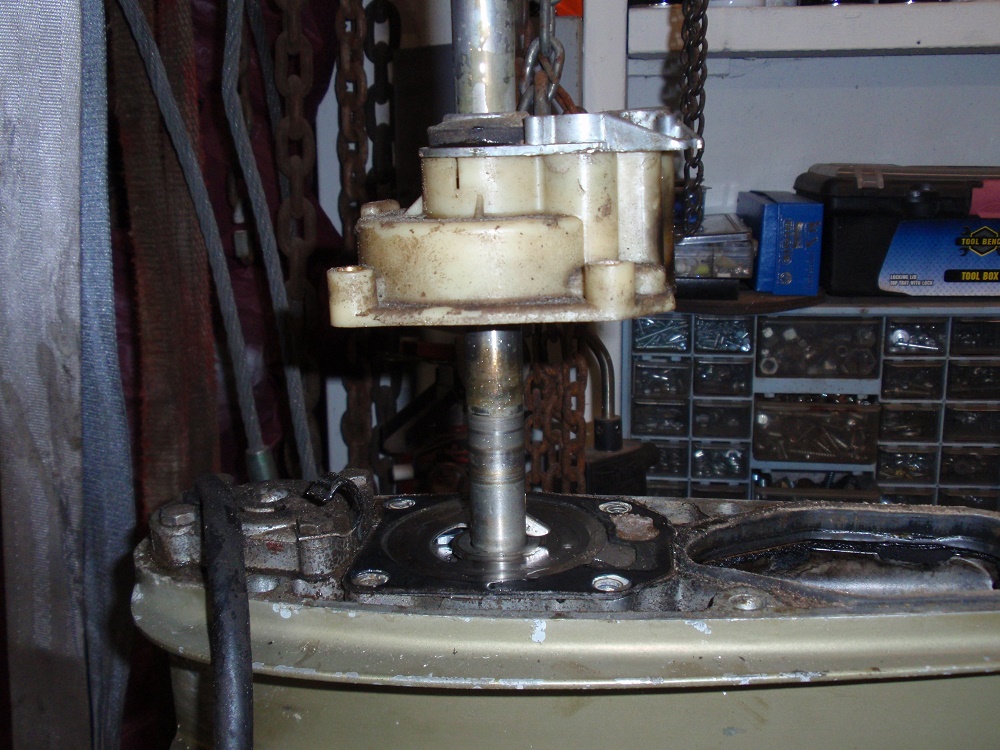
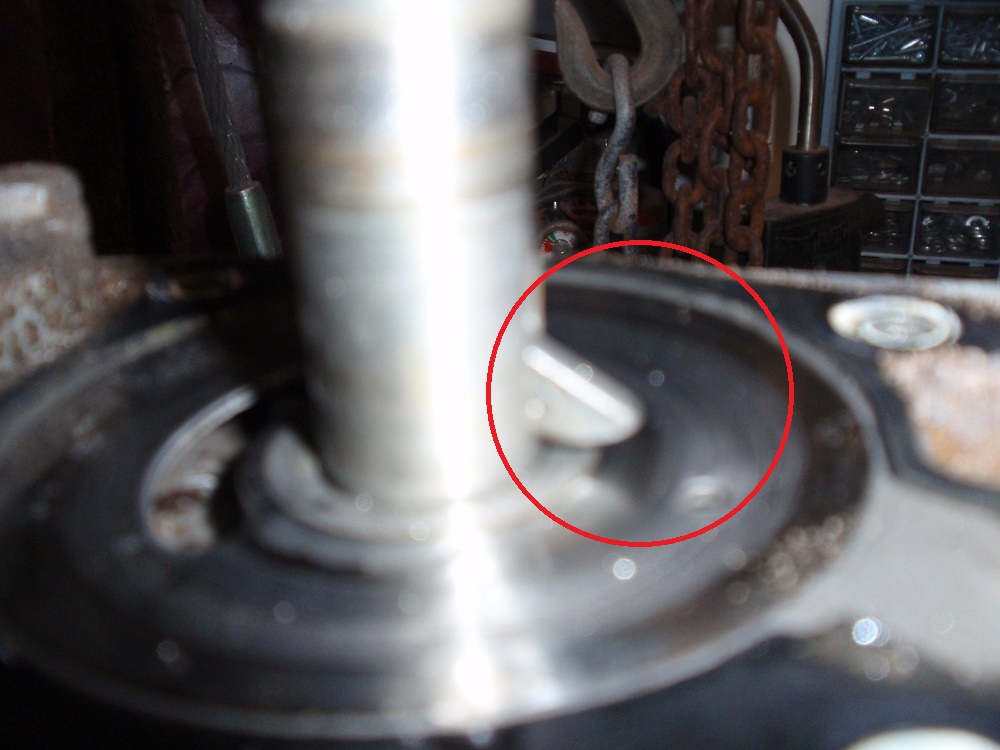
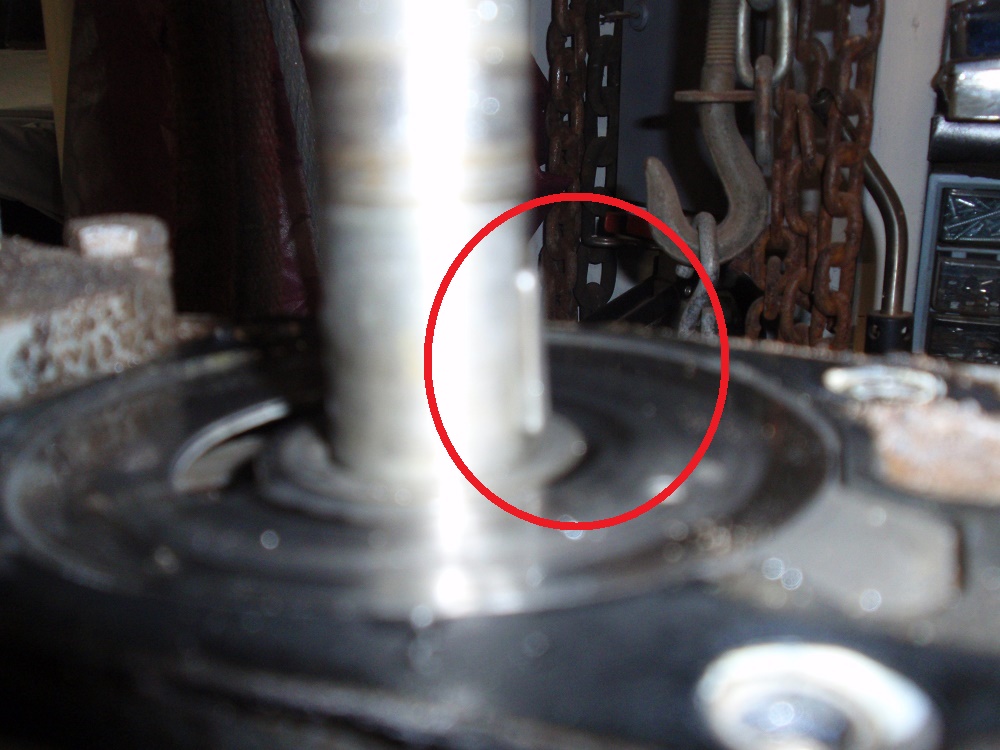
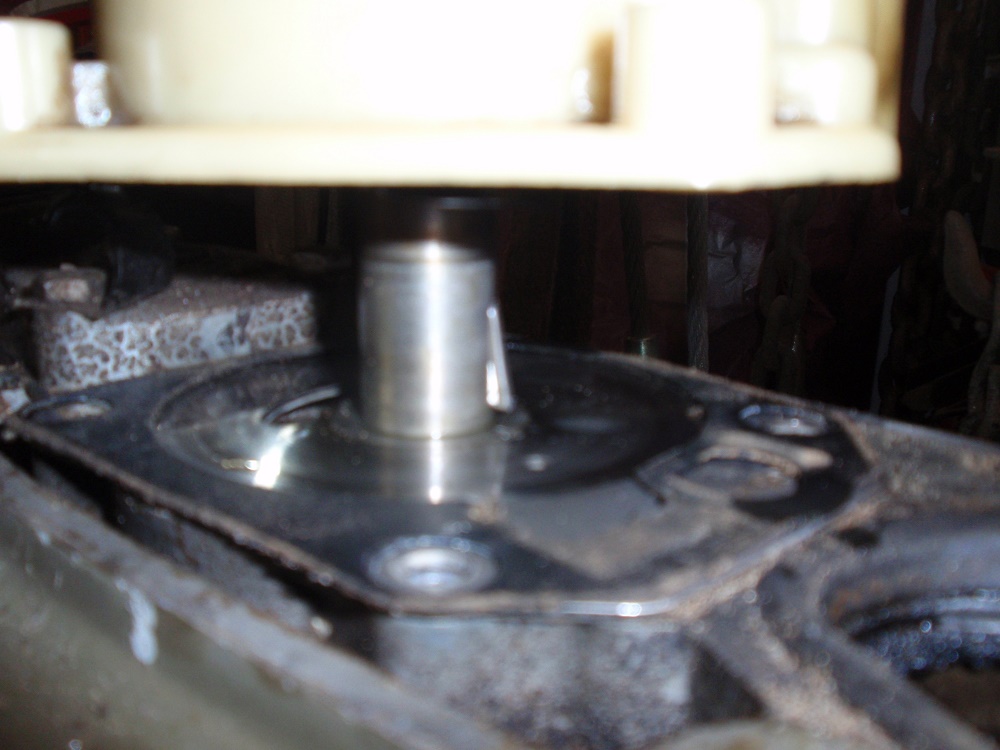
With the bolts removed gently raise the pump assembly, there is a "key" on the shaft, do not lose it. It's replaceable but you will have to take the whole lower unit to your local hardware store.

Please Log in or Create an account to join the conversation.

Re:Water impeller posting 10 years 2 weeks ago #102048

Hardware stores normally do not have stainless keys.

Please Log in or Create an account to join the conversation.

Re:Water impeller posting 10 years 2 weeks ago #102057

  • 63 Sabre
  • 63 Sabre's Avatar Topic Author
  • Offline
  • Contributing Member
  • Contributing Member
  • Posts: 4676
  • Karma: 147
  • Thank you received: 167
Thank you Prof, glad someone is helping out here. You're right. A local ACE hardware store by me makes it difficult to find something they don't have :laugh: Either way a good point so here is some info from Marineengine.com.

KEY 0308928 Part number: 0308928
0308928OEM Part 0308928 - Key (more info) About Johnson Evinrude OMC $12.26 $8.06 Add to shopping cart
10+ in stock. Explain stock levels

S.S. Steel Key Part number: 18-3108
18-3108OEM Match 18-3108 - Key, 308928 (more info)
Replaces OEM #0308928 About Sierra Marine $11.64 $7.67

NAPA may also have them since they handle Sierra marine.

Price is reasonable.

Please Log in or Create an account to join the conversation.

Re:Water impeller posting 10 years 2 weeks ago #102059

  • 63 Sabre
  • 63 Sabre's Avatar Topic Author
  • Offline
  • Contributing Member
  • Contributing Member
  • Posts: 4676
  • Karma: 147
  • Thank you received: 167
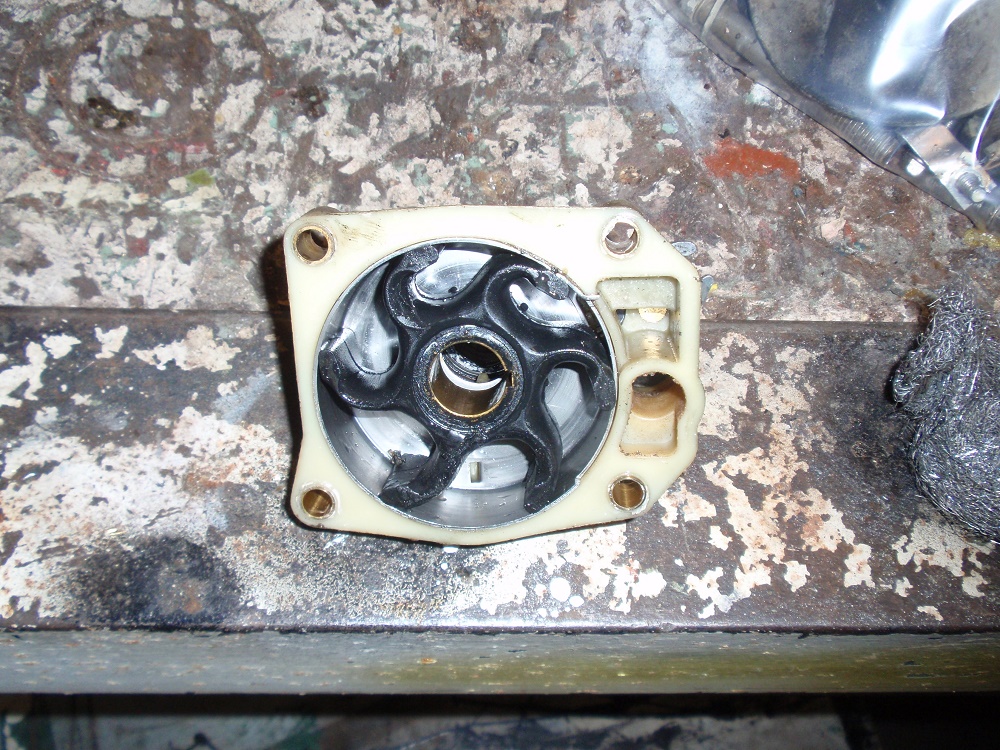
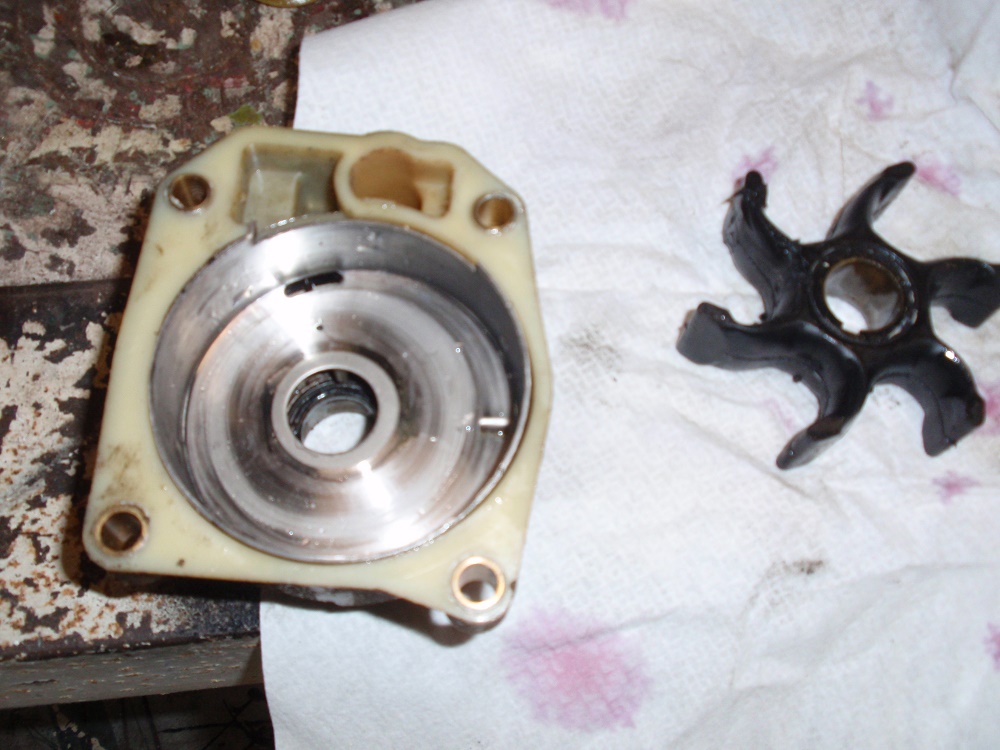
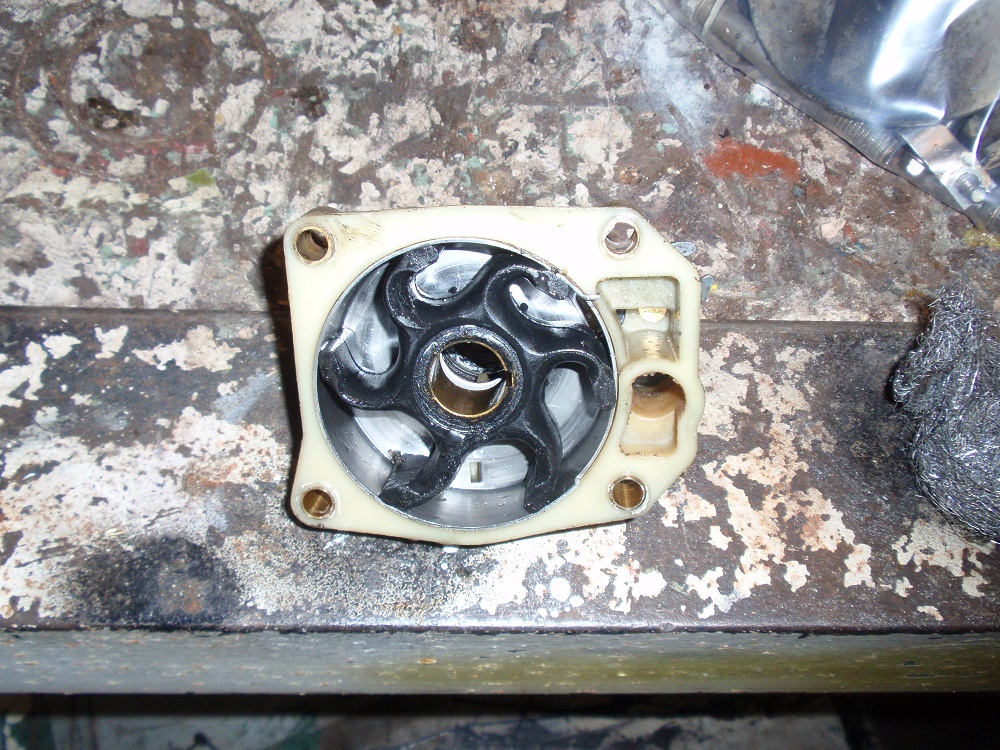
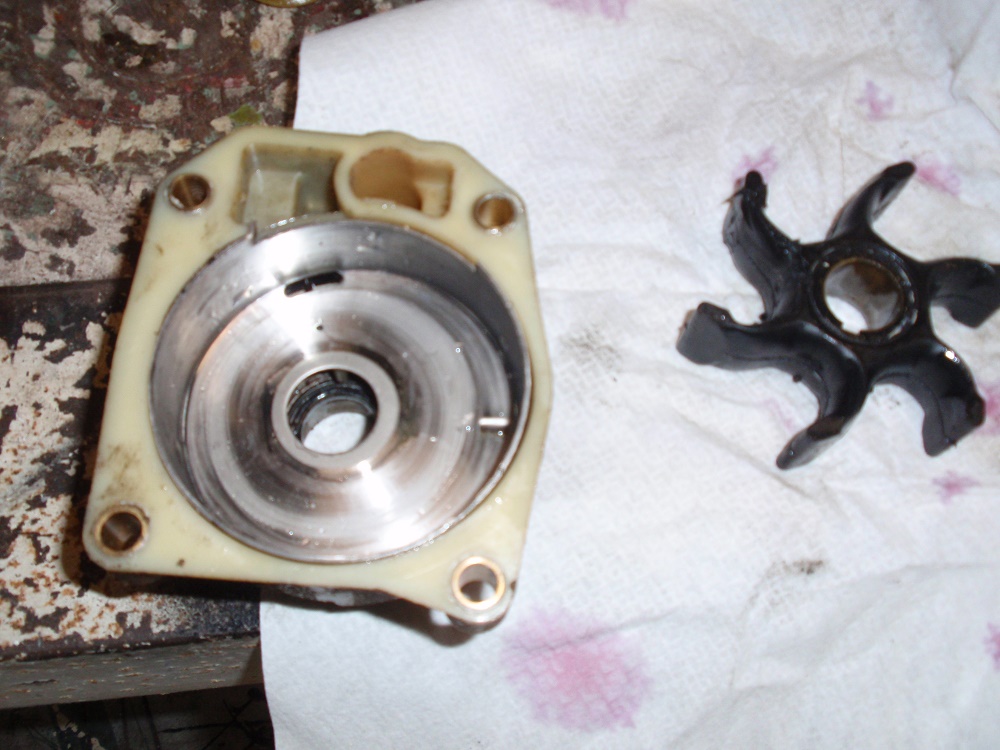
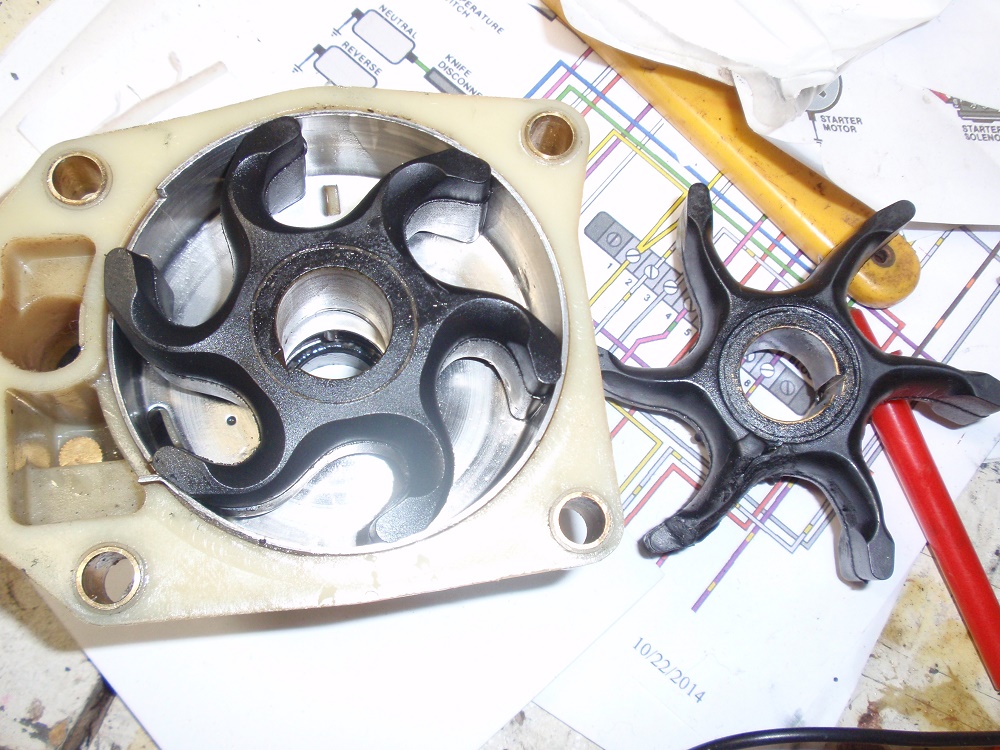
You can now raise the pump unit up the shaft being careful not to snag the unit seal on the groove on the upper end of the shaft. Now is the time to inspect the stainless internals of the pump unit. Look for any heavy scratches, gouges, anything else that would damage a new impeller or prevent proper action.
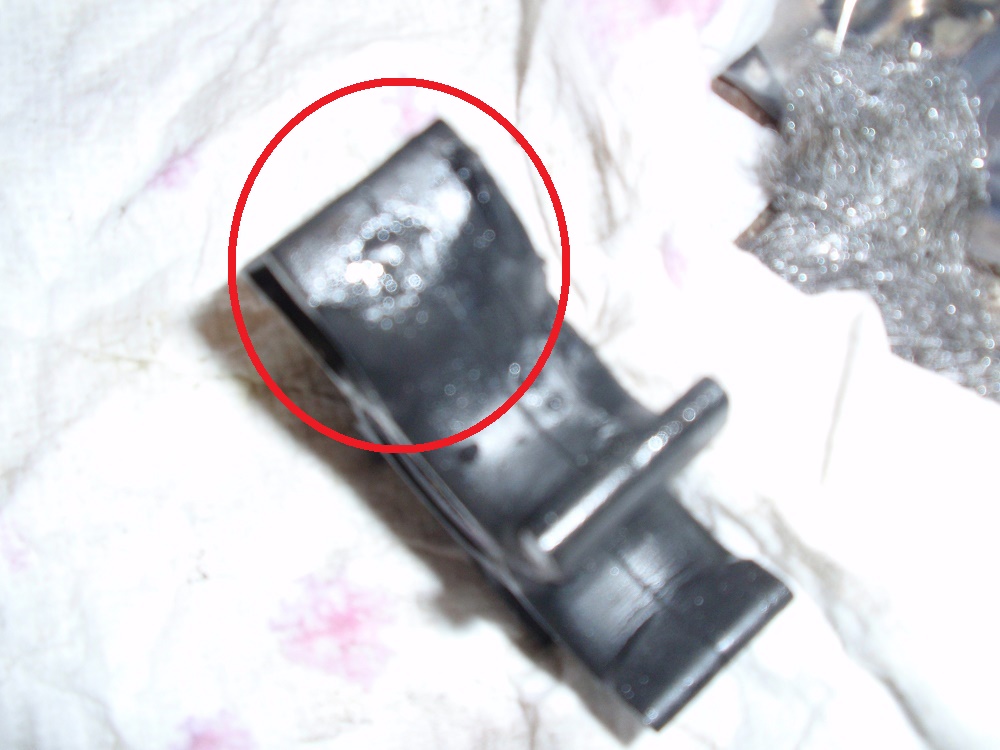
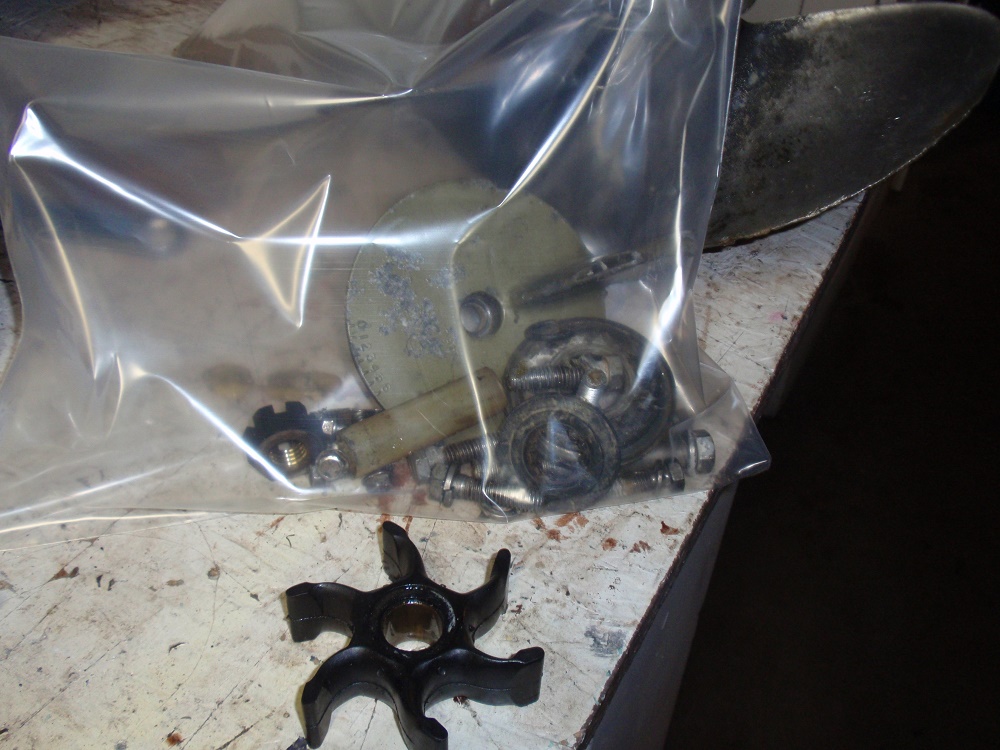
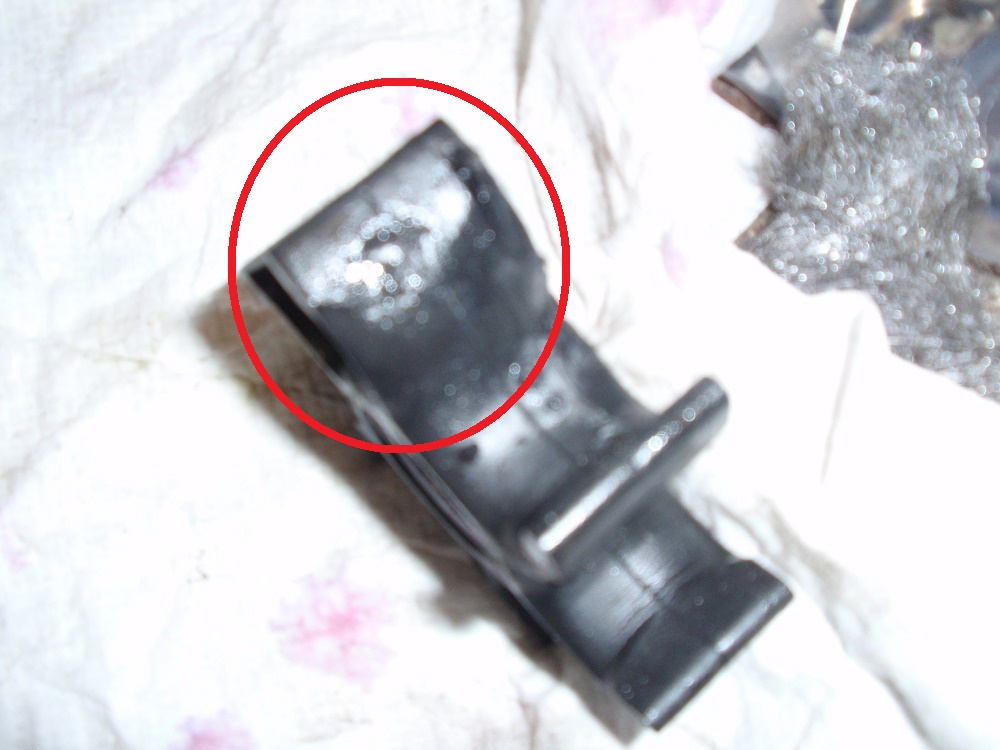
This impeller looked fairly good, not worn and quite flexible. But after removal it's plain to see that it has taken a "set" and on further close looking one of the rotor blades looked like it got chewed up by something. I suspect it was done at the time of install because it's only one blade and looks like it was mangled with a tool.

Time for the new impeller.
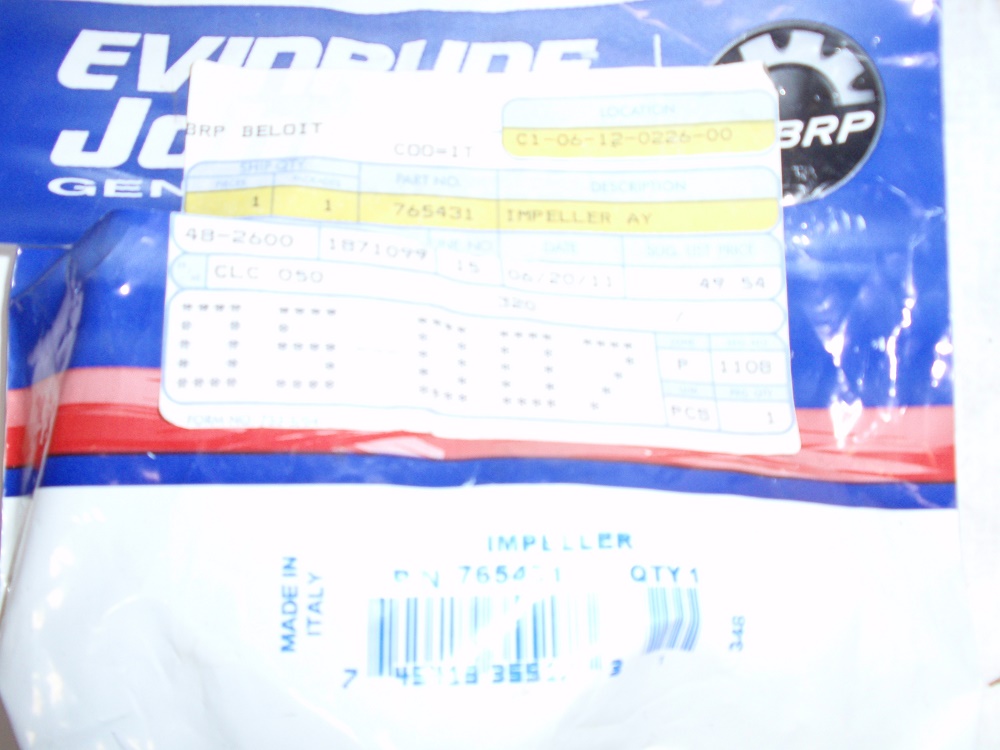
Local OMC dealer had a few. A whole pump unit, housing/impeller kit was $79. and change. I opted for just the replacement impeller since there was no damage to the housing and the gasket was in like new condition, not even imprinted. Total cost $54. and change.


Installing the new impeller can be a bit tricky but not too difficult. I use Mazola cooking oil and soak it up pretty good then carefully bend the blades into the housing. Make sure you have them facing in the right direction. The engine runs clockwise looking from the top so if you twist the impeller into the housing do it counterclockwise.
Make sure you have the gasket in place and facing in the right direction. Eyeball the impeller in the housing so the shaft holes line up and then slide the unit back onto the shaft. Put the key back into it's slot on the shaft. I tilt the key slightly to help line it up with the slot on the impeller. If it's properly lined up the unit will snug up to the lower unit without any gaps. If not the key probably slipped out of the shaft and will have to be reinstalled.

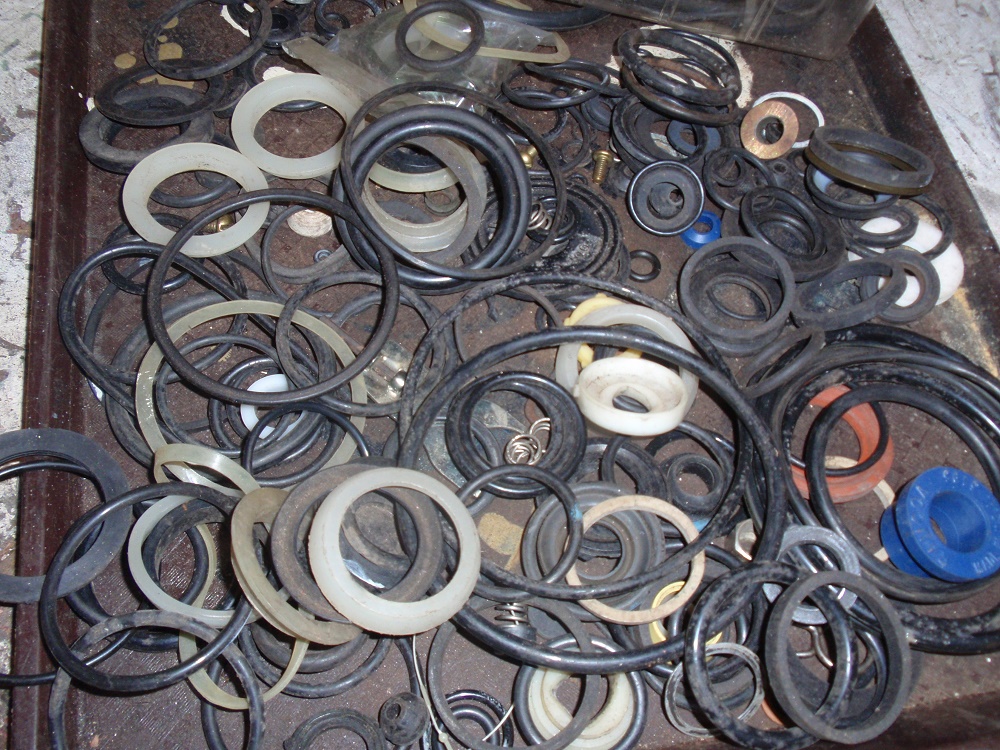
You can now bolt down the pump, and put the shift wires back in place. Now don't forget to replace that "O" ring on top of the drive shaft. I usually have a generous amount of rings laying around so finding the proper size both diameter and thickness isn't a problem.

Voila!! A like new water pump ready for mounting. Just for drill I usually give the prop shaft a clockwise turn just to make sure nothing is binding. Keep in mind again, the engine turns clockwise, The prop turns clockwise in forward gear and being either a hydro or selectric, without power to the lower unit it is locked in forward.

Please Log in or Create an account to join the conversation.

Re:Water impeller posting 10 years 2 weeks ago #102061

Great informatiom. The step by step and tips are super. thanks!!! madbohunk safe boating

Please Log in or Create an account to join the conversation.

Re:Water impeller posting 10 years 2 weeks ago #102072

Great stuff Cal! Should also mention that an impellor can be TOO flexible. I pulled one out of a unit that seemed good but after removing it the blades were too flexible. When the pump was spinning at speed the blades were bending too much and not pumping enough water, way too flexible. Just my two cents.

Bob

Please Log in or Create an account to join the conversation.

Re:Water impeller posting 10 years 2 weeks ago #102075

  • 63 Sabre
  • 63 Sabre's Avatar Topic Author
  • Offline
  • Contributing Member
  • Contributing Member
  • Posts: 4676
  • Karma: 147
  • Thank you received: 167
Mad, Bob. Thanks. Those blades were on the soft side. The string will probably get lost in the flurry of info on this site but at least it will be searchable.
Two other things I want to mention...

When putting the LU back on the motor and if you used the string trick make sure that you tie the string back on the wire leads secure and high enough on the wire so it won't catch on the hole while pulling it through. I usually put some tape on the end.
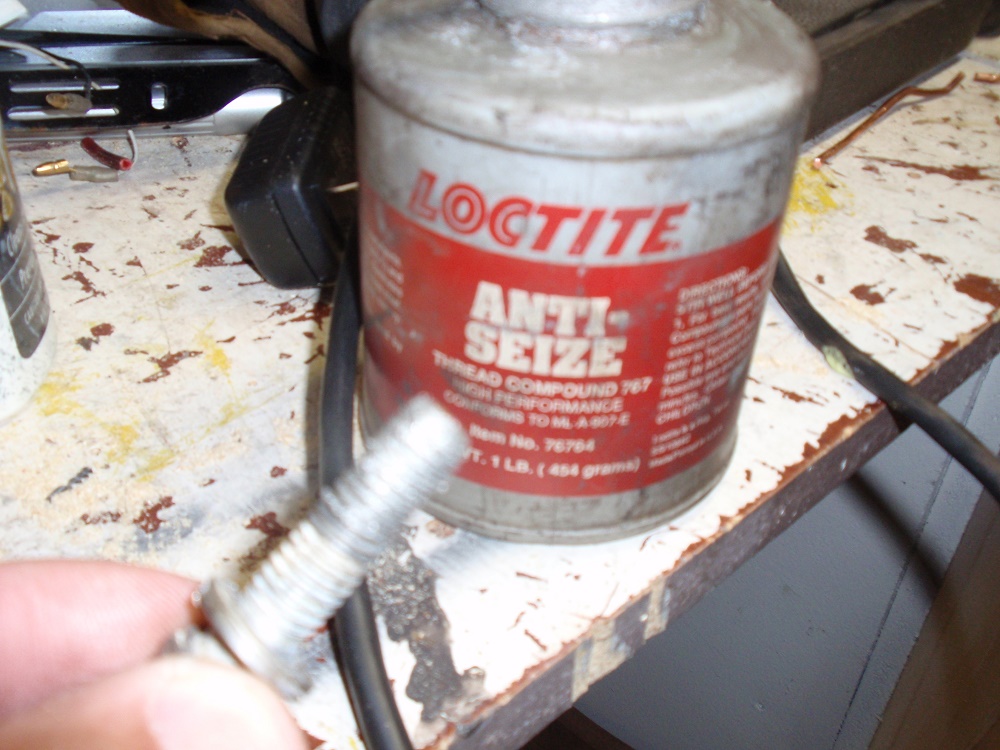
Next thing is to put some anti-seize lube on the bolts just to help out if you have to remove the unit again later on.

When putting the unit back together it's tricky to get the water tube lined up with the coupler. Be careful not to bend the copper tube out of position or damage the plastic coupler. A flashlight helps in "peeking" in the area during assembly.
Once the tubes are in place move the unit up while lightly rotating the prop shaft in a clockwise motion to line up the splines of the driveshaft and motor. You will sort of feel when everything falls into place.

If everything is lined up the two units will mate and fit together without any problems. Do not force the units together using the bolts. If it won't go together something is wrong, usually the water tube not lined up, or the shift wires binding.
Also a word of caution, if you put grease on the drive shaft splines DO NOT put grease on the very top of the shaft. It's possible that you can create a hydraulic effect during the installation and put an excess preload on the shaft and LU gears.
Attachments:

Please Log in or Create an account to join the conversation.

Re:Water impeller posting 10 years 2 weeks ago #102085

You do not install the impeller in the housing !
The proper way is to install the impeller on the shaft and making sure that the key is in place.
Verify that the key is driving the impeller.
Then lower the housing on top of the impeller.
Gentle down pressure while turning the shaft puts it all together with vanes going the right way.
Water lubricates the impeller on start-up.

Please Log in or Create an account to join the conversation.

Re:Water impeller posting 10 years 2 weeks ago #102089

  • 63 Sabre
  • 63 Sabre's Avatar Topic Author
  • Offline
  • Contributing Member
  • Contributing Member
  • Posts: 4676
  • Karma: 147
  • Thank you received: 167
Good points, but we can agree to disagree. Either way works but I've found that the sharp edges on the stainless housing have a tendency to cut into the vanes while twisting it on, see the damage to the one vane on the impeller I removed, the top edge on that one vane was cut by something sharp and a small chunk missing. You would never see this if you turned the impeller into the housing and then just assumed it was good to go.
I use cooking oil because it is not a petroleum product that can soften up the rubber. It also lubes the vanes so you can turn the impeller/shaft with ease during installation without any damage. The lower unit is not always submerged in water for lubrication while turning the engine over like checking compression, checking spark, adjusting linkages etc. That's why I lube the pump.

Please Log in or Create an account to join the conversation.

Re:Water impeller posting 10 years 2 weeks ago #102117

  • MarkS
  • MarkS's Avatar
  • Offline
  • Moderator
  • Moderator
  • Posts: 5348
  • Karma: 118
  • Thank you received: 5
Awesome job on the tutorial Cal, thank you very much for taking the time and effort to document the procedure. Should be very helpful to those tackling the job for the first time, and a good refresher for those who haven't done it in a while!

We hope to get some of these excellent maintenance/mechanical tutorials listed in the Research/Restoration section so they'll be easier to find. Your contribution is highly appreciated.

Please Log in or Create an account to join the conversation.

Mark

Re:Water impeller posting 10 years 2 weeks ago #102127

  • 63 Sabre
  • 63 Sabre's Avatar Topic Author
  • Offline
  • Contributing Member
  • Contributing Member
  • Posts: 4676
  • Karma: 147
  • Thank you received: 167
Thanks Mark, I know some others have their own way and maybe shortcuts for doing the same job but I hope to at least have laid out basics and anyone can add to it.

Please Log in or Create an account to join the conversation.

  • Page:
  • 1
Time to create page: 0.301 seconds

Donate

Please consider supporting our efforts.

Glassified Ads

1967 23 ft powercat flybridge
( / Boats)

noimage
11-17-2024

Mercury outboard
( / Engines)

noimage
11-03-2024

Classic Mercury Outboard Motors
( / Engines)

Classic Mercury Outboard Motors
10-18-2024

FG Login

FiberGoogle

Who's Online

We have 8793 guests and no members online