Welcome, Guest
Username: Password: Remember me
  • Page:
  • 1
  • 2

TOPIC: 1959 Glastron Seaflite

Re:1959 Glastron Seaflite 12 years 8 months ago #58196

Looks like it's going to be a fun project !
I'm really new to the Glassic world, and I'm sure I'm off base,
But why do you need to take the deck off now ? It looks like you can get to 90 percent of the interior hull as it sits ?

Please Log in or Create an account to join the conversation.

Re:1959 Glastron Seaflite 12 years 8 months ago #58199

  • thetudor
  • thetudor's Avatar Topic Author
  • Offline
  • Platinum Boarder
  • Platinum Boarder
  • Posts: 1204
  • Karma: 33
  • Thank you received: 2
Chuck, welcome! The main reason to take the deck off is to repair the rot in the transom. The deck caps the transom and needs to come off to access the wood. However, it will allow me to do a lot of work without having to crawl under decks, fins and/or splash wells. If I didn't need to do the transom, I wouldn't split it.
Attachments:

Please Log in or Create an account to join the conversation.

Todd (aka thetudor)
1964 Custom Craft Aqua Ray
1959 Glastron Seaflite
1959 Tomahawk Spirit

Re:1959 Glastron Seaflite 12 years 8 months ago #58216

Now that's going to be a fun project. I like that hull line it's so cool.

Bob

Please Log in or Create an account to join the conversation.

Re:1959 Glastron Seaflite 12 years 8 months ago #58275

  • Andgott
  • Andgott's Avatar
  • Offline
  • Contributing Member
  • Contributing Member
  • Posts: 1243
  • Karma: 72
  • Thank you received: 0
I'm pulling up a chair to watch, too- This should be an interesting one. I love the lines of those boats, and the hard top makes it that much more cool!!

-Andrew

Please Log in or Create an account to join the conversation.

Re:1959 Glastron Seaflite 12 years 8 months ago #58317

  • thetudor
  • thetudor's Avatar Topic Author
  • Offline
  • Platinum Boarder
  • Platinum Boarder
  • Posts: 1204
  • Karma: 33
  • Thank you received: 2
Andrew, the hardtop is what sold me on it. I probably wouldn't have picked it up without it.

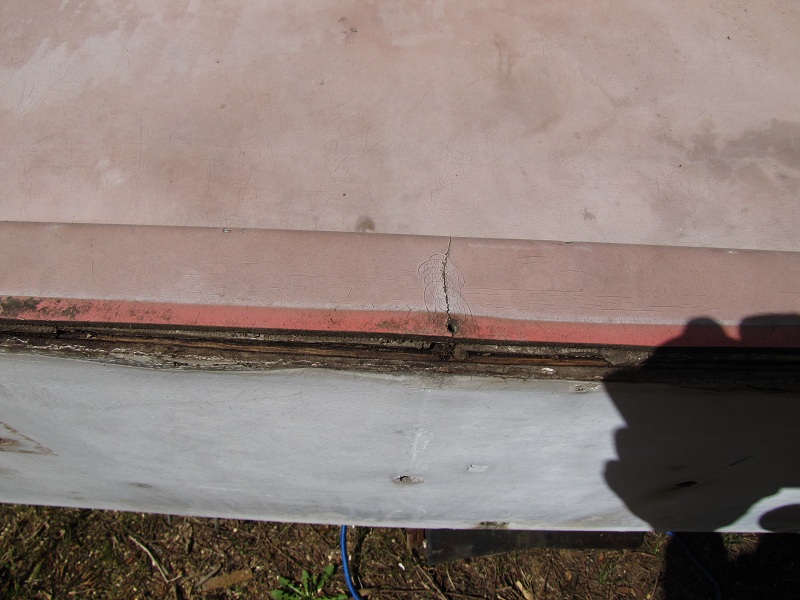
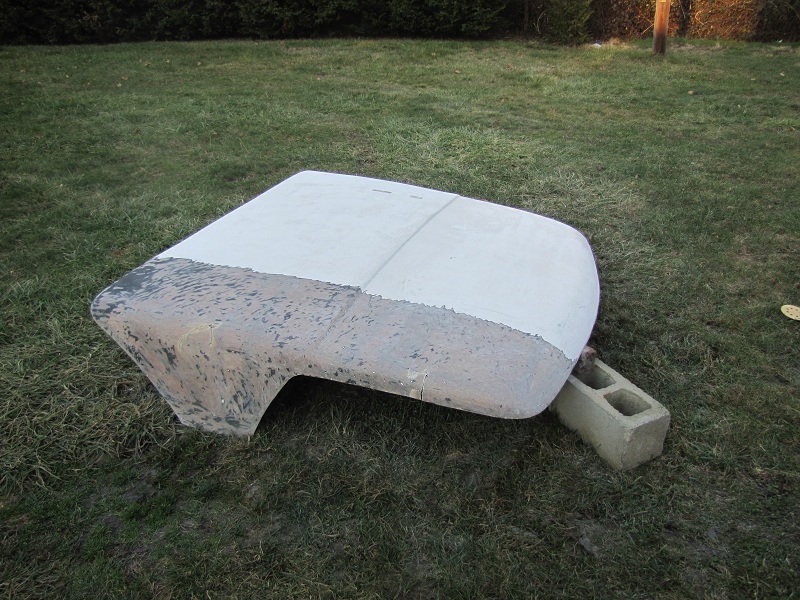
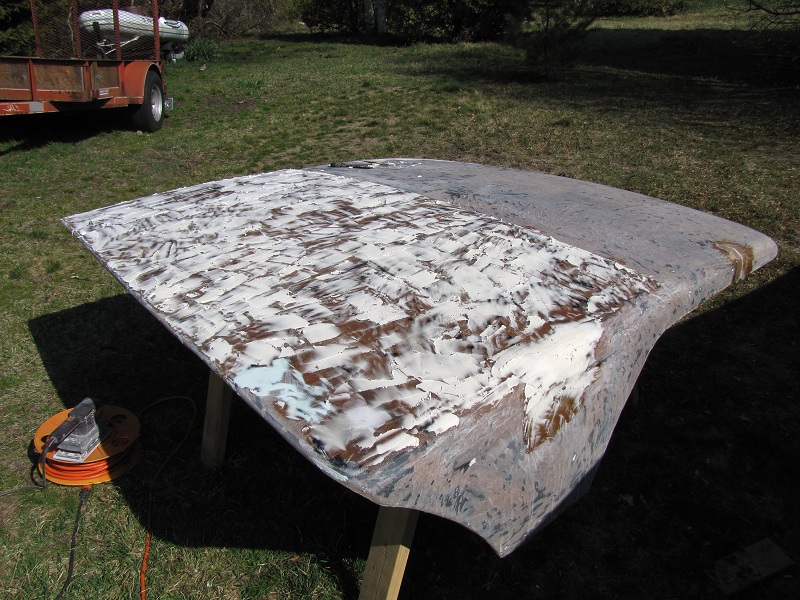
With no heated workshop, not much one can do in the winter in CT. I've had the windshield re-made picked up a lot of the parts I needed. Bought a bunch of NOS stuff to save on re-chroming. I have taken the cover off and am starting on the hardtop. The gelcoat is shot, so I ground that off. There are a couple of holes and one crack that need to be repaired and then the filling and fairing begins. Some of my exploits have been documented in the Main Forum.

After seeing what is going to be involved in filling and fairing, I am going to try nead blasting on the rest of the boat. Hopefully will result in a lot less.

I am using a Vinylester Fairing Compound from LBI Fiberglass for that and their Vinylester Bonding Compound for filling the holes. (LBI is a local company that supplies epoxy and fiberglass materials to the boat building industry. They have pretty much everything. Prices are pretty competative, plus I like to support local businesses)

I've included a few pics.

Grinding partially done

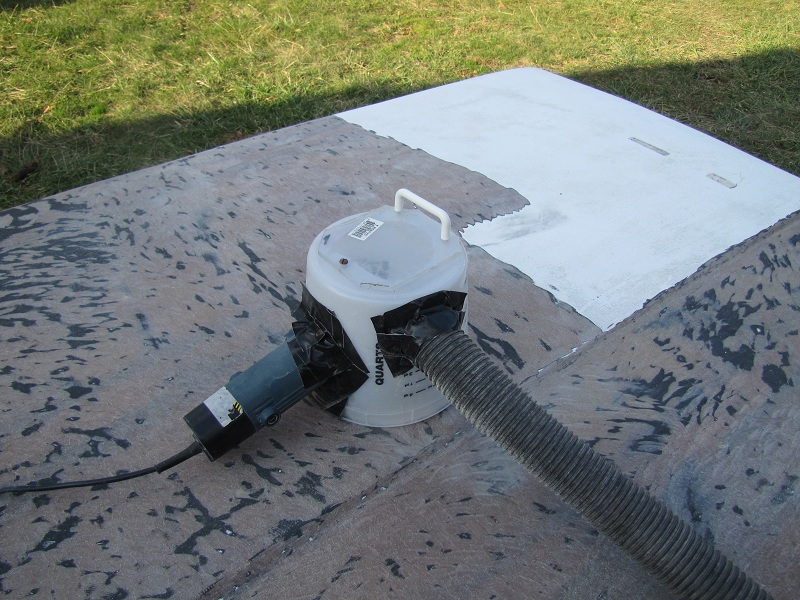
Homemade dust collector

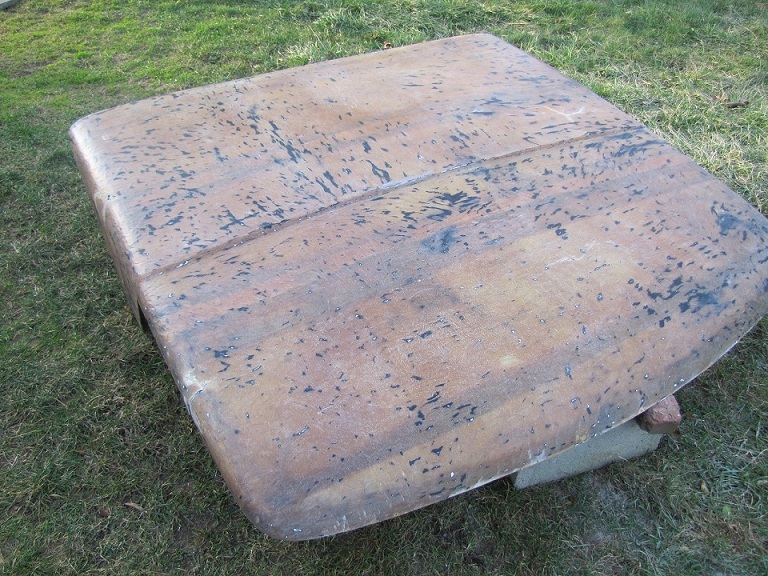
Stripped and sanded

Let the fairing begin.....
Attachments:

Please Log in or Create an account to join the conversation.

Todd (aka thetudor)
1964 Custom Craft Aqua Ray
1959 Glastron Seaflite
1959 Tomahawk Spirit

Re:1959 Glastron Seaflite 12 years 8 months ago #58320

Looks good. What type of grinder is that and what type of disc are you using

Please Log in or Create an account to join the conversation.

Re:1959 Glastron Seaflite 12 years 8 months ago #58326

  • thetudor
  • thetudor's Avatar Topic Author
  • Offline
  • Platinum Boarder
  • Platinum Boarder
  • Posts: 1204
  • Karma: 33
  • Thank you received: 2
Joe, the grinder is a basic Harbor Freight special angle grinder. The sandpaper was 30 grit and I think I got that on line. Did the job well, but dust everywhere (hence the "hood")

Please Log in or Create an account to join the conversation.

Todd (aka thetudor)
1964 Custom Craft Aqua Ray
1959 Glastron Seaflite
1959 Tomahawk Spirit

Re:1959 Glastron Seaflite 12 years 8 months ago #58352

  • thetudor
  • thetudor's Avatar Topic Author
  • Offline
  • Platinum Boarder
  • Platinum Boarder
  • Posts: 1204
  • Karma: 33
  • Thank you received: 2
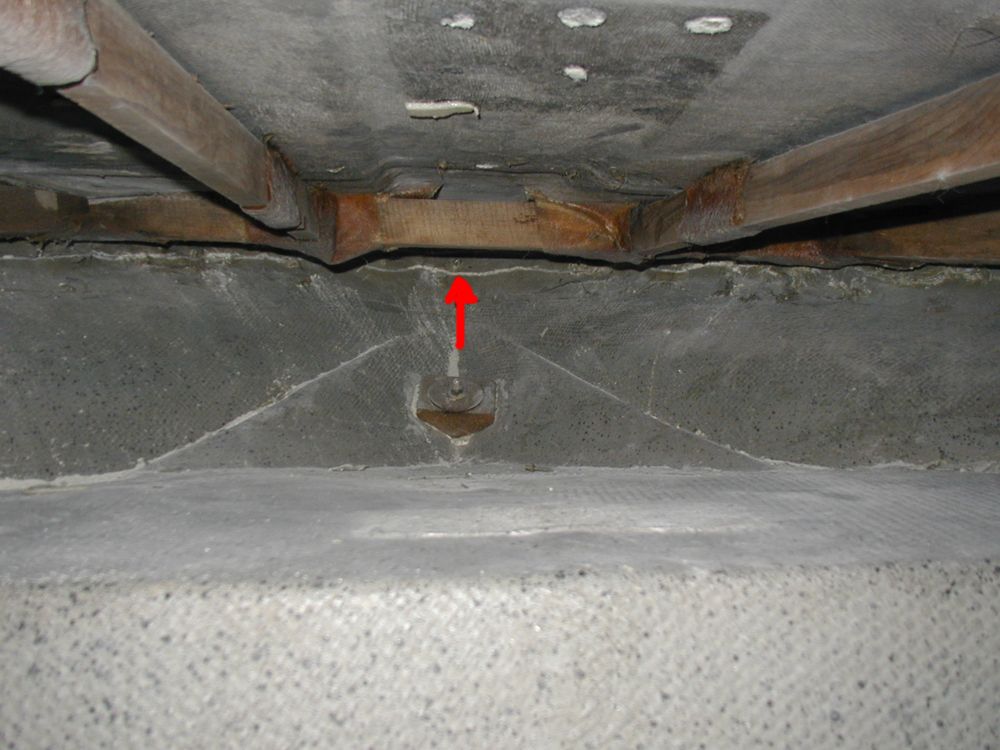
I played with removing the bolts (machine screws) which hold the hull and deck together. I am thinking that the easiest way is to cut them on the back with a Multimaster and remove the rest on the outside. They are going to be replaced and unbolting them is a pain in the Botox.

Please Log in or Create an account to join the conversation.

Todd (aka thetudor)
1964 Custom Craft Aqua Ray
1959 Glastron Seaflite
1959 Tomahawk Spirit

Re:1959 Glastron Seaflite 12 years 8 months ago #58363

Yep, if your going to replace them for sure cut those babies off!!!!!!!!!!!!! Like the dust hood! :laugh:

Bob

Please Log in or Create an account to join the conversation.

Re:1959 Glastron Seaflite 12 years 8 months ago #58480

Todd: I just drilled the heads off & punched them through, took about 15 min to do them all & you don't have to crawl under the deck
Mine were glassed over on the inside, under the deck, so removal would have been very difficult from the inside. If yours is the same, you will have to cut the glass all the way along to remove the deck
Cheers
Bill
Attachments:

Please Log in or Create an account to join the conversation.

Re:1959 Glastron Seaflite 12 years 8 months ago #58491

  • thetudor
  • thetudor's Avatar Topic Author
  • Offline
  • Platinum Boarder
  • Platinum Boarder
  • Posts: 1204
  • Karma: 33
  • Thank you received: 2
Bill, I may try that out. I am a little nervous about drilling out too large a hole, but that may not be much of a problem.

Please Log in or Create an account to join the conversation.

Todd (aka thetudor)
1964 Custom Craft Aqua Ray
1959 Glastron Seaflite
1959 Tomahawk Spirit

Re:1959 Glastron Seaflite 12 years 8 months ago #58496

Just take a drill bit a little larger than the shank of the bolt & stop drilling when the head comes off, don't drill all the way through. You will be left with the original hole
Cheers
Bill

Please Log in or Create an account to join the conversation.

Re:1959 Glastron Seaflite 12 years 8 months ago #58514

  • thetudor
  • thetudor's Avatar Topic Author
  • Offline
  • Platinum Boarder
  • Platinum Boarder
  • Posts: 1204
  • Karma: 33
  • Thank you received: 2
I tried doing that, but is a little hard to hit center witha slotted screw. However, this is the way to do it. I'm going to fill and re-drill the hones in the hulla nd deck anyway, so they are not a concern. Also I was thinking that since the center of the trim piece, where the screws are, is going to have a rubber insert, if I have to abandon and oversized one and drill a new hole, it is not the end of the world.

Please Log in or Create an account to join the conversation.

Todd (aka thetudor)
1964 Custom Craft Aqua Ray
1959 Glastron Seaflite
1959 Tomahawk Spirit

Re:1959 Glastron Seaflite 12 years 8 months ago #58517

barnickelbill wrote:

Todd: I just drilled the heads off & punched them through, took about 15 min to do them all & you don't have to crawl under the deck. Mine were glassed over on the inside, under the deck, so removal would have been very difficult from the inside. If yours is the same, you will have to cut the glass all the way along to remove the deck
Cheers
Bill

Once you drilled the bolt heads off of the rubrail, how did you get the cap loose from the 'glass ribbon backer shown in your pix. It's still stuck to the inside of the hull, but clearly no longer stuck to the back of the cap?

Multi-tool run up into & through the joint from the outside? After you got the rubrail off?

The '59 hardtop is a great looking boat!

Have a great weekend.

Please Log in or Create an account to join the conversation.

Re:1959 Glastron Seaflite 12 years 8 months ago #58526

I took a mini zip disc & cut from the inside, then the deck lifts off. (except where it is bonded to the transom)
Cheers
Bill
Attachments:

Please Log in or Create an account to join the conversation.

Re:1959 Glastron Seaflite 12 years 8 months ago #58577

  • thetudor
  • thetudor's Avatar Topic Author
  • Offline
  • Platinum Boarder
  • Platinum Boarder
  • Posts: 1204
  • Karma: 33
  • Thank you received: 2
That's what I was planning on doing with my Multimaster, cutting that ribbon. Any thoughts on separating the deck and the transom? Hopefully I'll have all the screws drilled out today and maybe the ribbon cut.

Please Log in or Create an account to join the conversation.

Todd (aka thetudor)
1964 Custom Craft Aqua Ray
1959 Glastron Seaflite
1959 Tomahawk Spirit

Re:1959 Glastron Seaflite 12 years 8 months ago #58587

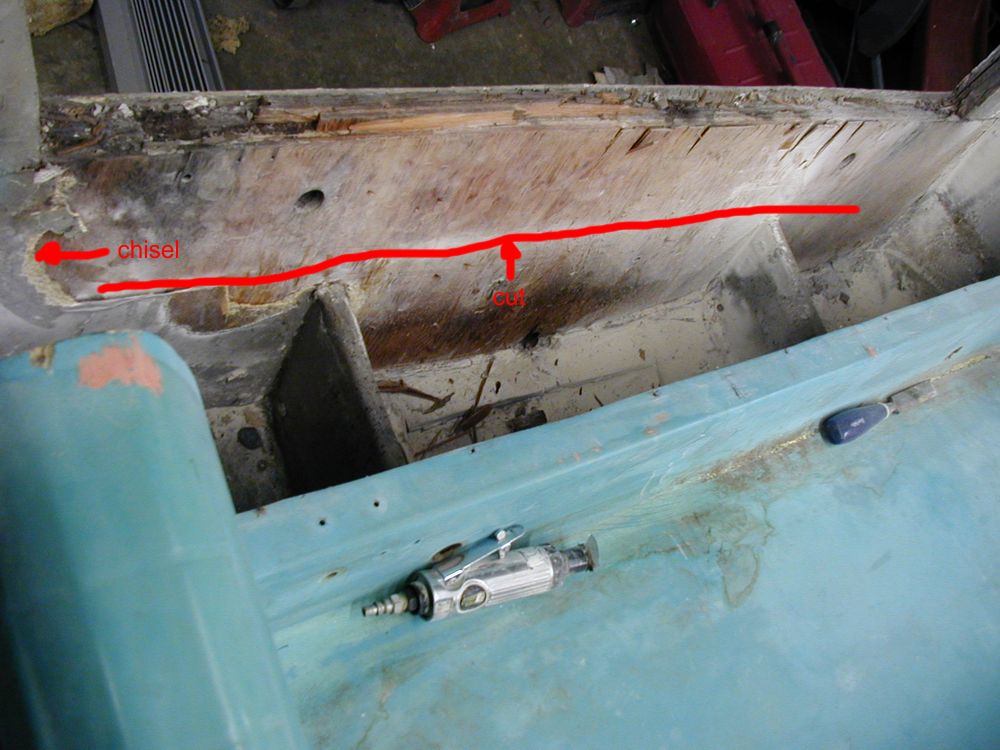
After you have removed all the bolts & cut the glass "ribbon", lift the deck up at the front. It is likely still bonded to the transom. You will probably find it easiest to cut the glass on the transom under the splash well and chisel up the sides, then chisel it off the back of the splash well once the deck is off.
Attachments:

Please Log in or Create an account to join the conversation.

Re:1959 Glastron Seaflite 12 years 8 months ago #58614

  • thetudor
  • thetudor's Avatar Topic Author
  • Offline
  • Platinum Boarder
  • Platinum Boarder
  • Posts: 1204
  • Karma: 33
  • Thank you received: 2
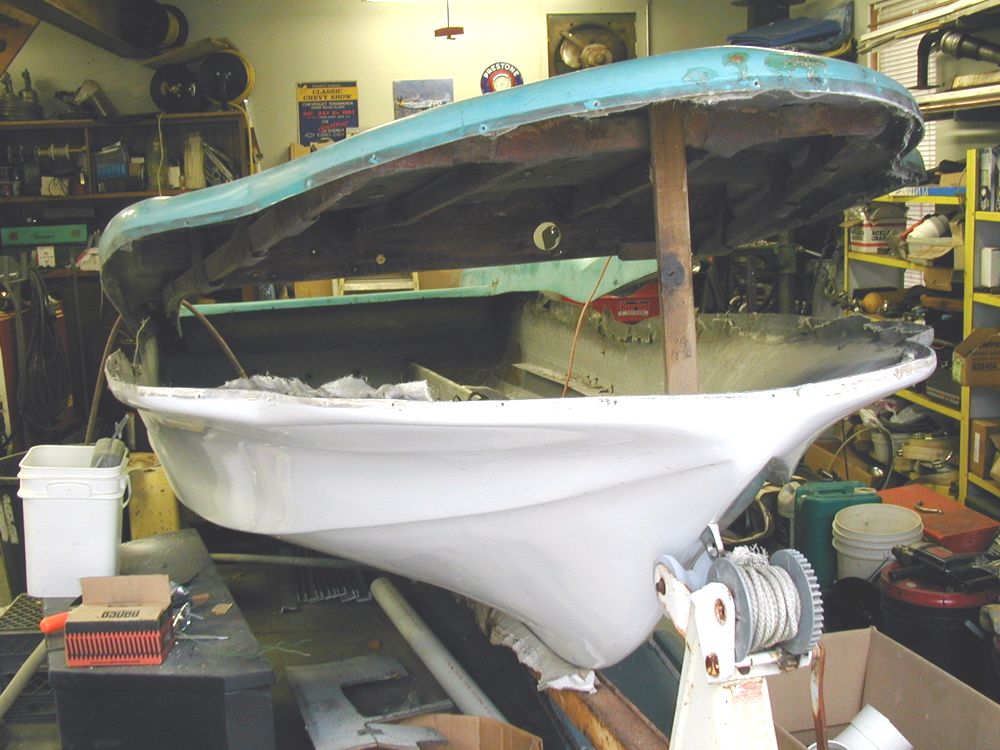
I got the rest of the trim piece off and loosened the deck. It is now ready to lift off when I find 3 other people to help me. A couple of observations:

1. Of all the techniques for removing the screws, cutting them from behind was the best. Drilling the screw heads, although it was quicker, became problematic in centering the drill and getting all of the head. Ended up with bigger holes and more scars on the trim piece.

2. The construction is not exactly top notch. A lot of uneven cuts and the fiberglass shroud was installed very sloppy. Some sections didn't have it and some were poorly placed. Worked to my advantage though. Am I going to need to reinstall something similar?

3. The transom area of the deck was fairly loose, once I removed the drain sleeves. One side had some extra glass, which I cut with the Multimaster.

4. It seems like the transom is a little better that I thought. No severe rot, but a lot of moisture. May have to replace less than I thought. Will know more when deck completely off.

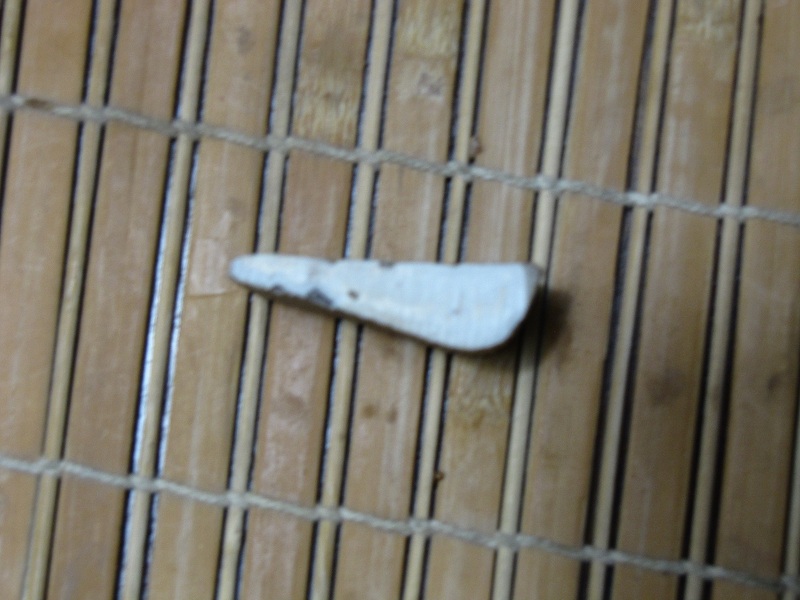
5. There is a fiberglass spacer between the top of the transom and the cap part of the deck. The profile is in the picture. It is solid fiberglass and runs the length of the cap. I will need to reproduce this as the existing is broken in several pieces.

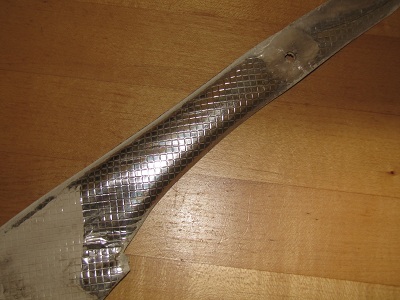
6. It appears that the Mylar sheet that is located in the coves on the sides of the hull was installed before the deck went on. Will install the new stuff that way. The Mylar is a silver sheet embossed with 1/8" squares (which matches the pattern on the aluminum dash trim) that is backed by paper. There is evidence of it being glued around the edges, but not in the cove itself. This may be why there are few if any left with the original Mylar. I will probably glue it to the hull and use wallpaper brushes to smooth it out. BTW, the Mylar with the squares can be bought at hydroponic gardening supply houses.

7. I posted a question on the main Forum about bracing the hull when the deck is off. Any ideas if this is necessary and the best way to go about it?

Transom Spacer Profile

Mylar Pattern
Attachments:

Please Log in or Create an account to join the conversation.

Todd (aka thetudor)
1964 Custom Craft Aqua Ray
1959 Glastron Seaflite
1959 Tomahawk Spirit

Re:1959 Glastron Seaflite 12 years 8 months ago #58617

Measure from inside of hull to inside of hull before you lift the cap, and use a plastic or grommet washer to protect the hull & screw through an existing rubrail bolt hole into a 2X cut to fit between the 2 sides of the hull. &/or ratchet straps around the hull. There will likely be little deflection of the hull sides when you're putting down the new deck/sole on the stringers. But even just a little would make putting the cap back on. If you need to do stringers too, support from below would probably be better then the strapping/2X. The hull doesn't to be particularly laid up thick w/ the original roving or cloth during construction. But I don't have to replace the stringers, all glass & hollow, not wood wrapped w/ glass.

I found lots of interesting 'lack of quality' in the '60 FireFlite too. Slow progress.... But some lately..

The hardtop is very cool

Please Log in or Create an account to join the conversation.

Re:1959 Glastron Seaflite 12 years 8 months ago #58645

  • Andgott
  • Andgott's Avatar
  • Offline
  • Contributing Member
  • Contributing Member
  • Posts: 1243
  • Karma: 72
  • Thank you received: 0
thetudor wrote:

2. The construction is not exactly top notch. A lot of uneven cuts and the fiberglass shroud was installed very sloppy. Some sections didn't have it and some were poorly placed. Worked to my advantage though. Am I going to need to reinstall something similar?


No big surprise there! I'm AMAZED at what I find in hidden areas on most boats- regardless of age. The older glassics seem to be REALLY bad. Remember there was a lot of competition out there, and they had to crank 'em out fast to make money, so corners WERE cut!

4. It seems like the transom is a little better that I thought. No severe rot, but a lot of moisture. May have to replace less than I thought. Will know more when deck completely off.


Do yourself a favor- When you've got the boat torn up, just replace the whole thing... Better than having to rip it apart in a few years to repair a spot that rots later. If water/dampness got in there, it should be replaced.

7. I posted a question on the main Forum about bracing the hull when the deck is off. Any ideas if this is necessary and the best way to go about it?


As previously mentioned, take some good measurements and then use straps or something similar to hold the hull in proper shape while you work on it. You may nor may not need to do this- You'll know when you separate the halves how much it 'deflects'. I used some minimal bracing on my Glasspar, just to be on the safe side, and it all fit back together correctly.... Same thing with the g3's I've done. I can't speak for the Lake N Sea, Yet.

Please Log in or Create an account to join the conversation.

Re:1959 Glastron Seaflite 12 years 8 months ago #58677

Wow !!! that's looking great ! Being new to this, and soaking up all the tips, hints and pointers, like a sponge. It makes it very exciting to watch how other projects are coming along, so when I have time to start mine, I can hit the floor running.
I'm sorry to go off on a tangent right now, because you are in the
dis-mantle and repair stages, but I have a question on gel coat ?
I see you ground it off of the top. after you smooth it fare it, will you be putting gel coat back on ? or epoxy paint ?
What are the diferences ? Are there advantages from one to another ?
I'm sorry if this question may seem simple for you folks who do this a lot, but I have to figure what to do with mine at some point ?
Thanks !!!

Please Log in or Create an account to join the conversation.

Re:1959 Glastron Seaflite 12 years 8 months ago #58682

  • thetudor
  • thetudor's Avatar Topic Author
  • Offline
  • Platinum Boarder
  • Platinum Boarder
  • Posts: 1204
  • Karma: 33
  • Thank you received: 2
Chuck, the gelcoat vs epoxy paint (Imiron, Awlgrip, etc) has been going around for a long time. I would love to do it in gelcoat for teh sake of authenticity, but from a practical standpoint, Imiron would be easier, probably better, probably cheaper. I haven't made a decision on that yet, but am leaning towards the paint. I'm sure others have opinions and ideas and always love to hear them.

Andy, I will probably replace most if not all of the transom. My debate right now is pourable vs wood.

For the braces, I plan to install a single brace between two screw holes for trim pieces before I remove the deck. Once that is off, I will add a few more across the top. At some point, I would like to be able to flip the hull to work on it. Not sure how to do that safely with the deck off.

Please Log in or Create an account to join the conversation.

Todd (aka thetudor)
1964 Custom Craft Aqua Ray
1959 Glastron Seaflite
1959 Tomahawk Spirit

Re:1959 Glastron Seaflite 12 years 8 months ago #58700

  • Andgott
  • Andgott's Avatar
  • Offline
  • Contributing Member
  • Contributing Member
  • Posts: 1243
  • Karma: 72
  • Thank you received: 0
thetudor wrote:

Andy, I will probably replace most if not all of the transom. My debate right now is pourable vs wood.


I vote wood all the way... Easier, Cheaper, lighter. People argue that it won't last- BUT your boat made it 50 years, most of which it was severely neglected, with a wood transom. Even if you 'only' get 50 more out of the next, I think you're good. But, odds are it'll last forever- since I have a feeling that this boat will enjoy a MUCH higher standard of living from now on!

-Andrew

Please Log in or Create an account to join the conversation.

Re:1959 Glastron Seaflite 12 years 8 months ago #58703

  • thetudor
  • thetudor's Avatar Topic Author
  • Offline
  • Platinum Boarder
  • Platinum Boarder
  • Posts: 1204
  • Karma: 33
  • Thank you received: 2
Andrew, your point is well taken. I have 2 issues with plywood. The first is that the end grains tend to absorb water rather quickly. I lost a replacement transom in a plywood runabout for exactly that reason. The second is that I have an aversion to cutting perfectly good fiberglass and the layers on both the inside and outside are in good shape. A repair never has the integrity of the original.

COnsidering the boat was last registered in 1969 in LA and somehow made it to Danbury, CT by 2010, I won't take much for it to have a higher standard of living.

Please Log in or Create an account to join the conversation.

Todd (aka thetudor)
1964 Custom Craft Aqua Ray
1959 Glastron Seaflite
1959 Tomahawk Spirit

Re:1959 Glastron Seaflite 12 years 7 months ago #61554

  • thetudor
  • thetudor's Avatar Topic Author
  • Offline
  • Platinum Boarder
  • Platinum Boarder
  • Posts: 1204
  • Karma: 33
  • Thank you received: 2
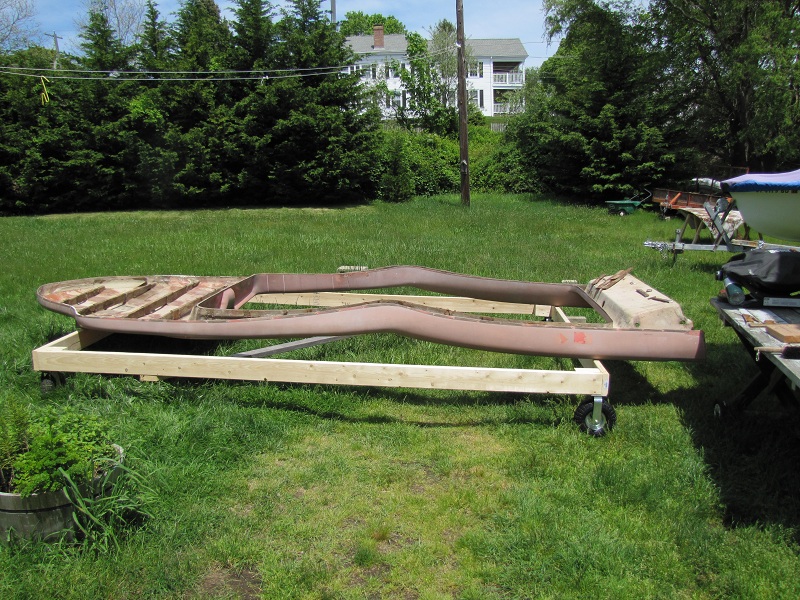
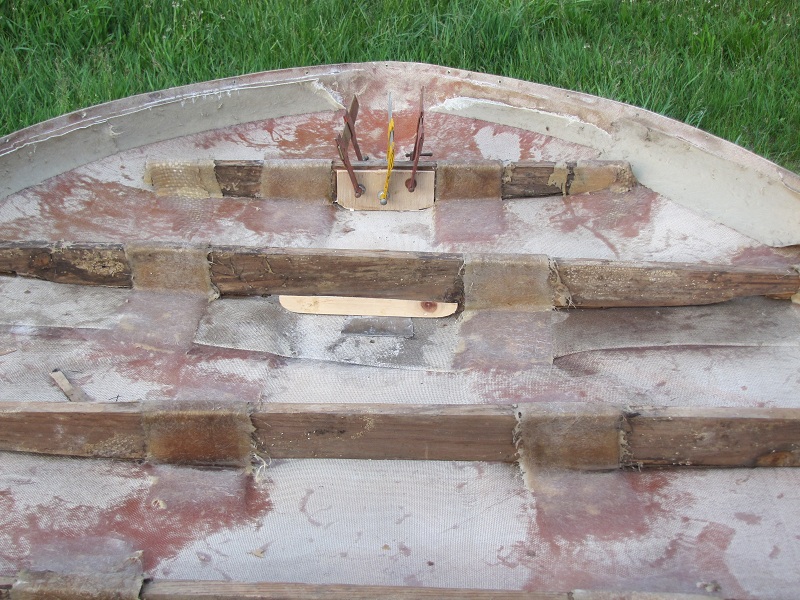
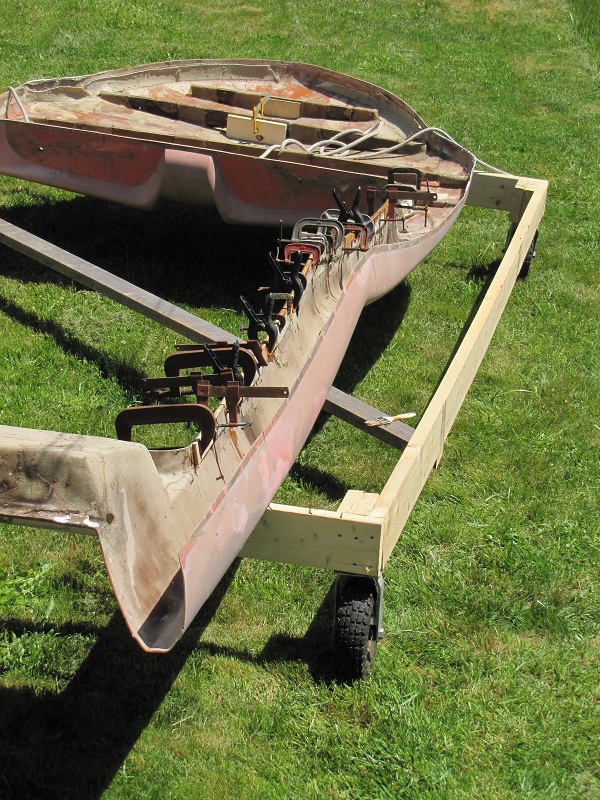
After not being able to get a lot done on this for a while, I am back. The deck is off the hull and upside down on my new cart. I am reinforcing the foredeck stringers, removing the rest of the poorly installed flap for he hull/deck screws and replacing the wood strip strip around the cockpit. After that, it is on to bead blasting to remove the gelcoat.


The hull awaits floor and transom replacement (with plywood - I made my decision)

The fairing on teh hardtop continues
Attachments:

Please Log in or Create an account to join the conversation.

Todd (aka thetudor)
1964 Custom Craft Aqua Ray
1959 Glastron Seaflite
1959 Tomahawk Spirit

Re:1959 Glastron Seaflite 12 years 7 months ago #61556

hi todd i have a suggestion for you on the hard top,the easist way to get it looking like glass that i have found is using the west marine system,2 part,with the pumps.
mix a good bit,then roll it on with a very smooth foam roller,but be quick,it will probably eat the roller,the thing to do is put it on fast in a cool area,spread it out with the roller.
dont over do it,it will find its own level,just do it a thin coat at a time,you will get runs,especially down the sides,but they will sand off,i hope this helps,john

Please Log in or Create an account to join the conversation.

\"too soon old,too late smart\" my pap

Twenty years from now you will be more disappointed by the things that you didn’t do than by the ones you did do. So throw off the bowlines. Sail away from the safe harbor. Catch the trade winds in your sails. Explore. Dream. Discover.“

---Mark Twain

Re:1959 Glastron Seaflite 12 years 7 months ago #61561

  • thetudor
  • thetudor's Avatar Topic Author
  • Offline
  • Platinum Boarder
  • Platinum Boarder
  • Posts: 1204
  • Karma: 33
  • Thank you received: 2
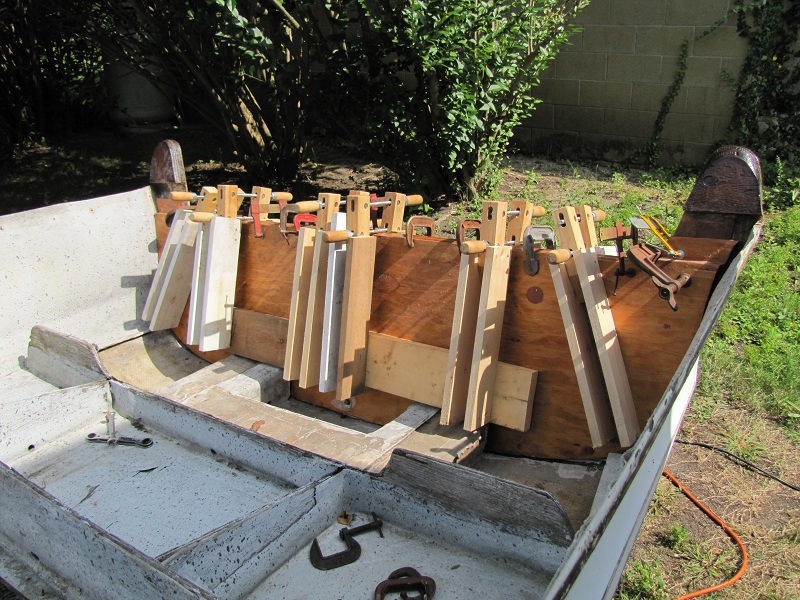
John, I actually did something similar. I put a thin coat of fiberglass resin on the top. This sealed up some minor pits and it has also allowed me to use a lot less fairing compound as compared to the rough glass. With the exception of one side, it is about 85% done.

Here is a pic of the new plywood I installed along the cockpit side. This picture contains all 23 clamps that I own.
Attachments:

Please Log in or Create an account to join the conversation.

Todd (aka thetudor)
1964 Custom Craft Aqua Ray
1959 Glastron Seaflite
1959 Tomahawk Spirit

Re:1959 Glastron Seaflite 12 years 7 months ago #61650

  • 63 Sabre
  • 63 Sabre's Avatar
  • Offline
  • Contributing Member
  • Contributing Member
  • Posts: 4676
  • Karma: 147
  • Thank you received: 167
Looks like you stole my clamp collection. Either that or we come from like mind beginnings. I might have two that look the same.
Cal
Attachments:

Please Log in or Create an account to join the conversation.

Re:1959 Glastron Seaflite 12 years 4 months ago #66070

  • thetudor
  • thetudor's Avatar Topic Author
  • Offline
  • Platinum Boarder
  • Platinum Boarder
  • Posts: 1204
  • Karma: 33
  • Thank you received: 2
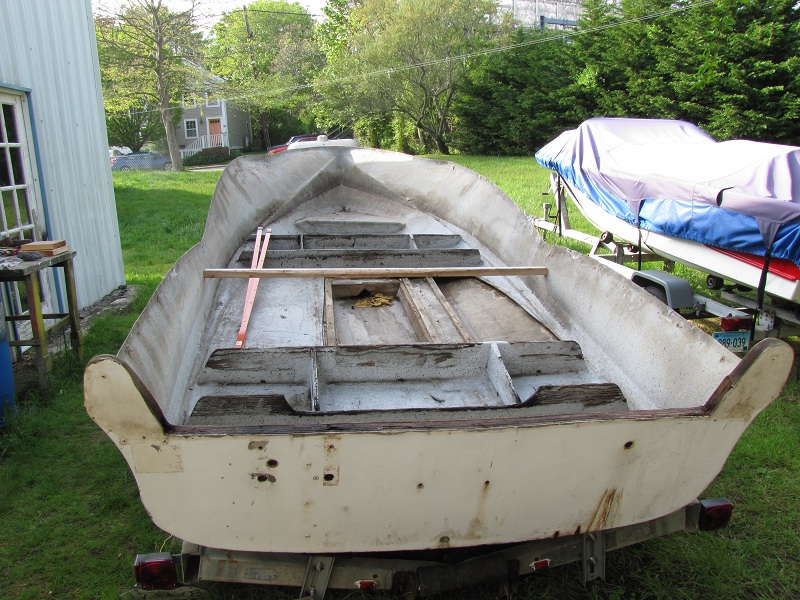
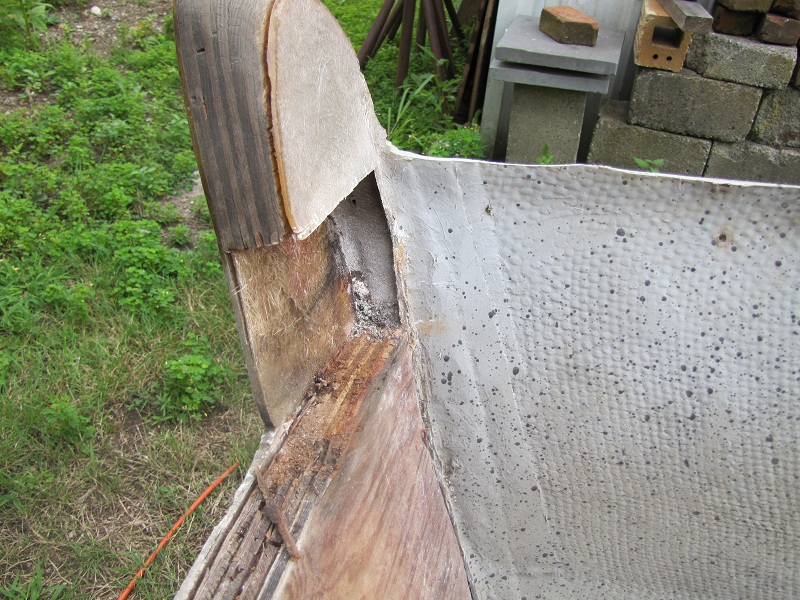
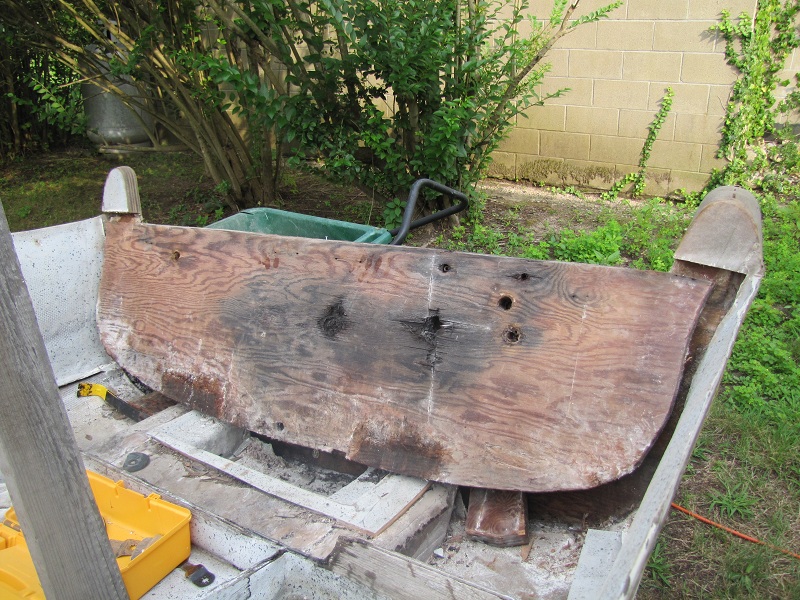
After not working on this for a while (due to too many other distractions), I'm back. Removed the transom today, in almost 1 piece. That was mostly due to the rot on the plywood being around the penetrations and a little on the edges only. I had to cut out the piece that goes up from the main transom half way up the fin on both sides. The plywood at the very top is a separate piece and is in good shape. All the cuts were made with a Multimaster and about the only other tool was a short pry bar. It was actually easier that I thought it would be. The marine plywood for the new transom is in the garage and I will start on that this weekend.

A couple of observations: There was a 3/4" gap between the bottom of the plywood and the hull. Also roughly a 1/2" gap between the sides of the wood and the sides of the hull. There was no filler in these spaces. That will obviously be rectified on the new one.

Also, the plywood was standard exterior grade plywood with at least 1 A side (the piece consisted of two 3/4" pieces of plywood glued together). A lot of gaps. The plywood at the top of the fins is the same, but I will fill and epoxy that for preservation. The new plywood is 3/4" marine grade fir.

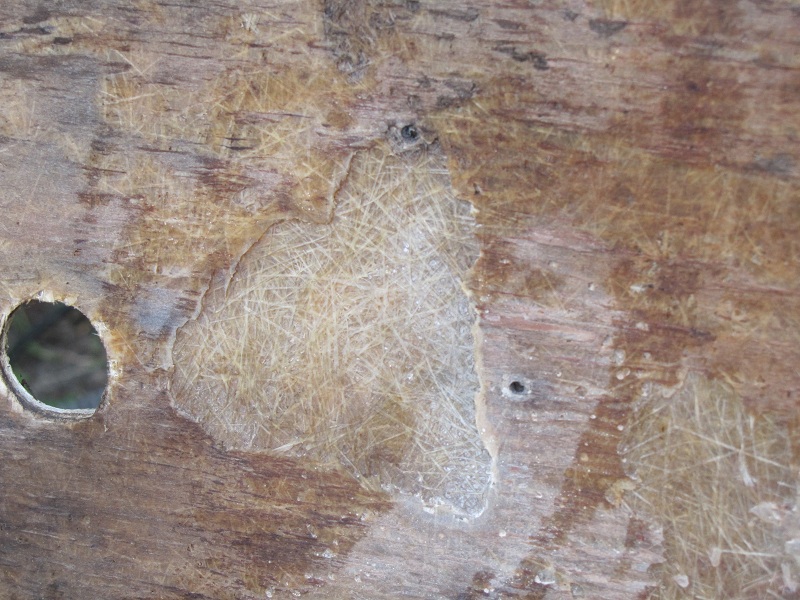
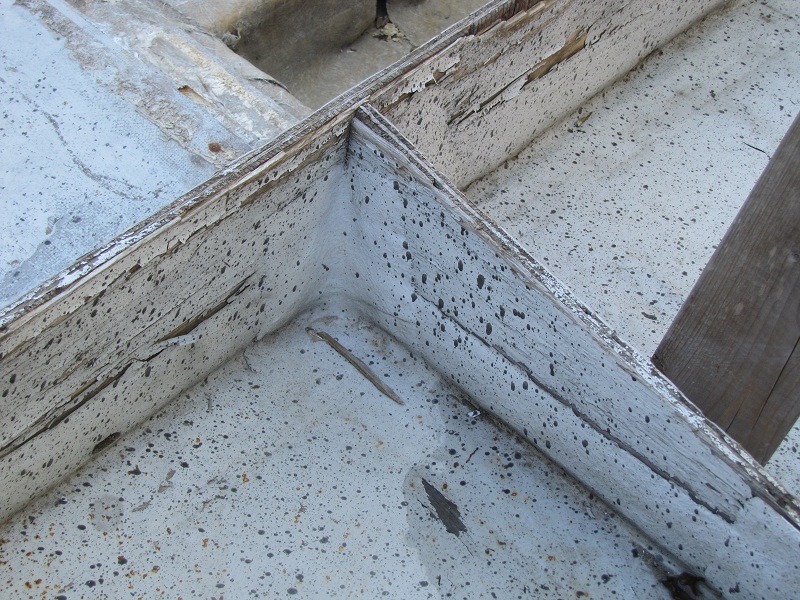
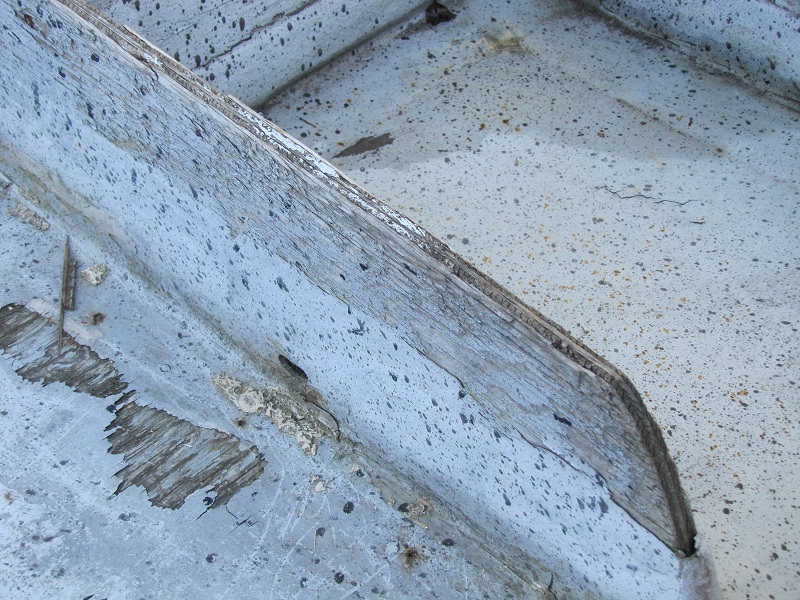
There were a lot of air pockets in the fiberglass where is met the plywood (see pic). These will be filled before the new wood goes in.


Please Log in or Create an account to join the conversation.

Todd (aka thetudor)
1964 Custom Craft Aqua Ray
1959 Glastron Seaflite
1959 Tomahawk Spirit

Re:1959 Glastron Seaflite 12 years 4 months ago #66077

  • MarkS
  • MarkS's Avatar
  • Offline
  • Moderator
  • Moderator
  • Posts: 5348
  • Karma: 118
  • Thank you received: 5
Good progress Todd, glad to see you're back at it.

Please Log in or Create an account to join the conversation.

Mark

Re:1959 Glastron Seaflite 12 years 3 months ago #68400

  • thetudor
  • thetudor's Avatar Topic Author
  • Offline
  • Platinum Boarder
  • Platinum Boarder
  • Posts: 1204
  • Karma: 33
  • Thank you received: 2
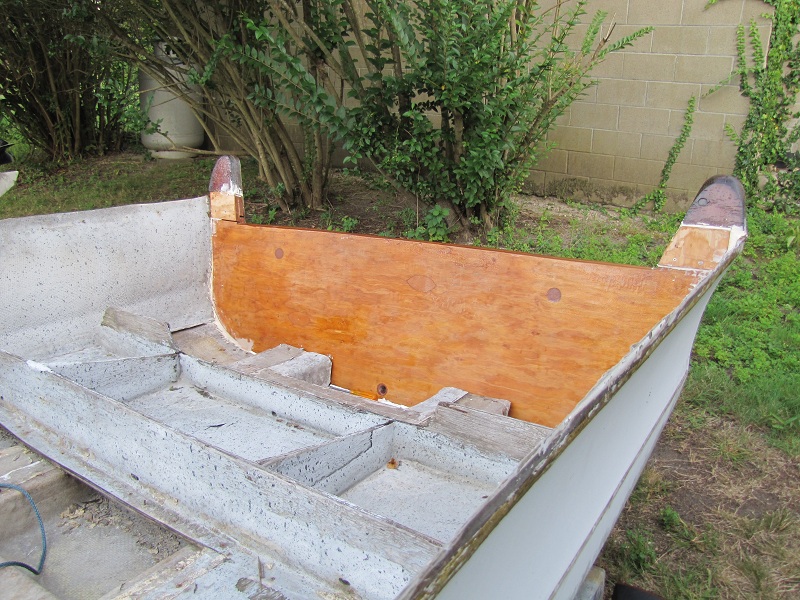
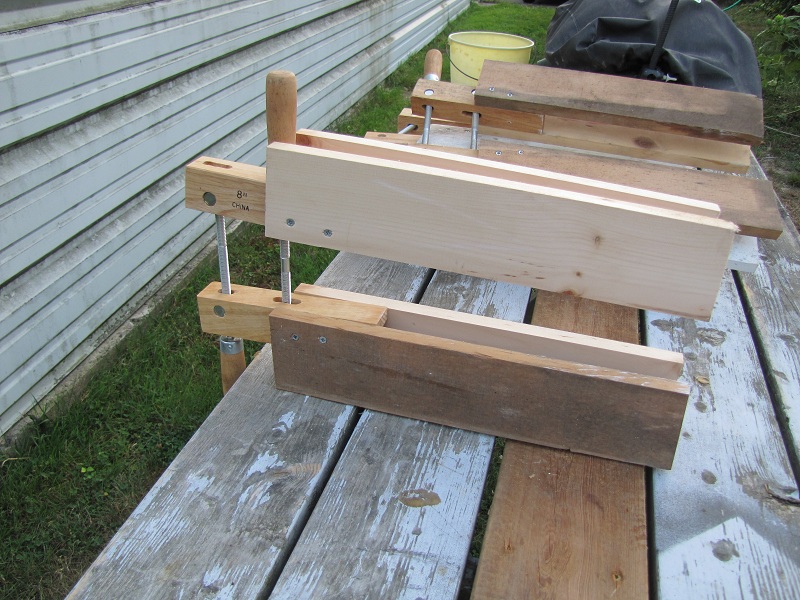
The new transom is now installed. Two pieces of 3/4" marine plywood epoxied together, shaped and coated with epoxy. Two layers everywhere and 3 on the edge grain on the top. Epoxied to the transom glass and the gaps partially filled. Now to finish the filling and fiberglass to the hull.

.

And a detail of the clamps I made to do it.
Attachments:

Please Log in or Create an account to join the conversation.

Todd (aka thetudor)
1964 Custom Craft Aqua Ray
1959 Glastron Seaflite
1959 Tomahawk Spirit

Re:1959 Glastron Seaflite 12 years 3 months ago #68402

  • 63 Sabre
  • 63 Sabre's Avatar
  • Offline
  • Contributing Member
  • Contributing Member
  • Posts: 4676
  • Karma: 147
  • Thank you received: 167
Whoo Hoo, another milestone passed. Should be strong enough to hang at least a 400# motor on.
Attachments:

Please Log in or Create an account to join the conversation.

Re:1959 Glastron Seaflite 12 years 3 months ago #68449

Outstanding Todd, better than original!!!!!!!!!!!!!!!!!

Bob

Please Log in or Create an account to join the conversation.

Re:1959 Glastron Seaflite 12 years 3 months ago #68453

  • 63 Sabre
  • 63 Sabre's Avatar
  • Offline
  • Contributing Member
  • Contributing Member
  • Posts: 4676
  • Karma: 147
  • Thank you received: 167
The agony comes when you have to drill the drain hole in your new transom. :woohoo:

Please Log in or Create an account to join the conversation.

Re:1959 Glastron Seaflite 12 years 3 months ago #68468

  • thetudor
  • thetudor's Avatar Topic Author
  • Offline
  • Platinum Boarder
  • Platinum Boarder
  • Posts: 1204
  • Karma: 33
  • Thank you received: 2
Thanks guys. It already feels stronger than the the original and I don't have the 3/4" gap below the bottom of the plywood.

I had actually marked the holes for the bottom drain and the two motor well drains previously. Cut holes with 1-1/2" hole saw and filled the with epoxy. I put the transom in place and drilled out the bottom drain the a 1" hole saw right through the epoxy, so that one is done. I put a bolt through that with fender washers and used that to help clamp the transom. I haven't drilled the holes for the splash well drains yet and I probably wont until I put the deck back on. (See the dark circles near the top of the transom.)

When the rain stops, I'll finish the filling and start the fiberglass.

Please Log in or Create an account to join the conversation.

Todd (aka thetudor)
1964 Custom Craft Aqua Ray
1959 Glastron Seaflite
1959 Tomahawk Spirit

Re:1959 Glastron Seaflite 12 years 2 months ago #69614

  • thetudor
  • thetudor's Avatar Topic Author
  • Offline
  • Platinum Boarder
  • Platinum Boarder
  • Posts: 1204
  • Karma: 33
  • Thank you received: 2
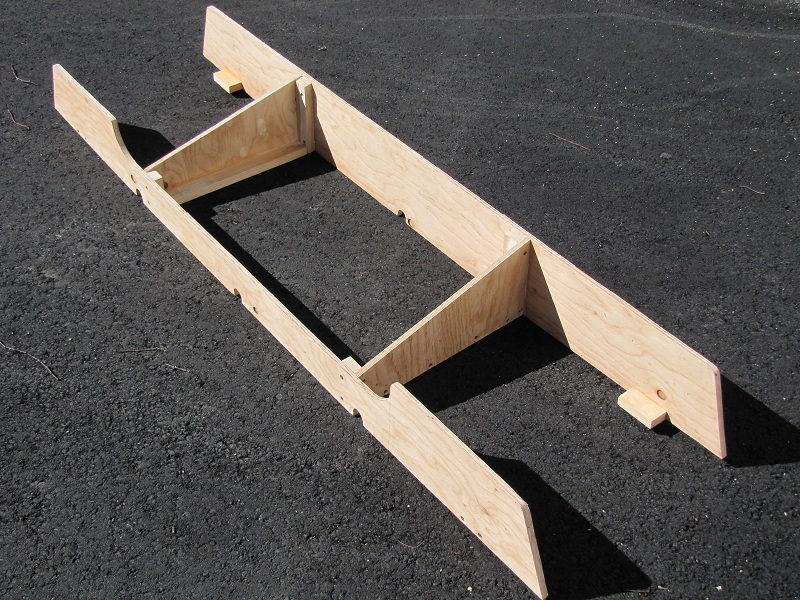
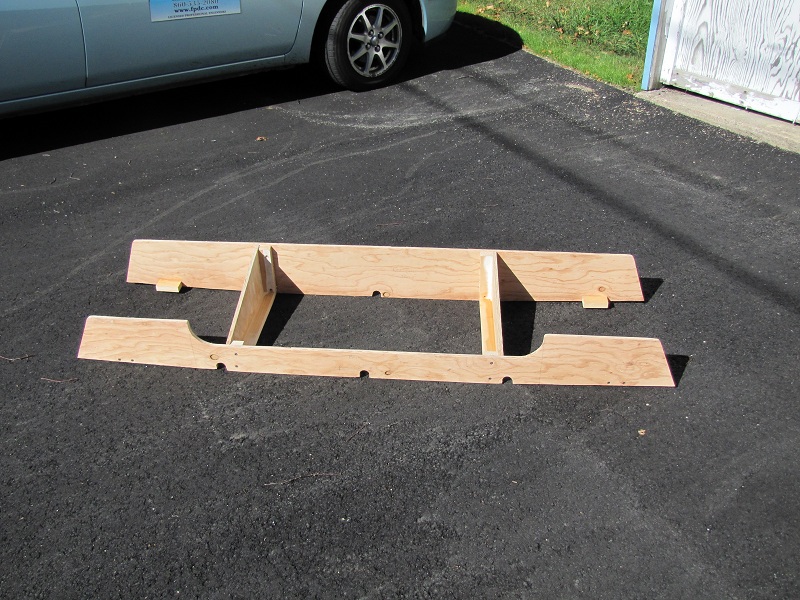
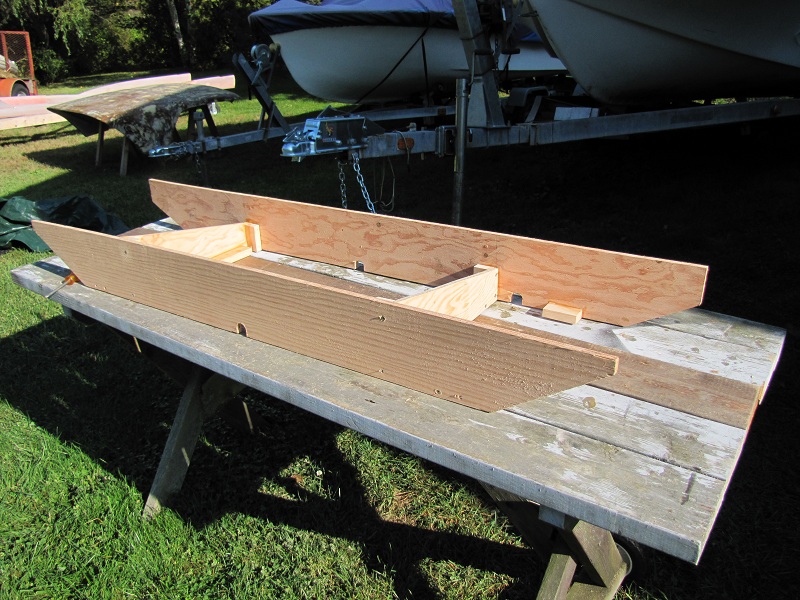
Today I built a new rear seat support. The original system consisted of 4 pieces of 1/2" plywood on edge supported by some fiberglass. The pieces are not connected together. I thought this was not a very good system and decided to build one better.

I used 1/2" ACX plywood and connected with pieces of 1x pine. I also put a piece of 1x at the base of the cross pieces and one piece near each of the corners. This will allow me to mechanically fasten (screw) the frame on to the new floor. I will probably run a piece of fiberglass up the from and back of the frame to give a little more stability and to blend the seat to the floor.

I also cut scuppers in the bottom of the frame for drainage. I opted for scuppers instead of driller holes to prevent water from retaining in the space. I also added two on the outside of the lateral supports to drain those pockets (none on the original)

All of the joints are glued and screwed. All knots and openings will be filled and sanded. The entire assembly will be covered in epoxy with added layers at the edges.

This should be a lot stronger and more stable, but still keep the look of the original.

existing conditions


New seat frame
Attachments:

Please Log in or Create an account to join the conversation.

Todd (aka thetudor)
1964 Custom Craft Aqua Ray
1959 Glastron Seaflite
1959 Tomahawk Spirit

Re:1959 Glastron Seaflite 12 years 2 months ago #69623

Excellent, better that the original. Great design.

Bob

Please Log in or Create an account to join the conversation.

Re:1959 Glastron Seaflite 12 years 2 months ago #69629

  • 63 Sabre
  • 63 Sabre's Avatar
  • Offline
  • Contributing Member
  • Contributing Member
  • Posts: 4676
  • Karma: 147
  • Thank you received: 167
If they did that kind of work at the factory you would be paying twice as much when it was new. Shortcut were what made money. Slap some boards together with a little glass mat and hide it under the seats...voila no one will know.
Great improvement and no worries about it coming apart when you hit some rough water.
Great work, keep it coming.
Cal
Attachments:

Please Log in or Create an account to join the conversation.

Re:1959 Glastron Seaflite 12 years 2 months ago #70010

  • thetudor
  • thetudor's Avatar Topic Author
  • Offline
  • Platinum Boarder
  • Platinum Boarder
  • Posts: 1204
  • Karma: 33
  • Thank you received: 2
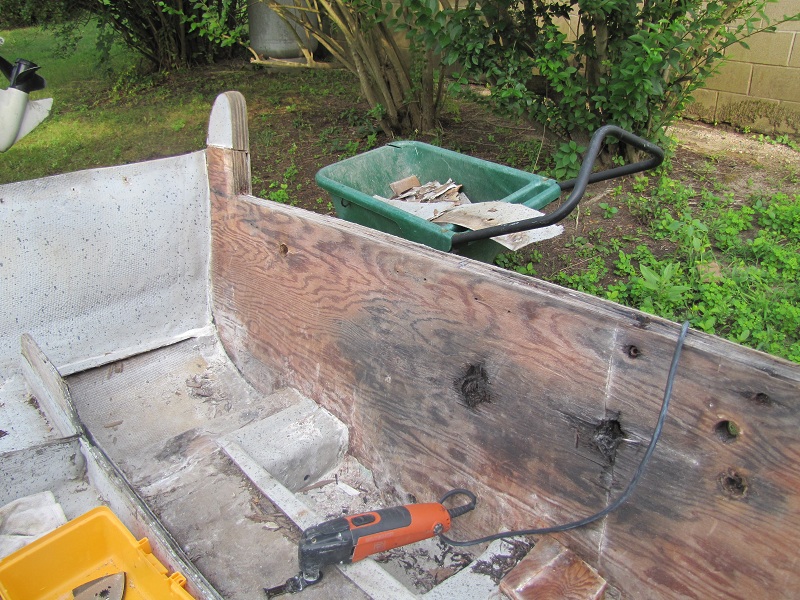
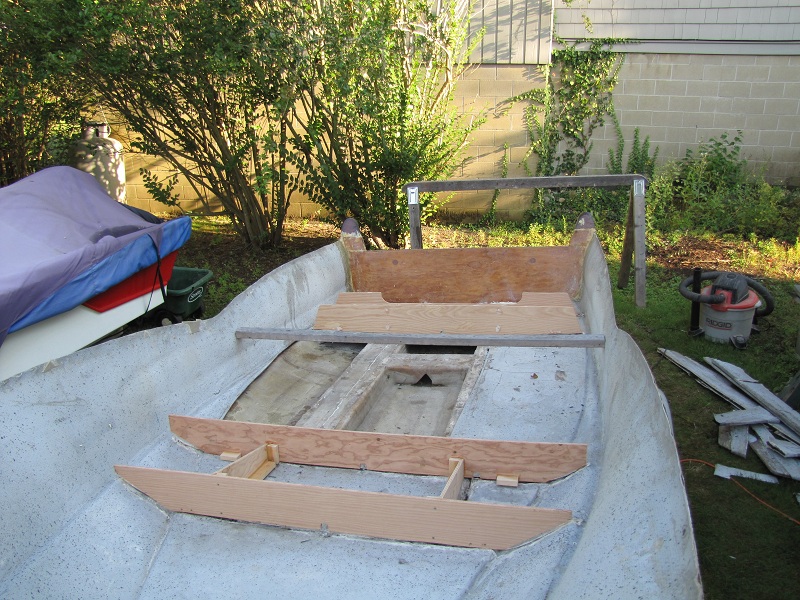
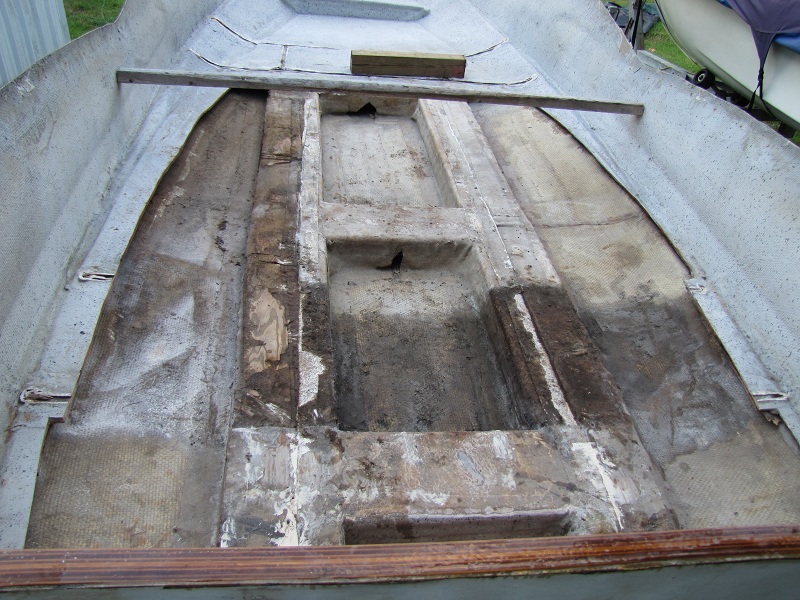
In spite of the damp weather this weekend (the only sun was late this afternoon), I did manage to get a few things done. I got the new front seat frame built. Once that was done, I marked on the hull where the seats are located and then demoed them in order to be able to start removing the floor. Unfortunately, I broke the round saw blade on my Multimaster early on, so I could only do some rough cutting on the floor, but made good progress with a Sawzall. (no hull damage, fortunately)

The seat supports were built little better than the transom. The 1/2" plywood for the back seat was ended about 1/2" up from the floor and was suspended by the fiberglass. The front seat was a little better, but the rot was such that it was tough to tell what was going on. I had previously said that the supporting boards were not attached together. That was not true, they were nailed together (into the edge of 1/2" plywood) with steel nails. They had rusted down to the size of pencil leads.

The floor was constructed in 3 pieces (transversely); a center piece 2' wide and pieces on either side shaped to the hull. Not sure at this point if the used 8 ft pieces and joined them together of perhaps 12 ft pieces. Will find out when the rest of it is removed.

Laying the reinforcing fiberglass around the stringers looks a little haphazard, but it has remained together for 53 years so it can't be all bad.

Hopefully next week will be dry enough to finished the glass work on the transom, epoxy the floor supports and remove the rest of the floor.

New front seat support

Removed both seat supports and set the new ones on the old floor

Rough floor cut out. The dark areas are wet and show the new cut. The dry areas had been opened by a previous owner.

Close up of the construction of one of the cross stringers. Not exactly consistent.
Attachments:

Please Log in or Create an account to join the conversation.

Todd (aka thetudor)
1964 Custom Craft Aqua Ray
1959 Glastron Seaflite
1959 Tomahawk Spirit

Re:1959 Glastron Seaflite 12 years 2 months ago #70014

Wow, great progress! Keep it up.

Bob

Please Log in or Create an account to join the conversation.

  • Page:
  • 1
  • 2
Time to create page: 0.326 seconds

Donate

Please consider supporting our efforts.

Glassified Ads

Mercury outboard
( / Engines)

noimage
11-03-2024

Classic Mercury Outboard Motors
( / Engines)

Classic Mercury Outboard Motors
10-18-2024

1958 Skagit Sportster
( / Boats)

1958 Skagit Sportster
09-25-2024

FG Login

FiberGoogle

Who's Online

We have 7156 guests and 2 members online