Welcome, Guest
Username: Password: Remember me
  • Page:
  • 1

TOPIC: Removing crank bearings in-line 6

Removing crank bearings in-line 6 12 years 7 months ago #59414

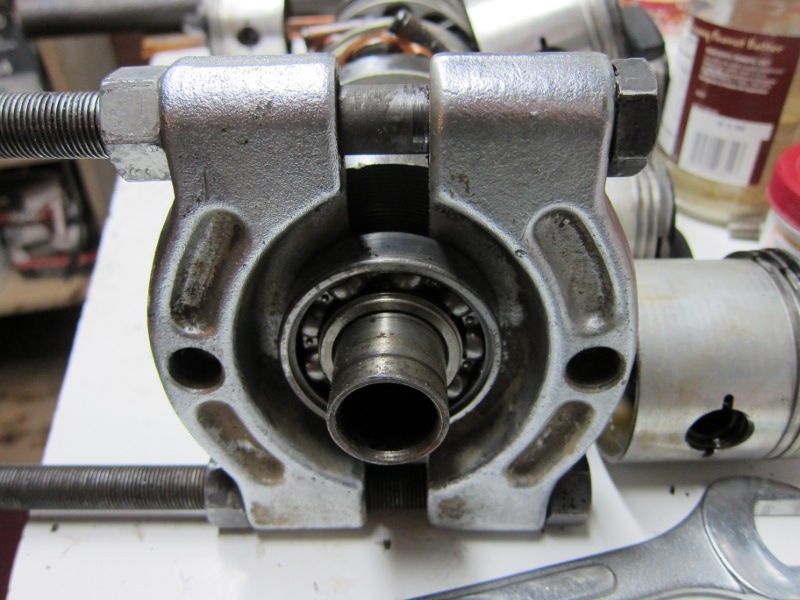
I borrowed the correct tool as described in the merc manual for pulling these crank bearings. The tool moves the bearing out some, but now what?

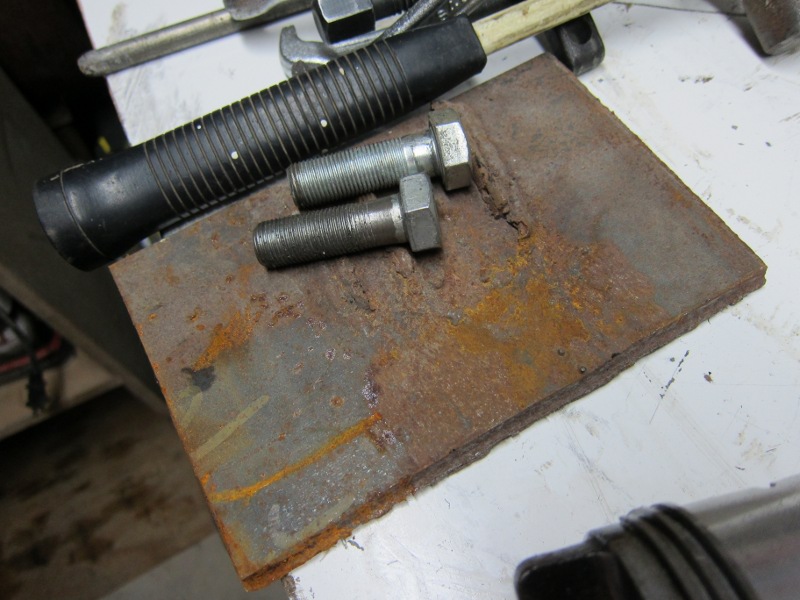
The puller has 5/8 fine threaded holes in each side. I got some 5/16 plate. Make a puller that pulls the whole thing off? Or?

Thanks for any help!

Frank


Attachments:

Please Log in or Create an account to join the conversation.

Re:Removing crank bearings in-line 6 12 years 7 months ago #59426

  • ed-mc
  • Offline
  • Platinum Boarder
  • Platinum Boarder
  • Posts: 1412
  • Karma: 232
  • Thank you received: 117
2 ways to get the bearing all the way off - either with a puller plate, or use a gear puller.

The idea of the bearing separator is to get it busted loose, so you can get a puller behind it, but since you have the bolt holes in the face of the separator, all you'd need to do is drill corresponding holes in your plate and that should have plenty of travel to get the bearing to the end of the crankshaft. Just make sure to back off the bearing wedge a bit so it doesn't dig into the crankshaft.

You may need a gear puller to get the bearing all the way off the end, unless you install some sort of stub into the crankshaft so the plate bears against the stub instead of the crank end; other wise the 'wedgie' is just gonna stop when it gets to the plate.

I guess if you wanted to get really fancy, you could drill & tap your plate to fit a fine-threaded puller bolt, small enough to fit the i.d. of the crankshaft. Then it'll pull the bearing all the way off.

To install a new bearing, clean any burrs off the crank, lightly oil, then take your new "206" ball bearing and stick it in a toaster oven, approx 200-210 deg F. for 10-15 minutes.

The heat expands the inner race just enough to make the installation a slip fit. As soon as the bearing is installed, heat transfer locks the bearing tight on the shaft.

Once heated to temperature, use leather or otherwise insulated gloves to handle the bearing.

Immediately slap that bearing on the shaft, make sure it's going on straight 'cause you only have one chance!

It should slide on like butter. Note that if something should happen and the bearing doesn't go on all the way before it shrinks to the shaft, you'll have to use a press to install the rest of the way.

HTH...........ed

Please Log in or Create an account to join the conversation.

Re:Removing crank bearings in-line 6 12 years 7 months ago #59427

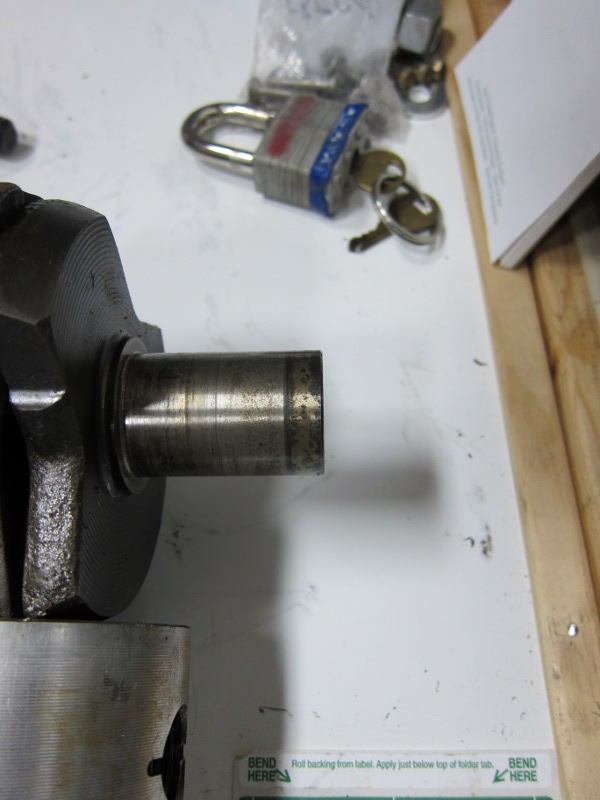
That helps a great deal Ed, thank you sir! I have a 3 jaw puller, but the bearing separator hasn't pulled the bearing off enough to get my jaws under the bearing.

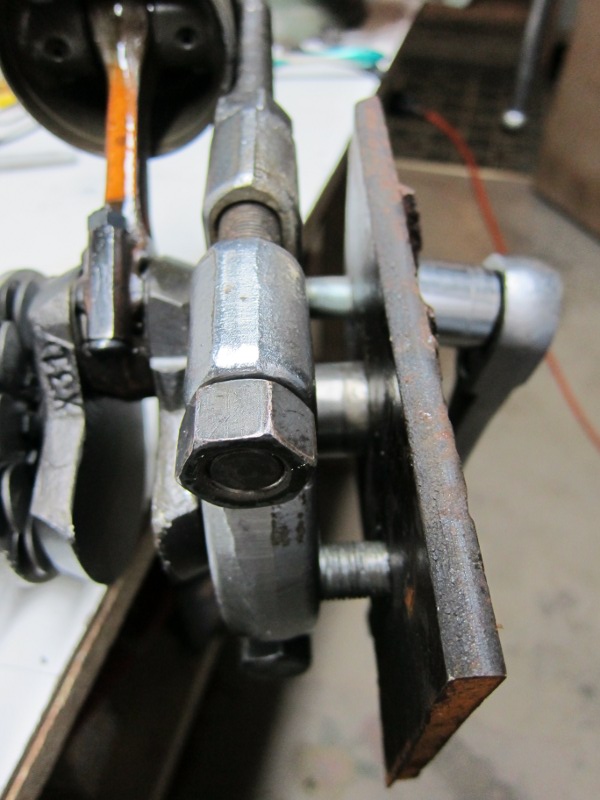
Once I tightened the separator all the way, I did back off the nuts a few turns so that I could use that steel plate and my two 5/8 fine threaded bolts in the pic with the plate as pullers, and not damage the crank. If I could just pull it out a bit more, I could then get my 3 jaw puller in.

Couldn't I use a socket for a stub? Also, drilling and tapping a hole in the center of that plate would be easy to do.

Anyways, very helpful, including install advice. Thanks!

Frank

Please Log in or Create an account to join the conversation.

Re:Removing crank bearings in-line 6 12 years 7 months ago #59488

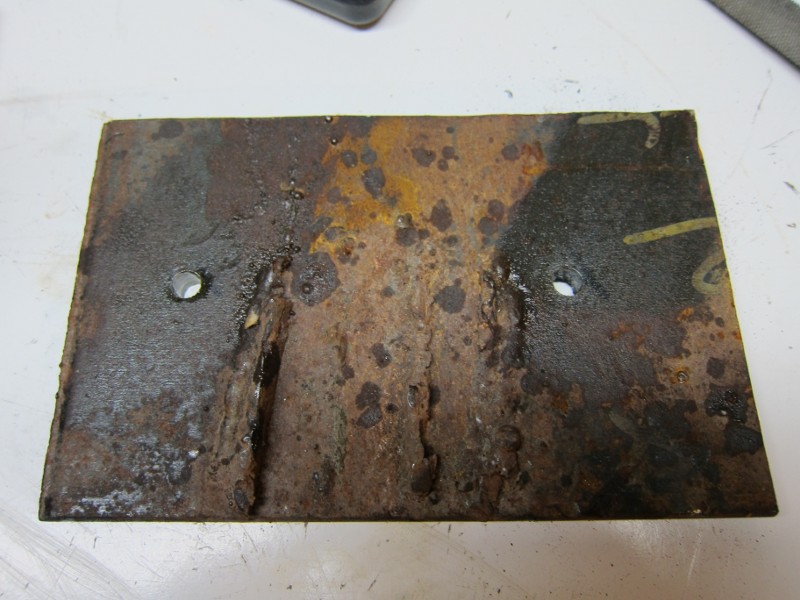
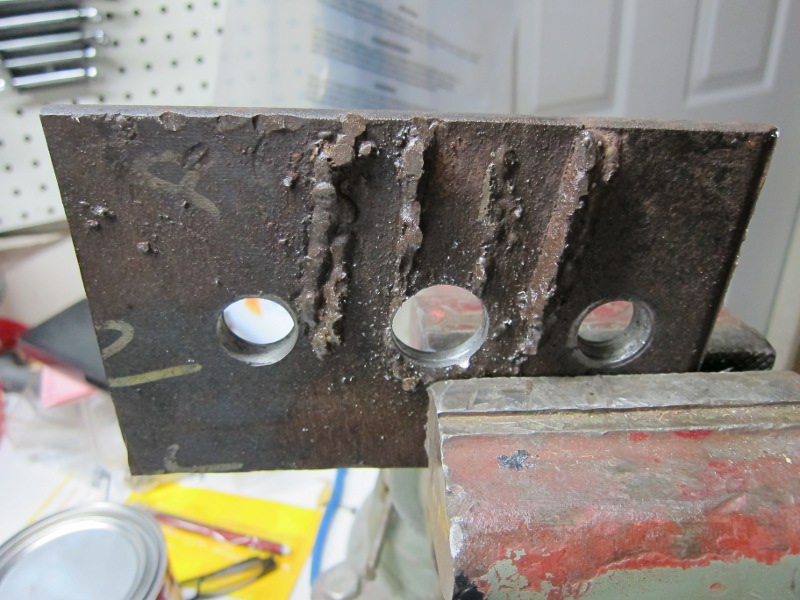
Honey-dews consumed my evening last night, but was able to get in my shop for a few free minutes this a.m. and got starter holes drilled for my puller plate. Hopefully tonight I can get them done and pull these bearings! Right after I mow the back lawn and play with the puppy...

Frank

Attachments:

Please Log in or Create an account to join the conversation.

Done removing crank bearings in-line 6 12 years 7 months ago #59511

Done!

Plate worked good on the lower bearing, just two 5/8 holes for the merc puller.


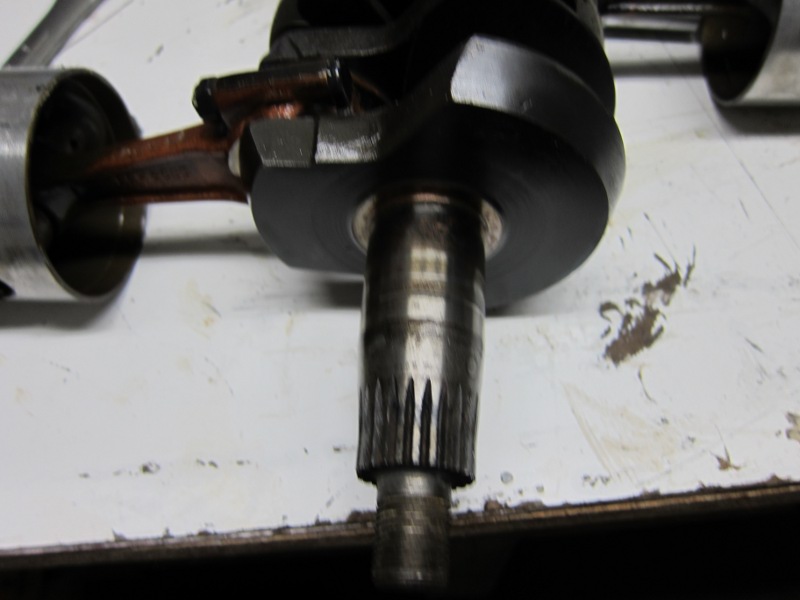
Lower bearing off, presto zippo!


Had to drill a center hole in my puller plate to fit down over the upper shaft just because I didn't have longer 5/8 bolts in the shop. Worked fine.


Top one came off even easier!

Attachments:

Please Log in or Create an account to join the conversation.

  • Page:
  • 1
Time to create page: 0.177 seconds

Donate

Please consider supporting our efforts.

Glassified Ads

1967 23 ft powercat flybridge
( / Boats)

noimage
11-17-2024

Mercury outboard
( / Engines)

noimage
11-03-2024

Classic Mercury Outboard Motors
( / Engines)

Classic Mercury Outboard Motors
10-18-2024

FG Login

FiberGoogle

Who's Online

We have 7113 guests and no members online