Transom Replacement
by Glass Clown Boats
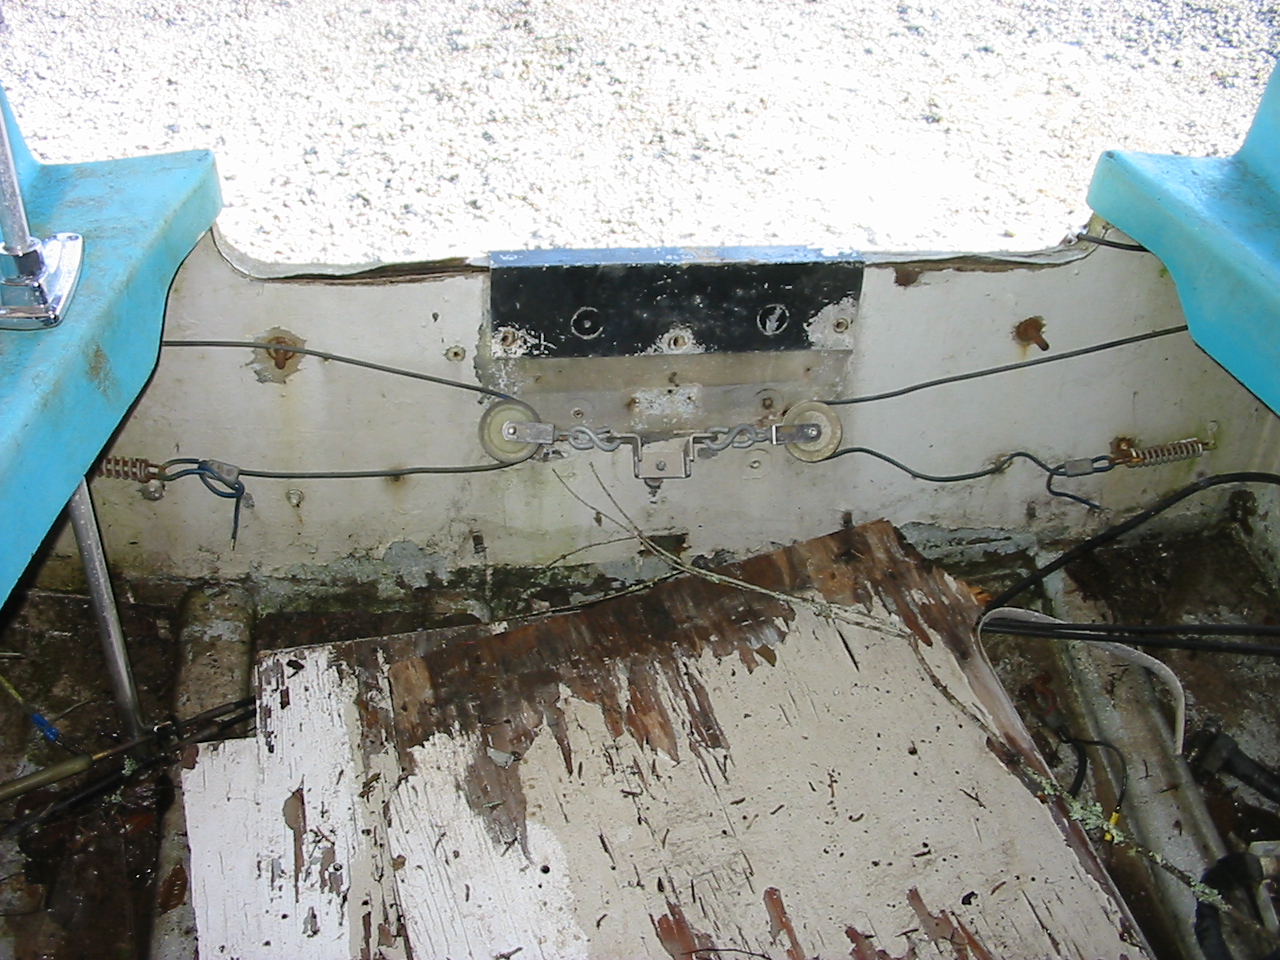
Almost without fail, fiberglassic boats will need a new transom. After half a century of exposure to the the elements, even the most stoutly built boat will end up with a rotted out transom core. This pictorial shows the steps involved with replacing a transom.
Before we begin, there are a few disclaimers to make.
Every boat is different. Some have curved transoms that require the new core to be laminated to the curvature of the boat. Some boats have splashwells molded in that necessitate separating the hull and deck. Some boats have stringers that may get in the way, or a floor that must be partially removed, or any number of other unforeseen hurdles to get past.
This pictorial does not attempt to address all of those issues, but instead, is intended as a general guide to transom replacement. When searching for a suitable candidate for this pictorial, I intentionally picked the most straight forward transom presented to me. Not because I'm lazy, but because it would be the clearest one to represent in photographs without getting too side tracked.
Because this is not a small undertaking, I've broken down the steps into five categories:
- Before
- Disassembly
- Suface Prep
- Fabrication
- Installation
This boat is a late fifties Speedliner and it's a pretty good representation of a fiberglassic boat. So without further ado...
Part 1: Before
This is the boat as it came to me. The aluminum plate was added to stiffen an already rotten transom.

As you can see, the single layer of fiberglass cloth covering the endgrain of the plywood core did little to prevent water from penetrating.


The inside is just as ugly.

Notice the deflection when I press against the aluminum plate. This transom is a disaster waiting to happen.

Originally the core was two pieces of ¾” plywood laminated together. In this photo, you can see that the lamination was one of the first spots to fail.

Not that the rest was any better.

The inside skin of the transom, like the end grain at the top, was covered in only a single skin of fiberglass cloth. Evidence of rot is seen in this photo by the hardware sinking into transom.

The finished thickness of the transom is 1 ½”. That will be the finished thickness after the repair is completed.

Part 2: Disassembly
Part of the disassembly was helped by the advanced rot. In this case, large swaths of fiberglass cloth peels right off the transom.

These are the tools that will get rid of most of old core material. There is no finesse to this part.

Notice the gap between the skin and the core once the hardware is removed. The fiberglass inner skin was superfluous by the time it came to me.

Here's our first hurdle. The hollow core stringers are filled with mud and mulch from years of sitting outside. I already know I'm going to have to separate the stringers from the transom, but I can't until they're clean and dry inside.
See the hole in the top of the stringer? There are also drain holes on each side of the stringer. I drilled a hole in the top to flush out the mud and debris from inside


Once the insides are clean and dry, I can now use my grinder to slice through the joint between the stringer and transom. If I hadn't cleaned out the stringers first, water and mud would not only fly everywhere, but I would be risking electrocution with the grinder in my hand.

Here's a close up of the joint.

With the stringers no longer in the way, I can now pry, slice, and chisel off the rotted core material.

A lot of boat repair is like archeology. You see the effects of time and you then try to figure out what happened. There is a lot to be learned from this photograph.
You see all the black areas in the remnants of the core? That's where the rot was most advanced. In the center of every rotted area, you can see a hole through the outer transom skin. These are where hardware was bolted through or screwed into the transom.
I've said it before and I'll say it again. Improperly bedded hardware is the most common cause extensive and expensive repairs to a boat.

Here, we begin to see the light at the end of the tunnel. That is bare fiberglass behind the remnants of the old plywood core.

Surface prep
These are the tools I'll be using to prep the transom to receive the new core.
The goggles are the full protection kind, not just modified sunglasses. This is highly recommended ad bits of wood and fiberglass dust will be flying through the air.
The wheel on the grinder has been replaced with an 80 grit flap wheel which will make short work of any remaining wood and also grind easily through fiberglass.
The dust mask and gloves should go without saying. They are required.

Because I'm not removing the deck from the hull. The new transom core will have swing into place from below. I ground off the back end of the stringers to allow for this motion. If the hull and deck were separated, I would leave them in place and simply drop the new core into place.
In this photo, and in the next, you can see that the hull directly forward of the transom has also been ground back several inches. This is absolutely vital! When the new transom is installed, it must be glassed into place. If you omit this step, the new transom will be glassed into place on top of a painted and contaminated surface. That is a sure fire way to get your new transom to prematurely fail.
To reiterate: Glass must meet glass, not paint.

Here's the transom after all the of the residual wood has been removed.

Most transoms will have an absurd number of holes to repair before the new core can be installed. To make the strongest repair possible, and to minimize the amount of exterior refinishing later, the repairs will be made from the inside.
This drill and countersink will bevel out the old screw holes. The grinding bit at the bottom of the picture will be used to bevel the larger holes.

This is what the holes look like after countersinking them. The bevel should extend all the way through the fiberglass skin, but not so far that it widens the hole on the other side.

In this transom, there are 34 holes to fill. That's pretty good actually. Many transoms will have 50 or 60 holes. It only takes one improperly bedded fastener to kill a transom.

Over the years, a number of people thought it would be a good idea to screw hardware directly into the stringers. My job is to repair the transom not the stringers, but I can't, in good conscience, just ignore them. I'll fix them while I'm at it.

This is a shot of the underside of the gunwale. The fiberglass must be clean and prepped everywhere. Just because you can't see it, doesn't mean it's not important.
You see that line extending down from the curve in the transom skin? That's a crack in the fiberglass. It's invisible from the outside, but if a motor was hung on this boat, that line is where the transom would have failed. I could have ripped straight down to the hull and it would have been a complete surprise to the boater.

Here's a close up of the crack

In order to repair this crack, I have to grind it out. The block of wood and back lighting is used to show the depth of the repair area.

To repair the holes, tape is used on the exterior to keep the filler from oozing out.

For this transom replacement, I'll be using epoxy as the resin for all repairs. Polyester or vinylester resin will work as well, but in this case, the owner of the boat asked me to use epoxy.
This pictorial is about transoms, not epoxy usage, but this is a good time to say a few words about it. First, I'm a big fan of West System. There are other good epoxies out there, and I don't pretend to know all of the chemical differences between them, but West System is a system I'm familiar with and have come to rely on. Depending on what you want to do with it, there are numerous options for adding structural thickeners, sanding thickeners, speeding up and slowing down cure times, etc.
As far as the additives go, in the picture below, you can see two tubes; 405 adhesive filler, and 410 Microlight fairing filler. WS uses the numbers 401-410 to designate additives. The lower the number, the more structural it is. If you want an easily sanded surfacing compound, you would use 410. If you wanted to thicken up some epoxy that will be strong as a rock, you would use 401.
Furthermore, West System has a phenomenal support network and how-to literature. Here's a shameless plug for them

I mix up a couple of ounces of epoxy...

Then add some 405 adhesive filler until...

...It's reached a peanut butter consistency. This will keep it from sagging out of the repairs.

Using a small plastic spreader, fill all of the holes. If you're going to use epoxy, be careful not to be messy at this stage. Cured epoxy mixed with 405 is very hard to sand and the repairs must be sanded flush before the new core goes in. I'm not filling the old drain tube hole. I'll use the existing hole as a placement guide for the new tube.

Here are repairs now sanded flush.
Fabrication
Now it's time to start working on the template for the new core.

Using door skin, which is just 3/16” mahogany plywood, I make a template of the transom's shape. Door skin will make a much more stable template than cardboard.
The thin material can be scored with a utility knife, then snapped like laminate. Final shaping can be done with some 40 grit sandpaper and a small block. The template is held together using a hot glue gun and reinforced to hold its shape.


The plywood is marine plywood and it is not the same thing as CDX plywood from Home Depot. This is not a place to save a few bucks!

Marine plywood has more plies per inch. Marine plywood has no voids throughout its plies. The woods used are highly stable meranti or okoume, not pine or birch. The glue is both water and UV resistant.
Looking at a piece of $30 plywood next a piece of marine plywood, the differences are obvious. Cheap plywood was not designed to take the stresses exerted on a transom with a three hundred pound motor trying to twist the transom off the boat.

Using the template and a jigsaw. I cut two blanks out of the 5/8” plywood.

These will need to be glued together to make a single 1 ¼” plywood core

The glue is epoxy thickened with 405 adhesive filler. Enough filler is added to make the consistency more like mayonnaise this time.

Using the smallest side of a vee-notched spreader will ensure good adhesion.


Apply epoxy to both surfaces.

Clamp them together and add some weight.

24 hours later, the transom blank is now solid. After cleaning up the squeezed out epoxy along the edges with some coarse sandpaper. I dry fit the transom blank into place.


After making sure it's a good fit. Remove the blank and set it up on a work surface to lay up the inner fiberglass skin. For the inner skin, I'll be using two layers of mat and woven roving, alternating between layers. Make sure the edges of the fiberglass fabrics extend beyond the transom's edges.

Doing this on a bench top or sawhorses, rather than when it is installed in place, will make a good strong lay up easier to achieve. When you're trying to lay up a 5' wide piece of fabric on a vertical surface with nooks and crannies to navigate, the likelihood of a compromised layup jumps through the roof. It's much easier to laminate the transom on a work surface and then tab it in place with mat and cloth.
Wet out each layer and lay it in place. When all four layers are laid up, compress the wet fiberglass with a resin roller. This will ensure there are no air bubbles. A squeegee will get rid of any excess resin.

The transom core with its inner skin laid up and curing in the February sun. Once the resin has kicked, but hasn't reached full cure, I'll slice off the excess fabric with shears or a utility knife.

Here's the transom blank after the epoxy has kicked. The edges have been shorn off.

The next day, the rough edges are cleaned up with a grinder and it is dry fit in place one last time.

5. Installation
The plan is to glue the transom core into place and then clamp and fasten it so it creates a secure bond to the outer skin.
First, mix up some epoxy and coat both the outer transom skin and the back side of the transom blank. Use the notched spreader again, but this time use the deepest vee side. You want as much adhesive as possible on the mating surfaces.

Carefully set the transom blank in place and clamp it as securely as possible. This is will complete the sandwich construction of the transom and it's vital to have a good bond.
In the following photos, I am using clamps, wedges, and even fasteners with fender washers from the exterior to make sure it is securely in place. I would rather repair a dozen new screw holes than have to replace the whole transom again.


Allow the transom to cure for another day. Once it's cured, it's OK to remove the clamps and fasteners.
When using epoxy, a phenomenon happens called amine blush. Basically, it's a waxy film that builds on the surface during the cure cycle. Before trying to laminate on top of cured epoxy, the surface must be washed with soap and water or scrubbed with a solvent.
I don't want to risk getting moisture in the core, so I opt for denatured alcohol.

With the transom cleaned, it almost time to bond the inside to the hull. Before doing that, I have to do something about the sharp inside corners of where the transom meets the hull. Fiberglass doesn't like sharp corners.
Mixing up some more epoxy and adding some 410 Microlight filler to a peanut butter consistency...
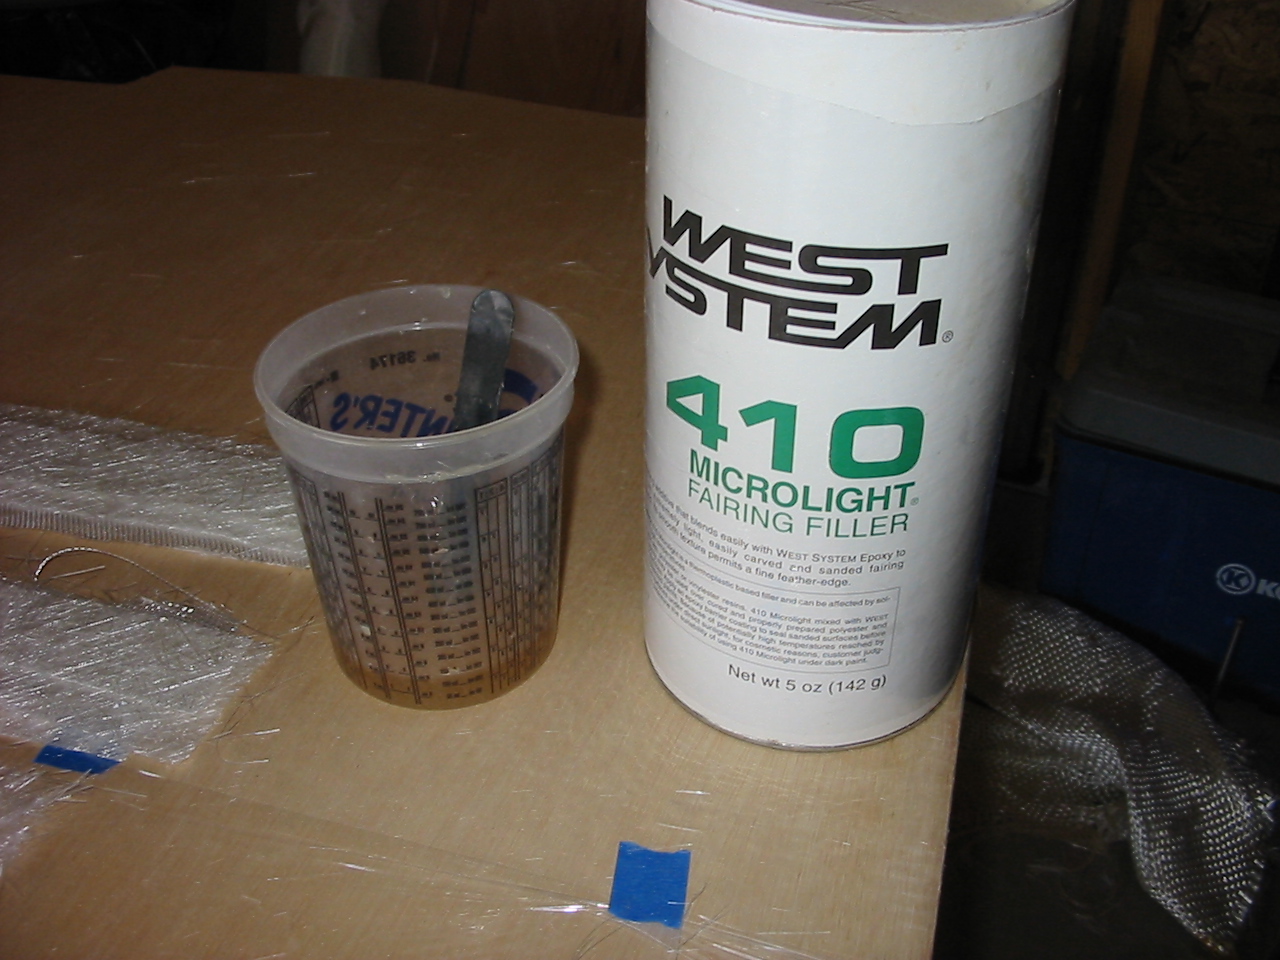
...I run a fillet (a rounded inside corner) all along the inside of the transom. This will give me a smooth curve for the fiberglass tabbing to conform to.
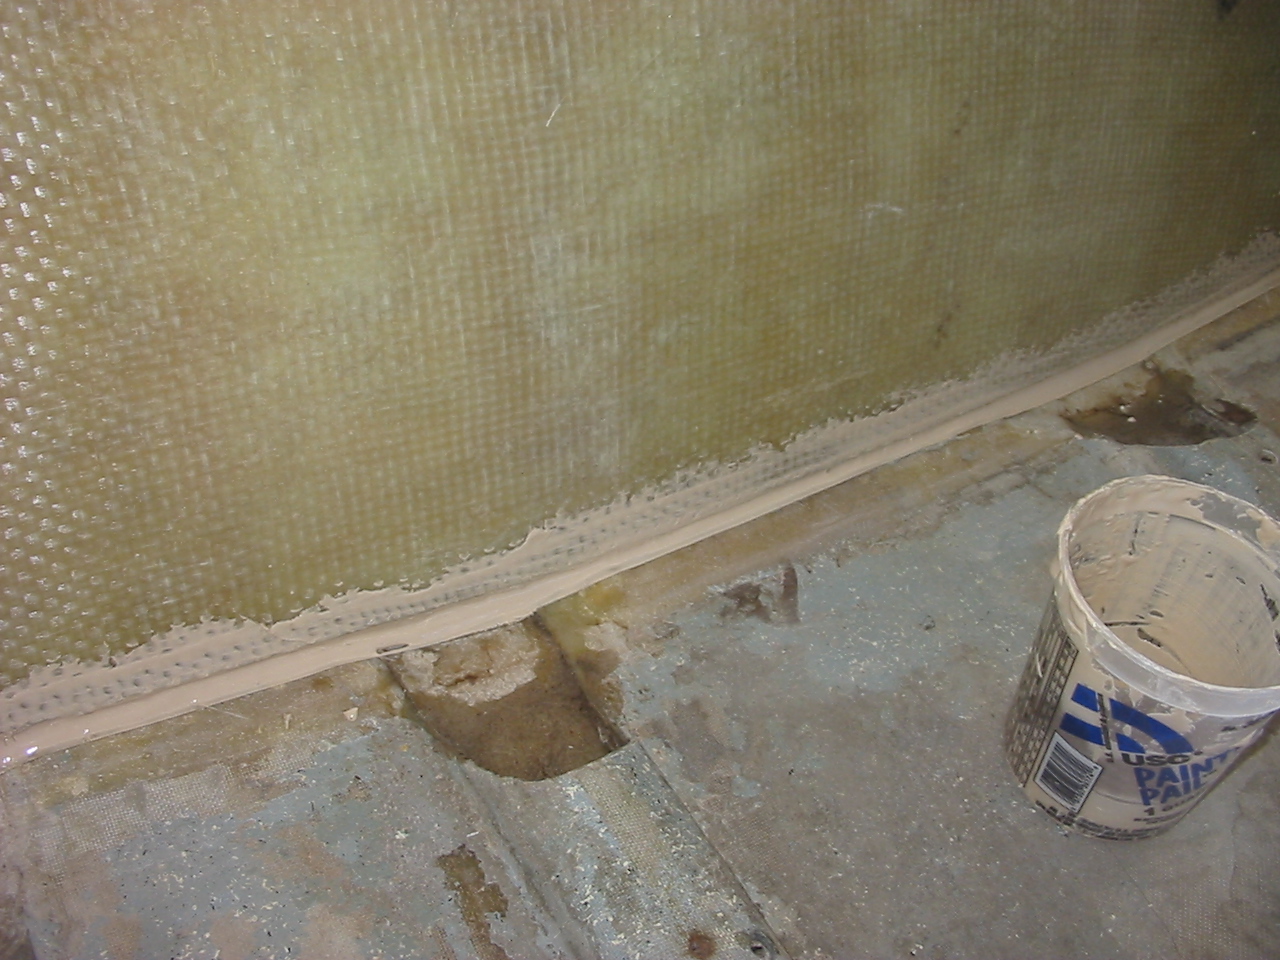
The fiberglass tabbing is five layers thick. Mat, cloth, mat, cloth, mat...
I can't use roving because roving doesn't like to conform to curves
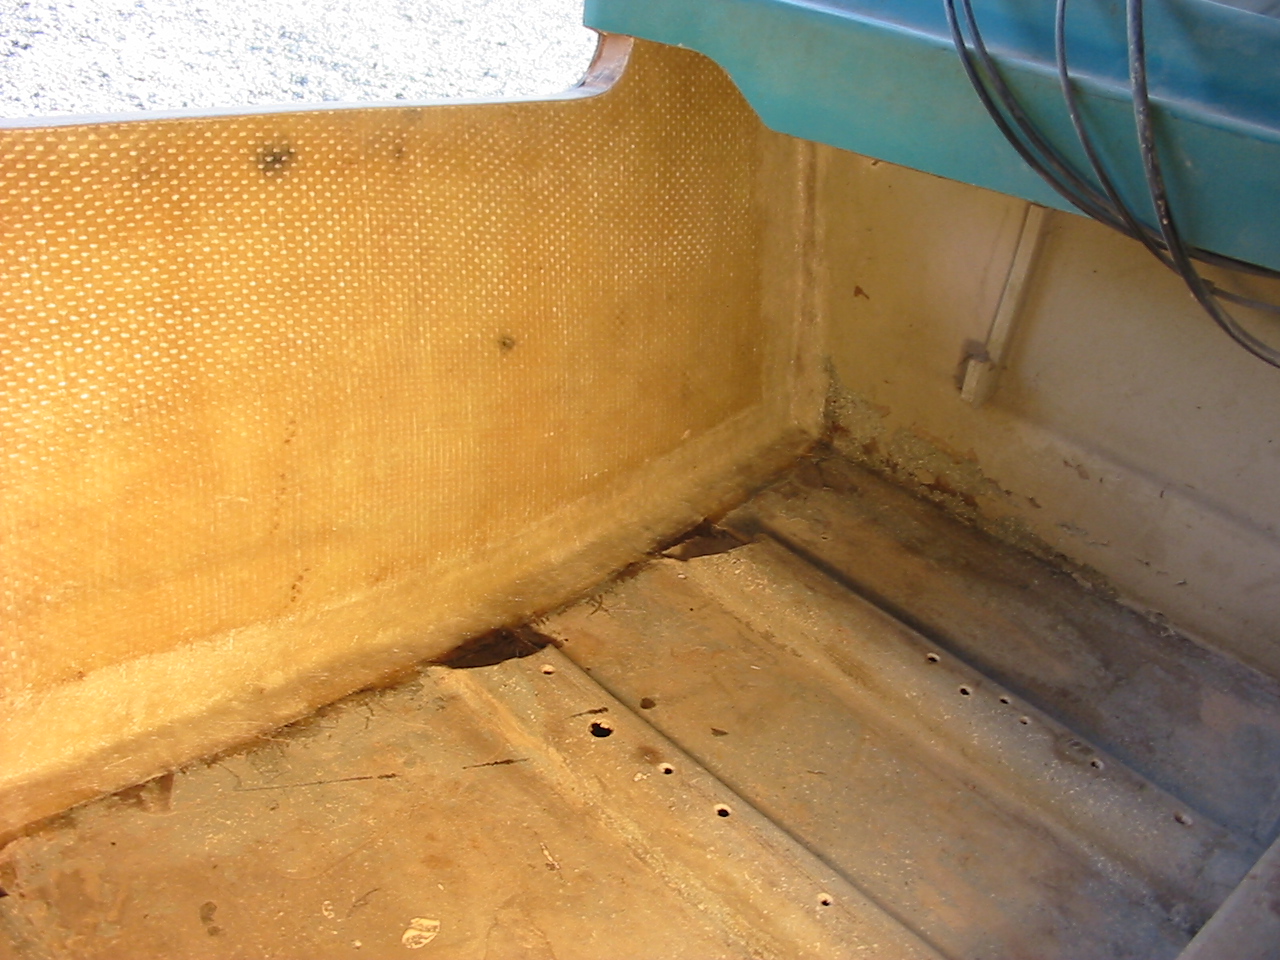
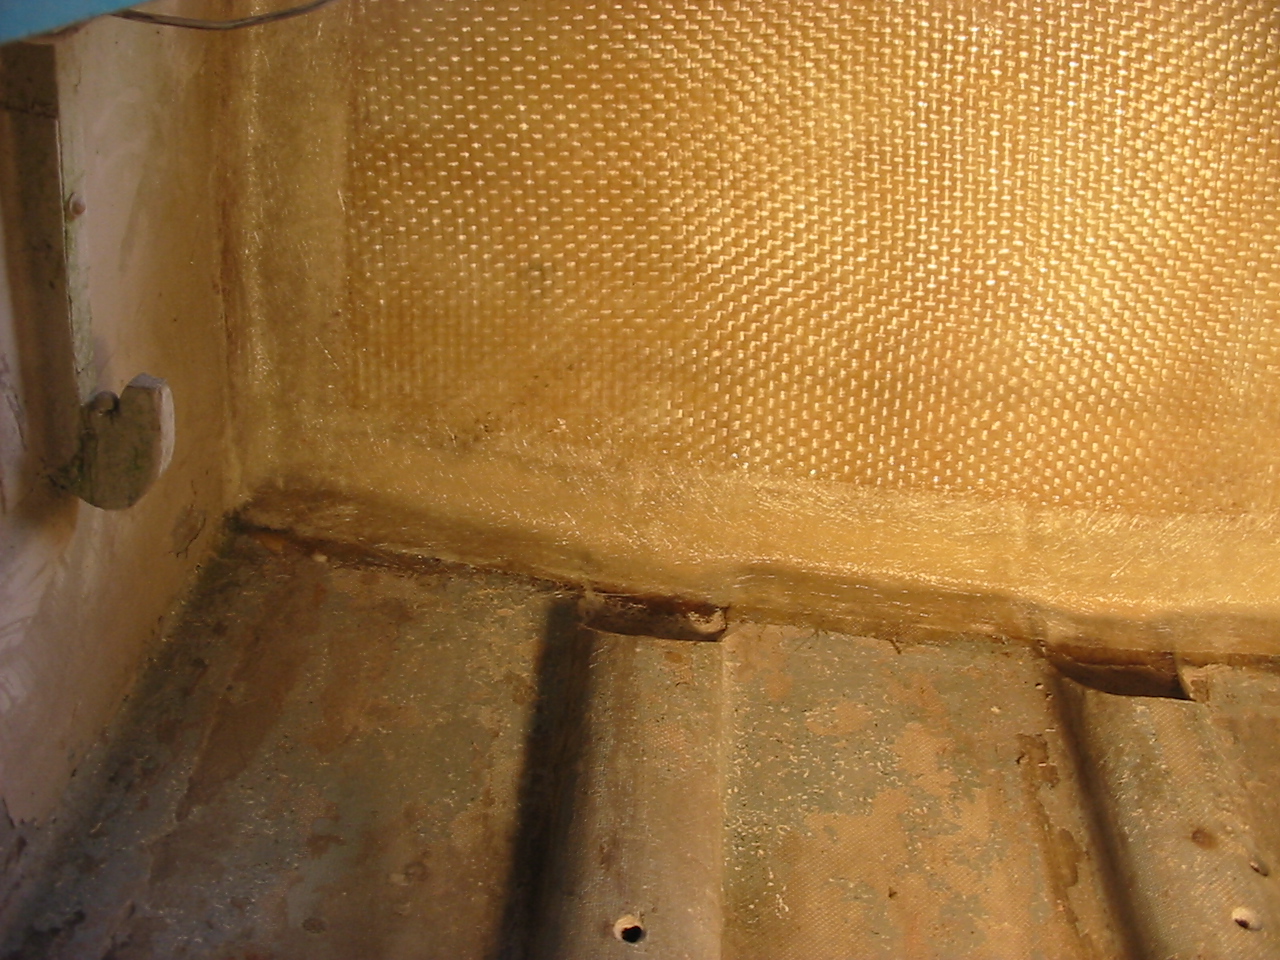
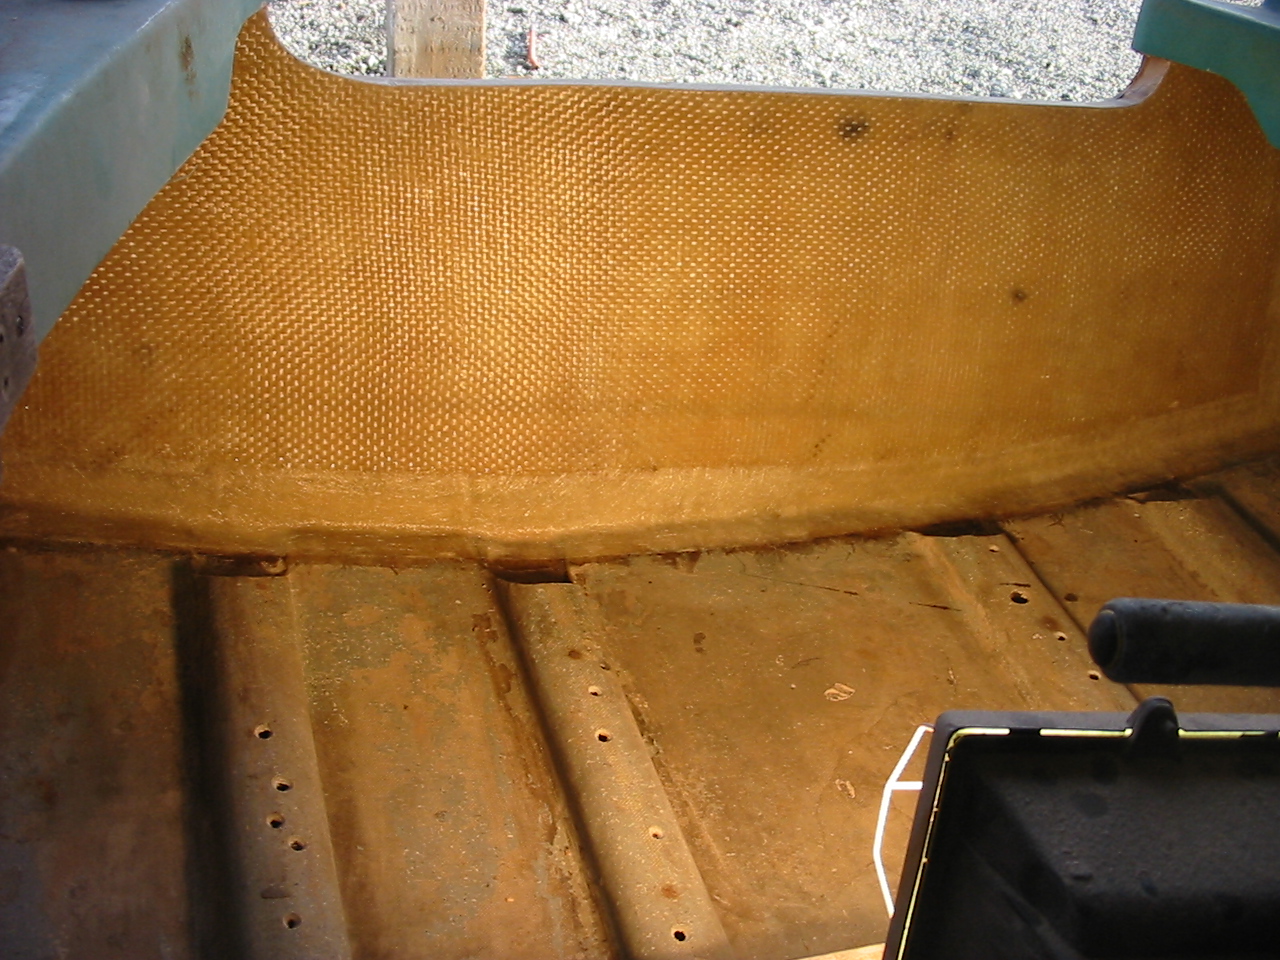
I don't want to glass all the way to the top because then I will have made the hull and deck a single piece. As this boat gets further along in its eventual restoration, the hull and deck will eventually be separated.
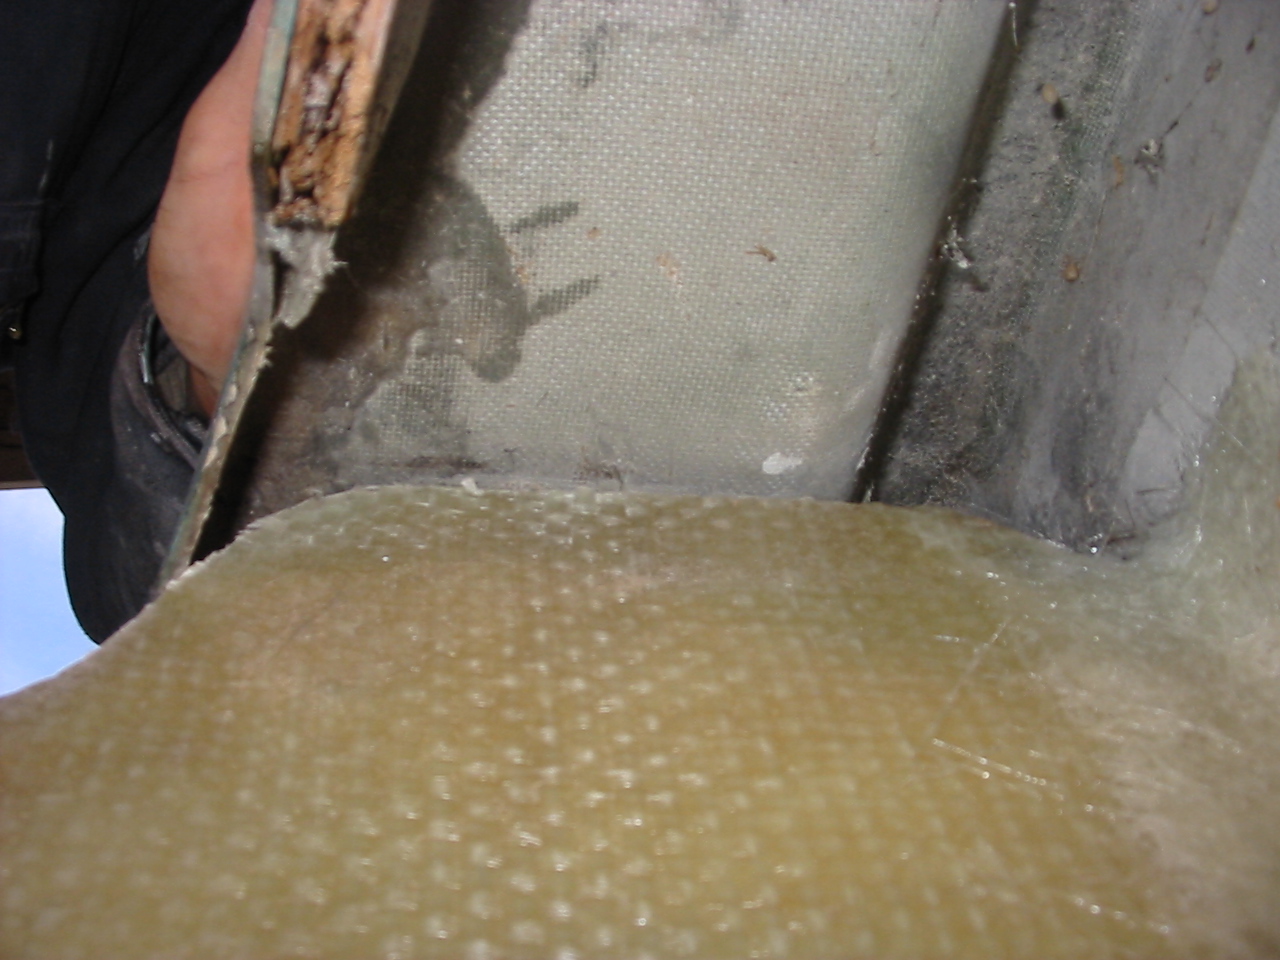
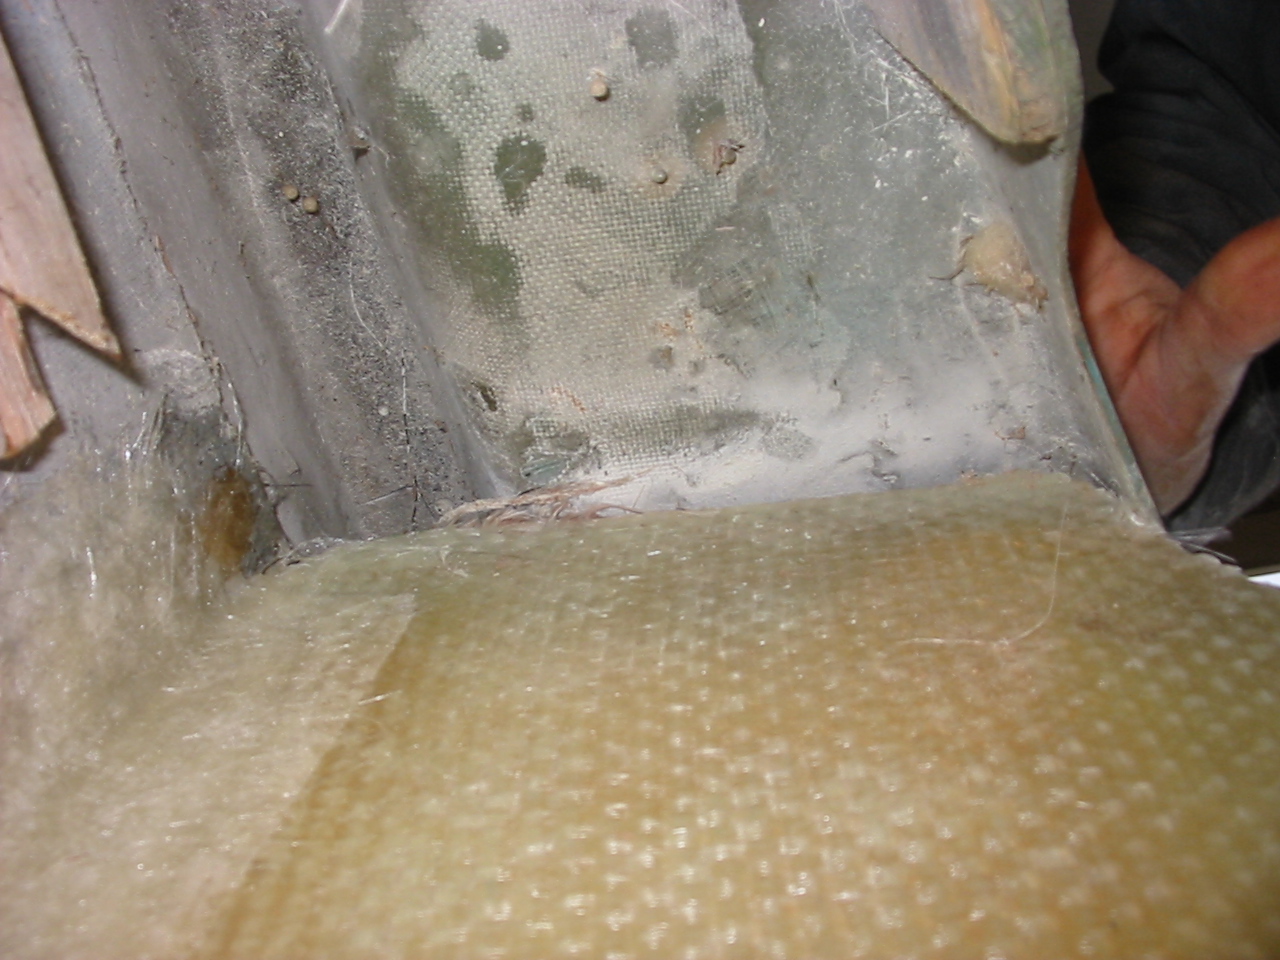
So there, you have it. All that's left to do is seal the exposed end grain at the top, rejoin the stringers to the transom and fix some screw holes.
(These will be posted tomorrow. I'm tired now)
Courtesy of Glass Clown Boats


