|
Welcome,
Guest
|
TOPIC: Progress on my Power Cat 14T
Re:Progress on my Power Cat 14T 14 years 8 months ago #4618
|
|
Please Log in or Create an account to join the conversation. |
Re:Progress on my Power Cat 14T 14 years 8 months ago #4628
|
|
Please Log in or Create an account to join the conversation. |

Re:Progress on my Power Cat 14T 14 years 8 months ago #4634
|
Please Log in or Create an account to join the conversation. |

Re:Progress on my Power Cat 14T 14 years 8 months ago #4637
|
|
Please Log in or Create an account to join the conversation. |
Re:Progress on my Power Cat 14T 14 years 8 months ago #4639
|
Please Log in or Create an account to join the conversation. |


Re:Progress on my Power Cat 14T 14 years 8 months ago #4640
|
Please Log in or Create an account to join the conversation. |
Re:Progress on my Power Cat 14T 14 years 8 months ago #4647
|
|
Please Log in or Create an account to join the conversation. |
Re:Progress on my Power Cat 14T 14 years 8 months ago #4649
|
|
Please Log in or Create an account to join the conversation. |

Re:Progress on my Power Cat 14T 14 years 8 months ago #4671
|
Please Log in or Create an account to join the conversation. |
Re:Progress on my Power Cat 14T 14 years 8 months ago #4674
|
|
Please Log in or Create an account to join the conversation. |
Re:Progress on my Power Cat 14T 14 years 8 months ago #4677
|
Please Log in or Create an account to join the conversation. |
Re:Progress on my Power Cat 14T 14 years 8 months ago #4678
|
|
Please Log in or Create an account to join the conversation. |
Re:Progress on my Power Cat 14T 14 years 8 months ago #4679
|
Please Log in or Create an account to join the conversation. |

Re:Progress on my Power Cat 14T 14 years 8 months ago #4682
|
|
Please Log in or Create an account to join the conversation. |


Re:Progress on my Power Cat 14T 14 years 8 months ago #4689
|
Please Log in or Create an account to join the conversation. |
Re:Progress on my Power Cat 14T 14 years 8 months ago #4690
|
|
Please Log in or Create an account to join the conversation. |
Re:Progress on my Power Cat 14T 14 years 8 months ago #4724
|
|
Please Log in or Create an account to join the conversation. |
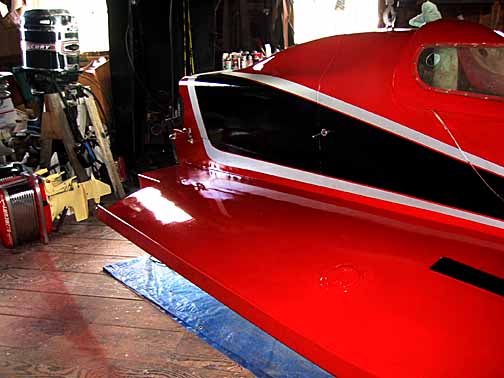
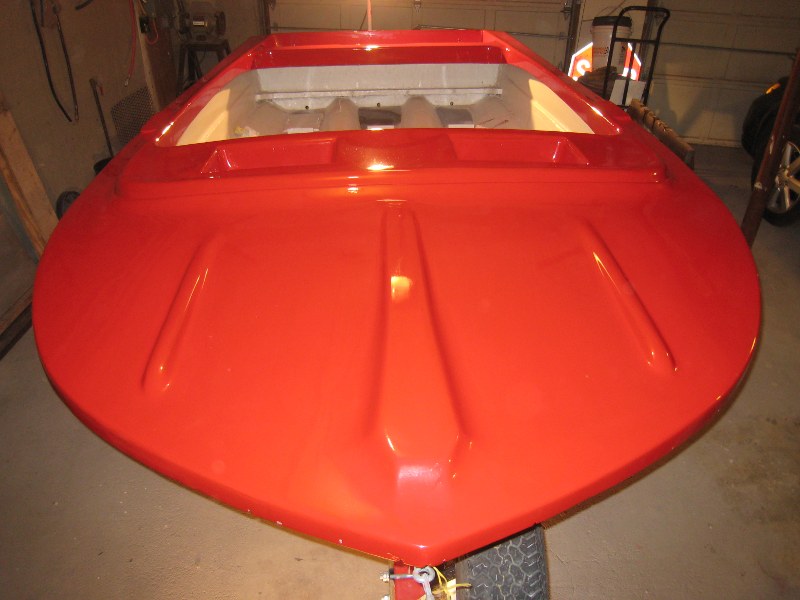
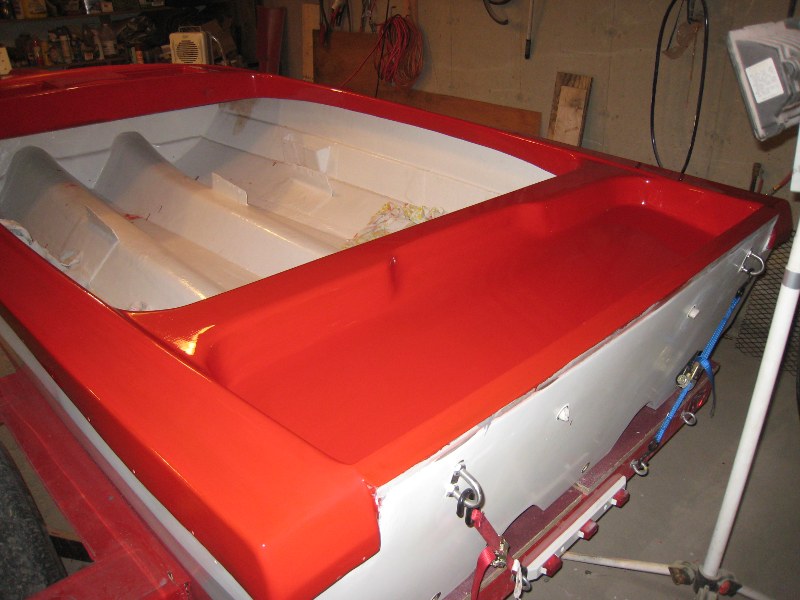
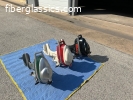
3rd coat of red 14 years 8 months ago #4836
|
|
Please Log in or Create an account to join the conversation. |


Re:Progress on my Power Cat 14T 14 years 8 months ago #4839
|
Please Log in or Create an account to join the conversation.
Mark
|
Re:Progress on my Power Cat 14T 14 years 8 months ago #4841
|
|
Please Log in or Create an account to join the conversation. |
Re:Progress on my Power Cat 14T 14 years 8 months ago #4850
|
|
Please Log in or Create an account to join the conversation.
Some people are like slinkies... Not much good for anything, but they sure are fun to push down the stairs.
|

Re:Progress on my Power Cat 14T 14 years 8 months ago #4851
|
|
Please Log in or Create an account to join the conversation. |

Re:Progress on my Power Cat 14T 14 years 8 months ago #4860
|
|
Please Log in or Create an account to join the conversation.
Some people are like slinkies... Not much good for anything, but they sure are fun to push down the stairs.
|

Re:Progress on my Power Cat 14T 14 years 8 months ago #4863
|
|
Please Log in or Create an account to join the conversation. |
Re:Progress on my Power Cat 14T 14 years 8 months ago #4883
|
Please Log in or Create an account to join the conversation. |

Re:Progress on my Power Cat 14T 14 years 8 months ago #4888
|
|
Please Log in or Create an account to join the conversation.
Some people are like slinkies... Not much good for anything, but they sure are fun to push down the stairs.
|
Re:Progress on my Power Cat 14T 14 years 8 months ago #4900
|
|
Please Log in or Create an account to join the conversation. |
Re:Progress on my Power Cat 14T 14 years 8 months ago #4904
|
|
Please Log in or Create an account to join the conversation.
Some people are like slinkies... Not much good for anything, but they sure are fun to push down the stairs.
|
Re:Progress on my Power Cat 14T 14 years 8 months ago #4907
|
|
Please Log in or Create an account to join the conversation. |
Re:Progress on my Power Cat 14T 14 years 8 months ago #4912
|
|
Please Log in or Create an account to join the conversation. |
Re:Progress on my Power Cat 14T 14 years 8 months ago #4913
|
|
Please Log in or Create an account to join the conversation. |
Re:Progress on my Power Cat 14T 14 years 8 months ago #4916
|
|
Please Log in or Create an account to join the conversation.
Some people are like slinkies... Not much good for anything, but they sure are fun to push down the stairs.
|
Re:Progress on my Power Cat 14T 14 years 8 months ago #4917
|
|
Please Log in or Create an account to join the conversation. |
Re:Progress on my Power Cat 14T 14 years 8 months ago #4918
|
|
Please Log in or Create an account to join the conversation. |
Re:Progress on my Power Cat 14T 14 years 8 months ago #4919
|
|
Please Log in or Create an account to join the conversation. |


Re:Progress on my Power Cat 14T 14 years 8 months ago #4921
|
|
Please Log in or Create an account to join the conversation. |
Re:Progress on my Power Cat 14T 14 years 8 months ago #4923
|
|
Please Log in or Create an account to join the conversation. |
Re:Progress on my Power Cat 14T 14 years 8 months ago #4925
|
|
Please Log in or Create an account to join the conversation. |
Re:Progress on my Power Cat 14T 14 years 8 months ago #4929
|
|
Please Log in or Create an account to join the conversation. |

Re:Progress on my Power Cat 14T 14 years 8 months ago #4930
|
|
Please Log in or Create an account to join the conversation.
Some people are like slinkies... Not much good for anything, but they sure are fun to push down the stairs.
|
Donate
Please consider supporting our efforts.
Glassified Ads
1956 Lonestar Meteor |


Mercury outboard( / Engines)


Classic Mercury Outboard Motors( / Engines)


FG Login

FiberGoogle
Who's Online
We have 9258 guests and no members online